WordPress Toolkit makes updating your site—and keeping it updated—simple. To manage updates for an existing WordPress install using WordPress Toolkit, follow these steps:
- Log in to cPanel.
- In the Domains section of the cPanel’s home screen, click WordPress Management:
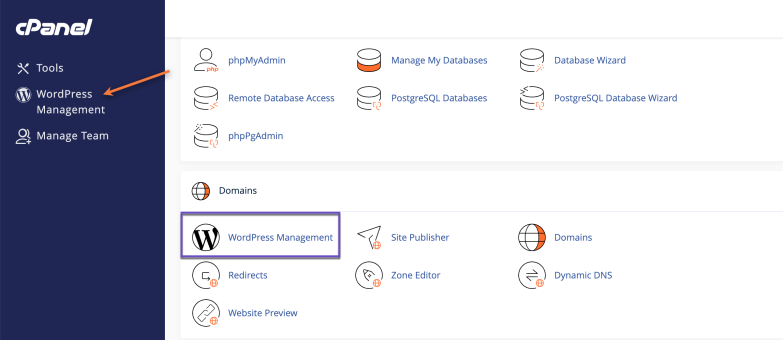
cPanel > WordPress Management - Next, the WordPress Toolkit page will appear, and you’ll see the list of the existing WordPress installs.
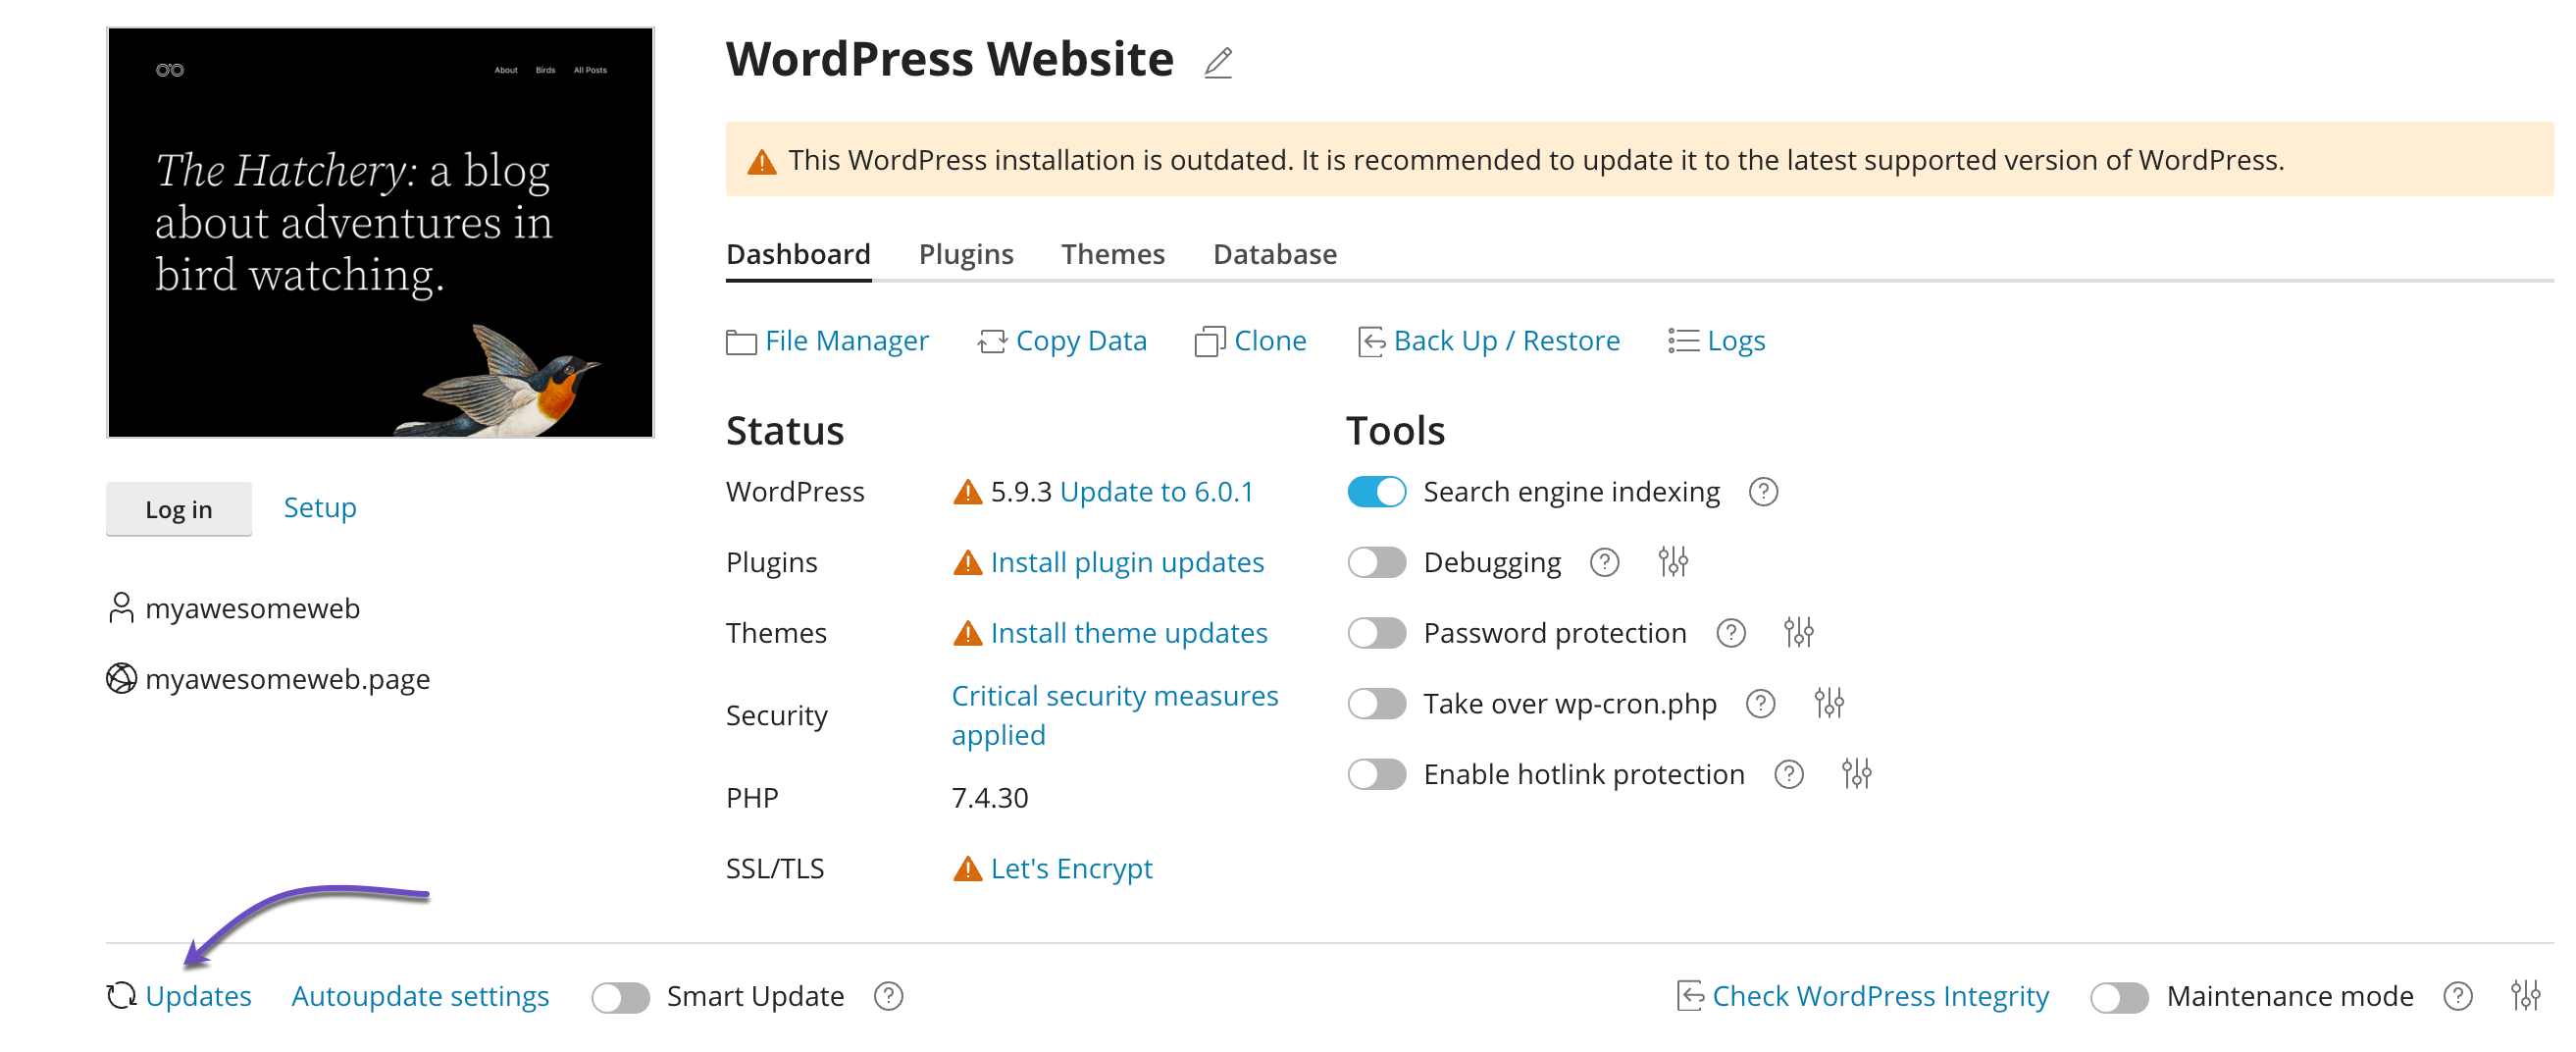
- Click on the Updates button for your WordPress install.

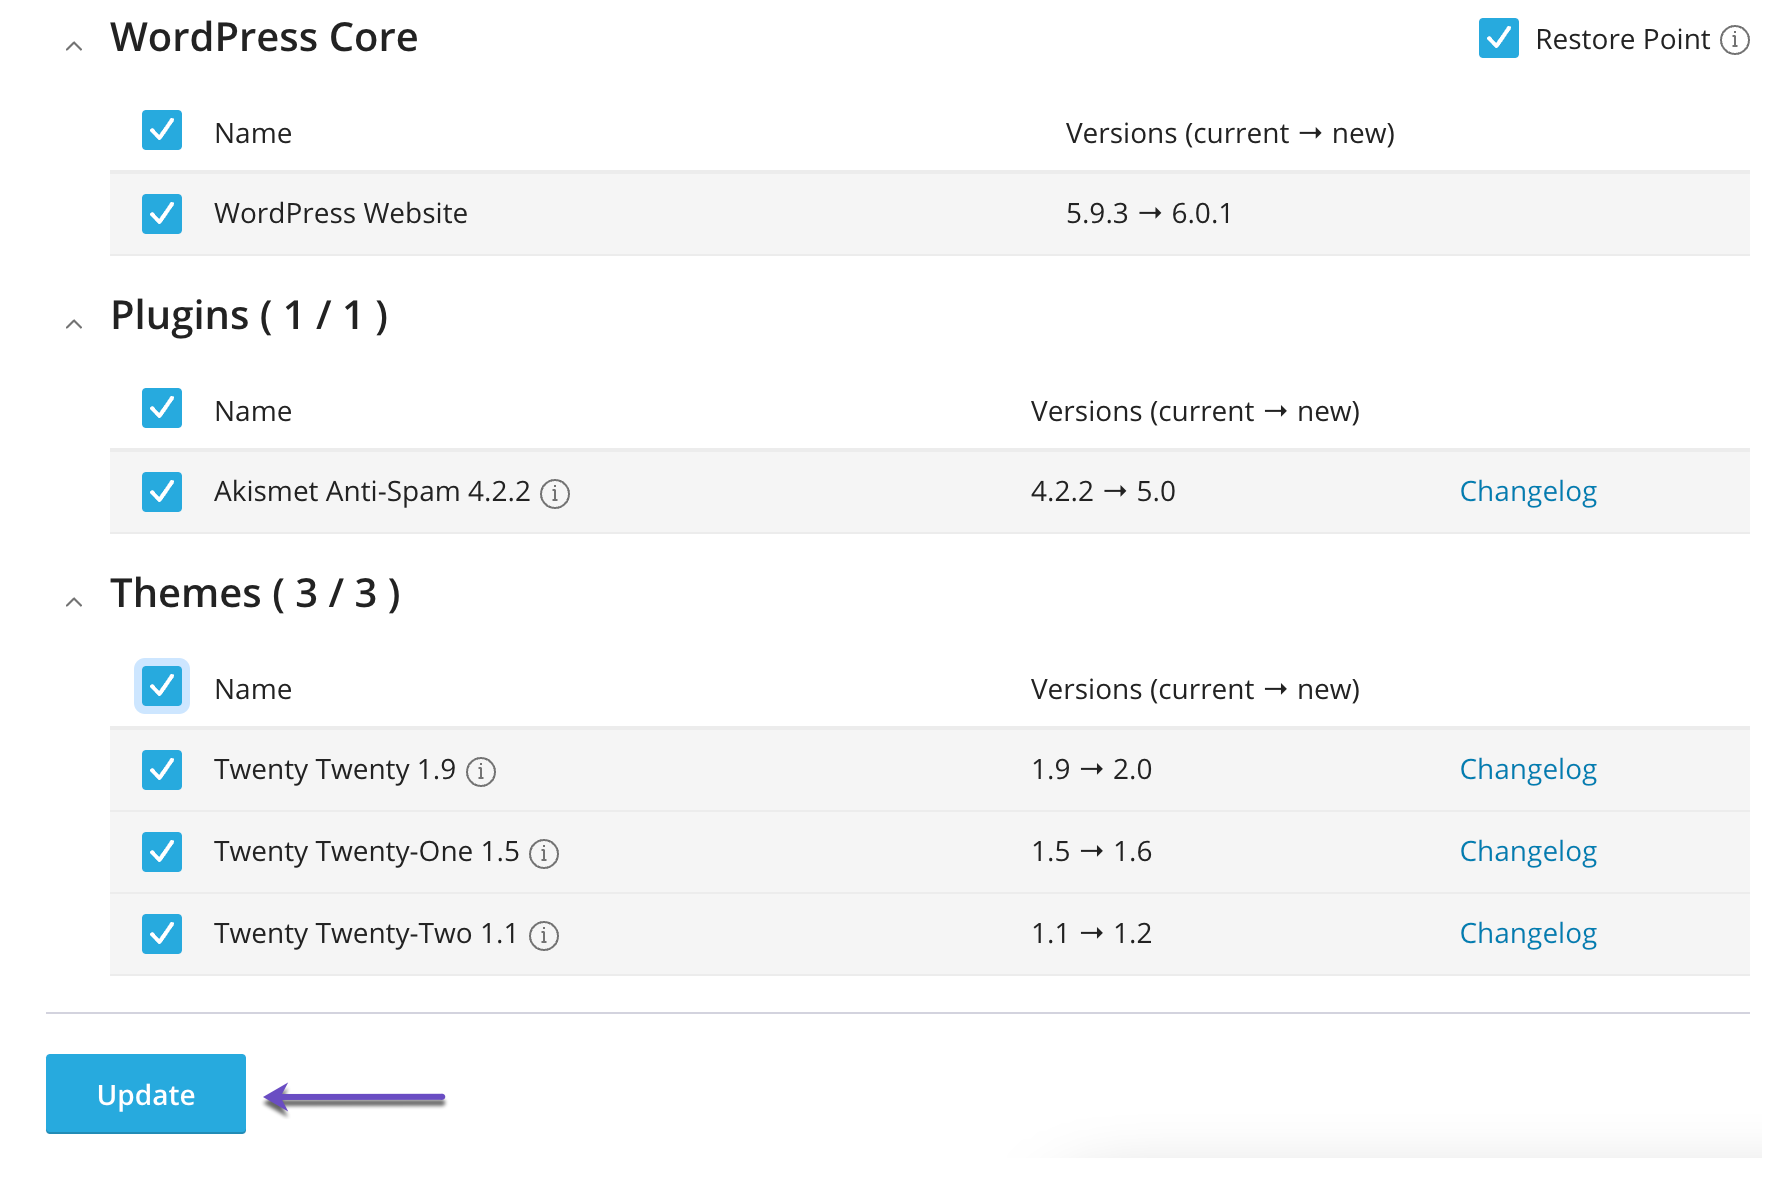
5. WordPress Toolkit will list the available updates for your WordPress core, plugins, or themes.
 6. If WordPress Toolkit finds any available updates, review and select them, then click the Update button at the bottom.
If you want to create a restore point before the update, you can use the Restore Point feature option to roll back the update if something goes wrong.To enable Restore Poing, check the Restore Point field.
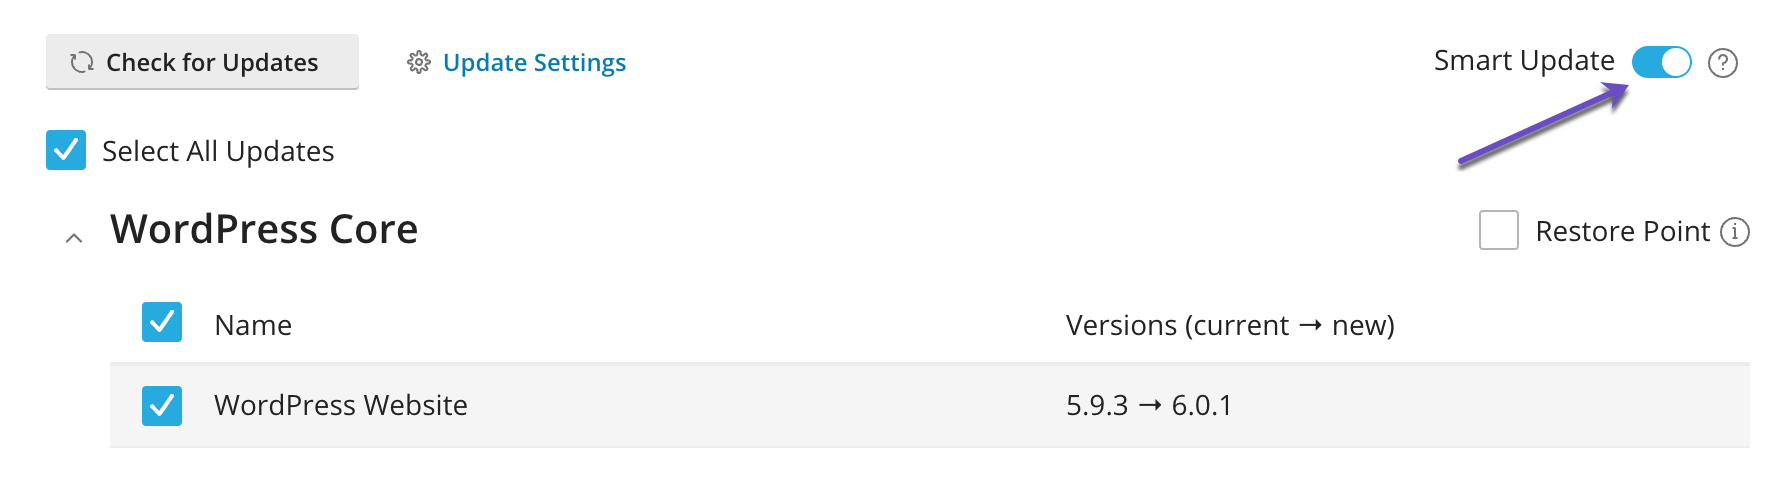
 Alternatively, you can use the Smart Update feature. Smart Update enables you to test an update without actually affecting the site. Smart Update does this by creating a complete clone of the website, running several preliminary checks, updating the cloned website, and rerunning the checks to see if the update breaks anything. The results include before-and-after screenshots that you can compare to make an informed decision about whether or not to proceed with the update on your site in production.To enable Smart Update, click the Smart Update toggle button.


That’s it! Now you know how to manage WordPress Updates using WordPress Toolkit in cPanel.