Using your computer’s hosts file will allow your computer to override the results of a typical DNS query and instruct your computer to always load your website from a specific server or IP address. This can come in handy after migrations as you might want to test how your website works on a different server before changing the DNS or in case the DNS hasn’t propagated yet.
There are a few different ways to preview your site before switching the DNS to your ChemiCloud server. The most accurate way to preview your site from our platform will be to use your local computer’s hosts file. There are also some free online tool options for beginners if you aren’t feeling comfortable editing your hosts file.
Preparing to Preview Your Website
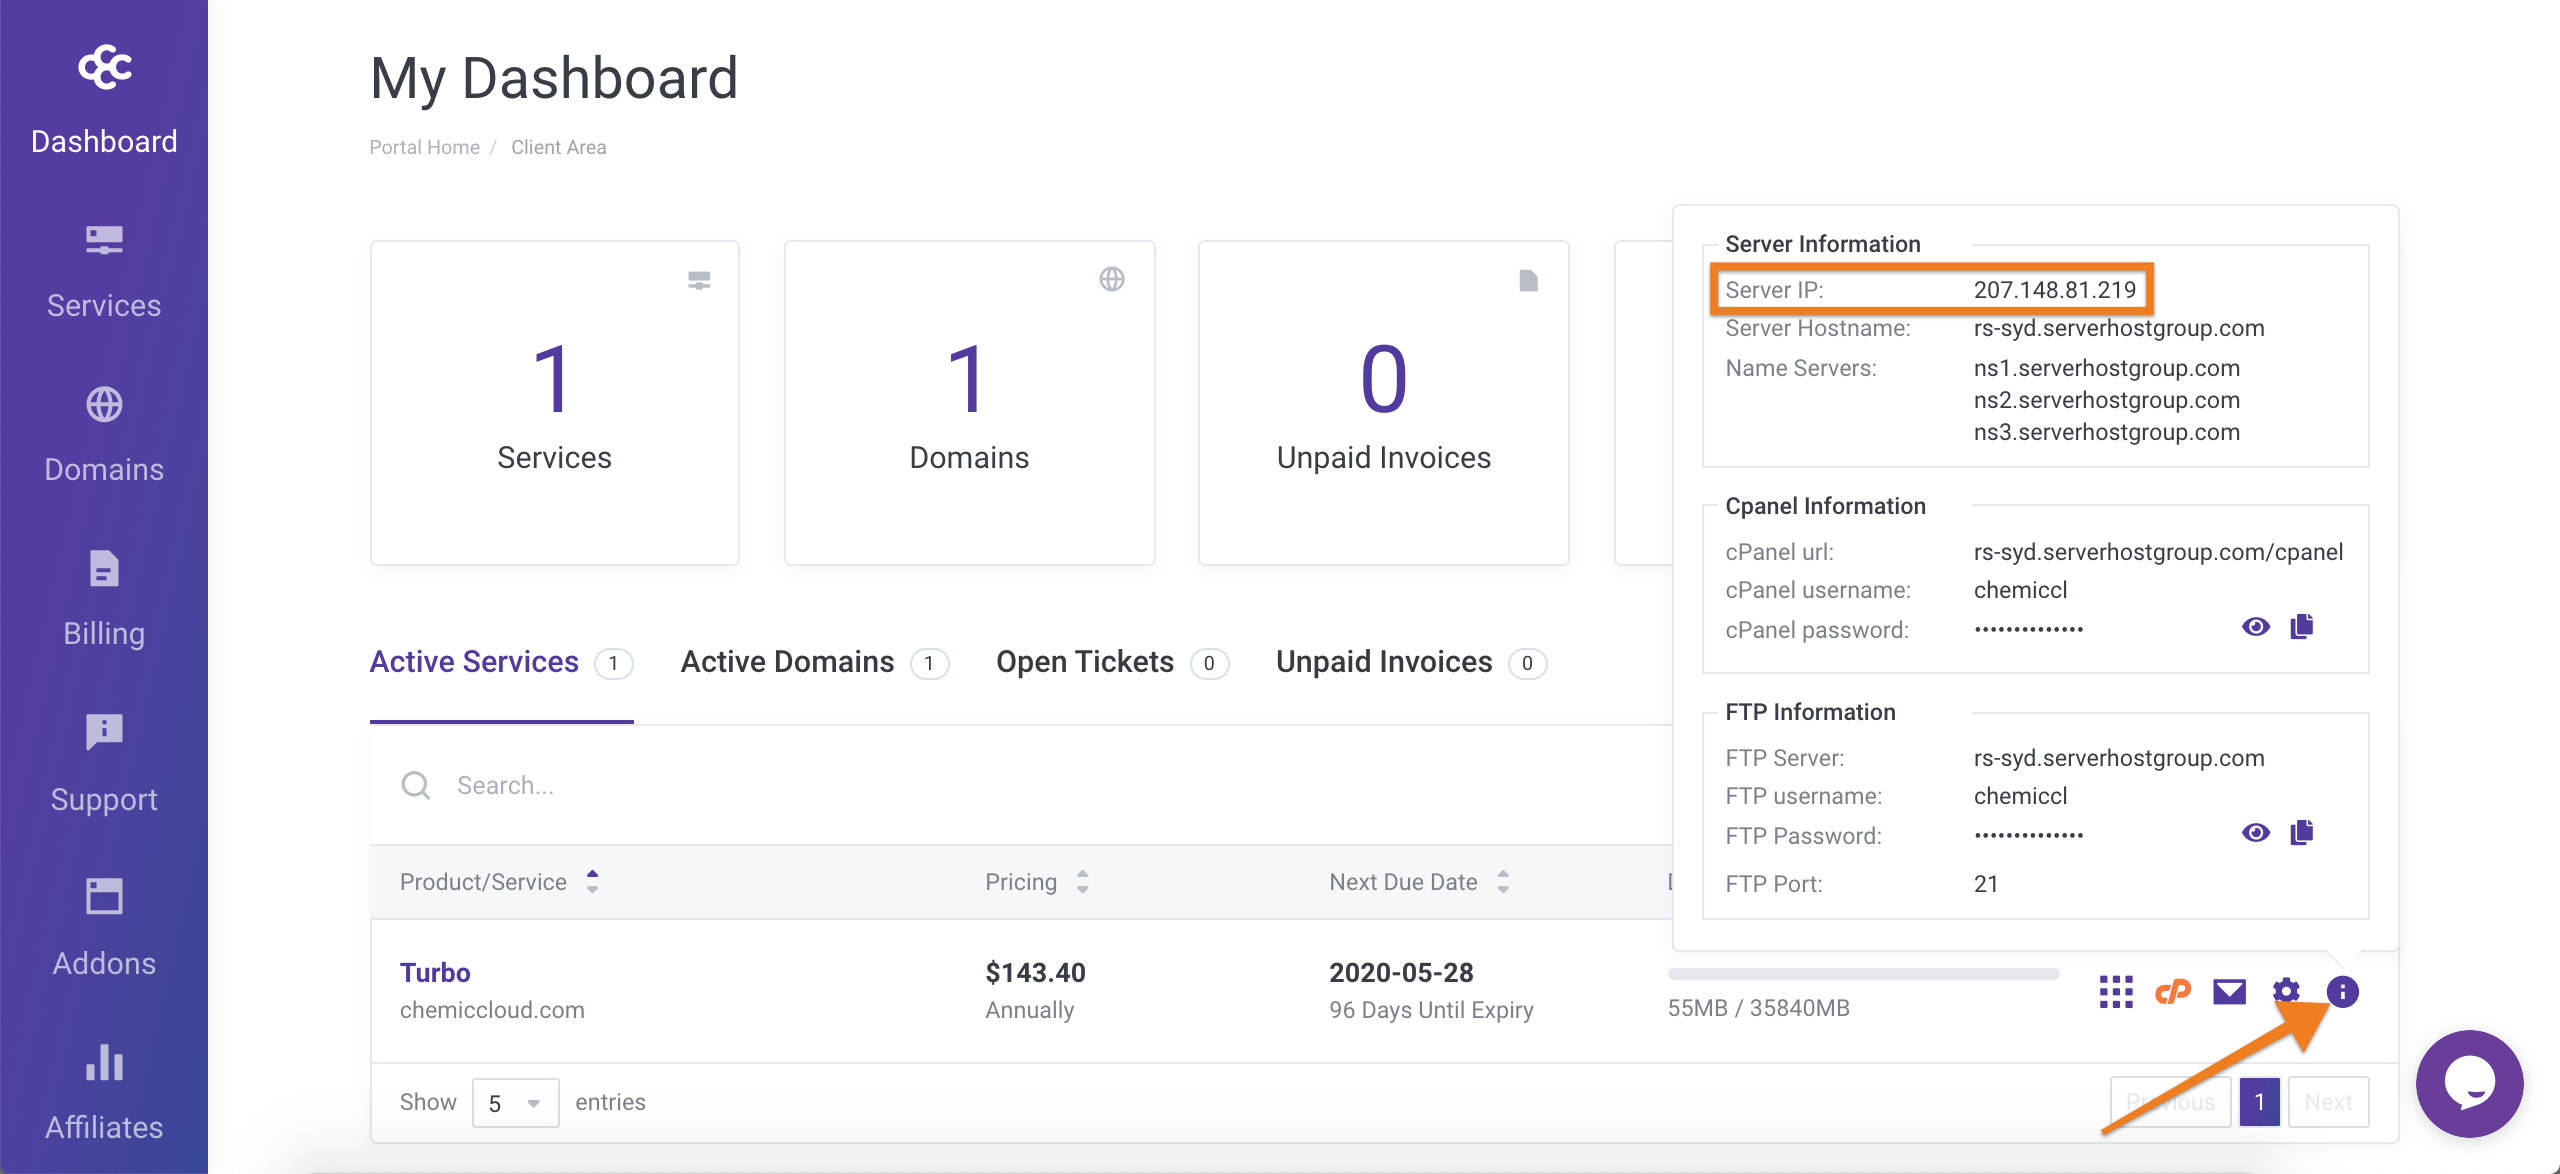
For you to be able to preview a website from a specific server you will need to know the IP address that is assigned to the server hosting your website. If you are a ChemiCloud customer, the server IP address can be found under the Info section within your Client Area.
Once you have located your server’s IP address, you can use the following instructions to preview your website before changing your DNS using your computers hosts file.
How to Edit Hosts File in Windows
Windows 10 and Windows 8
- Press the Windows key.
- Type Notepad in the search field.
- In the search results, right-click Notepad and select Run as administrator.
- From Notepad, open the following file:c:\Windows\System32\Drivers\etc\hosts
When the file opens, you will see two columns of information, the first column contains IP addresses and the second contains hostnames. By default, a Windows hosts file should be similar to the following:
Filename: hosts
127.0.0.1 localhost
You can add additional lines to this file that will point requests for a particular domain to your new server’s IP address. Example:
Filename: hosts
127.0.0.1 localhost
70.32.88.203 example.com
70.32.88.203 www.example.com
6. Select File > Save to save your changes.
7. You will need to close and reopen any pages you had open in your browser.
8. Open your browser and visit your new site.
How to Edit Hosts File in Mac OS
In macOS, the hosts file is located at: /etc/hosts. The instructions below are valid for all macOS versions.
Use Command + Space and enter: “Terminal”. In your terminal window, open the hosts file using your favorite text editor, like nano or vi. We are using nano, below:
sudo nano /etc/hosts
When prompted enter your administrative password.
Scroll down to the end of the file and add your new entries. Add your domain and the server’s IP address to the bottom of the file. For example:
##
# Host Database
#
# localhost is used to configure the loopback interface
# when the system is booting. Do not change this entry.
##
70.32.88.203 domain.com www.domain.com
70.32.88.203 otherdomain.com www.otherdomain.com
- Save the changes and flush the DNS cache:
dscacheutil -flushcache - Visit your new site.
How to Edit Hosts File in Linux
In Linux, the hosts file is located at: /etc/hosts. The instructions below are valid for Linux distribution, including Ubuntu, CentOS, RHEL, Debian and Linux Mint.
In your terminal window, open the hosts file using your favorite text editor, such as nano or vi. We are using nano below:
sudo nano /etc/hostsWhen prompted enter your sudo password.
Scroll down to the end of the file and add your new entries. Add your domain and the server’s IP address to the bottom of the file. For example:
##
# Host Database
#
# localhost is used to configure the loopback interface
# when the system is booting. Do not change this entry.
##
70.32.88.203 domain.com www.domain.com
70.32.88.203 otherdomain.com www.otherdomain.com
Save the changes and visit your new site.
How to Edit Hosts File Using an Online Website Pre-Viewer
- Access skipdns.link (or hosts.cx) into your browser.
Please enter your server IP address and the domain name which should be requested.
Conclusion
By now you should have a great understanding of how the hosts file works and how to make modifications to the file. If you want to undo the changes, simply open the file and remove the lines you added.
If you are experiencing any difficulties while using hosts file, please don’t hesitate to get in touch with our support team by live chat or by creating a support ticket.