This tutorial helps you easily manage all aspects of your WordPress instance, from configuring settings to managing updates, themes, plugins, and more.
My Instances
Log in to the WordPress Manager.
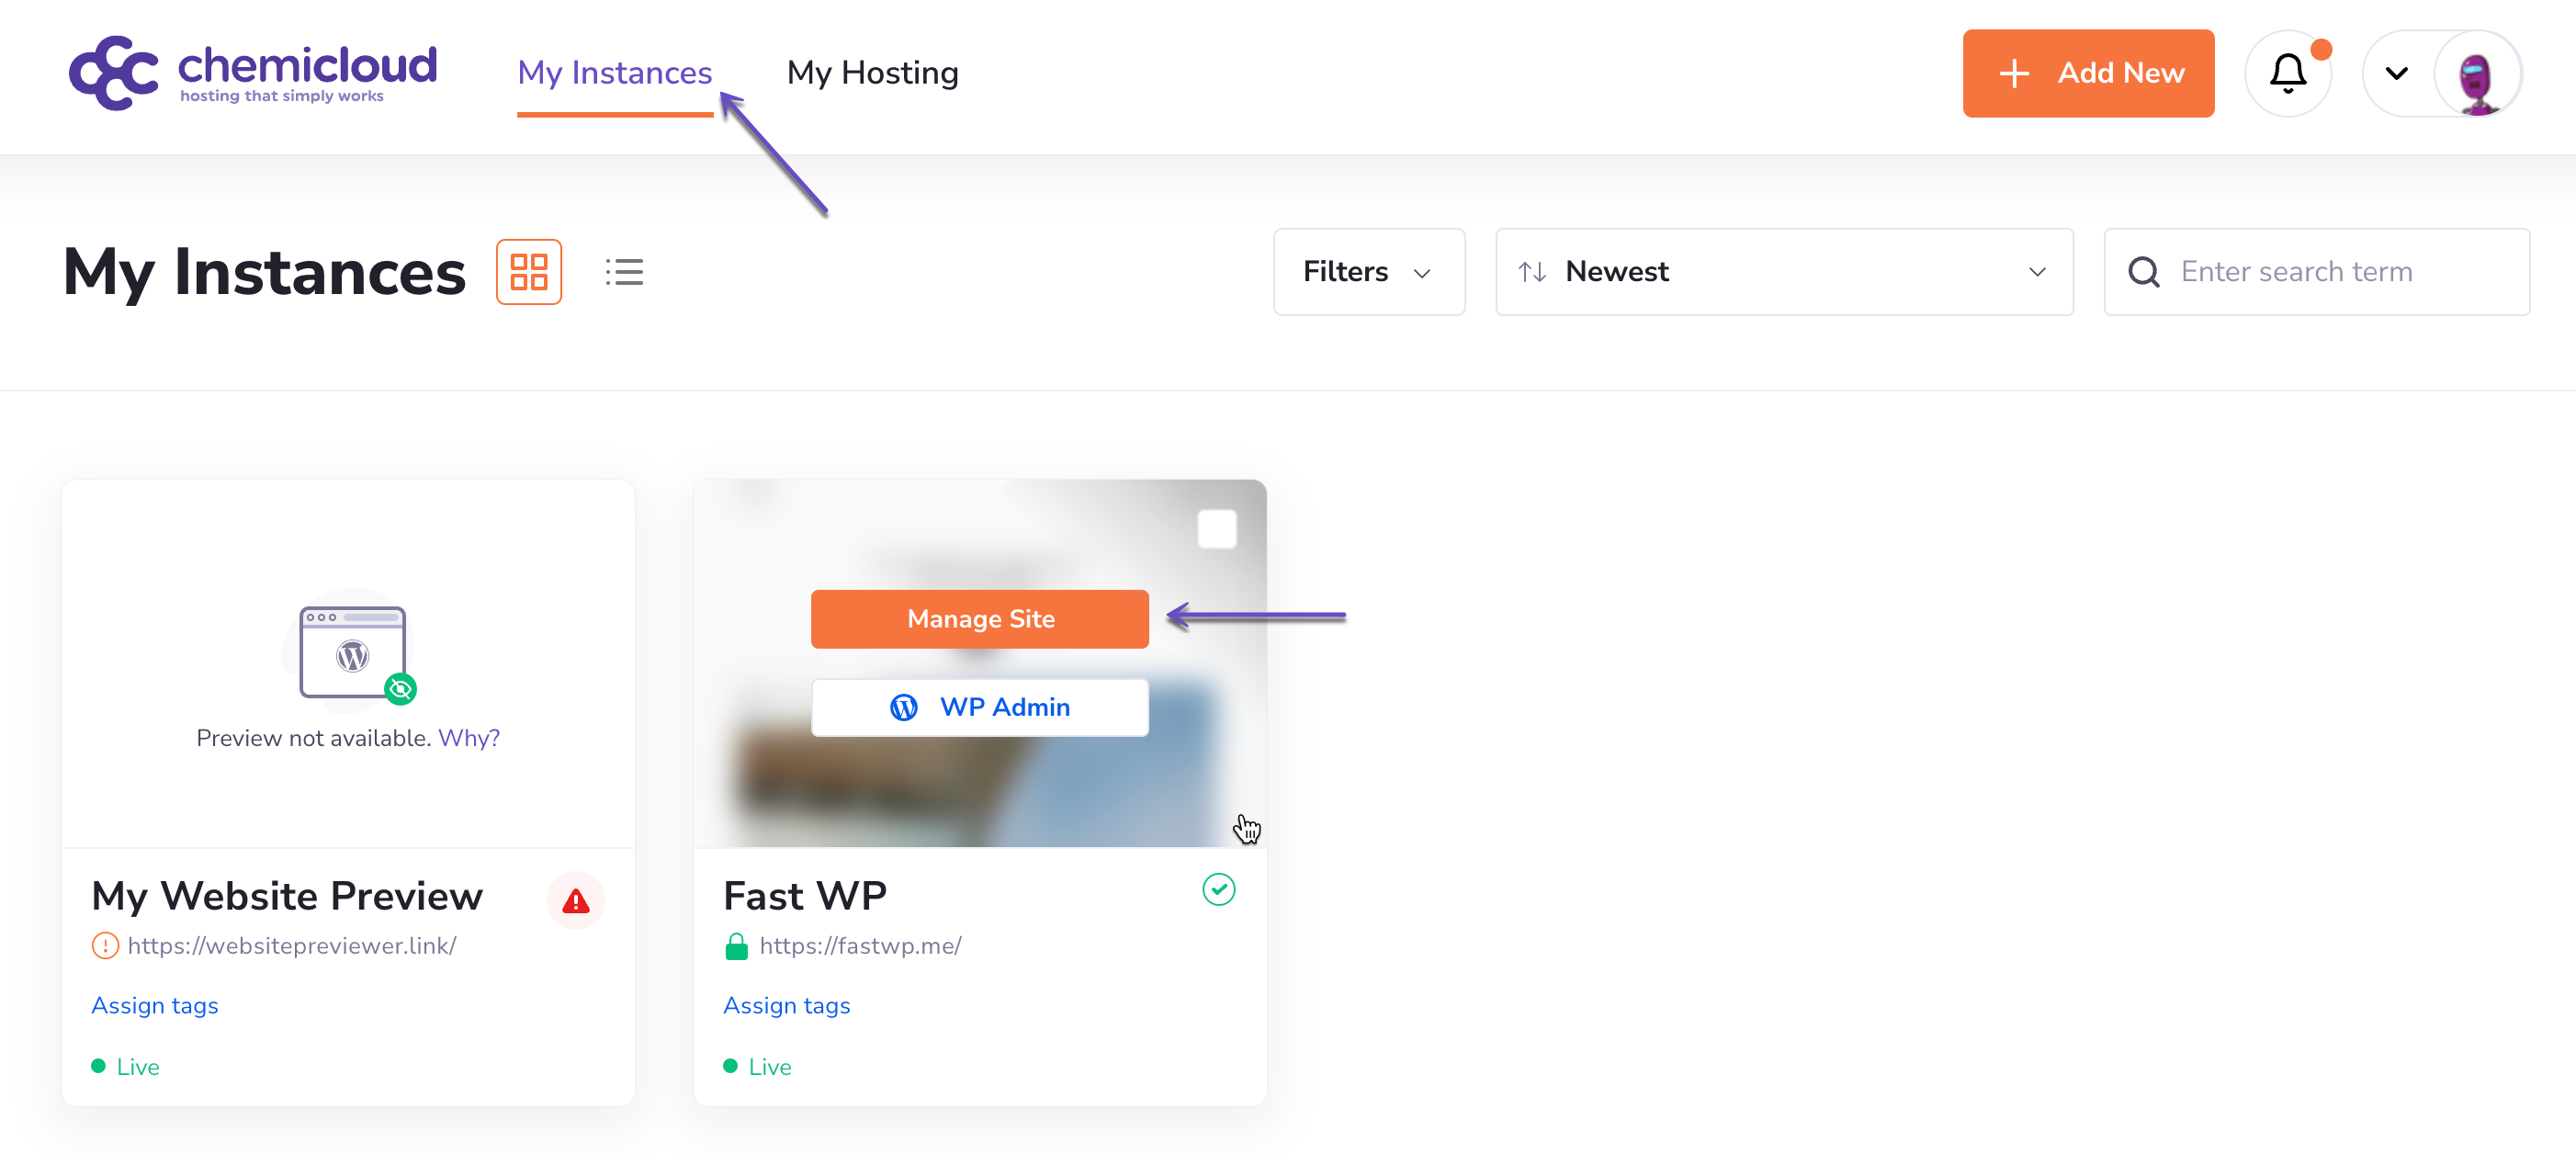
After logging into your WordPress Manager, you’ll see a dashboard with all your instances. The ‘My Instances’ section displays installed instances, as well as those in progress or with installation errors.
- View Modes: Switch between list view or tile view, where each instance displays a preview of the website.
- Select Instances: Choose one or more instances to perform actions like:
- Clear cache
- Share instances
- Remove selected instances
- Filtering Options: Filter instances by tags, or click a tag to apply the filter automatically.
- Sorting Options: Sort instances by:
- Title
- Visitors
- Bandwidth
- Storage
- Newest to oldest
Tags
Users can create custom tags to efficiently filter and organize your WordPress instances. To create a tag, click Assign Tags, then Add New. Enter a tag name, choose a color, and click Create & Assign to apply it to an instance. Tags can be removed later if needed.
Manage Site
Log in to the WordPress Manager.
Click on the “Manage site” button corresponding to the WordPress instance you wish to manage.
The “Manage Site” area provides different information and configuration options for your WordPress instance.
We’ll do a quick overview of all the available information and features.
Actions
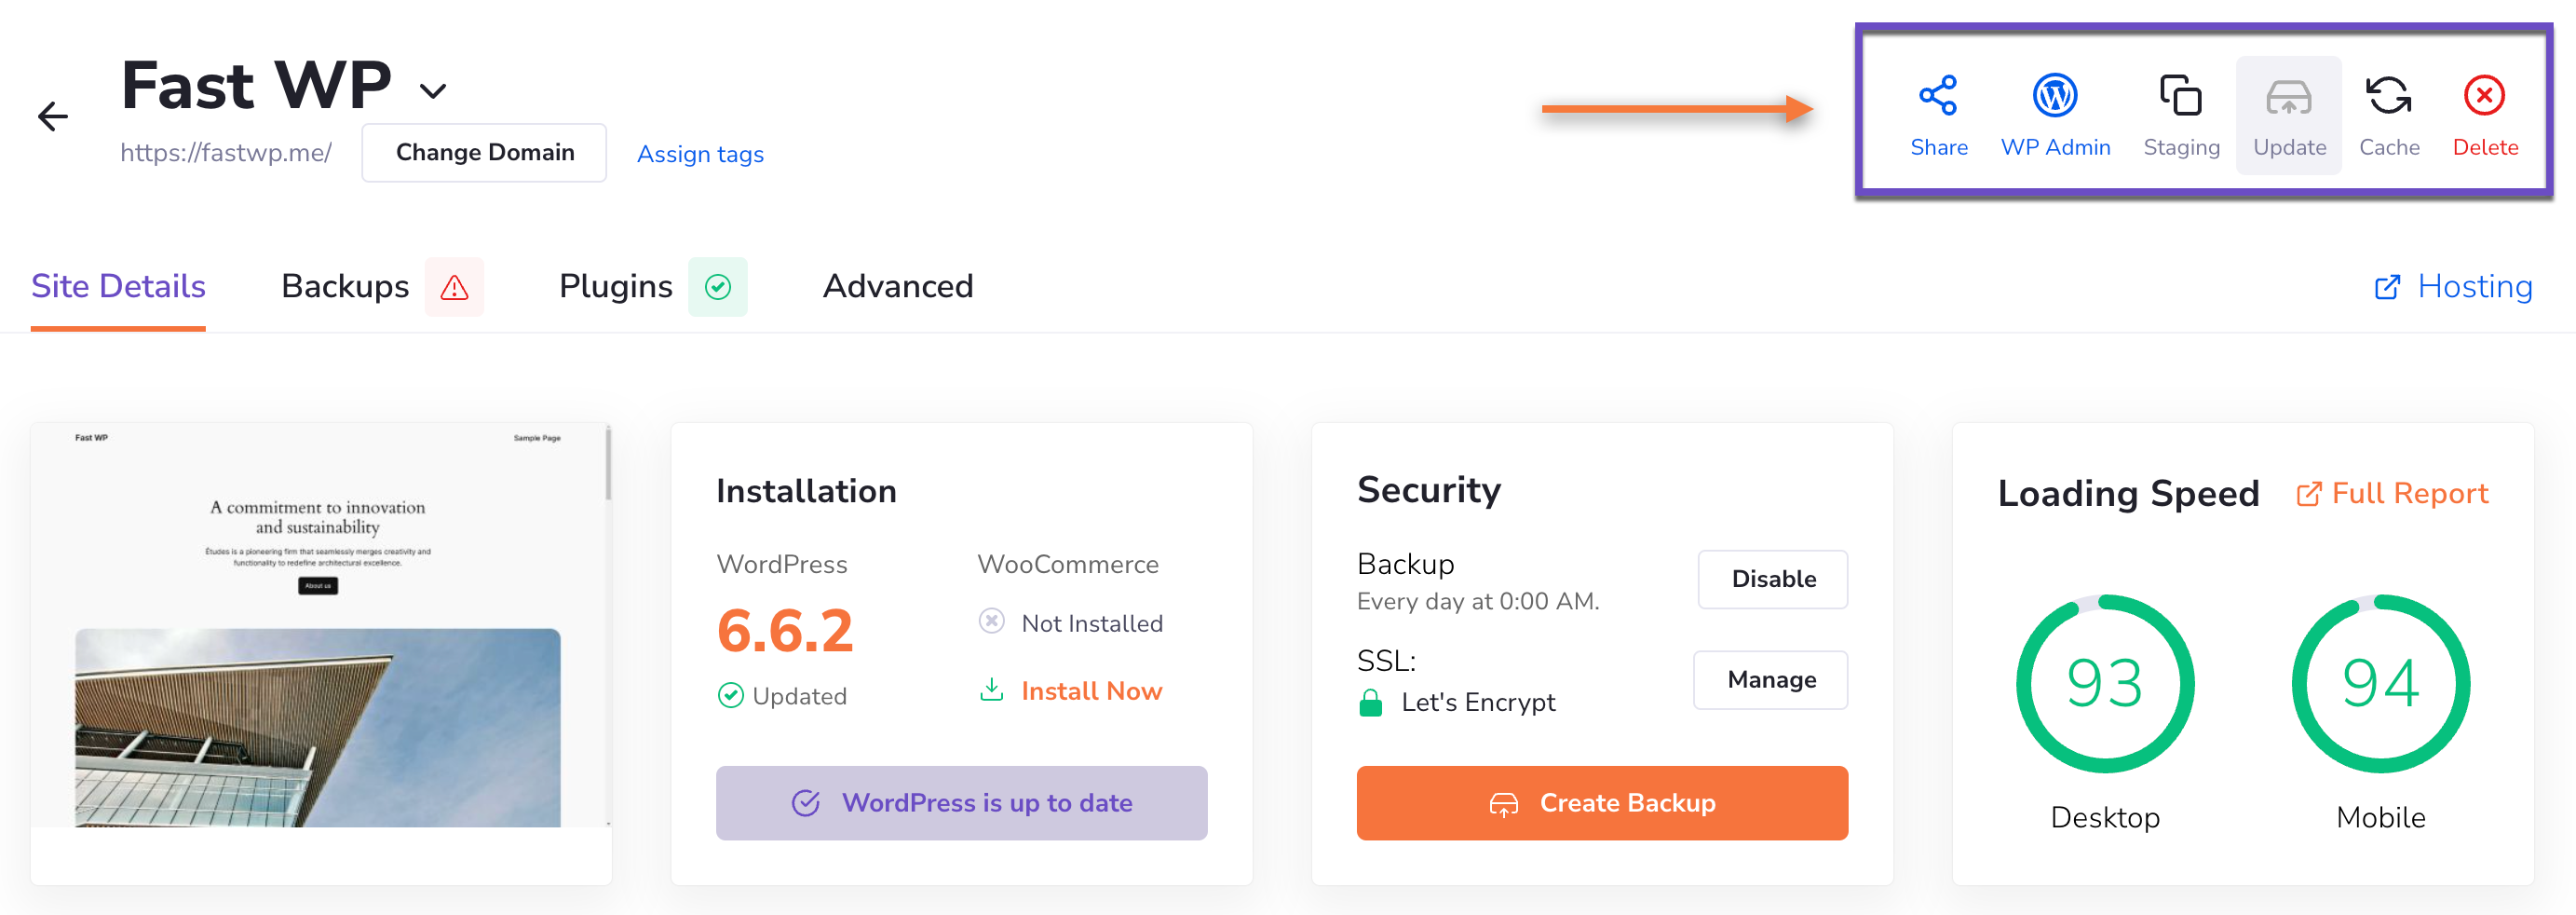
In the top right corner, you can perform several quick actions:
- Share Instance: Share access to your WordPress instance with others for collaboration. [learn how]
- WP Admin Access: Directly access your site’s WordPress admin dashboard. [learn how]
- Create Staging: Set up a staging environment to test changes safely before applying them to your live site. [learn how]
- Update: Install any available update for WordPress core.
- Clear Cache: Clear your WordPress instance cache to ensure that the most recent changes are visible to visitors.
- Delete Instance: Permanently delete the WordPress instance from your control panel.
Site Details
The Site Details tab provides essential statistics about your WordPress instance:
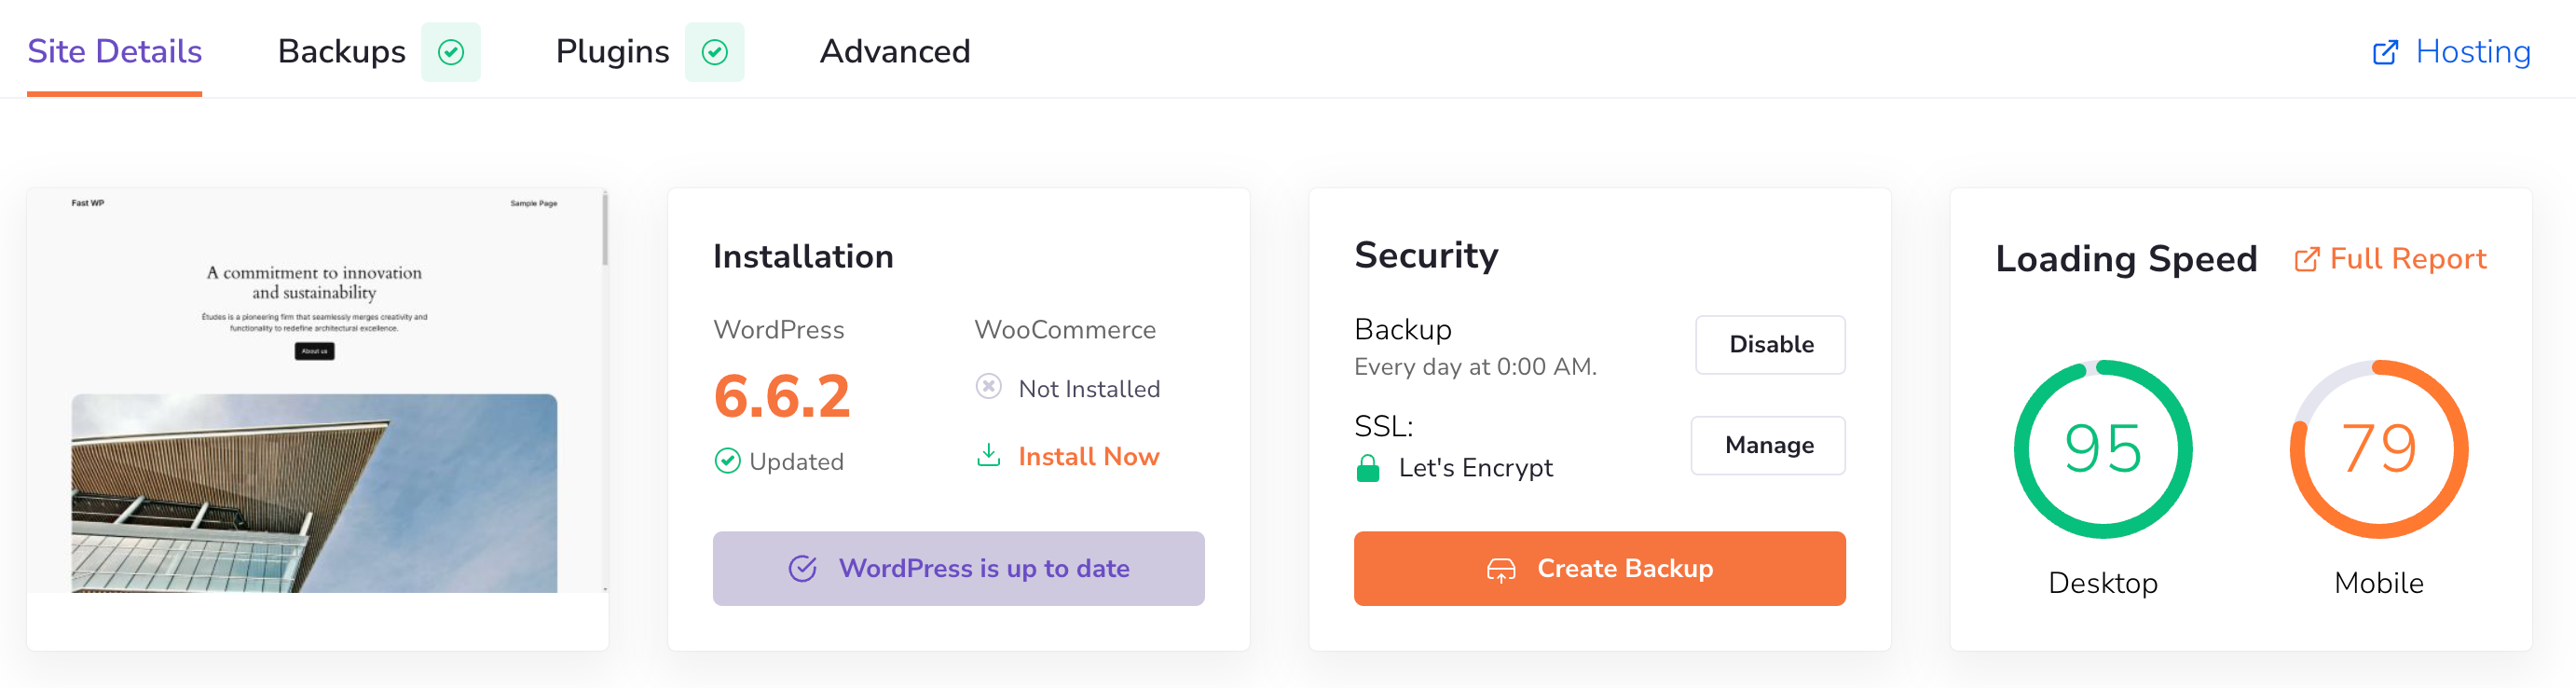
- Installation: This section displays information about your WordPress installation, such as the core version and whether it’s up to date.
- Security: This section provides details about your site’s automated remote backups and SSL installation status.
- Loading speed: this section displays your website’s performance for desktop and mobile browsers.
The performance data is gathered from Google Page Speed™. Click the “Full Report” button for more details. - Instance Analytics: this section displays the bandwidth usage over the last seven days.
Backups
The Backups tab is where you can easily manage your site’s backups. The action buttons on the far right of the list allow you to download, restore, or delete your backups.

The Backup History includes information such as:
- Name of the backup
- Date and Time Of The Backup
- Its Size
- Type (Automatic/Manual)
- WordPress Version
- Custom Notes
Plugins
The Plugins tab allows you to manage the plugins installed on your WordPress install.
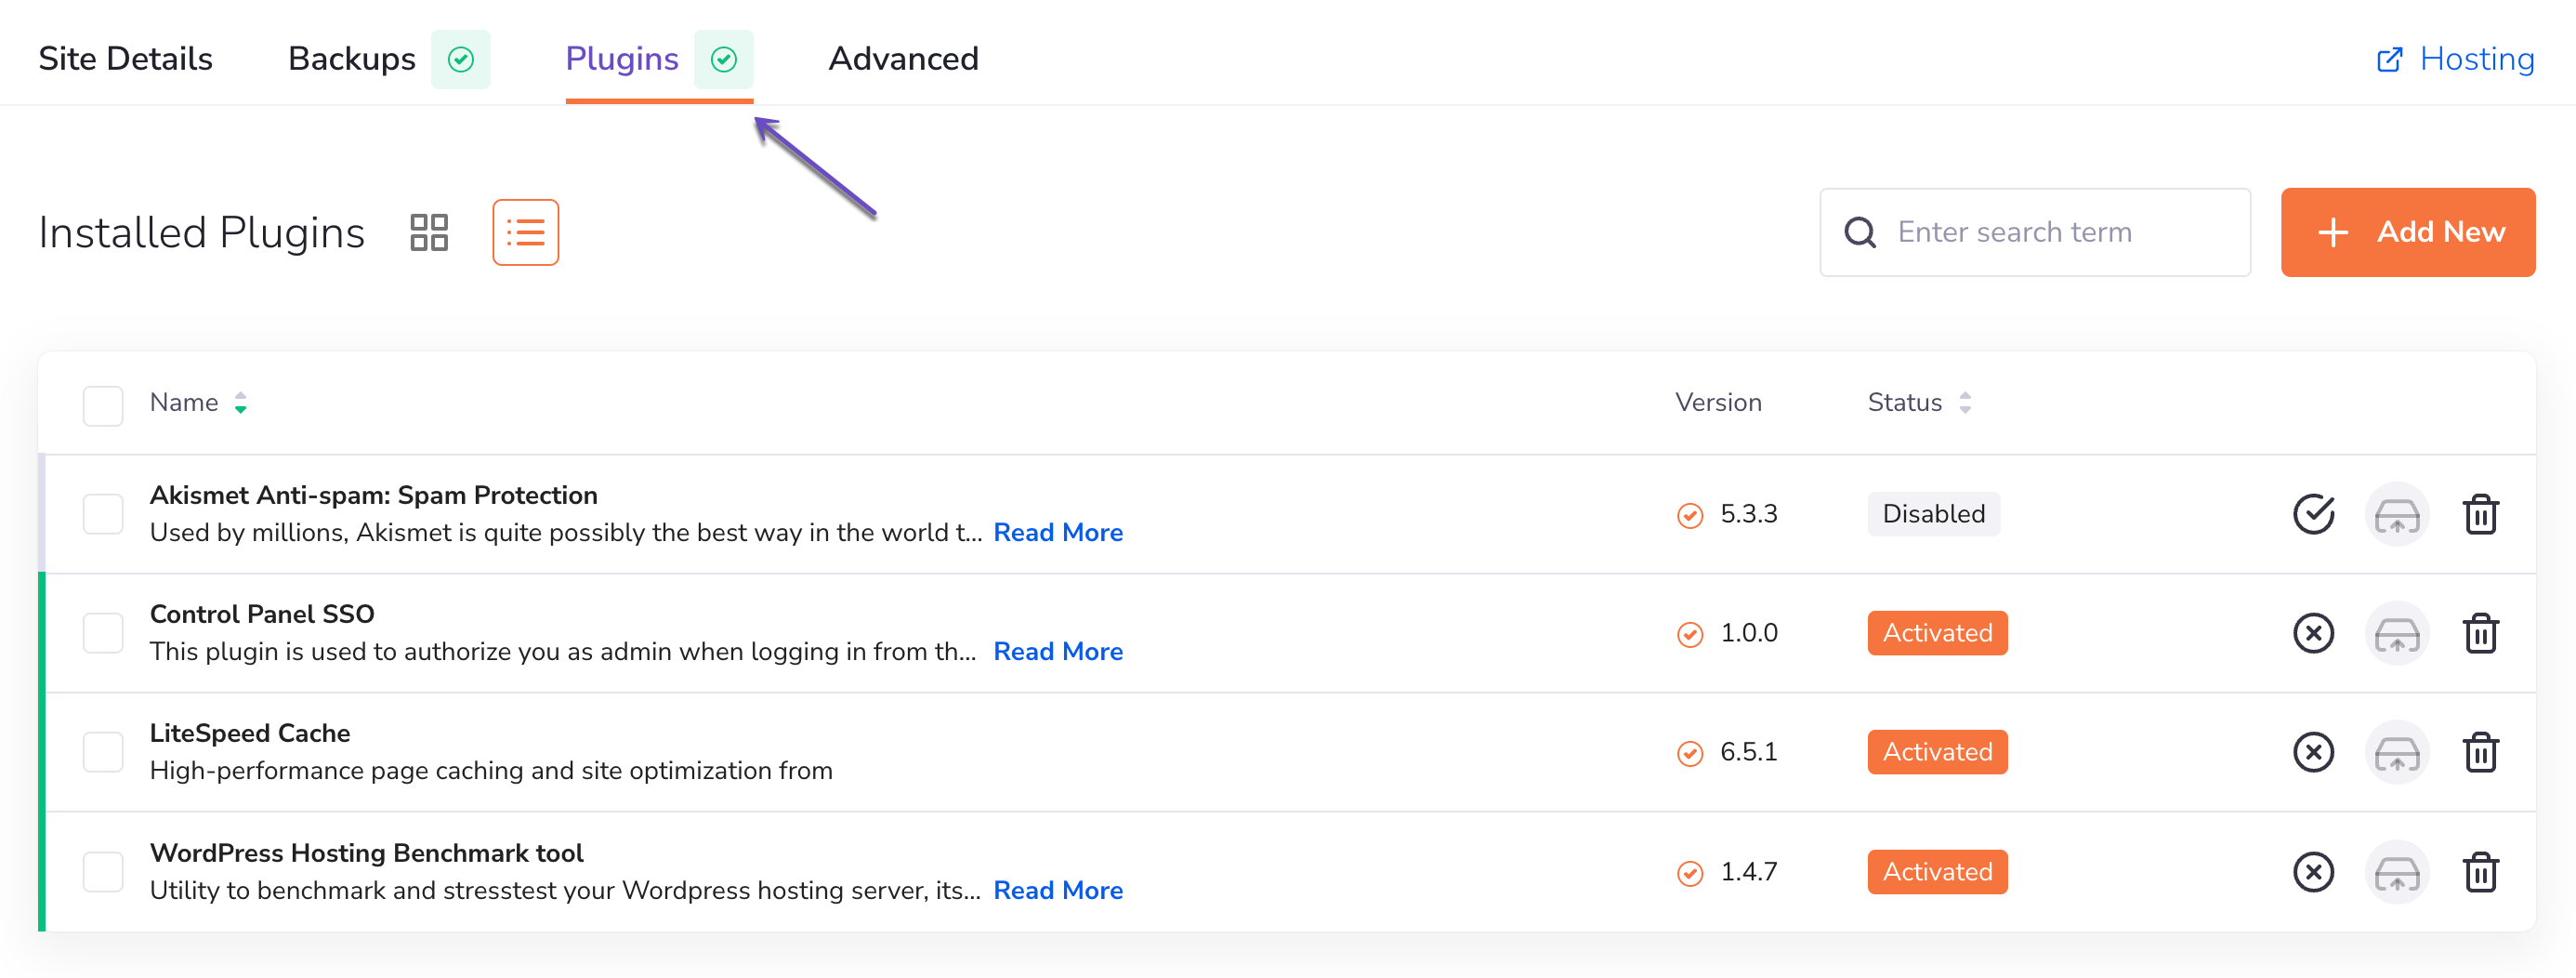
Both the list view and tile view offer the same information and options, just presented differently.
The status is indicated by “Activated” and “Disabled” markers in the “Status” column, as well as by the green or gray highlight on the edge of the list.
You can deactivate/activate, update or delete installed plugins by clicking on their respective action button on the far right.
Perform the actions in bulk by selecting multiple or all plugins at once. You will find the checkboxes to the far left. The checkbox in the header will select all plugins.
To install a completely new plugin, click on the Add New button to the right of the search bar.
Advanced Settings
All settings and information beyond regular daily operations are located in the Advanced section of the instance details. These are organized into the following categories:
- Site Details
- Security
- Auto Updates
- Developer Settings
- WordPress Config
- Users
- Themes
- Logs
Each category is explained in more detail below.
Instance Details
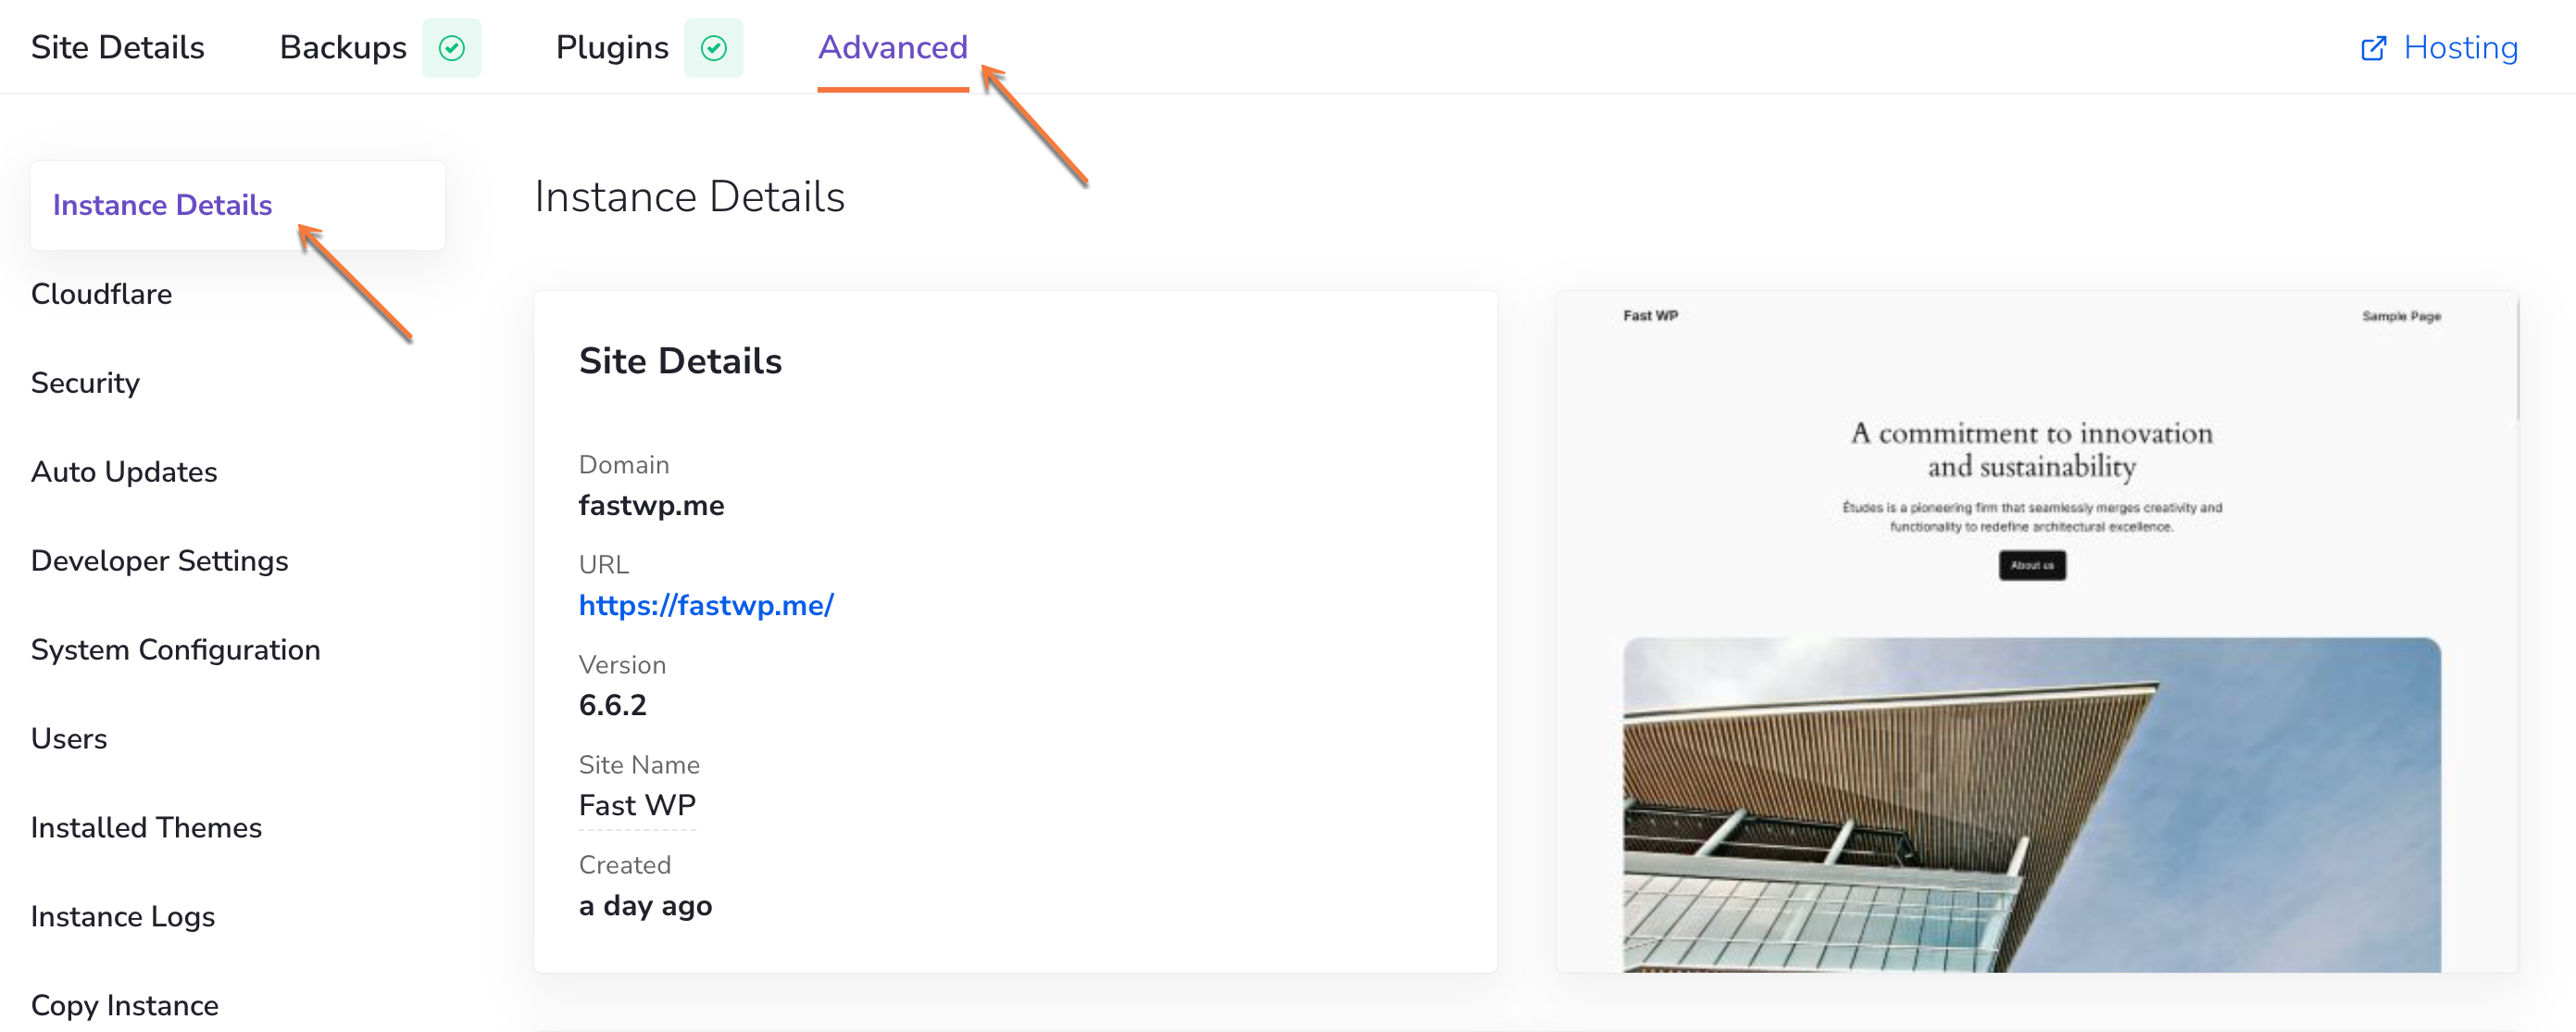
Here, you’ll find detailed information about your site and installation, including:
- DomainURL
- WordPress Version
- Site Name
- Site Age
- Installation Directory
- Database Name
- Database User
- Database Host
- A preview is also available on the right-hand side.
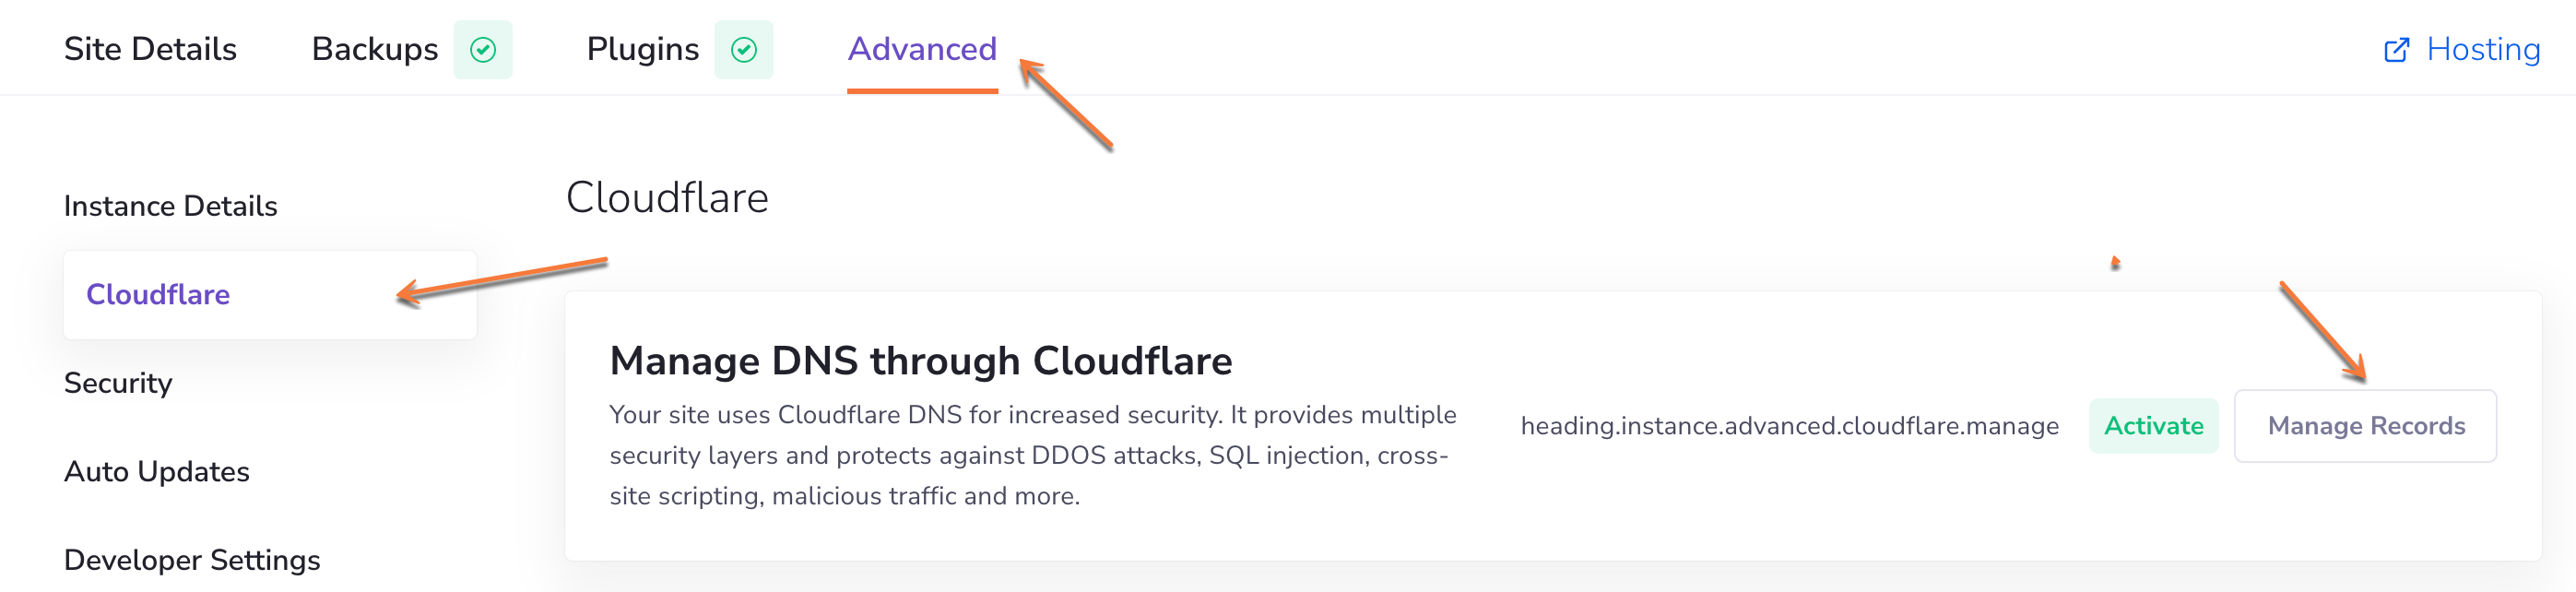
Cloudflare (DNS)
Our quick setup leverages the Cloudflare Anycast DNS network for enhanced speed and security. If you’re using the Cloudflare name servers, you can manage your domain’s DNS zone directly from the WordPress Manager.
Security
In the Security section, you can manage your security settings, including:
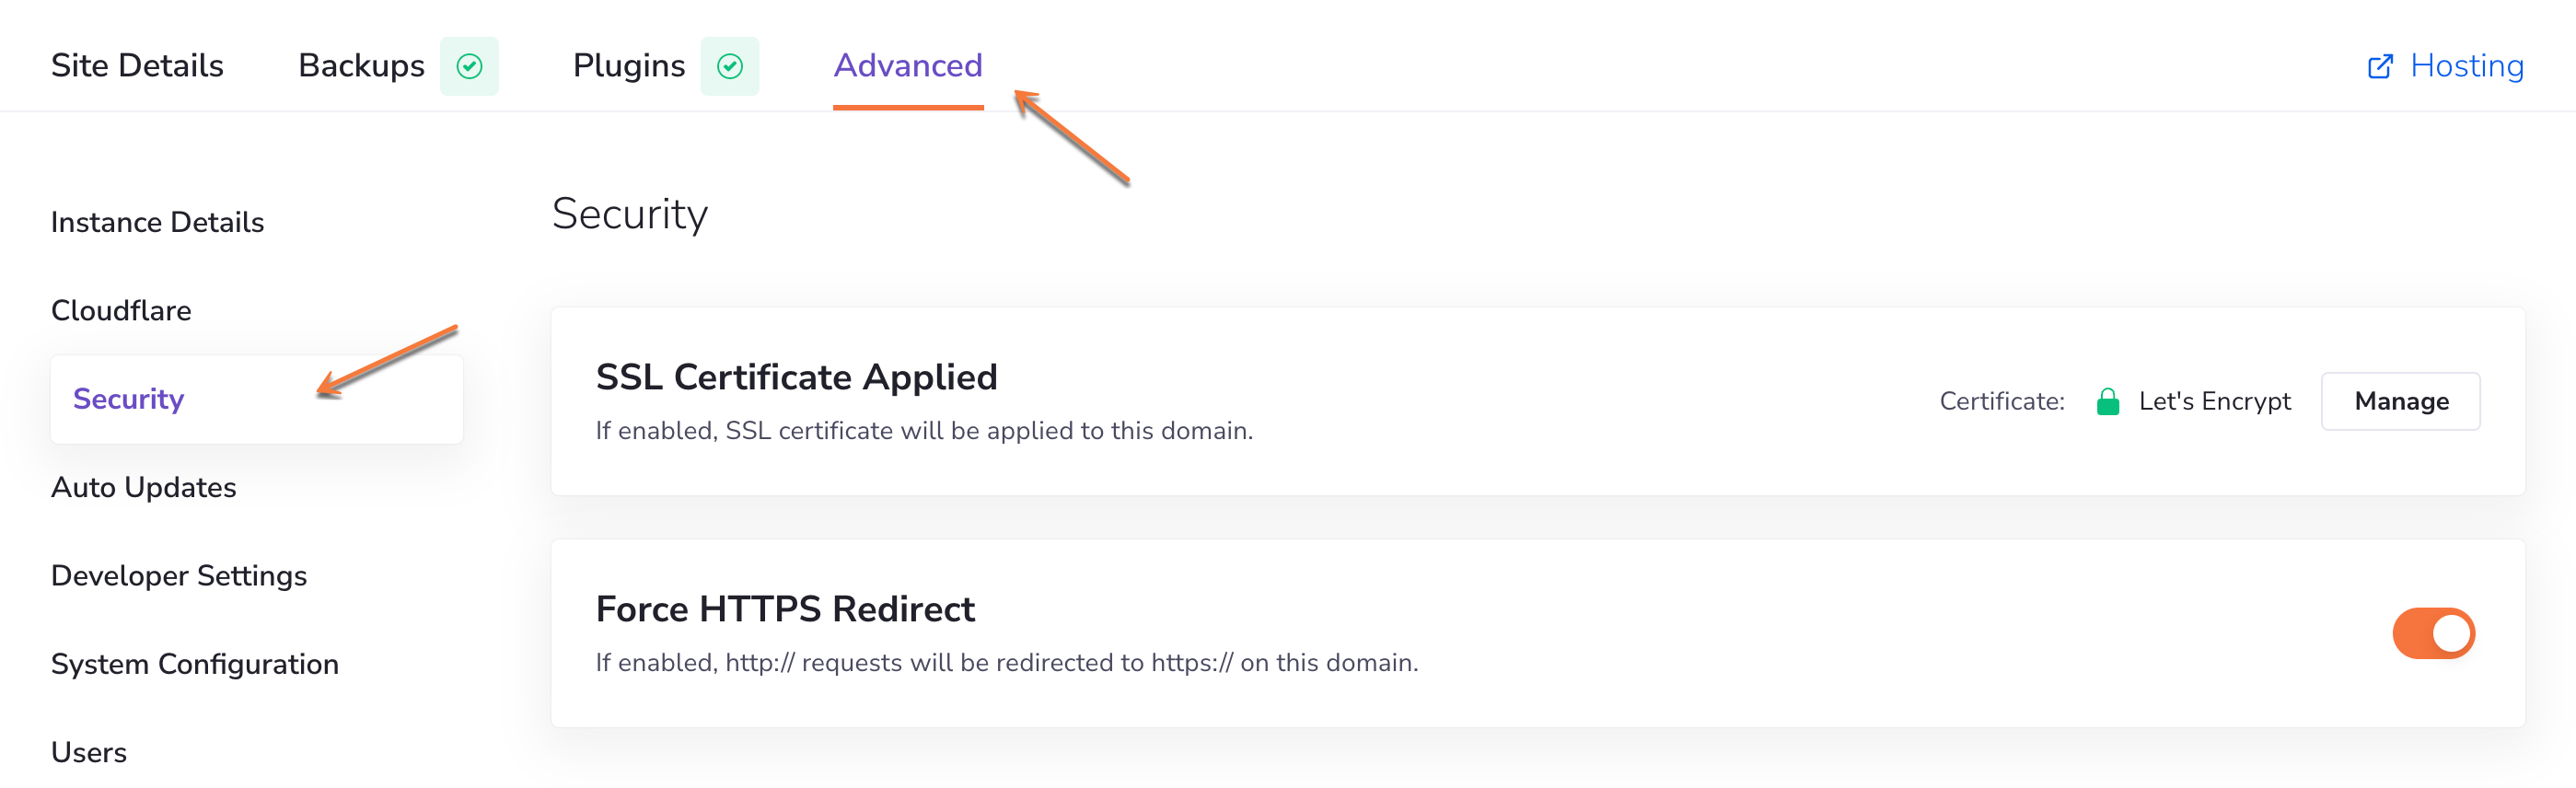
- SSL Certificate (if enabled, SSL certificate will be applied to your domain)
- Force HTTPS Redirect (if enabled, http:// requests will be redirected to https:// on your domain)
Auto Updates
In the Auto Updates section, you can enable or disable automatic updates for your WordPress instance; the options include:
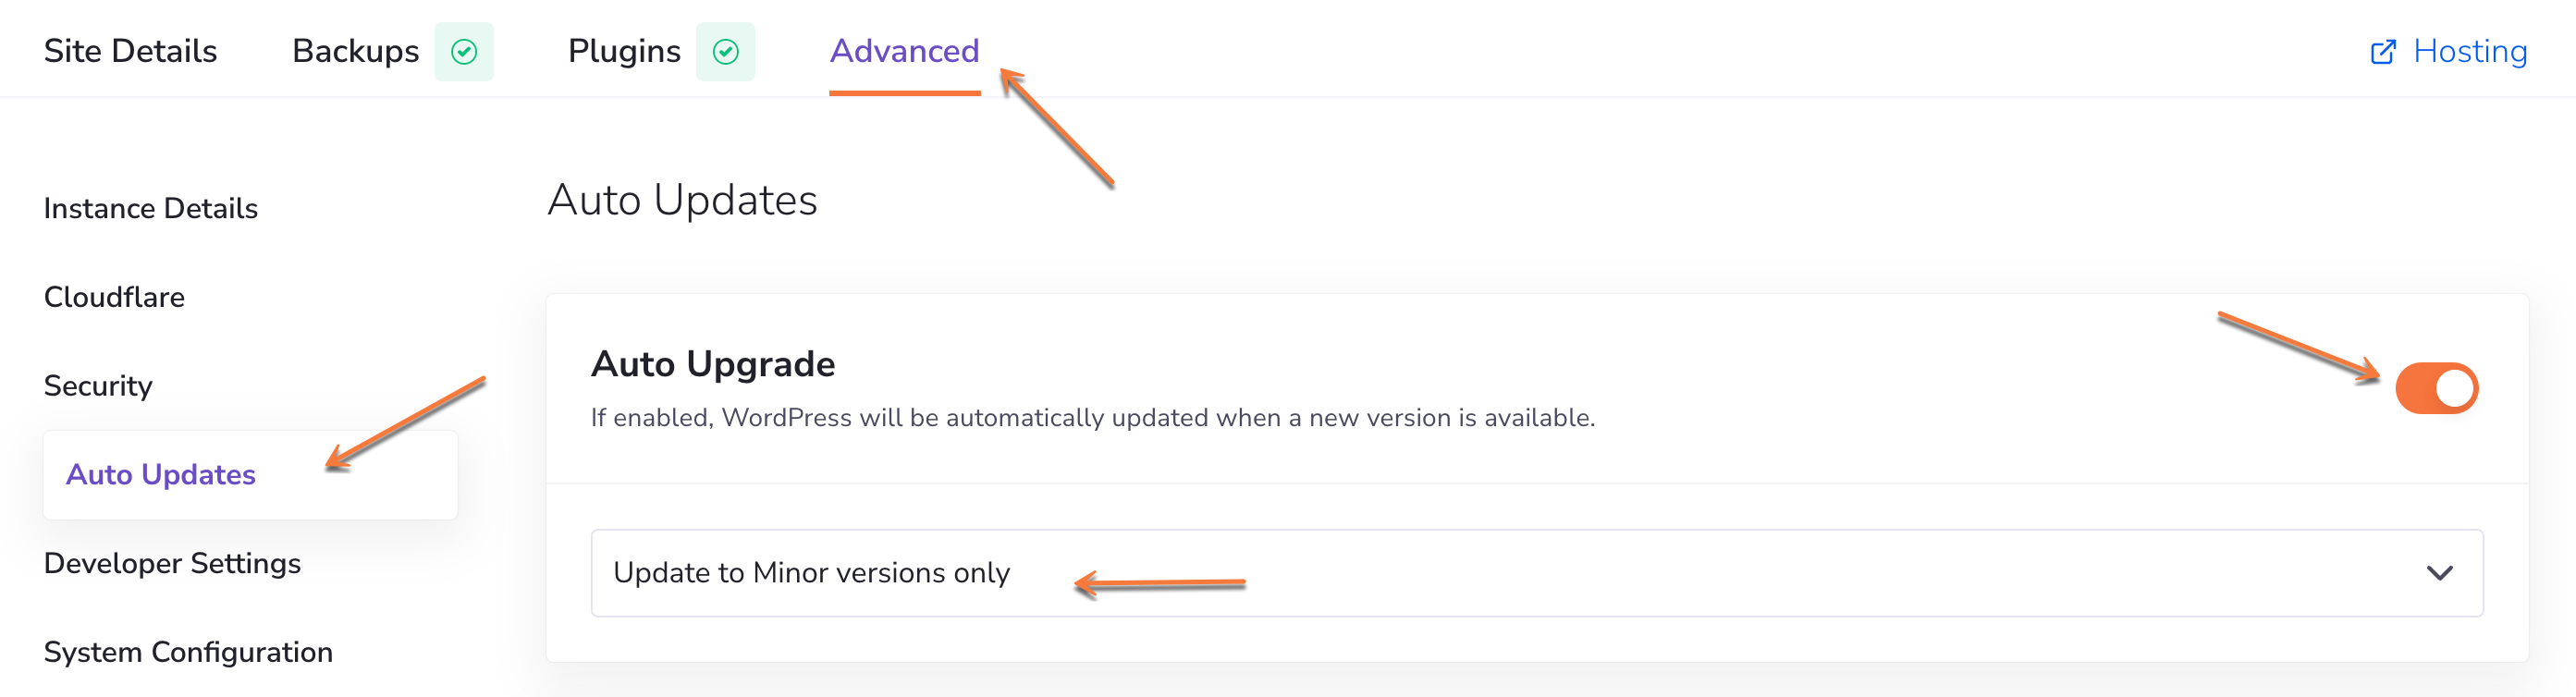
- Automatic WordPress update
- Automatic Plugins updates
- Automatic Themes updates
Developer Settings
In the Developer Settings section, you’ll find tools handy for website developers:
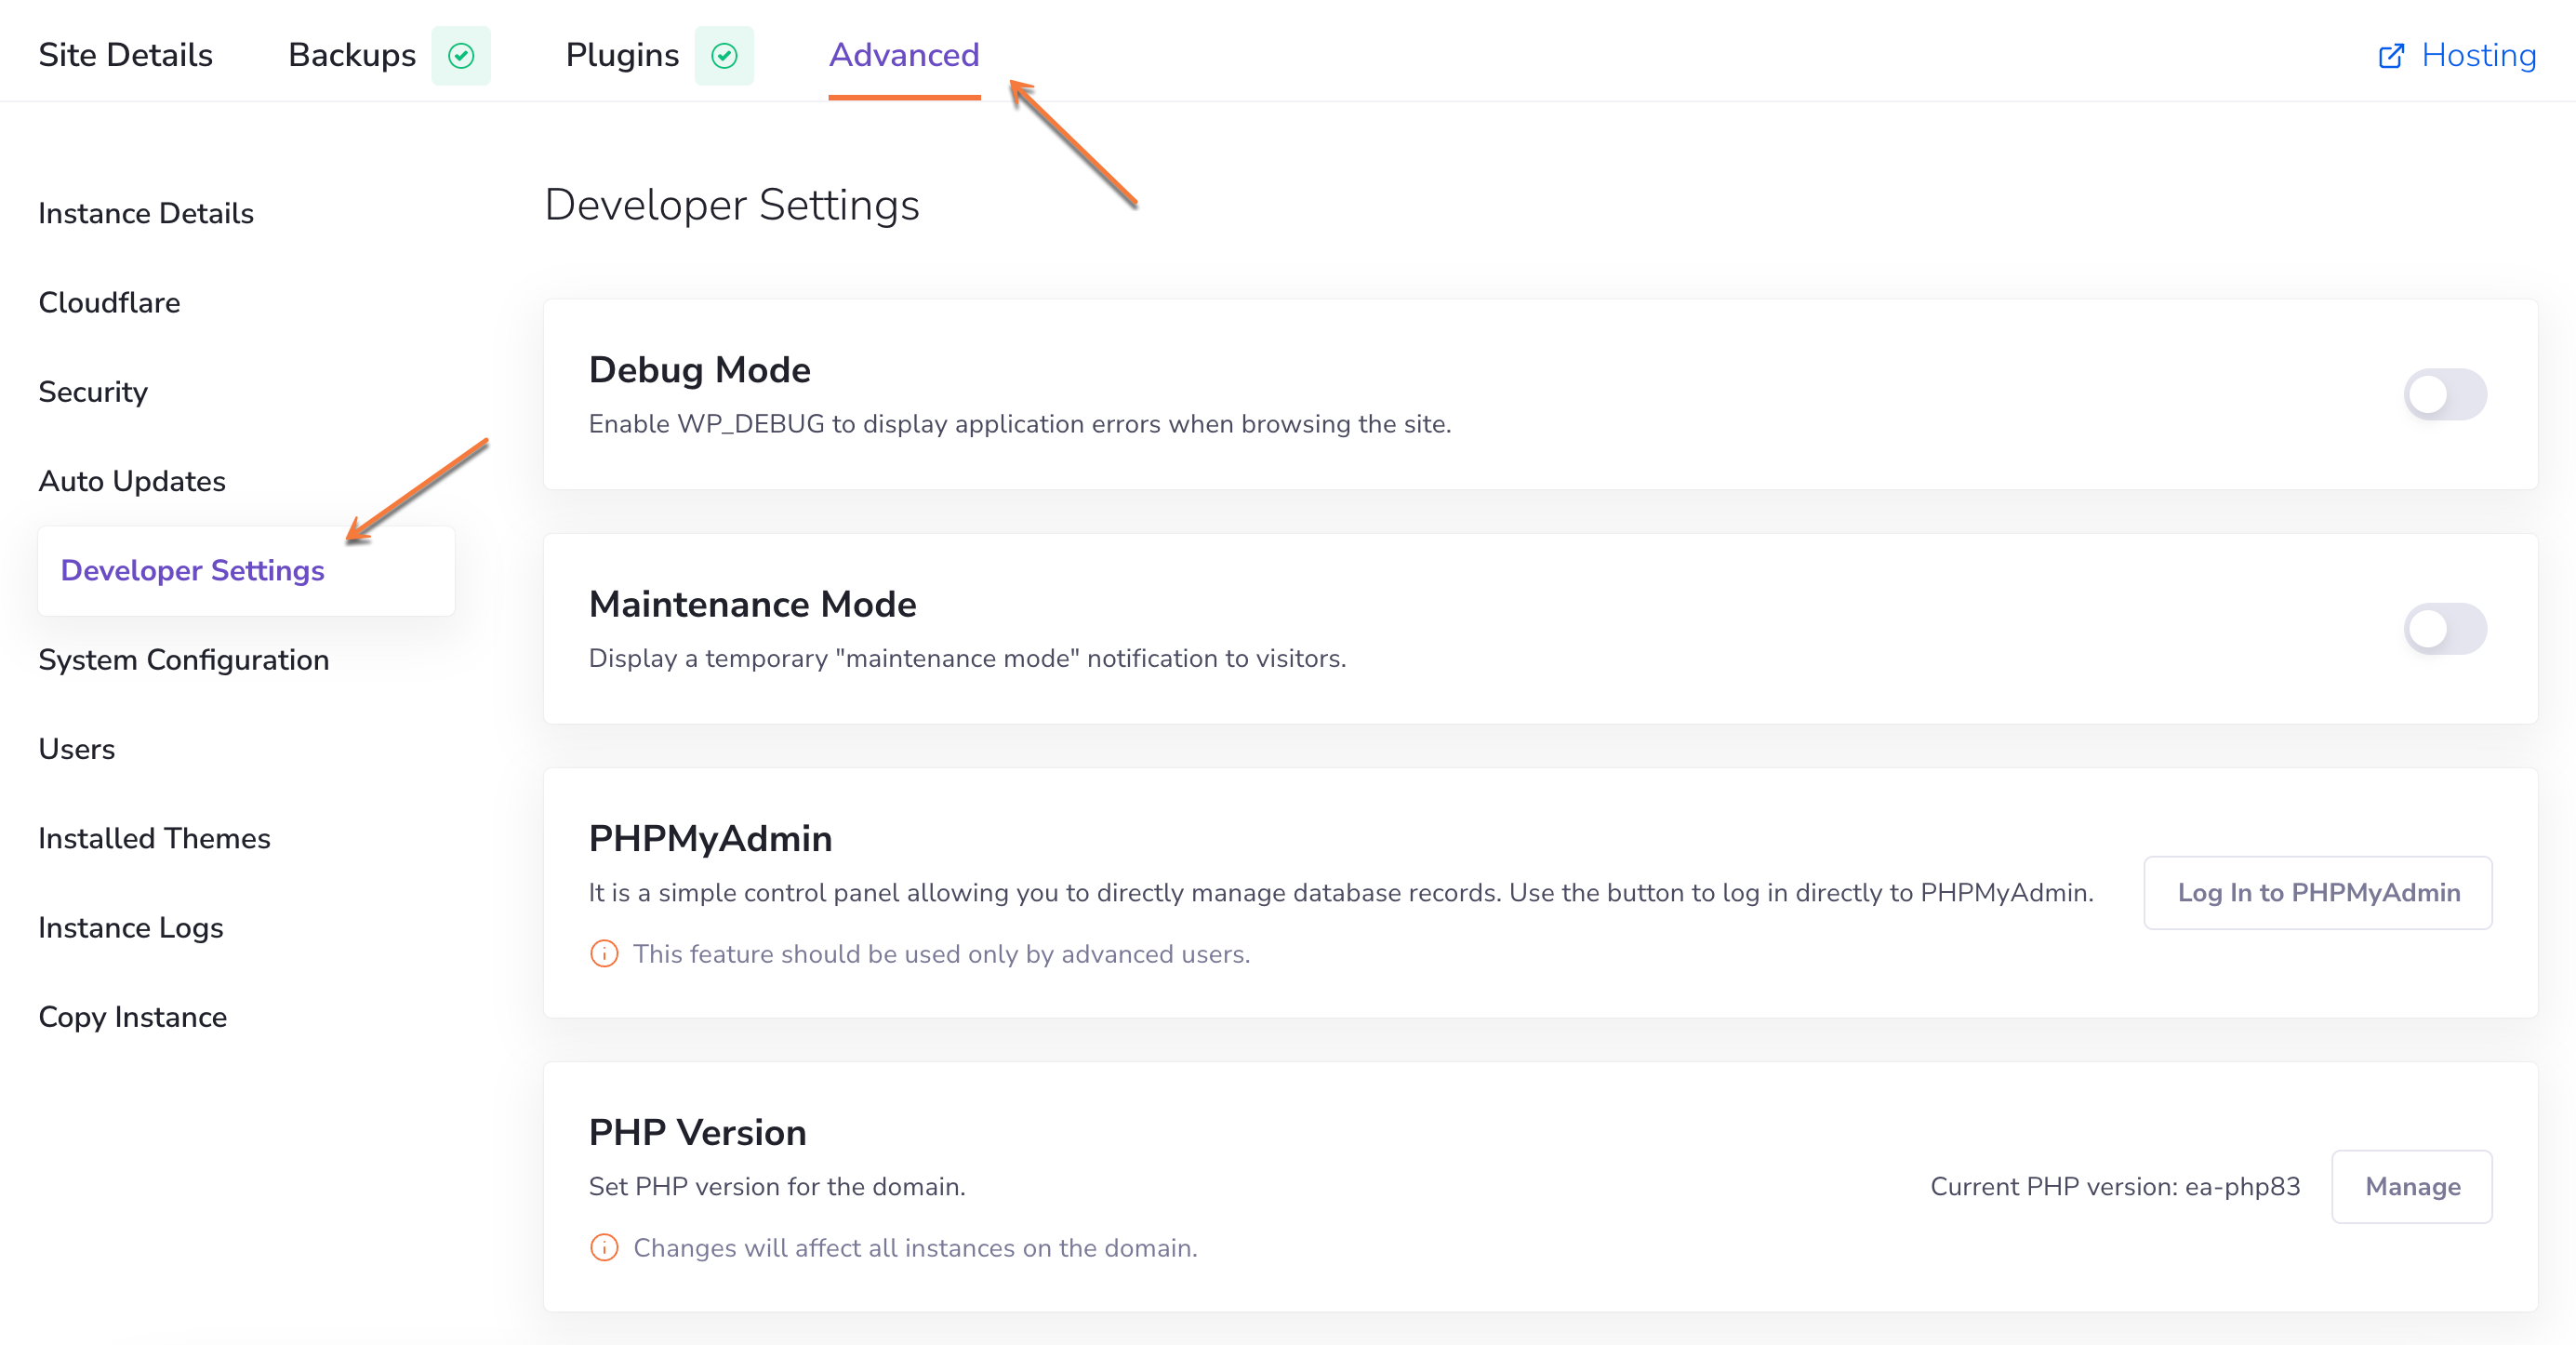
- WordPress Debug Mode – When enabled, application errors will be displayed while browsing the site.
- Maintenance Mode – When enabled, visitors will be shown a temporary maintenance notice.
- PHPMyAdmin access – A shortcut for direct login to the phpMyAdmin panel.
- PHP Version – Check or change the current PHP version used by the WordPress instance.
System Configuration
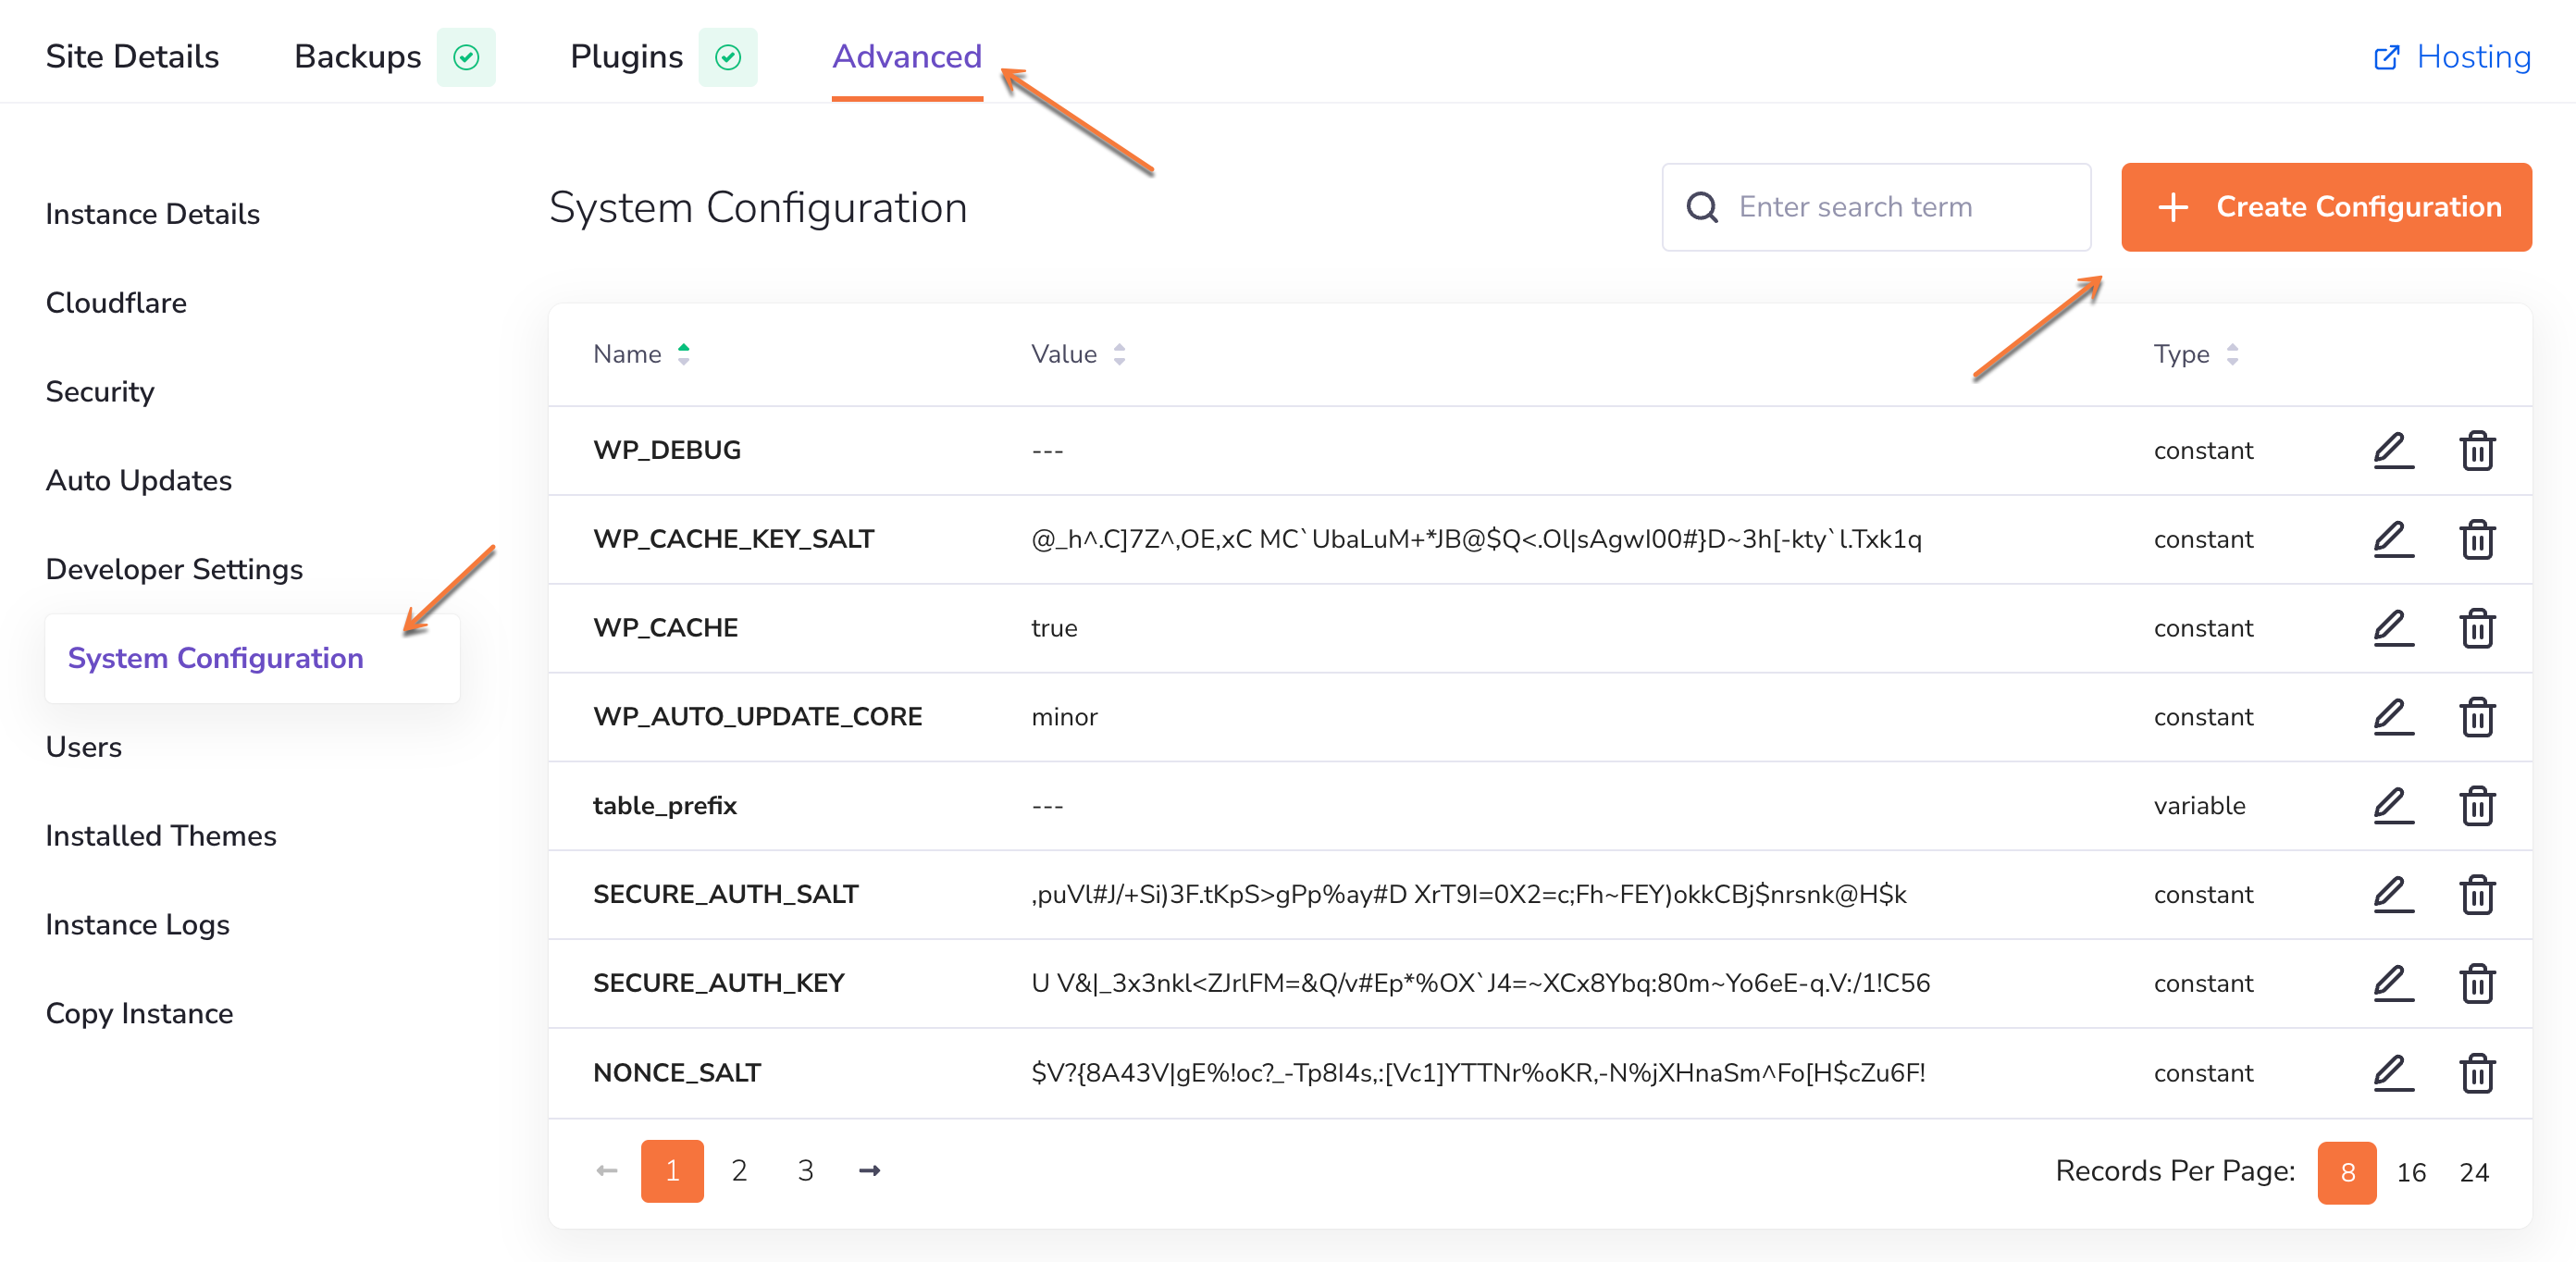
Make remote changes to your WordPress configuration file. To add a new configuration, click the Create Config button on the right. Configurations are displayed in a sortable table with Name, Value, and Type fields. Each configuration can be edited or removed using the action buttons on the right.
To find a specific configuration, use the search bar above the table.
Users
In the ‘Users’ section, you can manage admins and users who have access to your WordPress instance.

The following user data will be displayed: ID, Login, Display Name, Email Address, Role, and Registration Time.
Use the icons on the right to edit user details, reset the password, or delete the user.
To find a specific user, use the search feature above the table, or click the button next to it to create a new user.
Installed Themes
This is where you can manage your WordPress themes. Similar to the Plugins section, you can switch between tile view and list view for both installed themes and while browsing new ones. Both views provide the same information and options, just displayed differently.
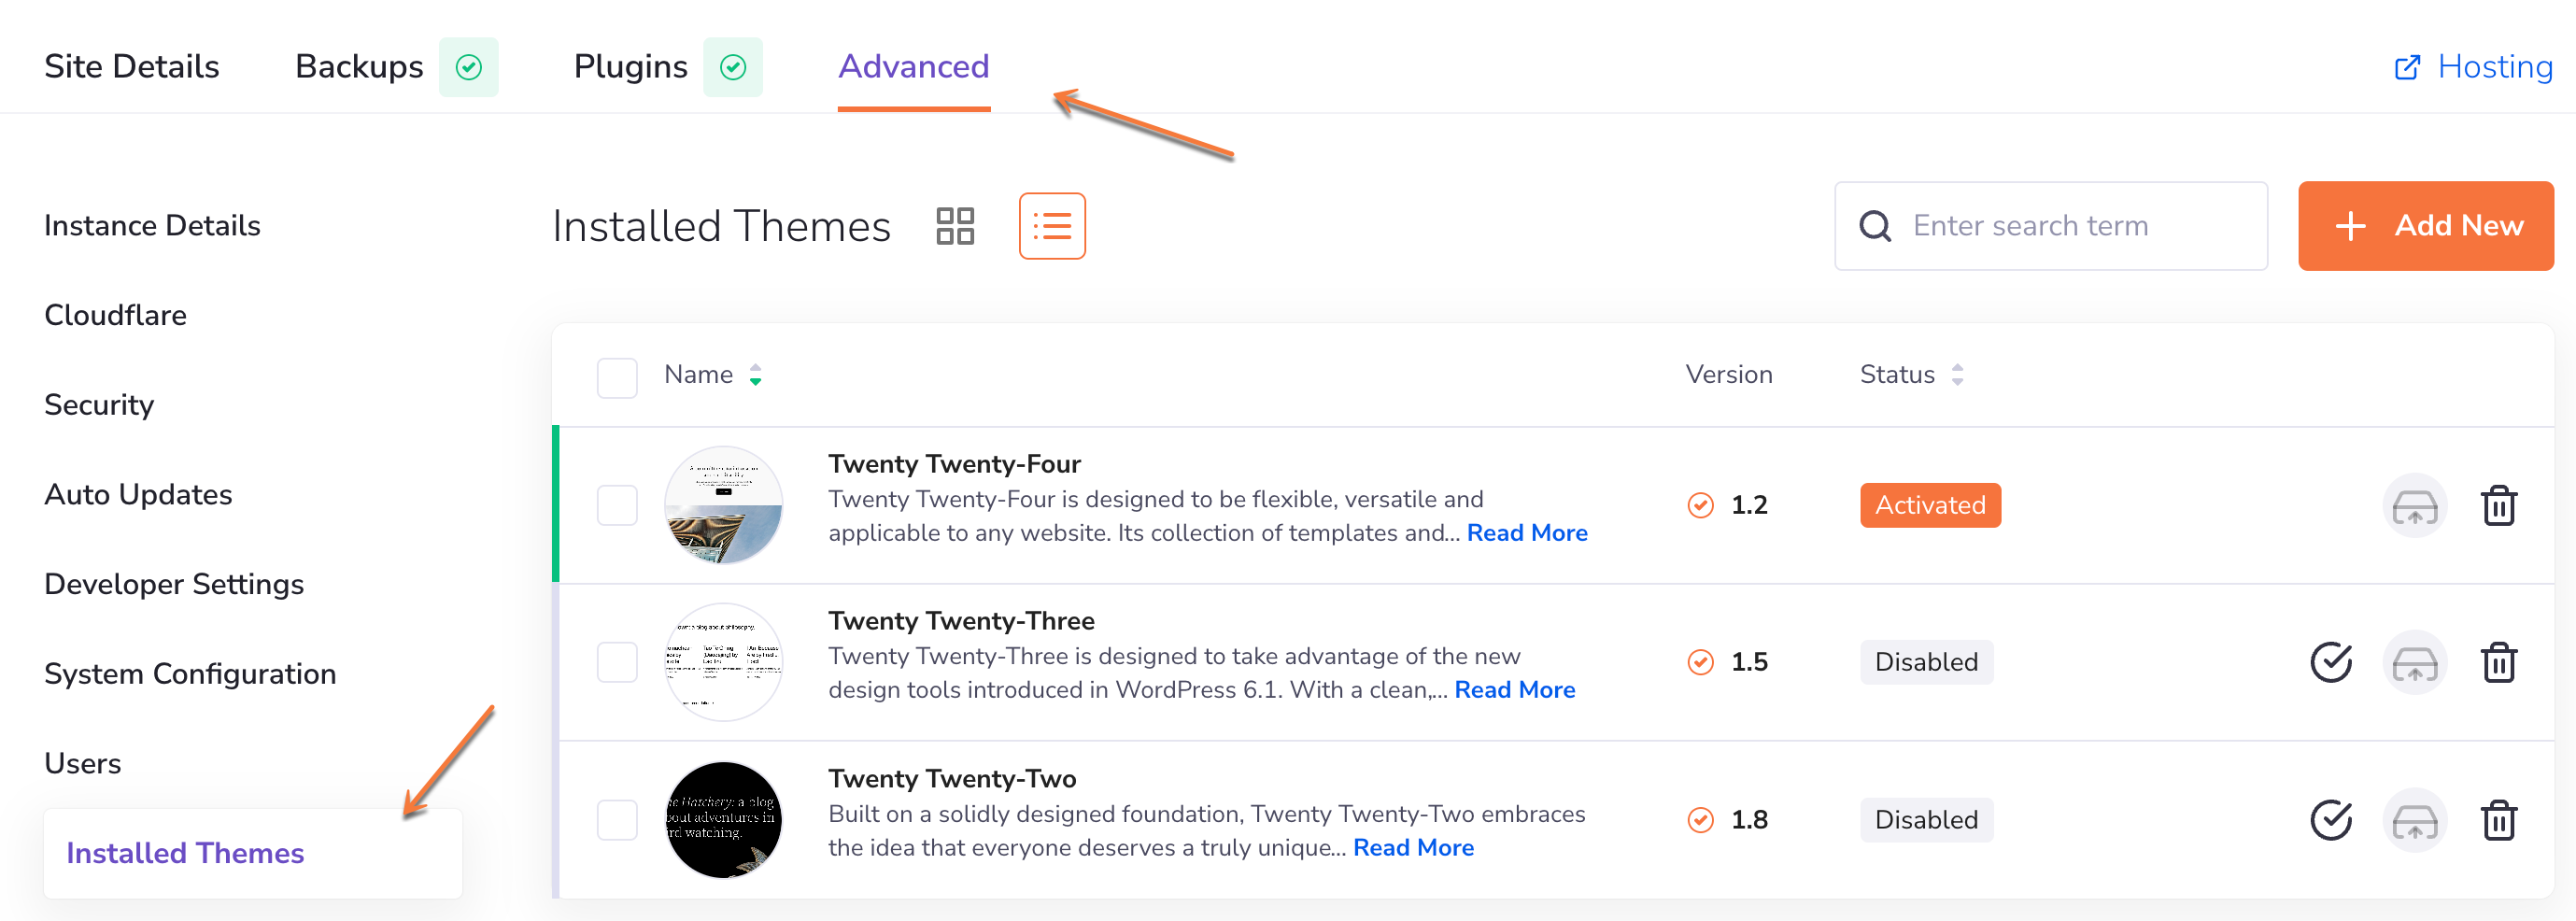
- The name and a short description of the theme can be seen on the left. Clicking on Read More will display the full description.
- One step to the right you will find the installed version of the theme. The symbol next to the version number indicates if the plugin is up to date.
- The status is indicated by “Activated” and “Disabled” markers in the “Status” column, as well as by the green or gray highlight on the edge of the list.
- You can deactivate/activate, update or delete installed plugins by clicking on their respective action button on the far right.
- Perform the actions in bulk by selecting multiple or all plugins at once. You will find the checkboxes to the far left. The checkbox in the header will select all plugins.
- You can sort the list by clicking on Name or Status in the header.
New Themes
To install a completely new WordPress theme, click on the Add New button to the right of the search bar.
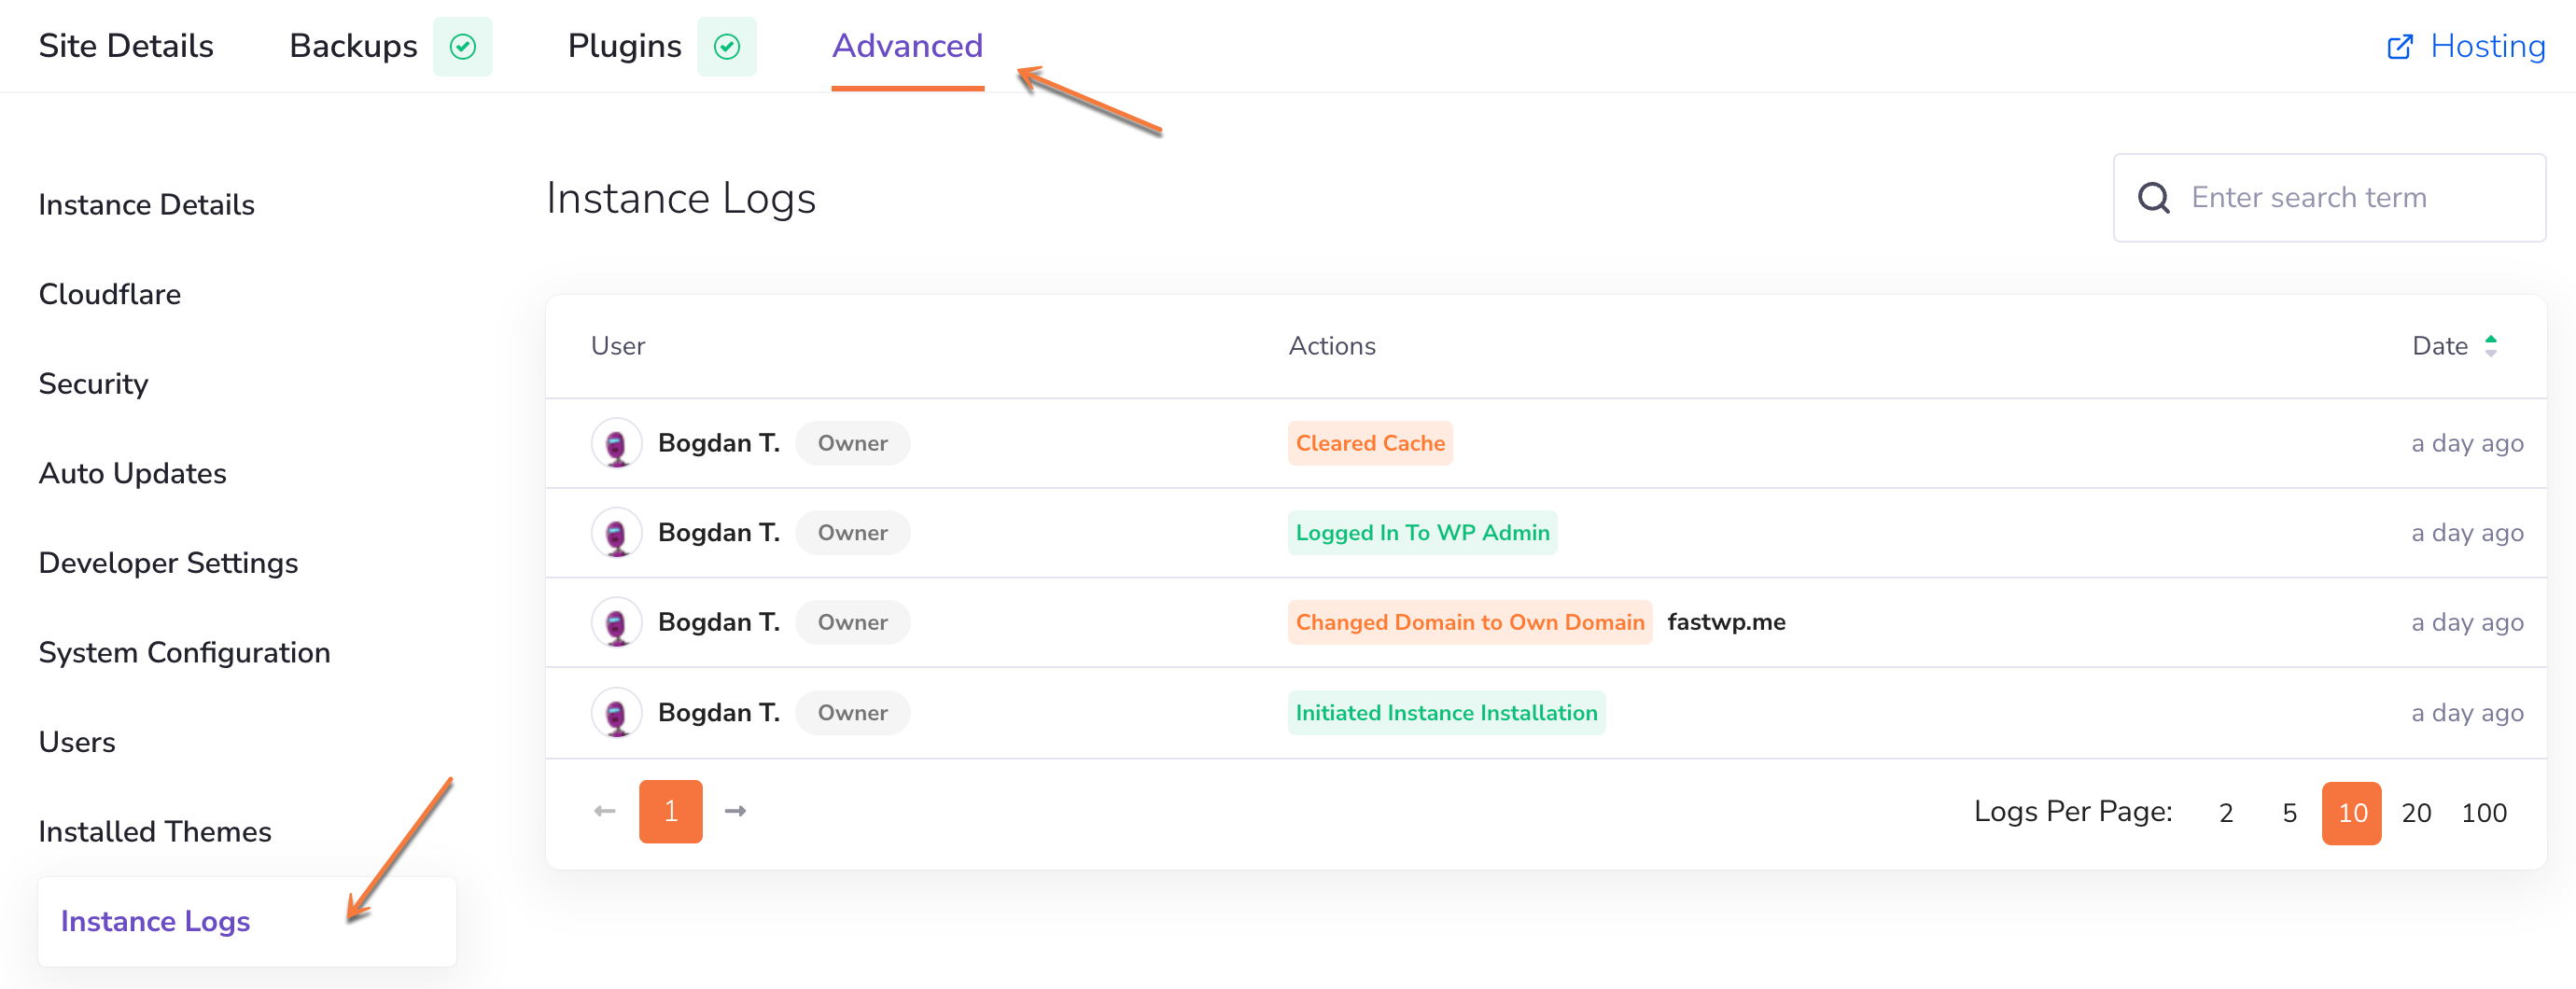
Instance Logs
The Instance logs section includes information on the user and the action date.
Copy Instance
Use this feature to duplicate your instance to any of your Managed WordPress Hosting services.
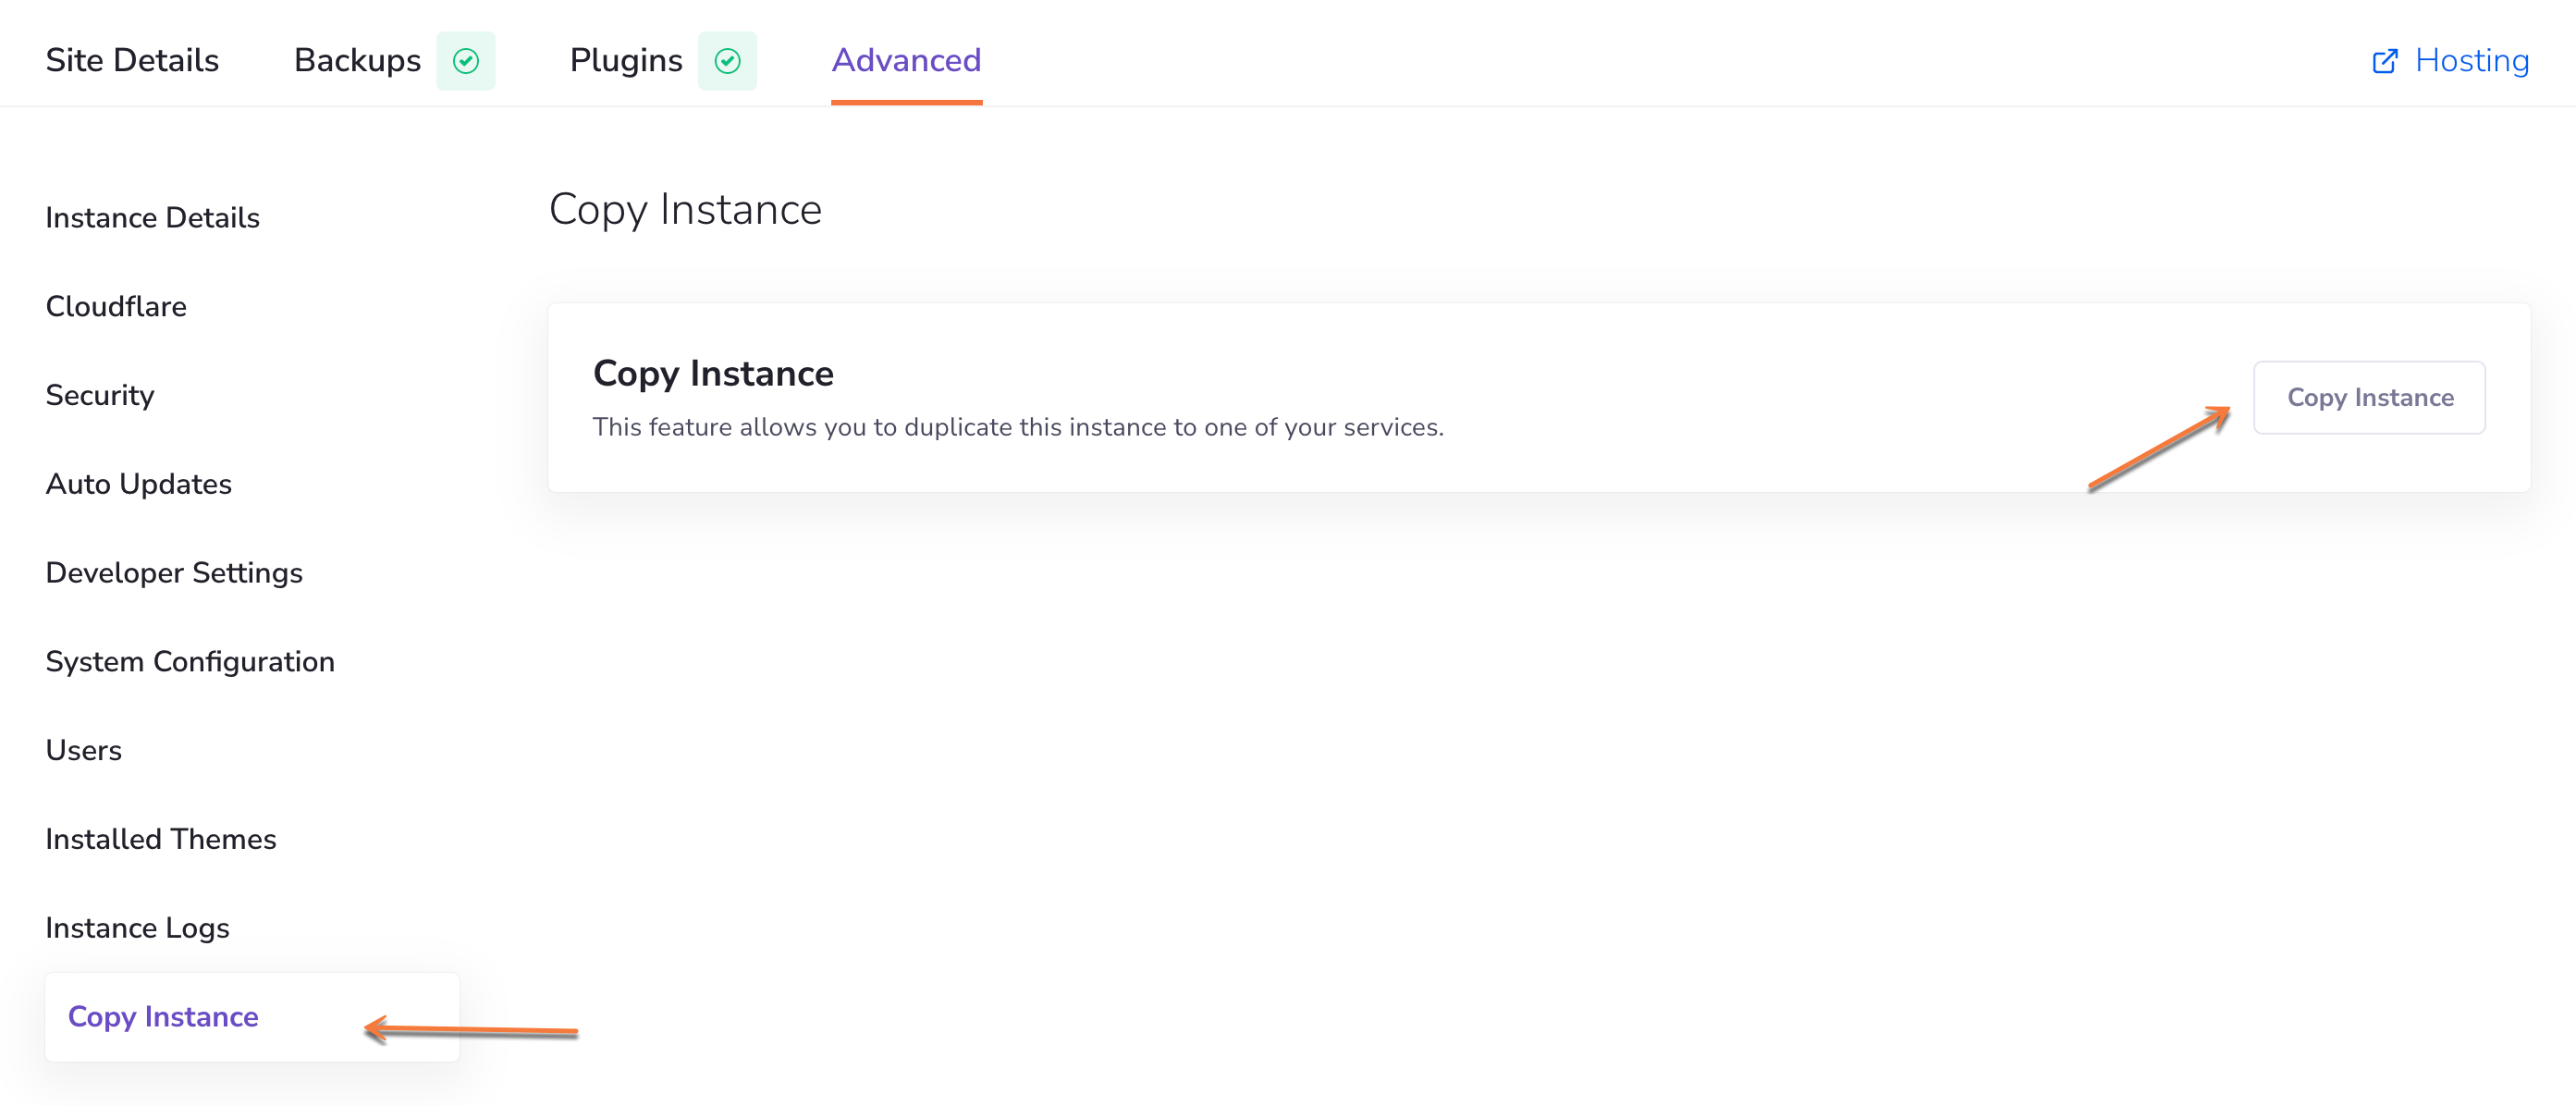
Click Copy Instance, then select the Managed WordPress Hosting service where the duplicate should be installed, as long as you have more than one service with available instances.
Summary
In conclusion, this tutorial provides a simple guide to managing all aspects of your WordPress instance, from settings configuration to handling updates, themes, plugins, and more, ensuring seamless site management.
⏭️ Join us for the following tutorial, where you will learn how to add a collaborator to your WordPress Instance.