Our WordPress Manager simplifies collaboration on your WordPress website. It allows you to securely share access with designers, developers, and other collaborators while keeping your account and other sites protected. Collaborator access grants them permissions specific to the site you choose.
Adding a New Collaborator
To add a collaborator to your WordPress instance, please follow the steps below:
Step 1) Log in to the WordPress Manager.
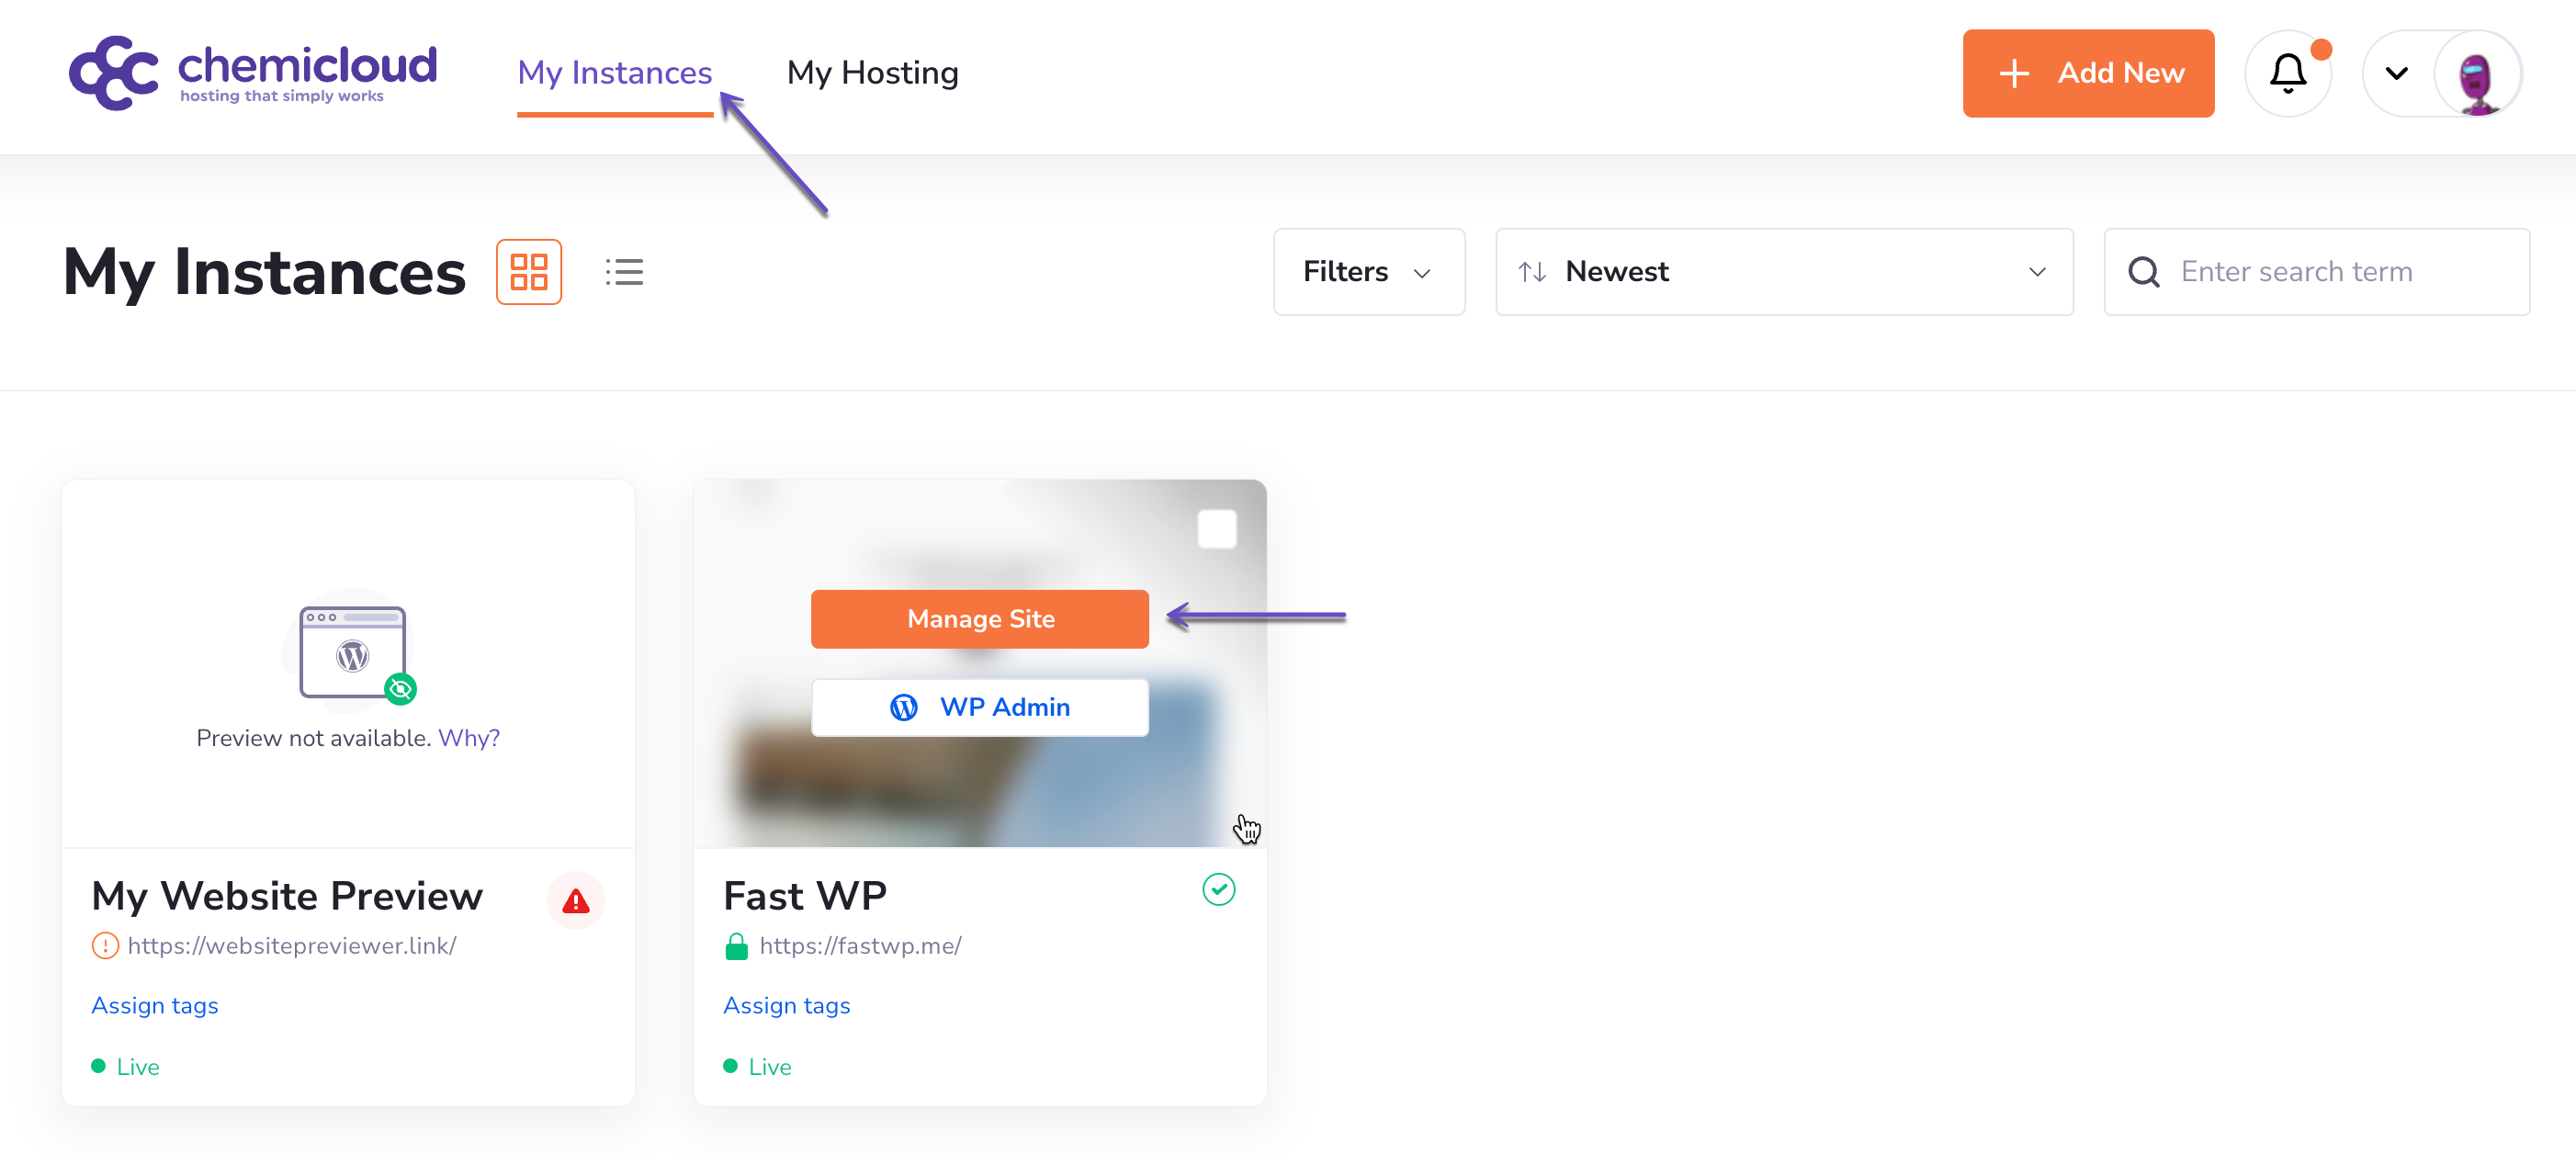
After logging into your WordPress Manager, you’ll see a dashboard with all your instances.
Step 2) Click on the “Manage site” button corresponding to the WordPress instance you wish to add a new collaborator.
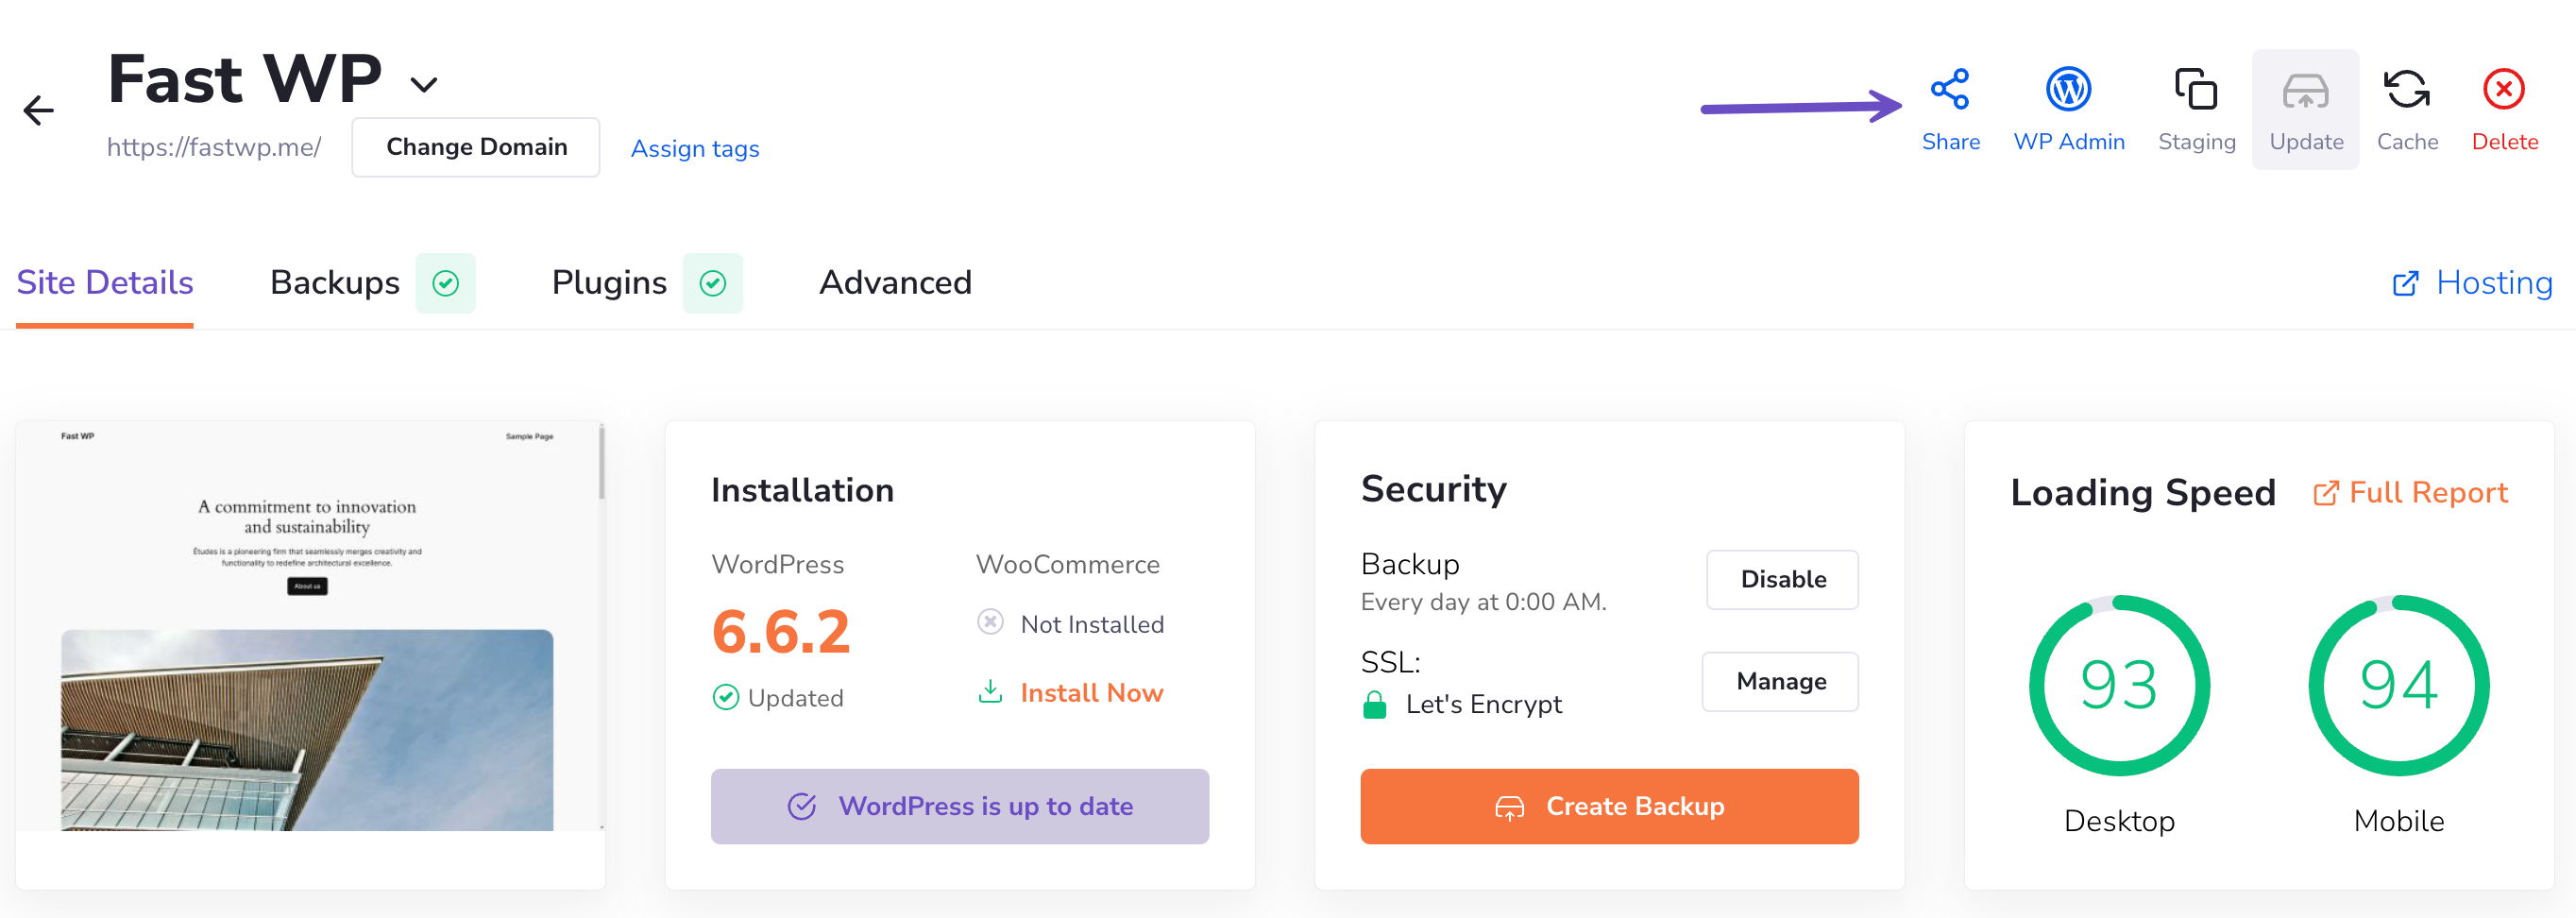
Step 3) Click the Share button in the top right corner.
Step 3) To add a user as a collaborator to your WordPress instance, enter their email address and assign them a role from the dropdown menu.
If you choose Custom, you can specify in detail which privileges to assign to each user (granular access). Clicking the checkmark next to each category will select all privileges within that category.
Be cautious of the Delete Instance option when assigning privileges. Privileges within the Manage Related Hosting category will apply to all sites associated with the Managed WordPress hosting account.

Step 4) When you are ready, click on Invite User
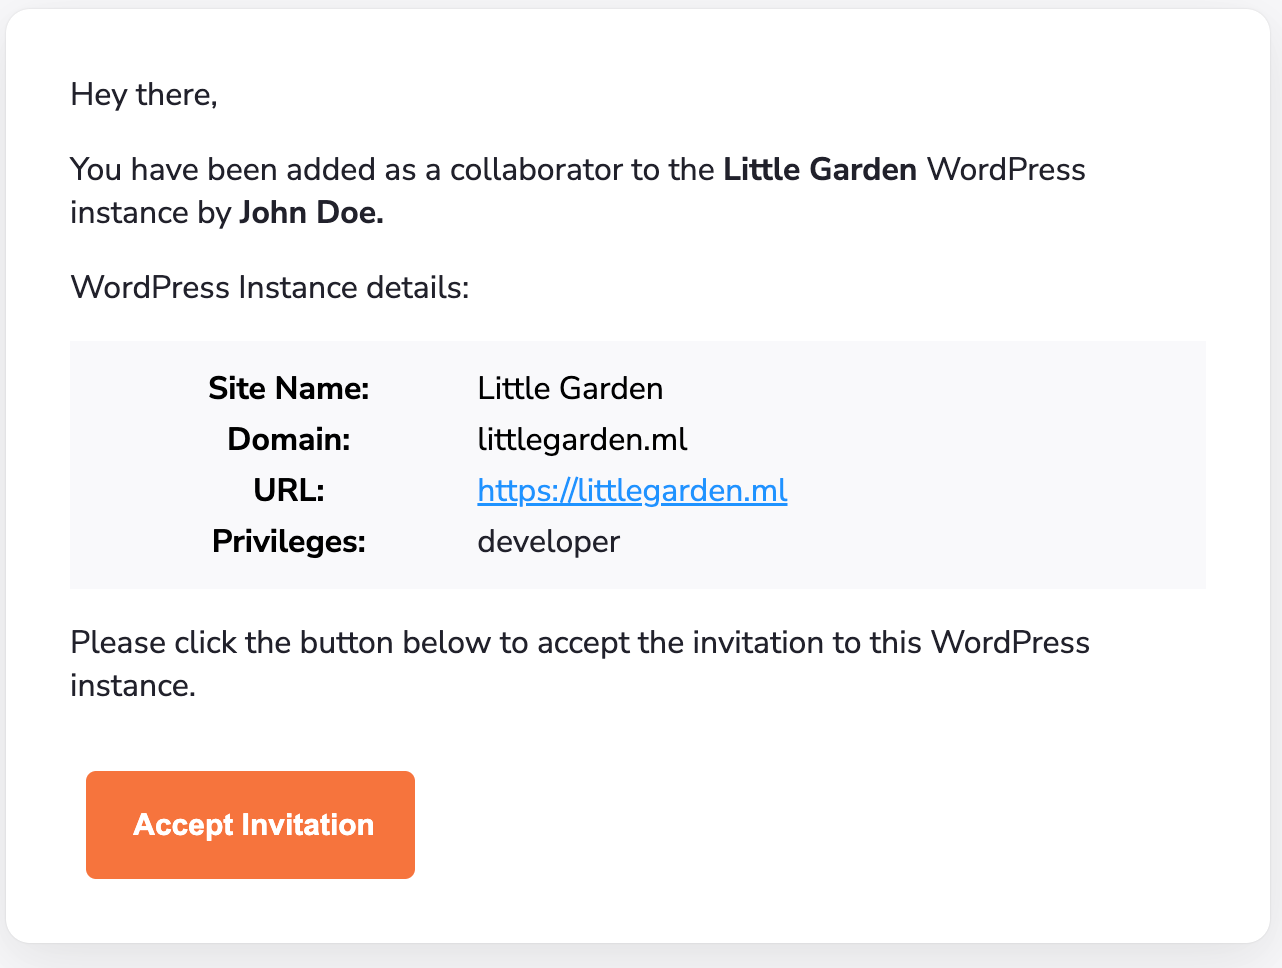
An invitation will be sent to their email address. Your collaborator will receive an email that looks something like this:
You will be able to see them on the list of People with access with the Pending status. After some time passes, you can send the invitation again by clicking on the button next to the status.
Updating Collaborator Permissions
If you need to update permissions for a user after adding them, please follow the steps below:
Step 1) Log in to the WordPress Manager.
After logging into your WordPress Manager, you’ll see a dashboard with all your instances.
Step 2) Click on the “Manage site” button corresponding to the WordPress instance you wish to update the permissions for a specific user.
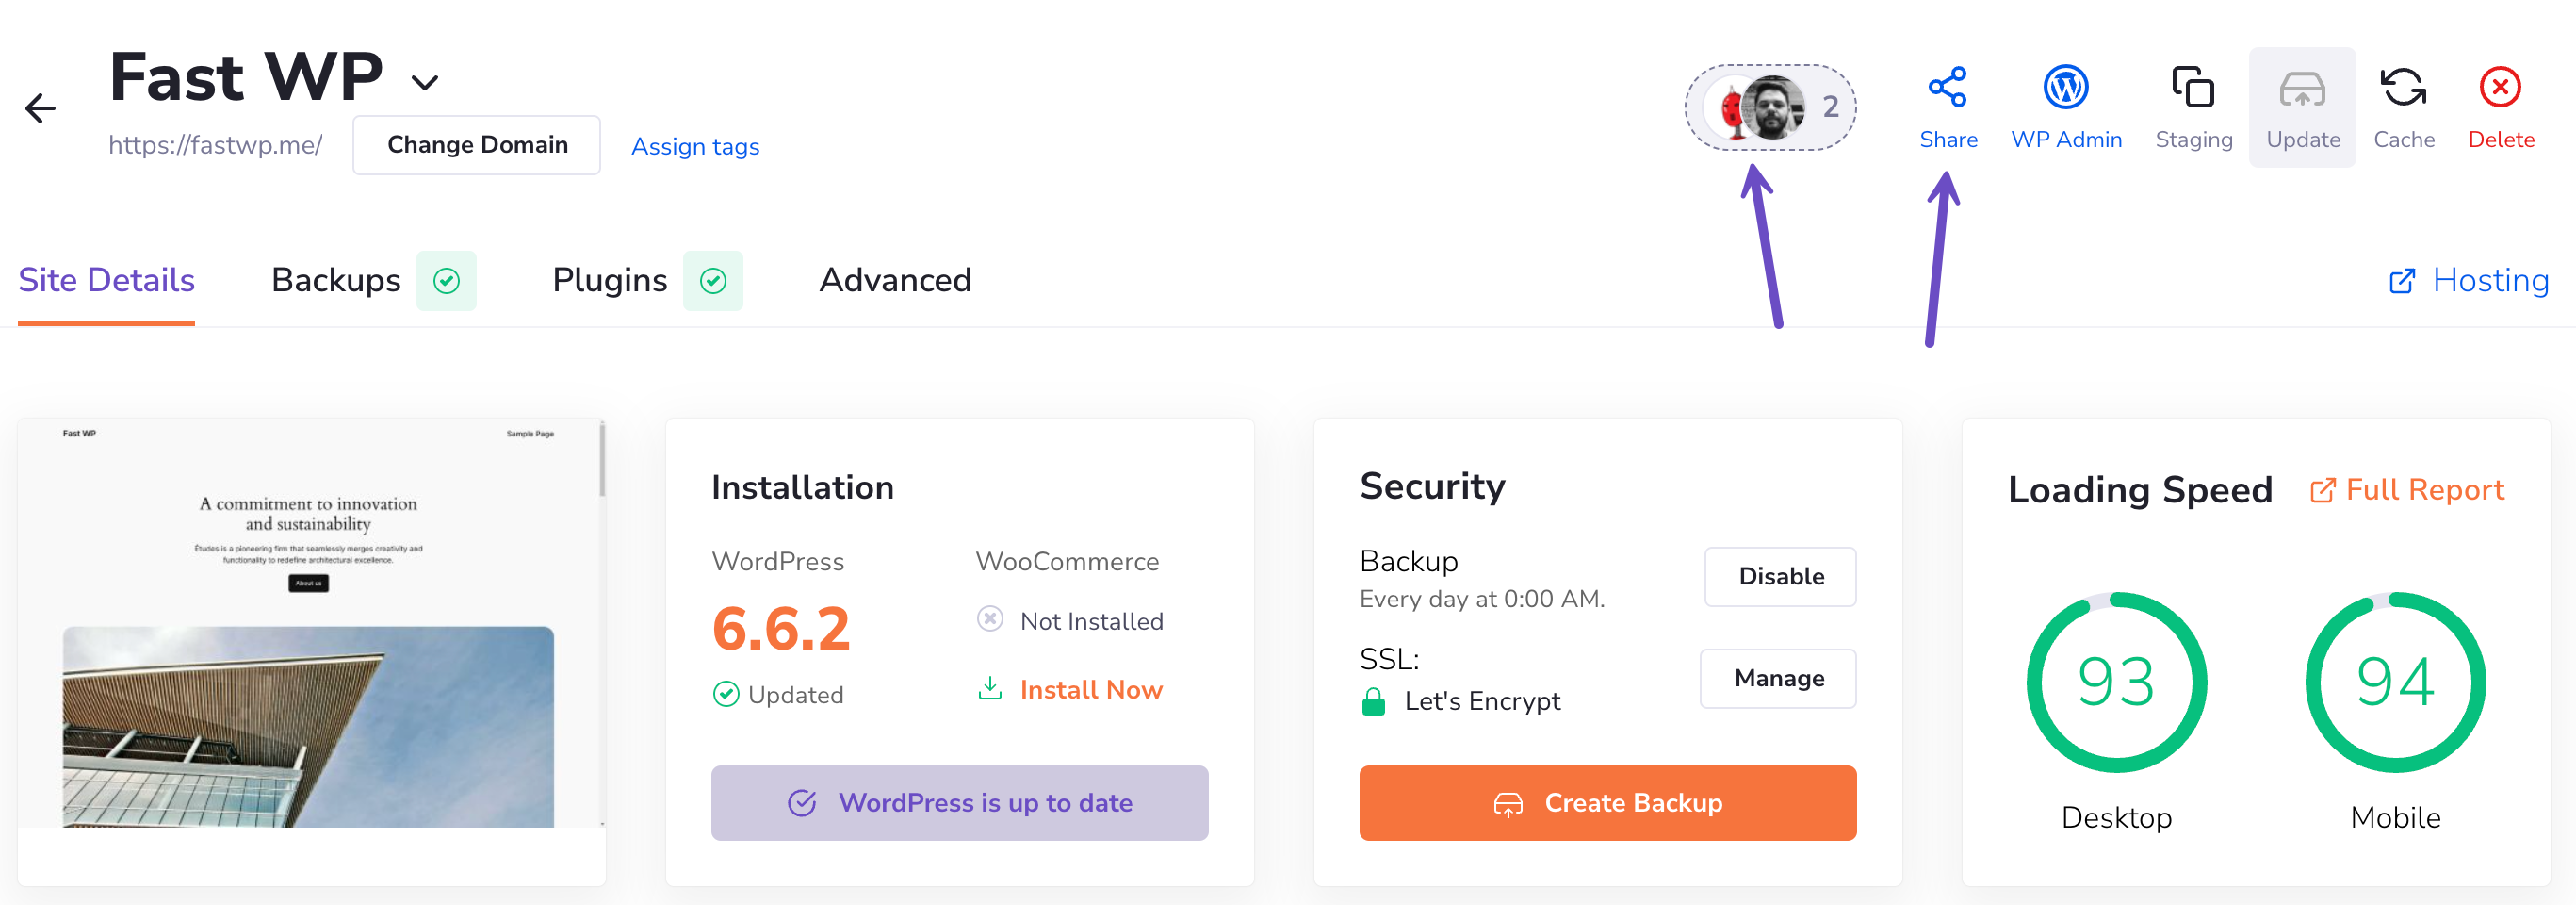
Step 3) Click the Share button in the top right corner or on the collaborator’s icon beside it.
Step 4) Click on the Role drop-down next to the user you want to update permissions for, you can find the Permissions option. Once you click on that, a pop-up window opens with the list of permissions.
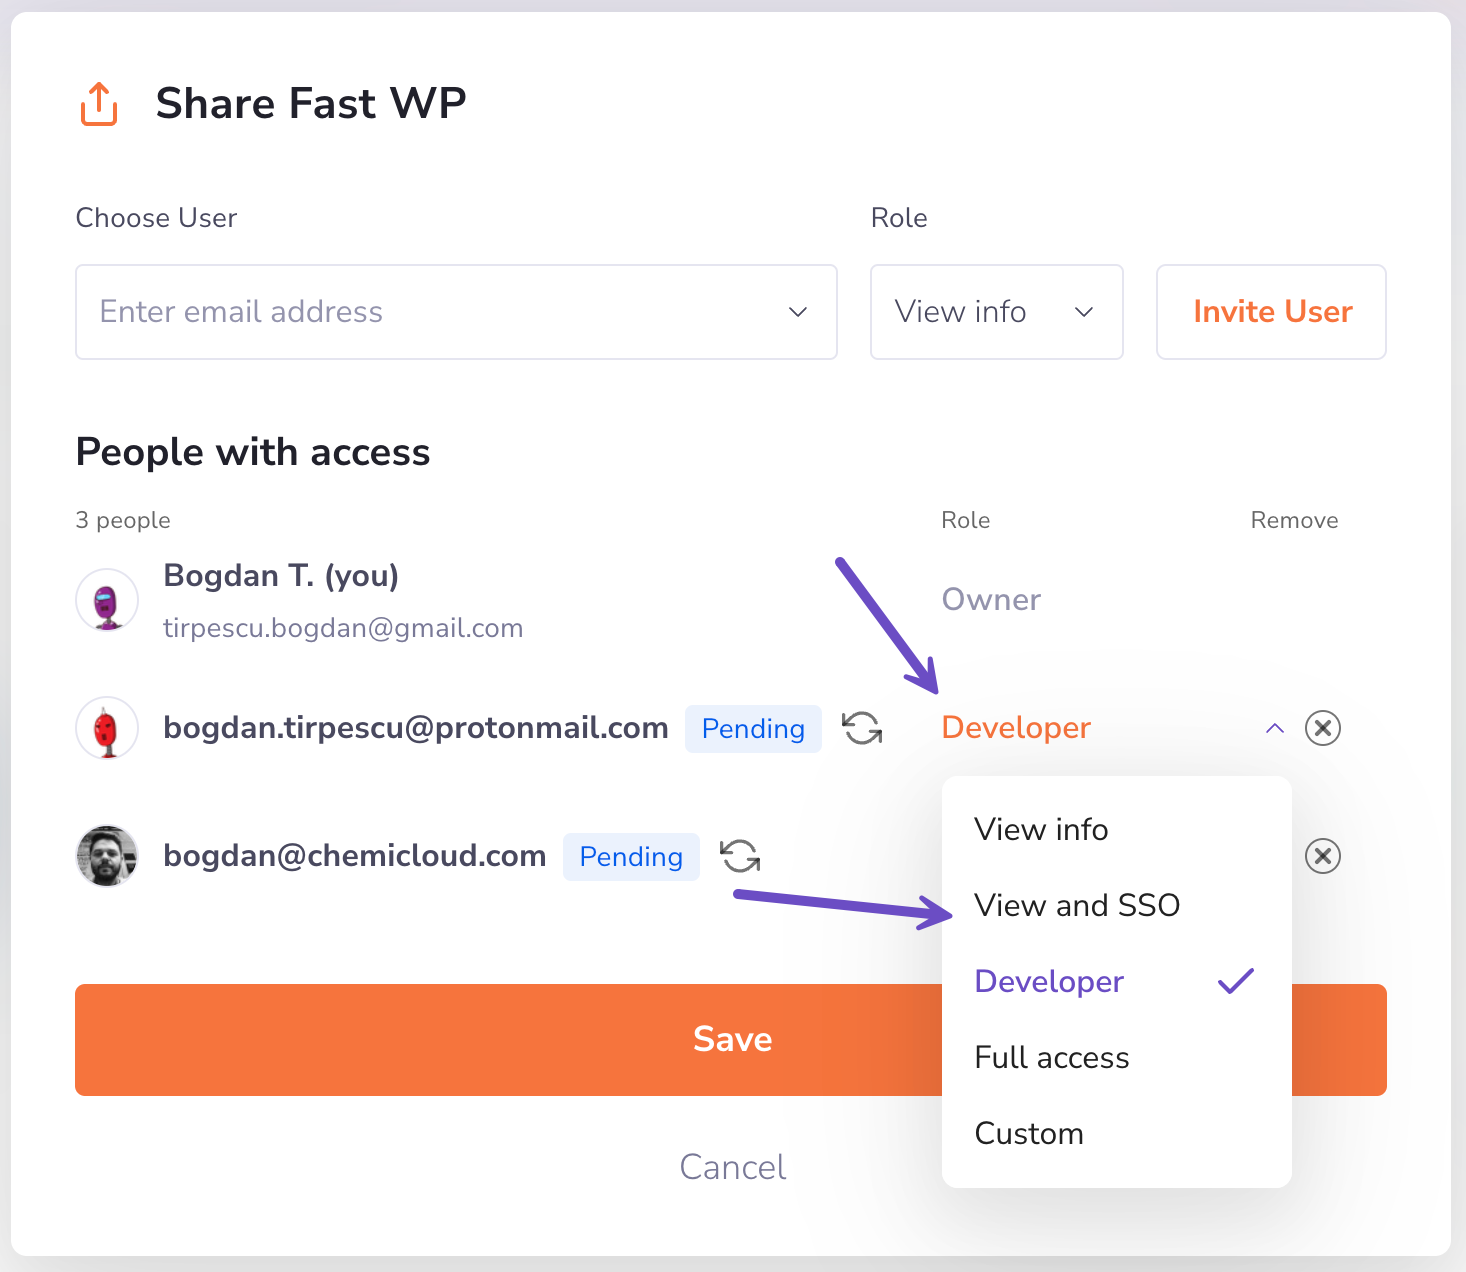
Step 5) Once you select the role that you want to update, you can click on the Save button.
Removing a Collaborator
If you need to remove a collaborator after adding them, please follow the steps below:
Step 1) Log in to the WordPress Manager.
After logging into your WordPress Manager, you’ll see a dashboard with all your instances.
Step 2) Click on the “Manage site” button corresponding to the WordPress instance you wish to update the permissions for a specific user.
Step 3) Click the Share button in the top right corner or on the collaborator’s icon beside it.
Step 4) Click the X button to remove access to that specific user.
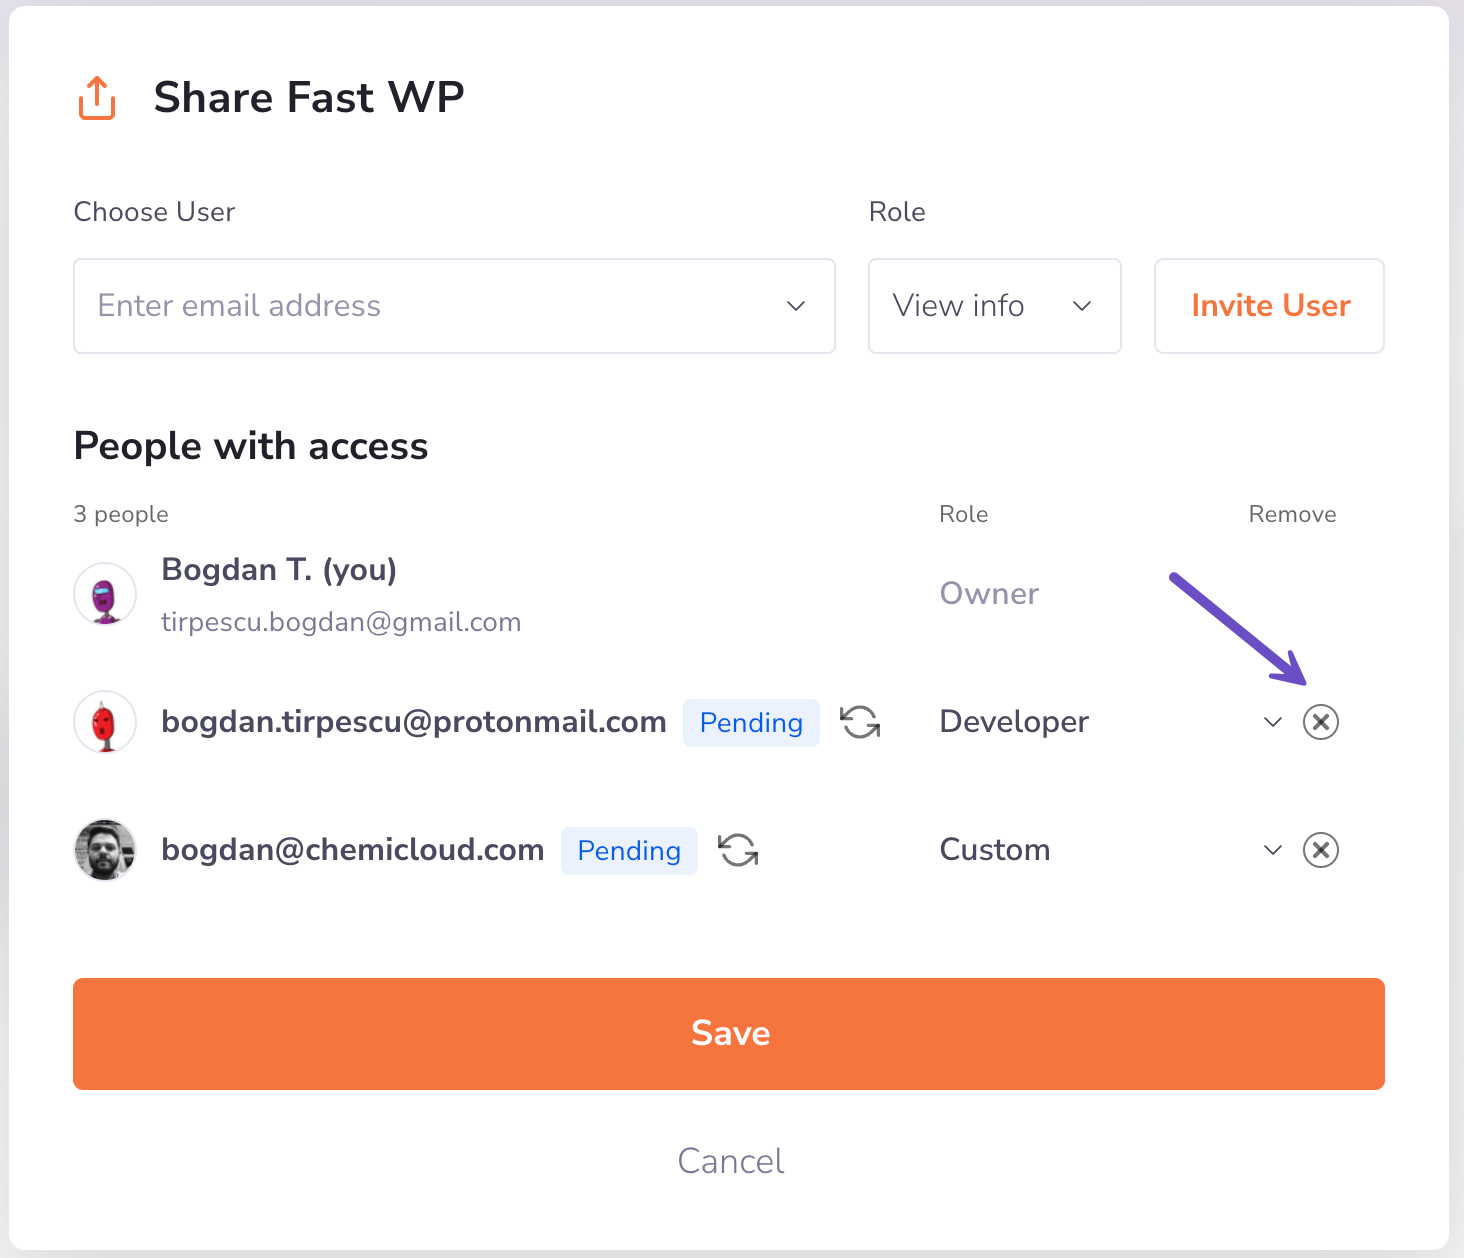
Step 5) Once you revoke access to that specific user, you can click on the Save button.
That’s it; you know how to remove access to a collaborator.
Summary
With the WordPress Manager, collaborating on your WordPress website is a breeze! You can securely share access with designers, developers, and other team members while keeping your account and other sites safe.
By granting permissions specific to the site you choose, everyone gets just the access they need.
So go ahead and enjoy seamless teamwork on your WordPress projects!