This article will teach you how to back up or restore your WordPress instance using the WordPress Manager.
When to Restore a WordPress Instance?
Our cloud Remote Backup feature protects your data with daily, automatic backups you can access anytime using the WordPress Manager. That way, you can worry less about backing up your data and more about customers.
With daily offsite backups, you can restore up to 30 days of backups at any time. What’s more, you can easily choose what kind of restoration you’d like to do for your site, whether for the files, database, or entire WordPress instance.
What’s the Difference Between a Local and Remote Backup?
Manual Backup (Local Backup): When you manually create a backup (on-demand), you can choose to back up your website files and database. This backup is stored locally on your Managed WordPress hosting storage.
Automated Backup (Remote Backup): Automated backups happen in the background and are stored on a secure, remote server. These backups can be restored at any time, without using your hosting storage.
Backup Retention Logic
When the backup retention limit has been reached: WordPress Manager will not automatically delete an existing automatic backup to make room for a new manual backup.
You must manually delete one or more existing backups (automatic or manual) before you can create a new manual backup.
WordPress Manager will automatically delete the oldest automatic backup to make room for the new automatic backup.
Please find below a table which shows the backup retention period and the total backups allowed per package:
| Plan | Backup Retention | Total Backups Allowed (Auto + Manual) |
|---|---|---|
| Tiny | 10 days | 15 backups |
| MWH 1 | 20 days | 25 backups |
| MWH 3 | 20 days | 25 backups |
| MWH 5 | 20 days | 25 backups |
| MWH 10 | 20 days | 25 backups |
| MWH 20 | 20 days | 25 backups |
| MWH 40 | 30 days | 35 backups |
| MWH 50 | 30 days | 35 backups |
| MWH 80 | 30 days | 35 backups |
| MWH 100 | 30 days | 35 backups |
Example:
If a plan allows a total of 25 backups, the system will automatically generate 25 daily backups by default—even if the retention period is only 20 days. This setup intentionally provides extra room, allowing the user to delete up to 5 older backups without impacting the core 20-day retention window. Once deleted, those slots can be used to create manual backups, keeping the total within the allowed limit.
How to Create a Manual Backup for your WordPress Instance
To create a manual backup for your WordPress instance using the WordPress Manager, follow these steps:
Step 1) Log in to the WordPress Manager.
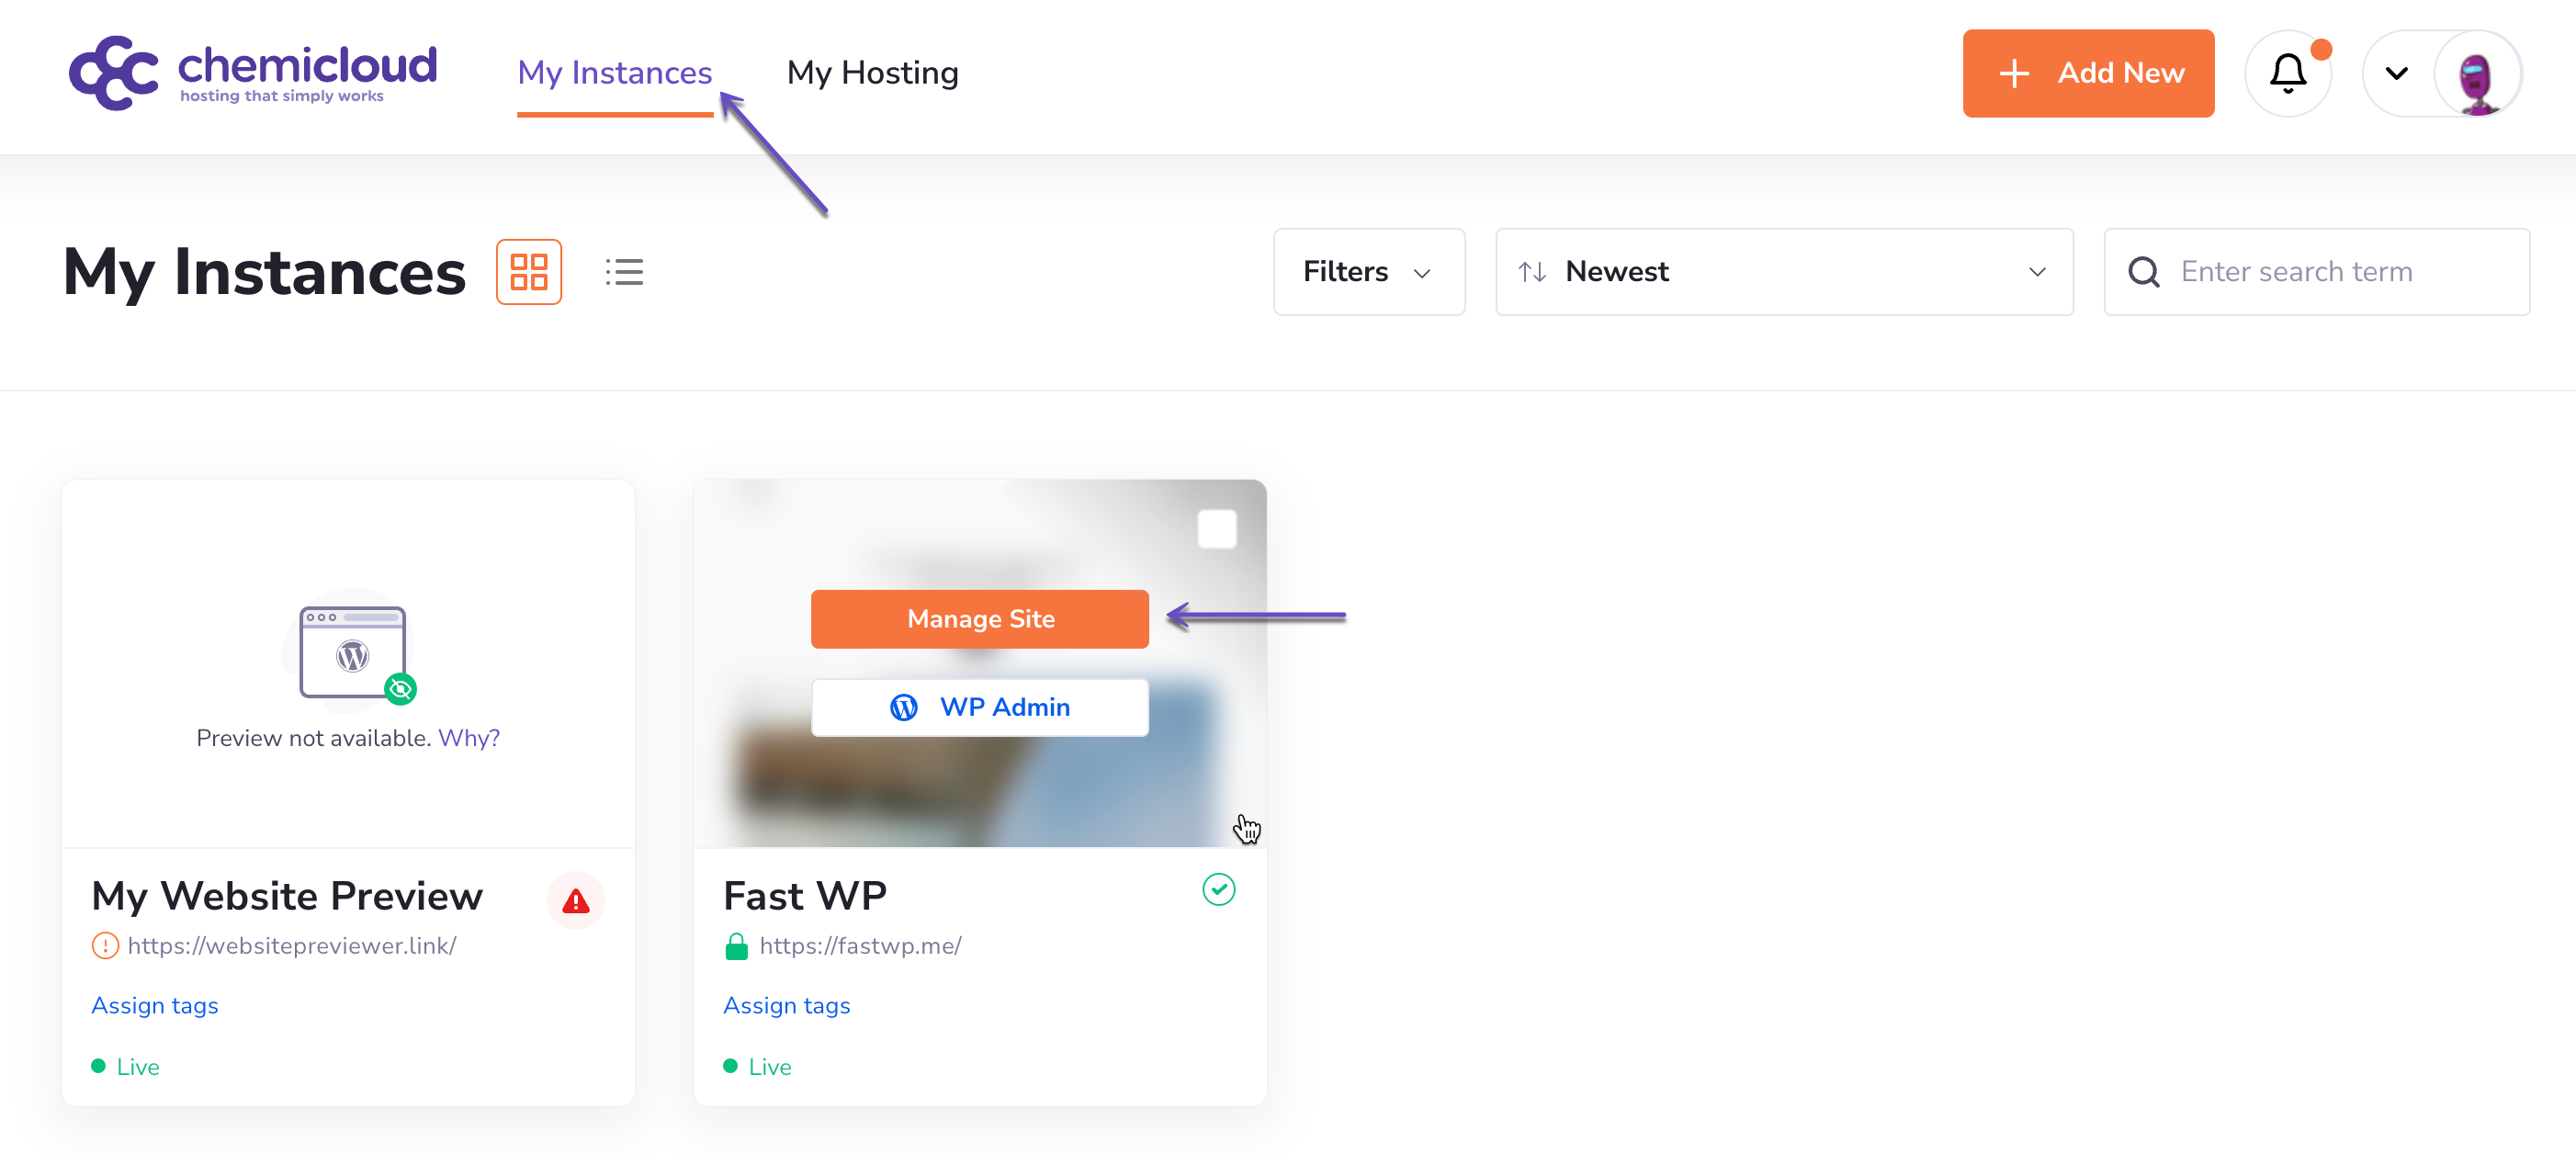
After logging into your WordPress Manager, you’ll see a dashboard with all your instances.
Step 2) Click on the “Manage site” button corresponding to the WordPress instance you wish to create a manual backup.
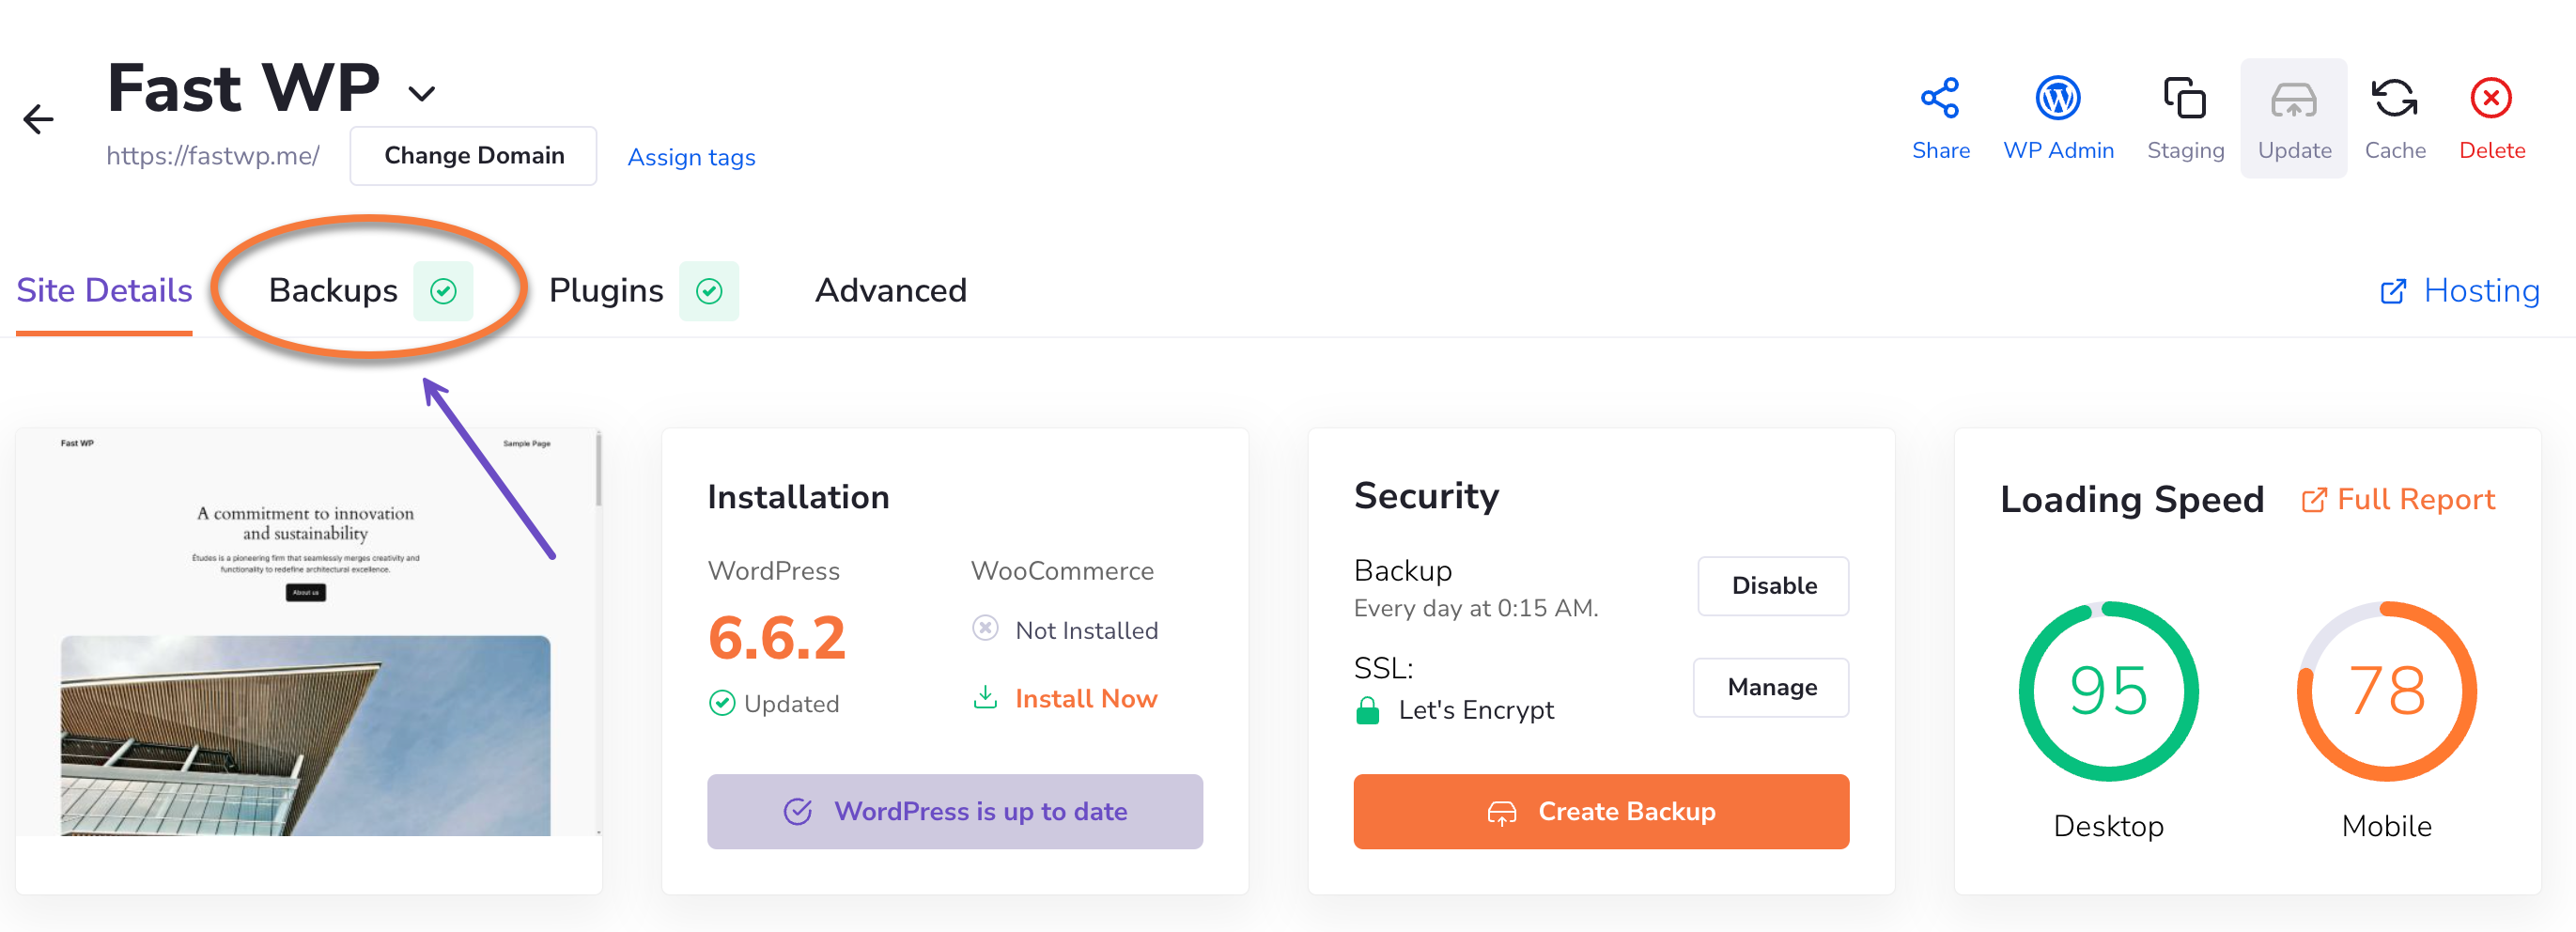
Step 3) Click the Backups tab of your WordPress instance.
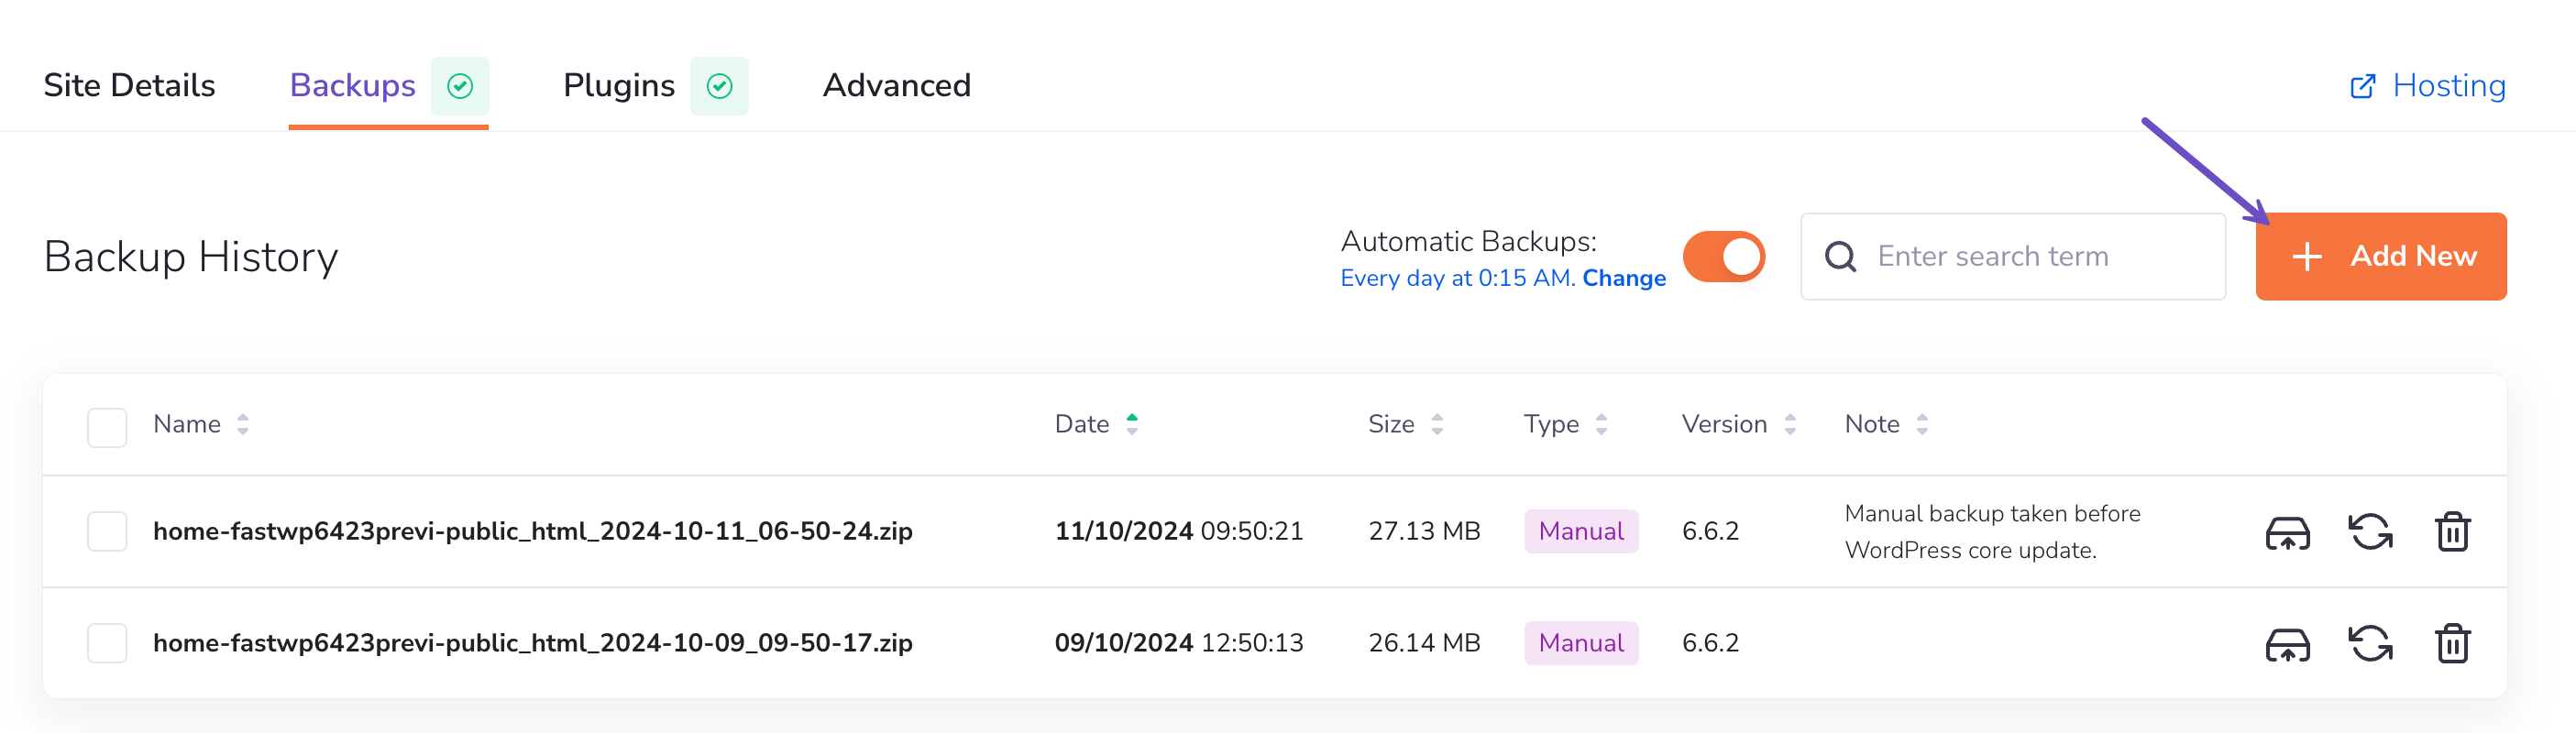
Step 4) Click the Add New button to take a manual backup.
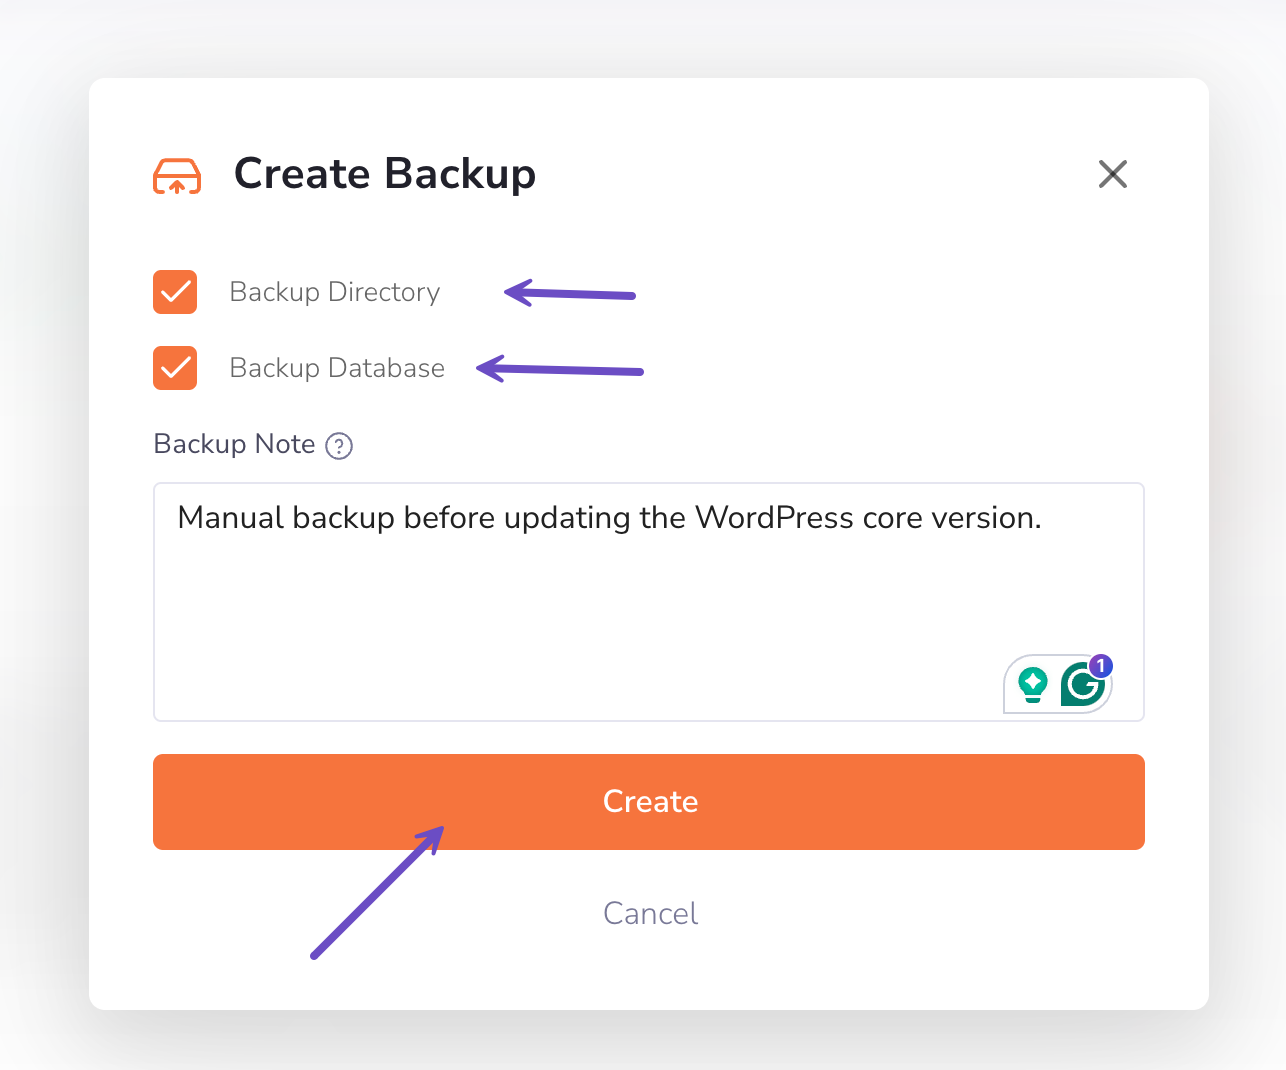
Step 5) Choose whether to backup the directory (site files) or the site’s database and click the Create button.
You can check the backup creation progress in the Backups tab > Backup history.
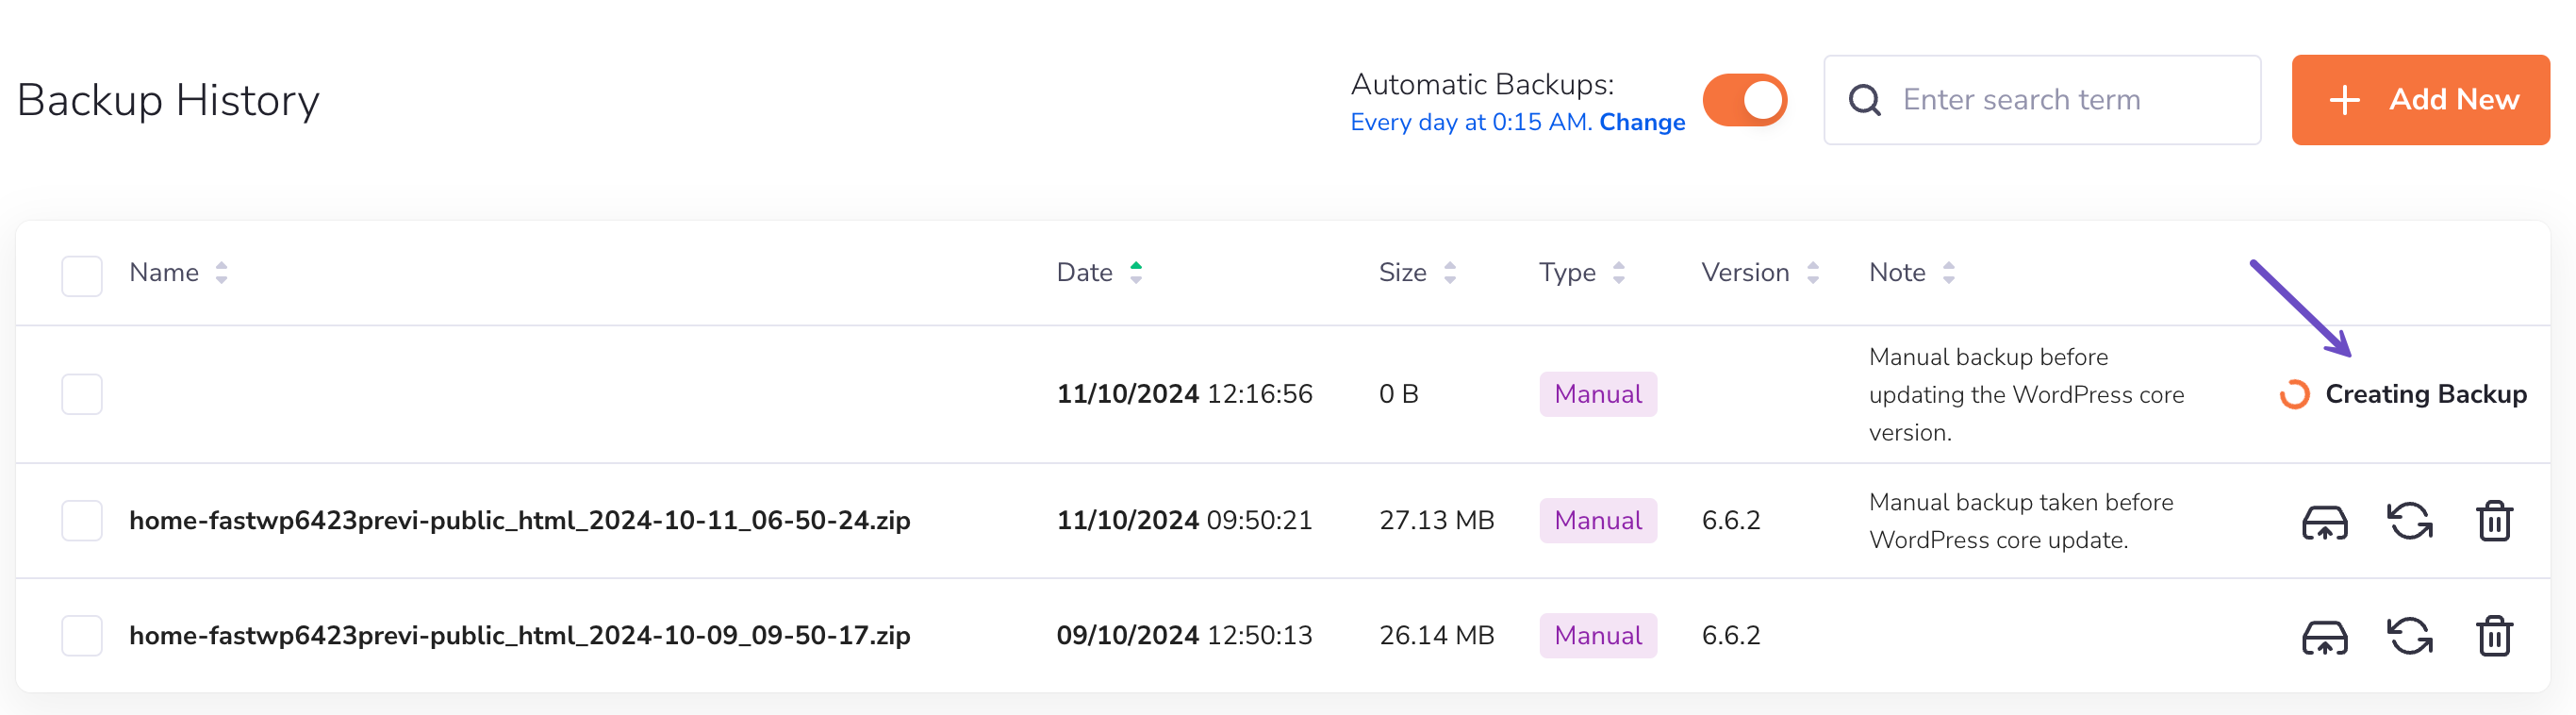
That’s it! A manual backup of your WordPress instance has been successfully created.
After creating a manual, you can restore, download, or delete it anytime.
How to Restore a Backup for your WordPress Instance
To restore an existing backup for your WordPress instance (either manual or automatic backup), follow these steps:
Step 1) Log in to the WordPress Manager.
After logging into your WordPress Manager, you’ll see a dashboard with all your instances.
Step 2) Click on the “Manage site” button corresponding to the WordPress instance you wish to create a manual backup.
Step 3) Click the Backups tab of your WordPress instance.
Step 4) In your Backups history, you’ll see a list of backups showing the date each was generated and whether it’s an automatic or manual backup. To restore a backup, click on the “Restore Backup” button next to the backup you wish to restore.

Step 5) Choose one of the following restore options below:
- Restore Database: select this option to restore the site’s database.
- Restore Directory: select this option to restore the site’s files.
- Delete Existing Files: select this option to delete and overwrite the existing site files.
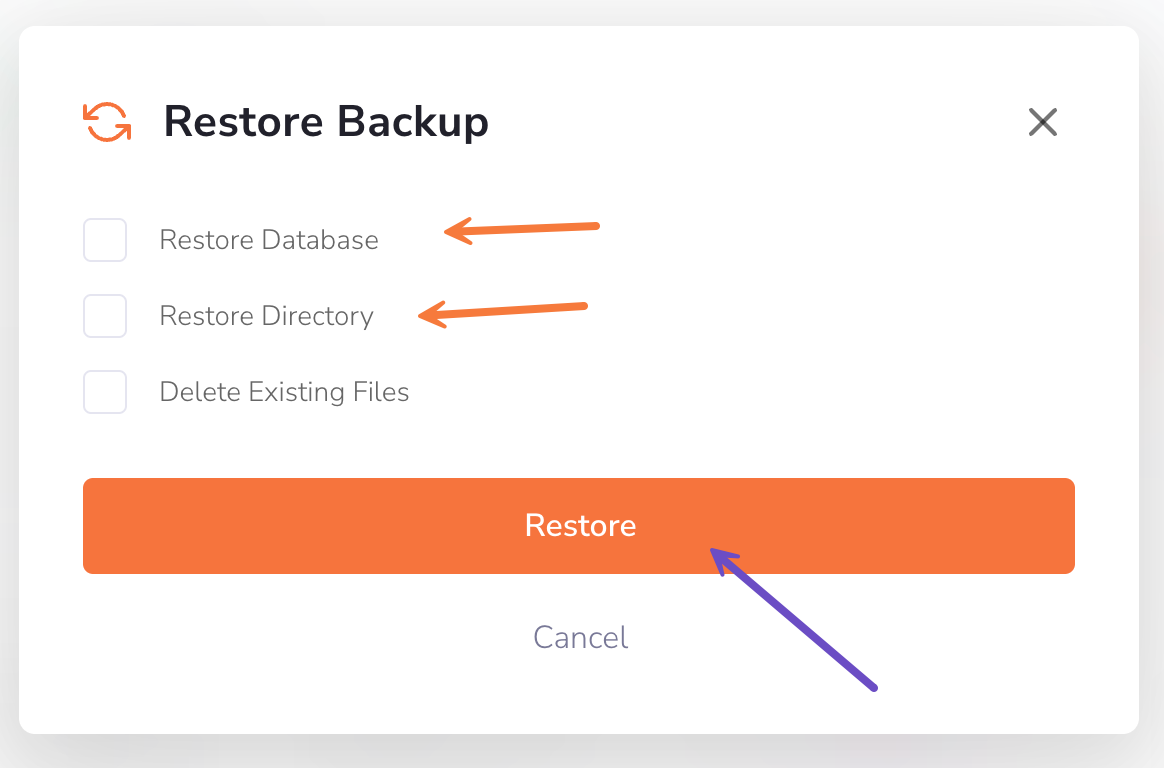
Step 6) When ready, click on the “Restore” button.
You will receive a confirmation message indicating that the restore is in progress. You can monitor the progress in the Backups section:
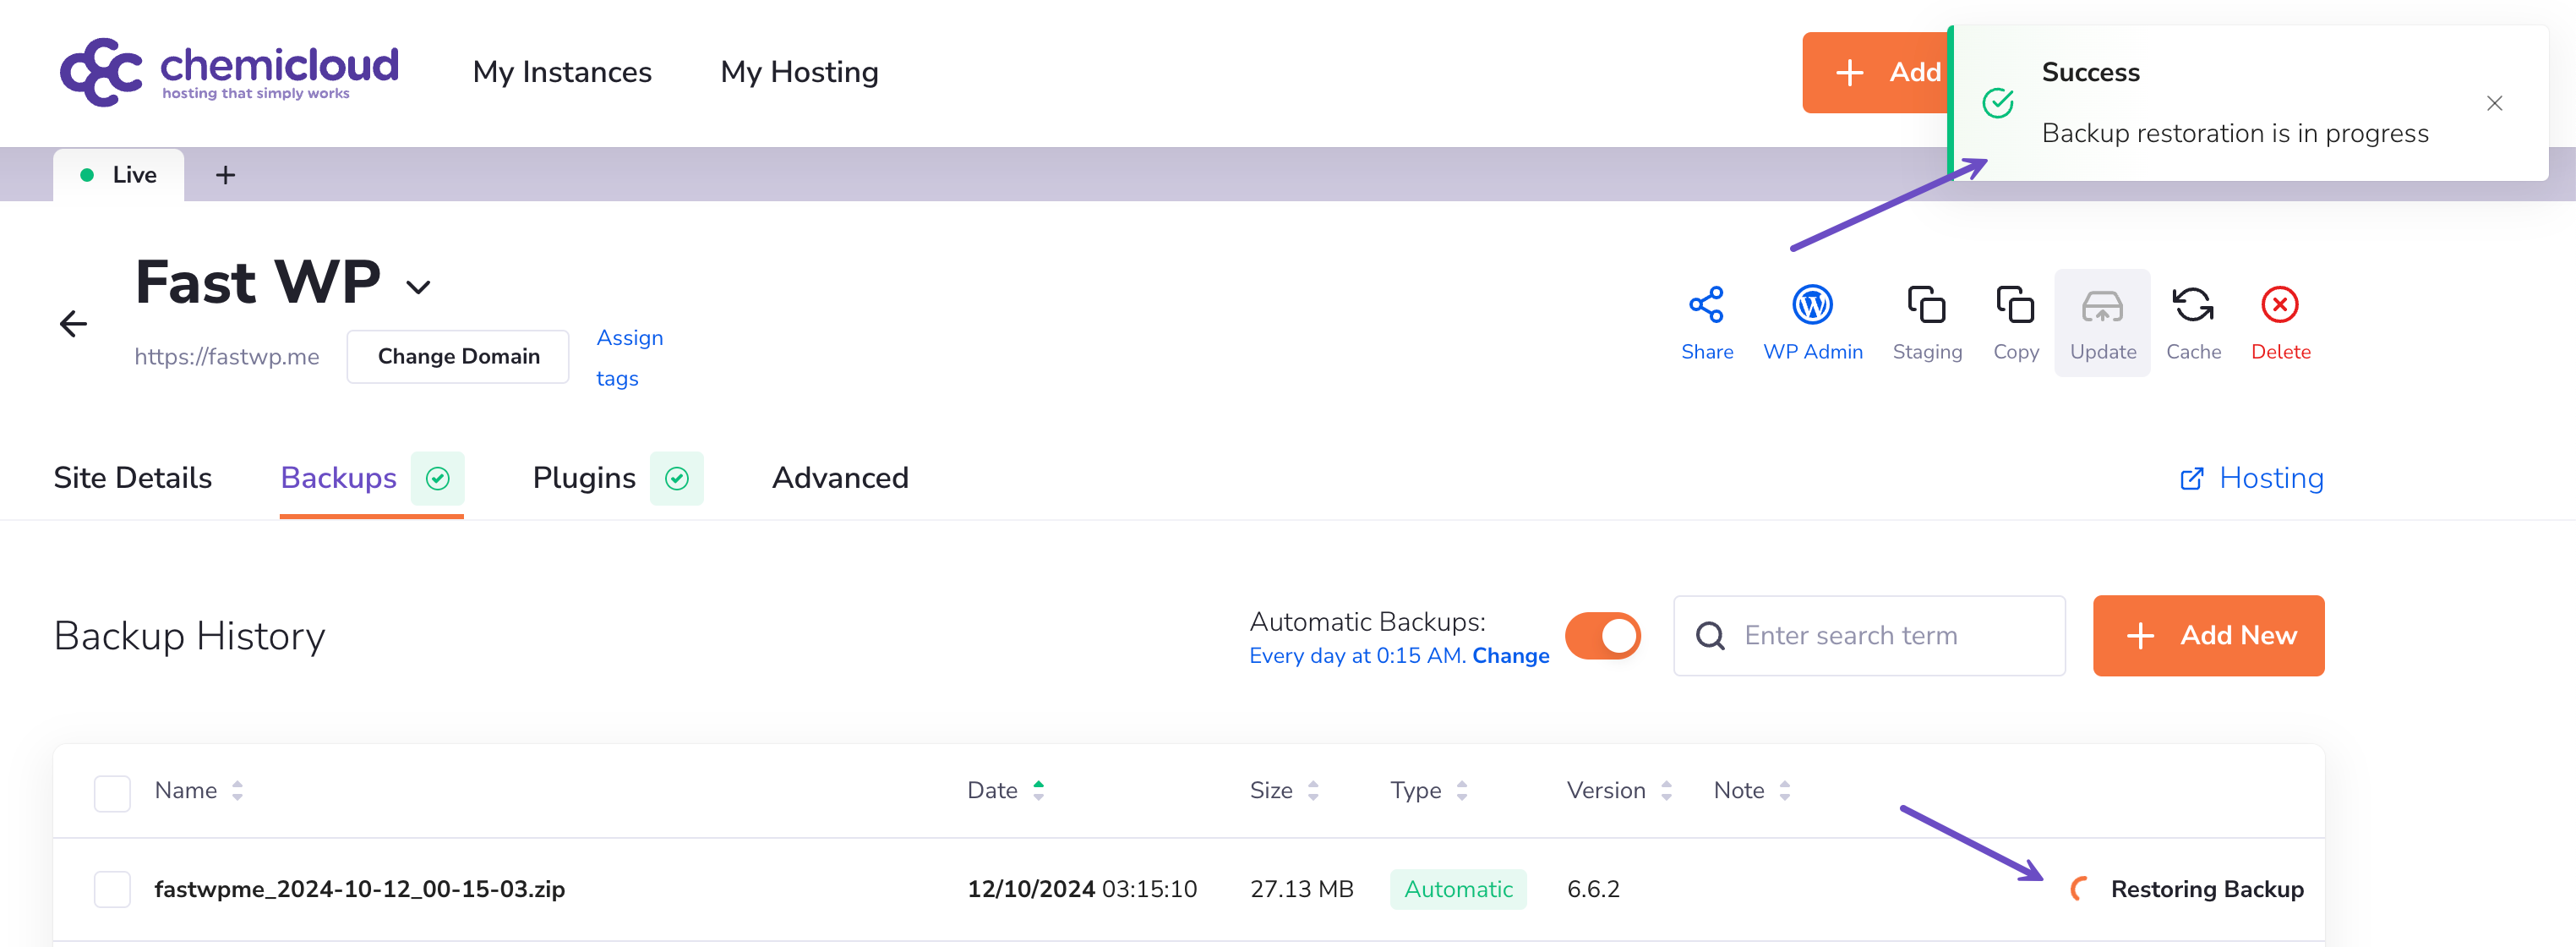
That’s it! Now you’ve restored a backup using the WordPress Manager.
How to Download a Backup for your WordPress Instance
This option allows you to download a backup of your WordPress instance, whether it was generated manually or automatically.
It’s useful when you want to restore a single file from your website rather than all the files.
You’ll download the entire .zip backup file, unzip it on your computer, extract the file you need, and then upload it back to your site via FTP.
Please follow the steps below to download a backup of your WordPress instance inside your computer.
Step 1) Log in to the WordPress Manager.
After logging into your WordPress Manager, you’ll see a dashboard with all your instances.
Step 2) Click on the “Manage site” button corresponding to the WordPress instance you wish to create a manual backup.
Step 3) Click the Backups tab of your WordPress instance.
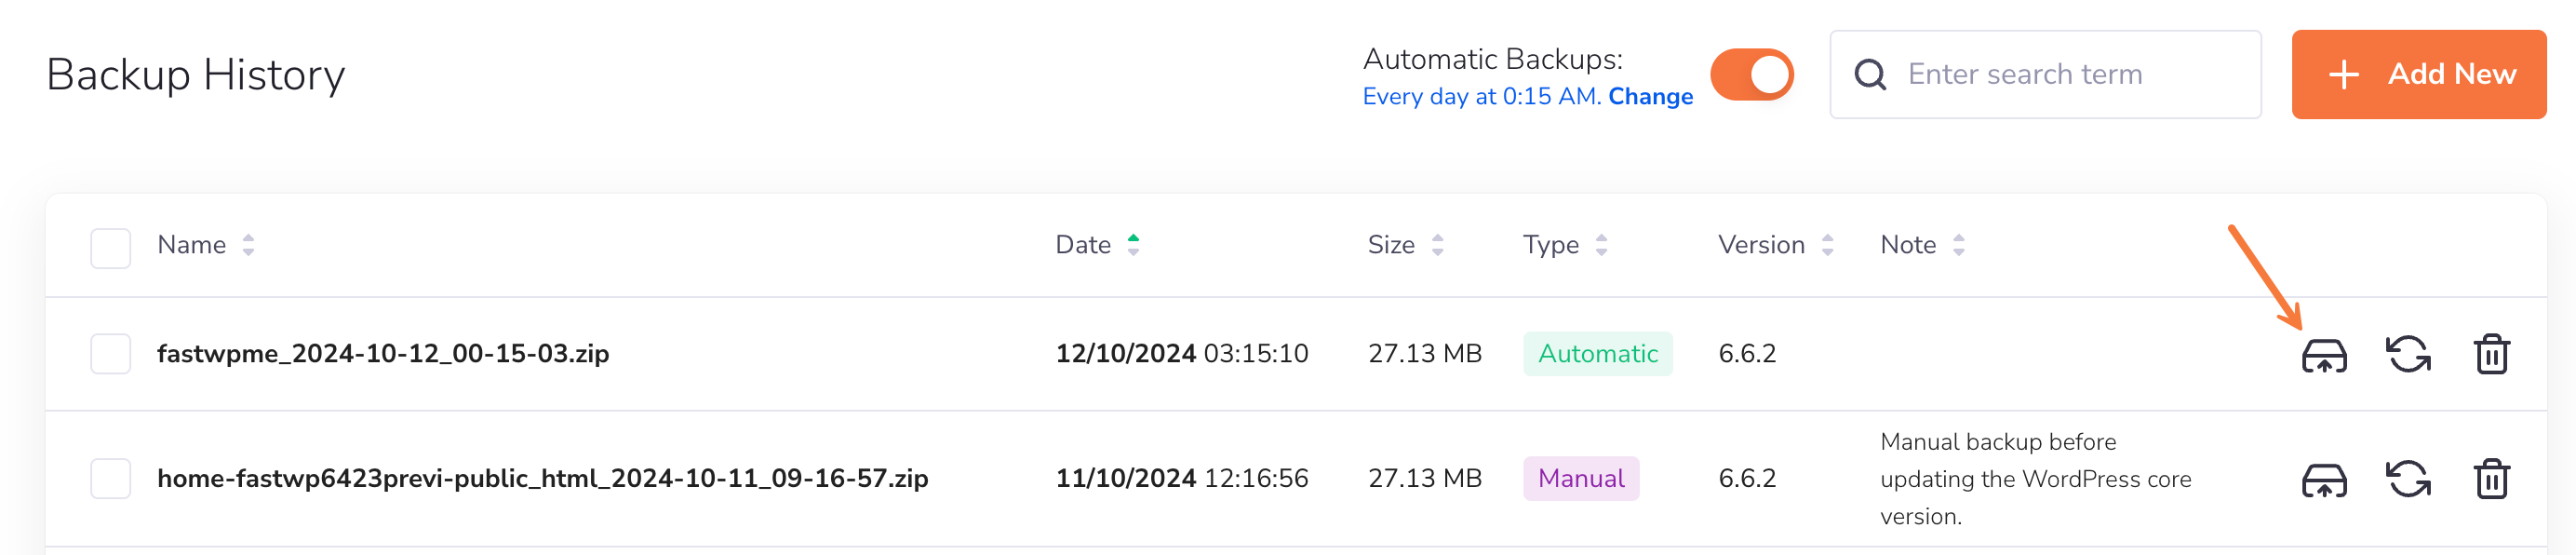
Step 4) In your Backups history, you’ll see a list of backups showing the date each was generated and whether it’s an automatic or manual backup.
To download a backup, click on the “Download Backup” button next to the backup you wish to restore.
Once downloaded the .zip backup file, unzip it on your computer, extract the file you need, and then upload it back to your site via FTP. The same applies to the database.
That’s it! Now, you’ve downloaded a backup inside your computer using the WordPress Manager.