Changing the domain of your WordPress site can be essential when rebranding, moving to a new domain, or simply updating your site’s address. The WordPress Manager makes this process straightforward.
This tutorial will guide you through each step to successfully change your WordPress instance’s domain within the WordPress Manager.
Prerequisites
- Access to WordPress Manager: Ensure you have your login credentials ready. If you need assistance logging in, refer to the MWH Login Guide.
- New Domain Ready: The new domain you wish to use should be registered and accessible.
How to Change the Domain of Your WordPress Instance
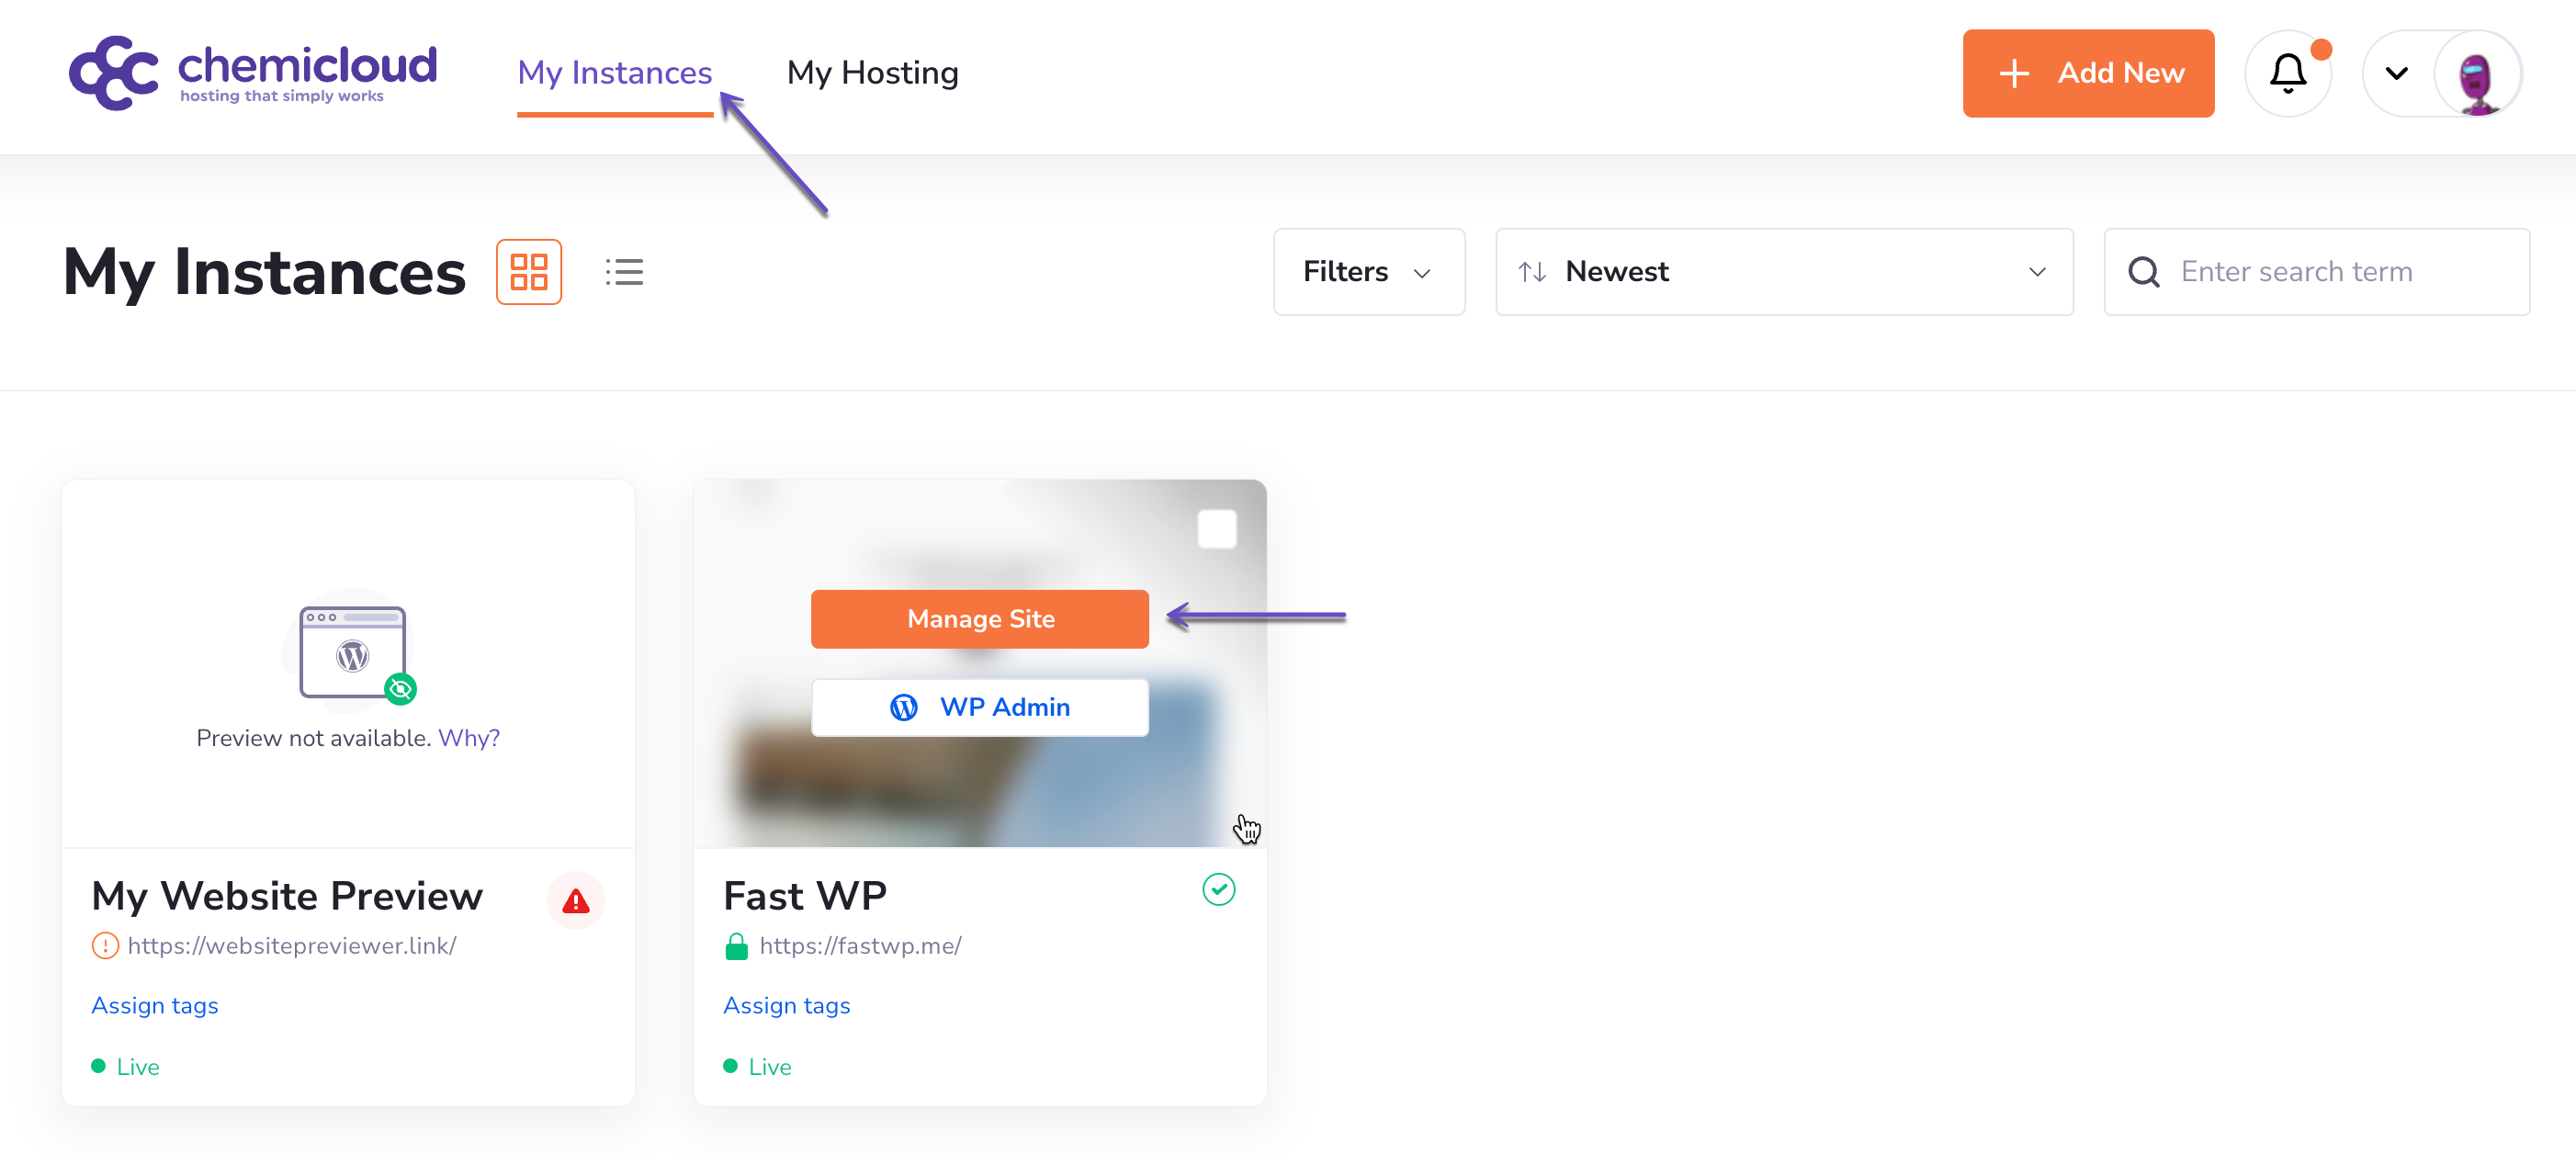
Step 1) Log in to the WordPress Manager.
After logging into your WordPress Manager, you’ll see a dashboard with all your instances.
Step 2) Click on the “Manage site” button corresponding to the WordPress instance you wish to add a new collaborator.
Step 3) On the site management page, find the “Change Domain” button located under your instance’s name.
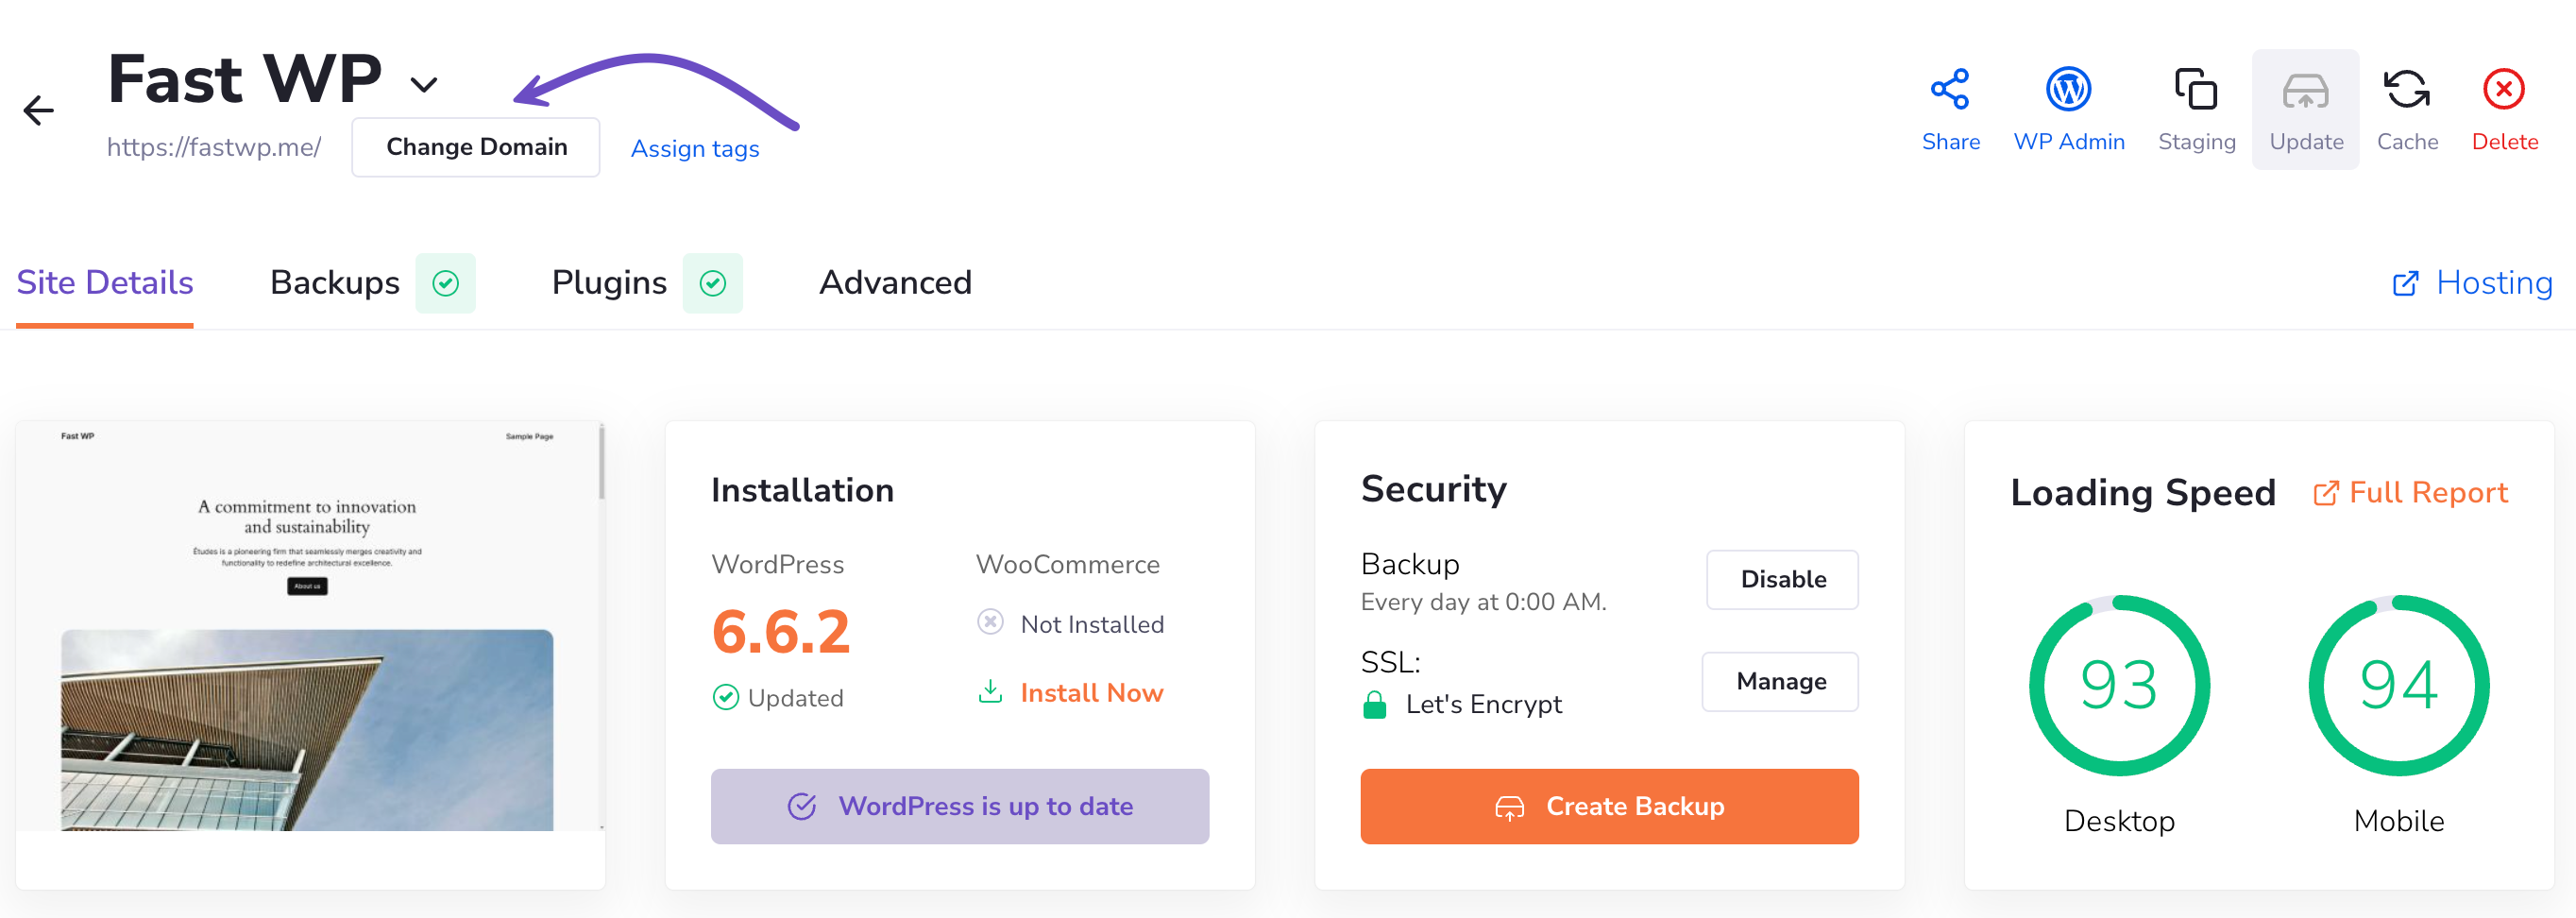
Step 4) Click the “Change Domain” button to proceed.
Step 5) A field will appear, prompting you to enter the new domain name. If you don’t own a domain yet: You can buy a domain directly through us at an affordable price.
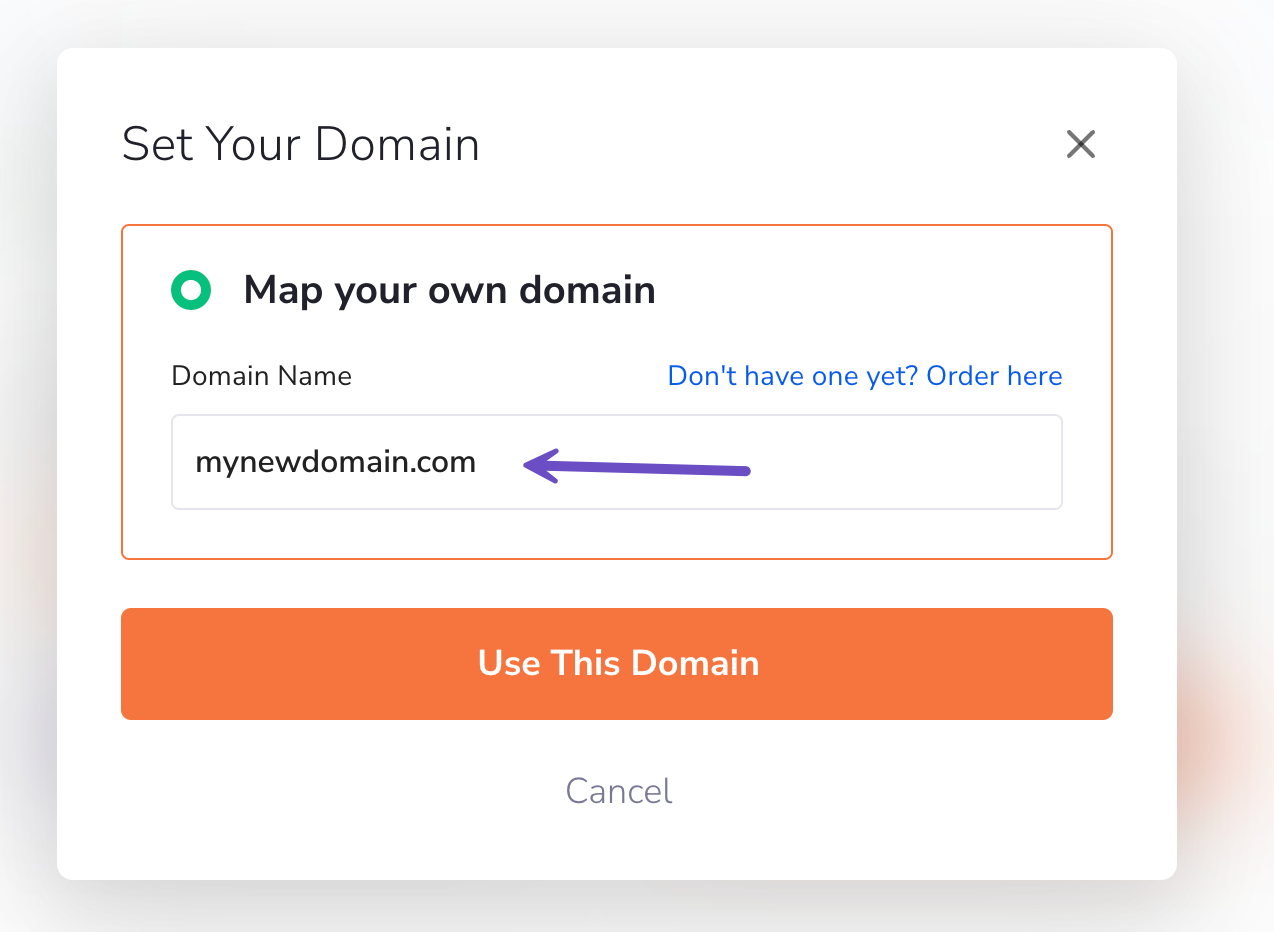
Step 6) Click on the Use This Domain button.
Step 7) To complete the process, you must point your new domain to your WordPress instance by changing the name servers to ours (recommended method). You’ll see the name servers addressed you need to use.
Changing the Nameservers of Your Domain
- Log in to your domain registrar’s control panel.
- Find the section to update nameservers.
- Replace the existing nameservers with the ones provided.
Propagation Time: Changing nameservers can also take up to a few minutes to take effect.
Summary
By following these steps, you’ve successfully changed the domain of your WordPress instance using the WordPress Manager. Remember that DNS changes can take some time to propagate. If your site doesn’t appear at the new domain immediately, give it some time and check back later.
For further assistance or troubleshooting, please get in touch with our 24/7 support team.