This Knowledge Base article will cover how you can easily add someone to your ChemiCloud account as a collaborator.
Defining Accounts and Users
What Is An Account?
Accounts (formerly “clients”) own products and services. They represent a billable party, like a business.
What Is A User or Collaborator?
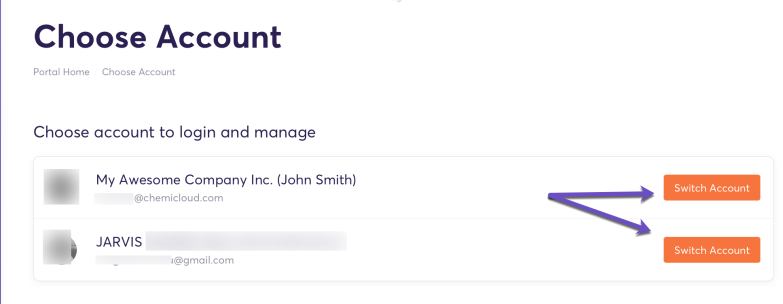
Users can have one or more associated accounts they can access and manage. A new user is created based on the account profile when a new account is created. When you’re logged in as a Collaborator with access to multiple ChemiCloud accounts, you can choose the account to which you should log in and manage.
For example, each web designer’s customer could represent a different account. The web designer could log in as a user and access each account using a single set of credentials. However, the accounts themselves would not be connected.
What Is An Account Owner?
Each account is associated with a single account owner. Account owners have all of the possible permissions that a user can possess. They are also the only user who can send invitations from the account to new or existing users.
Just a couple of examples where this might be useful are:
- Billing Department – corporate users may have a dedicated billing department that should be given access to pay invoices and place new orders, while the web/technical staff would only be given access to view current products & services and submit support requests, which was previously impossible
- Web Developers – you may be employing a web developer to build and maintain your website, so you might want to give that developer access to create tickets and correspond on your behalf without being able to access any billing information or change account details.
Regarding web developer’s access, we suggest you read about a few things to consider and security principles.
How to Delegate Access to Your ChemiCloud Account
You can delegate access to your ChemiCloud account by sending an invitation from the User Management section of your Client Area by following the steps below:
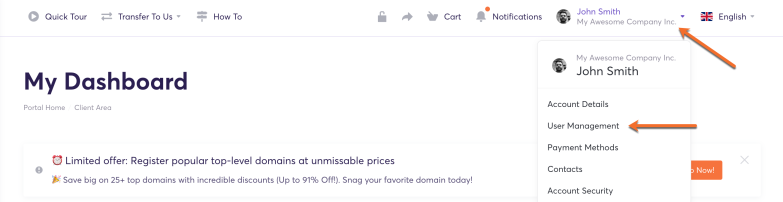
1) Once you are logged into your client area, click on the account name in the top header (right-hand side), then click on User Management.
You can also click on this link, which will take you to the User Management section.
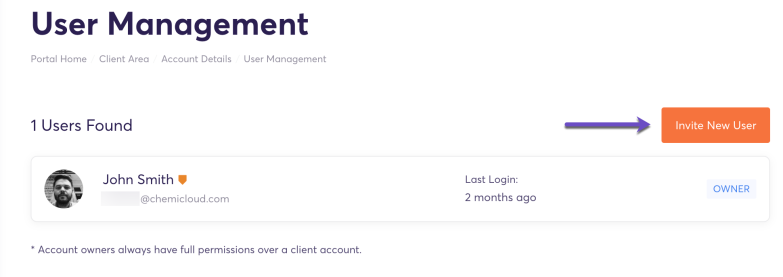
2) Click on the Invite New User button.
3) A modal will open, where you’ll need to fill in the email address of the person to which you’re delegating access. What’s more, you can choose the permissions level for that user.
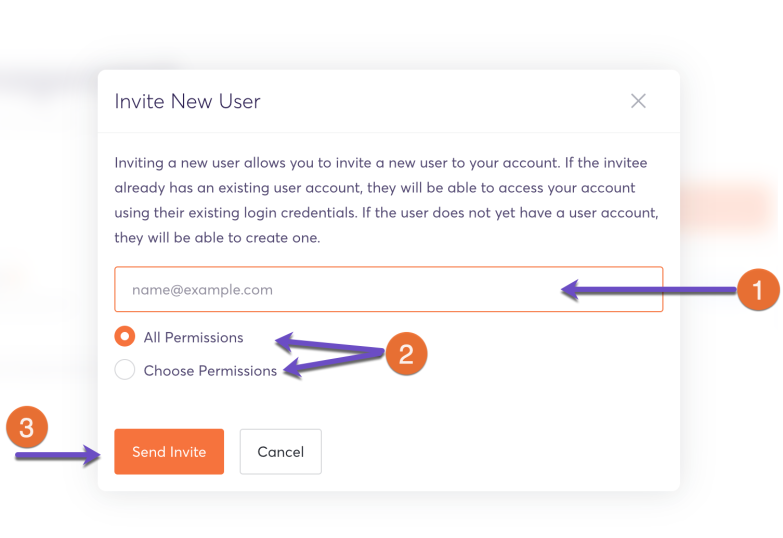
Choosing All Permissions will grant all available permissions to the user.
The Choose Permissions option will allow you to set limited permissions as explained below:
- Modify Master Account Profile – Access and modify the client profile information
- View & Manage Contacts – Access and manage contacts
- View Products & Services – View access to products, services, and add-ons
- View & Modify Product Passwords – Allow password resets and other actions
- Perform Single Sign-On – Allow single sign-on into services (e.g., cPanel)
- View Domains – View access to domain registrations
- Manage Domain Settings – Allow domain management, e.g., nameservers/whois/transfers
- View & Pay Invoices – View and payment access to invoices
- View & Accept Quotes – View and acceptance permissions for quotes
- View & Open Support Tickets – Access to open, respond and manage support tickets
- View & Manage Affiliate Account – Access to view and request withdrawals
- View Emails – Access to view account email history, which might include sensitive information regarding your hosting service.
- Place New Orders/Upgrades/Cancellations – Allow placing of new orders
4) Once you’ve selected the permissions level, click on the Send Invite button.
You should see a confirmation that the invite has been sent successfully.
After sending an invitation, it will display it in the Pending Invites section of your User Management area.

Click Resend Invite to resend the invitation email or Cancel Invite to cancel the invitation.
Managing Account’s Delegated Users in the Client Area
Managing User Permissions
As an Account Owner, you can manage users and their permissions from the Client Area User Management section.
1) Once you are logged into your client area, click on the account name in the top header (right-hand side), then click on User Management.
You can also click on this link, which will take you to the User Management section.
2) Find the desired user in the list and click the Manage Permissions button.
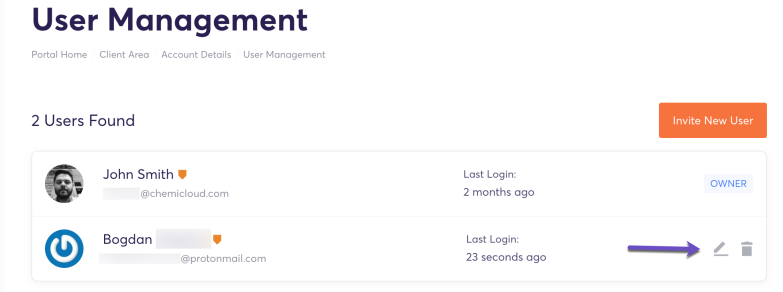
3) Select the desired permissions and click Save Changes.
Removing User Access
As an Account owner, you can remove users from the Client Area User Management section.
1) Once you are logged into your client area, click on the account name in the top header (right-hand side), then click on User Management.
You can also click on this link, which will take you to the User Management section.
2) Find the desired user in the list and click the Revoke access button.
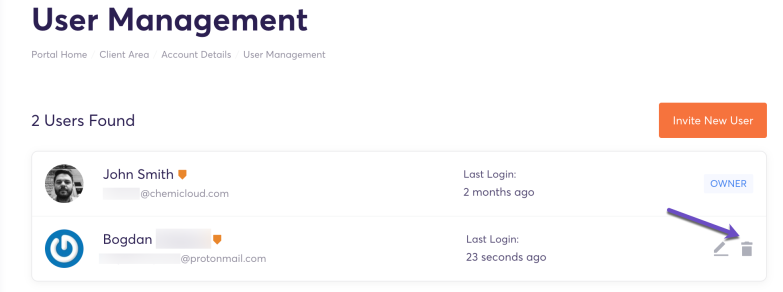
3) You’ll be asked to confirm the removal of the user. Click Confirm
That’s it! Now you know how to delegate access to your ChemiCloud account or to manage users with access to your account.