The LiteSpeed Cache Heartbeat API is a simple server polling API that is built into the LiteSpeed Cache Plugin for WordPress and allows for near real-time updates.
The API uses the admin-ajax.php file in WordPress to make calls. If you notice a significant number of POST requests to this file, it may mean you need to limit the frequency of calls LiteSpeed Cache makes to the Heartbeat, or completely disable it.
Excessive requests to the admin-ajax.php file can lead to high CPU usage.
How to disable LiteSpeed Cache Heartbeat
To completely disable the LiteSpeed Cache Heartbeat, follow the directions below:
Step 1: Log in to your /wp-admin. Once the wp-admin of your WordPress site loads, hover over LiteSpeed Cache from the menu on the left, then click Toolbox from the menu.
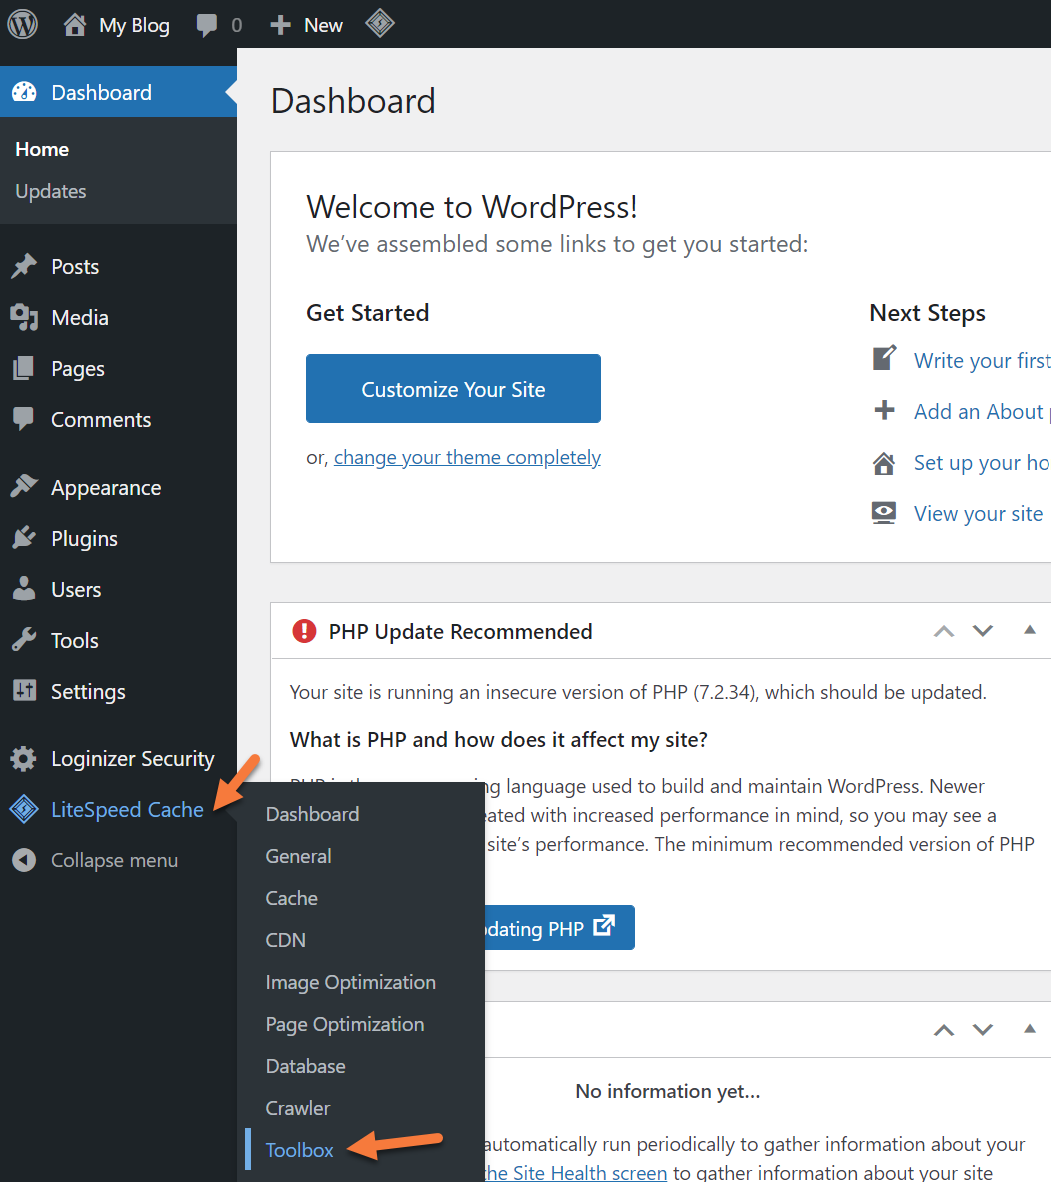
Step 2: Click Heartbeat from the row of options in the top menu.
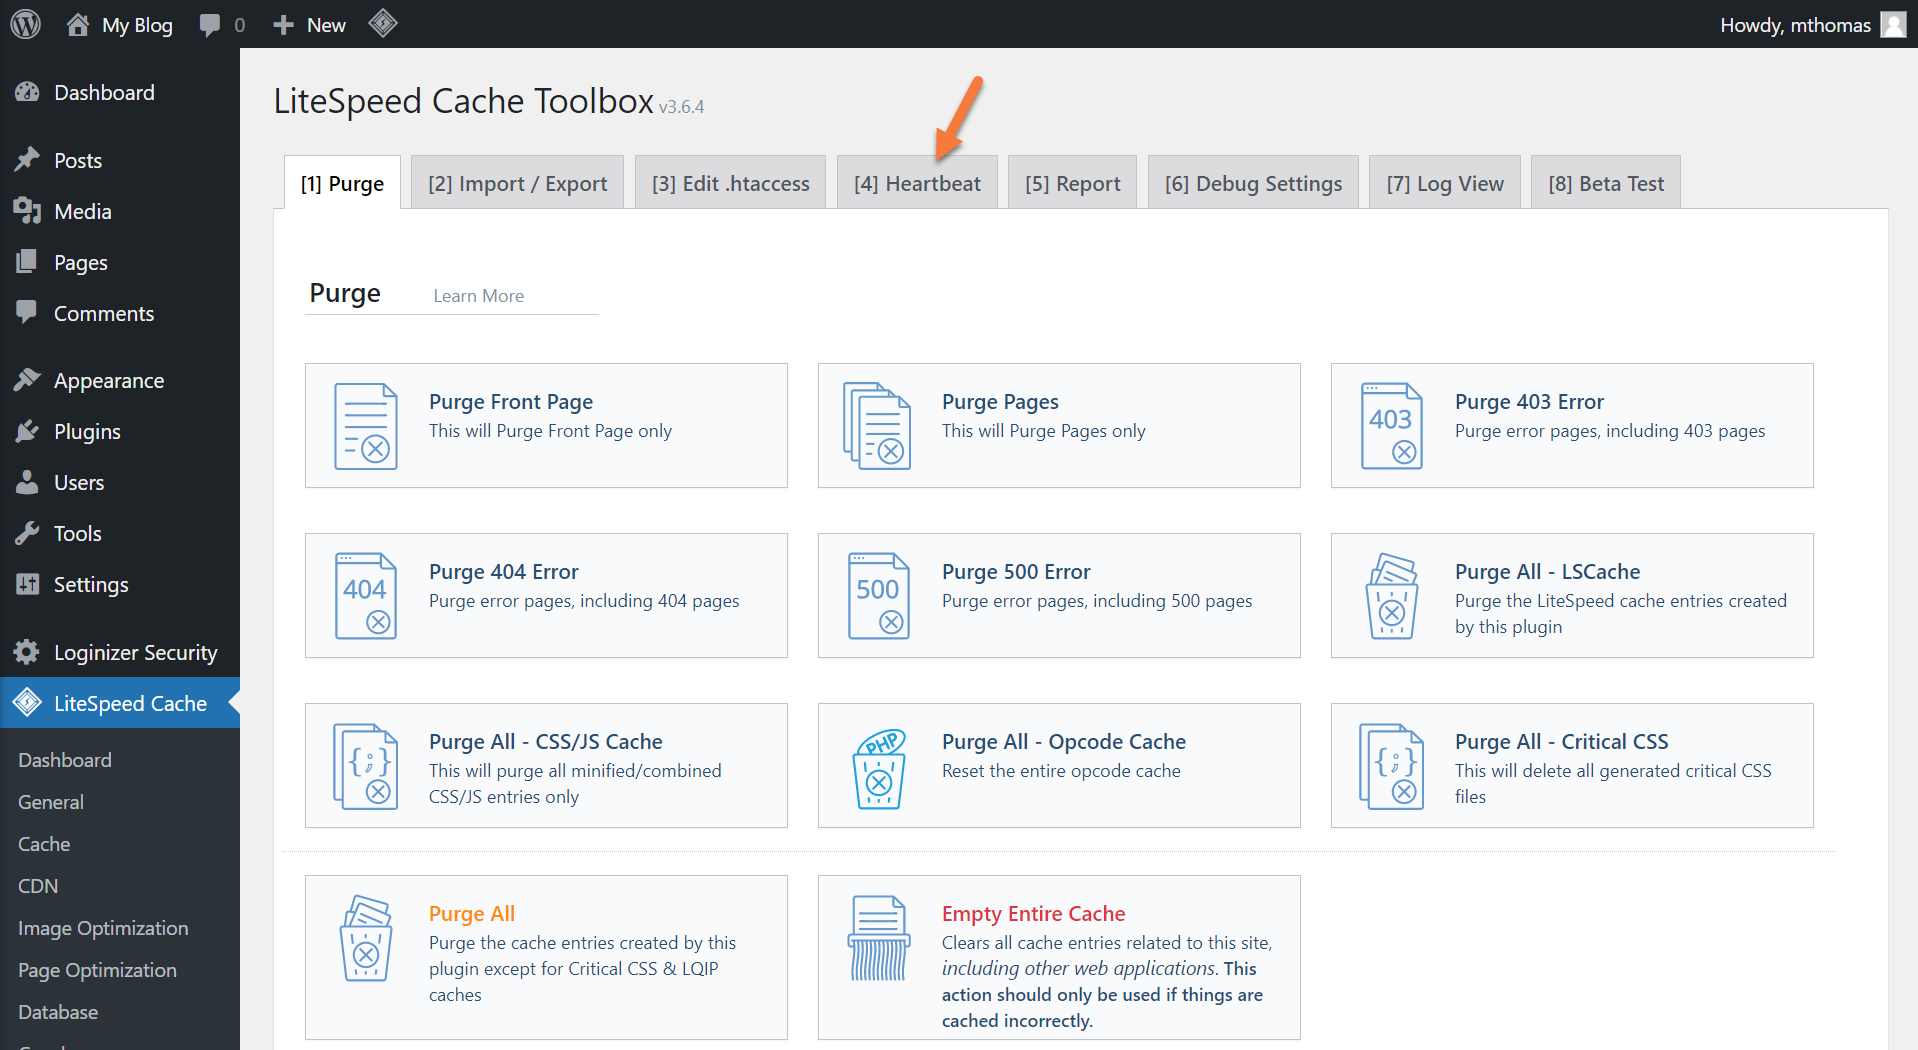
Step 3: The LiteSpeed Cache has 3 heartbeats:
- Frontend Heartbeat
- Backend Heartbeat
- Editor Heartbeat
By default, these options are disabled. However, if you want to disable Heartbeat, click the ON button next to each Heartbeat from the Heartbeat page.
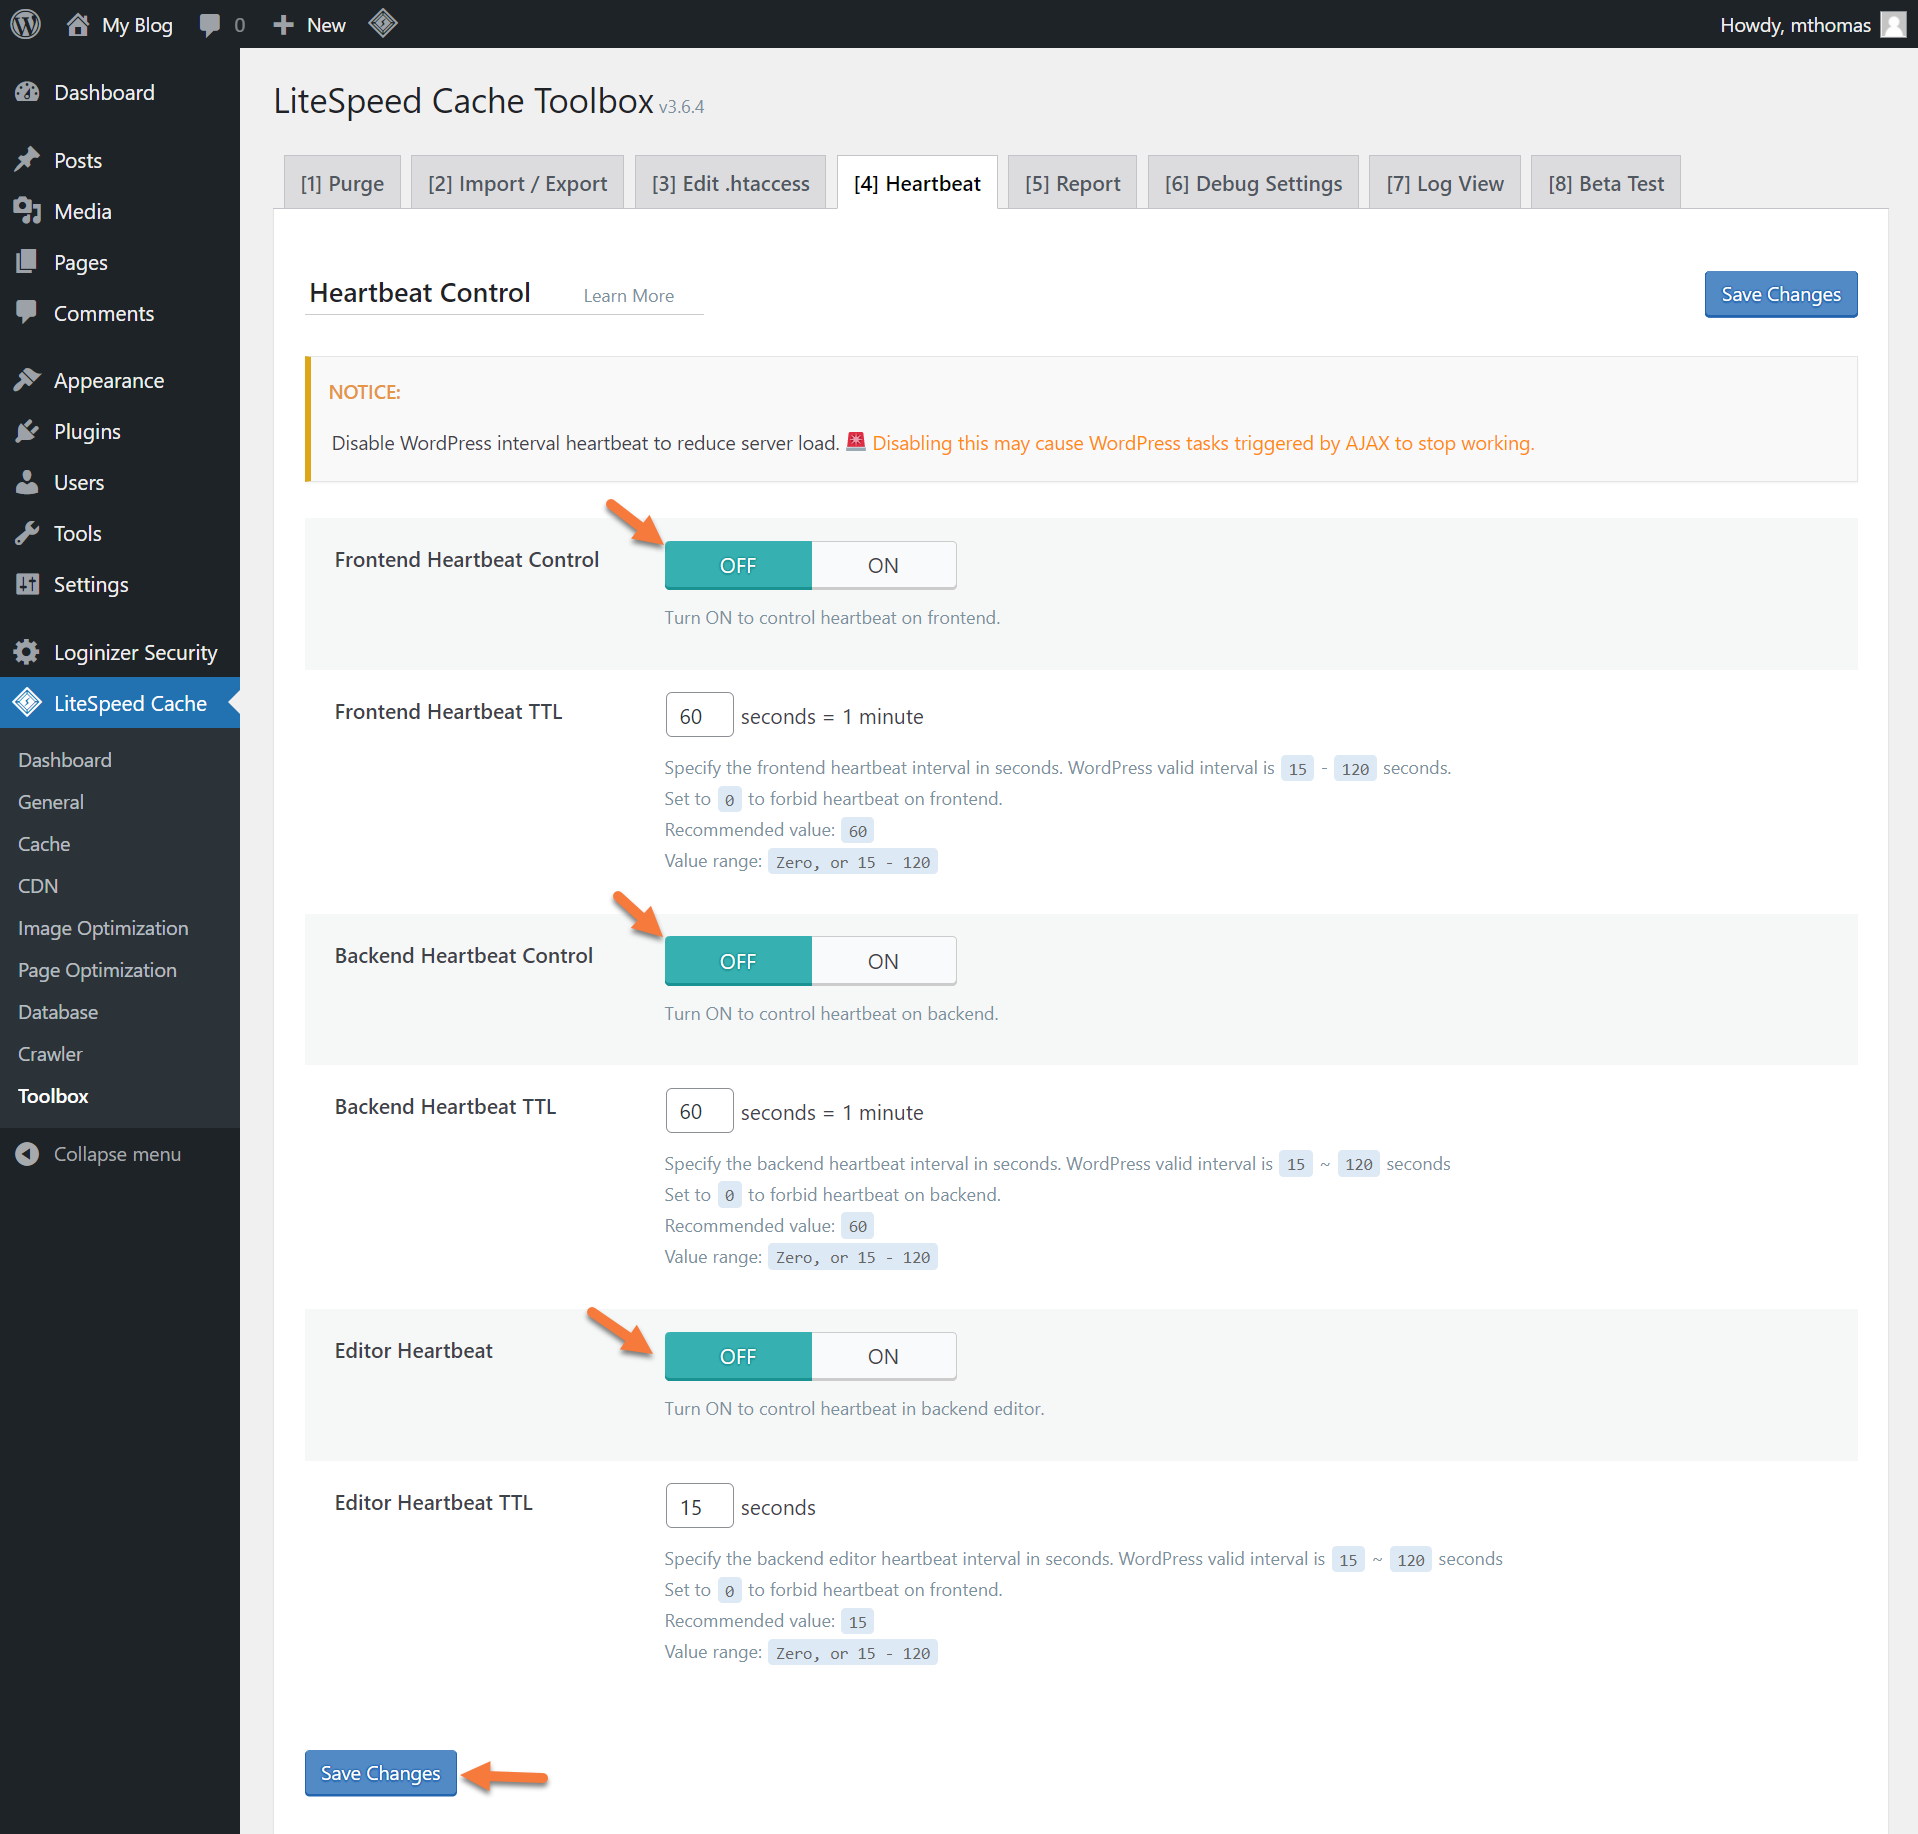
When you have selected the OFF function for all three heartbeats, click Save Changes at the bottom to save these changes.
Tired of slow WordPress hosting? We use LiteSpeed + QUIC.cloud Enterprise CDN to deliver content almost instantly. ⚡ Try our Managed WordPress Hosting plans for just $1!
How to Limit the LiteSpeed Cache Heartbeat
As we mentioned above, the Heartbeat in LiteSpeed Cache is disabled by default. However, if you have enabled it and noticed an uptick in the CPU Usage, you can limit the heartbeat using the instructions below.
Step 1: Log in to your /wp-admin. Once the wp-admin of your WordPress site loads, hover over LiteSpeed Cache from the menu on the left, then click Toolbox from the menu.
Step 2: Click Heartbeat from the row of options in the top menu.
Step 3: From the Heartbeats page, change the Heartbeat TTL interval for each of the three heartbeats to a more suitable interval of your choosing.

- For the Frontend Heartbeat TTL, specify the interval in seconds choosing a number between 15 and 120.
- Use 0 to forbid heartbeat on the front end.
- Recommended Value is 60.
- For the Backend Heartbeat TTL, specify the interval in seconds choosing a number between 15 and 120.
- Set to 0 to forbid heartbeat on the backend.
- Recommended Value is 60.
- For the Editor Heartbeat TTL, specify the interval in seconds choosing a number between 15 and 120.
- Use 0 to forbid heartbeat on the front end.
- Recommended Value is 60.
When you have finished, click Save Changes at the bottom of the page.
And that’s how you disable or change the Heartbeat in the LiteSpeed Cache Plugin.