From time to time you may need to export or import a PostgreSQL database. For example, you might be moving the database from one hosting provider to another, importing a database from a third party for repair or migrations, or you may be taking a backup of the database.
This knowledgebase article covers the various ways to import and export a PostgreSQL database.
How to export a PostgreSQL database
Method #1 Use the pg_dump application
The pg_dump command will allow you to export a PostgreSQL database to a file. To export using this method, follow the steps below:
Step 1: Connect to your web hosting account via SSH. If you are not familiar with how to do this, click here to review our KB article on the topic.
Step 2: Enter the following command using your keyboard and at the end, press enter/return on your keyboard. Be sure to replace the ‘username’ with your cPanel default account username and replace ‘dbname’ with the name of the database you wish to export.
pg_dump -U username dbname > dbexport.pgsql
You will be prompted for your default cPanel user account password in order to complete the export.
Method #2 Use phpPGAdmin
Step 1: Login to your cPanel. There’s a lot of ways to do this, but the sure fire easiest way is to login to your Client Area, then open your cPanel.
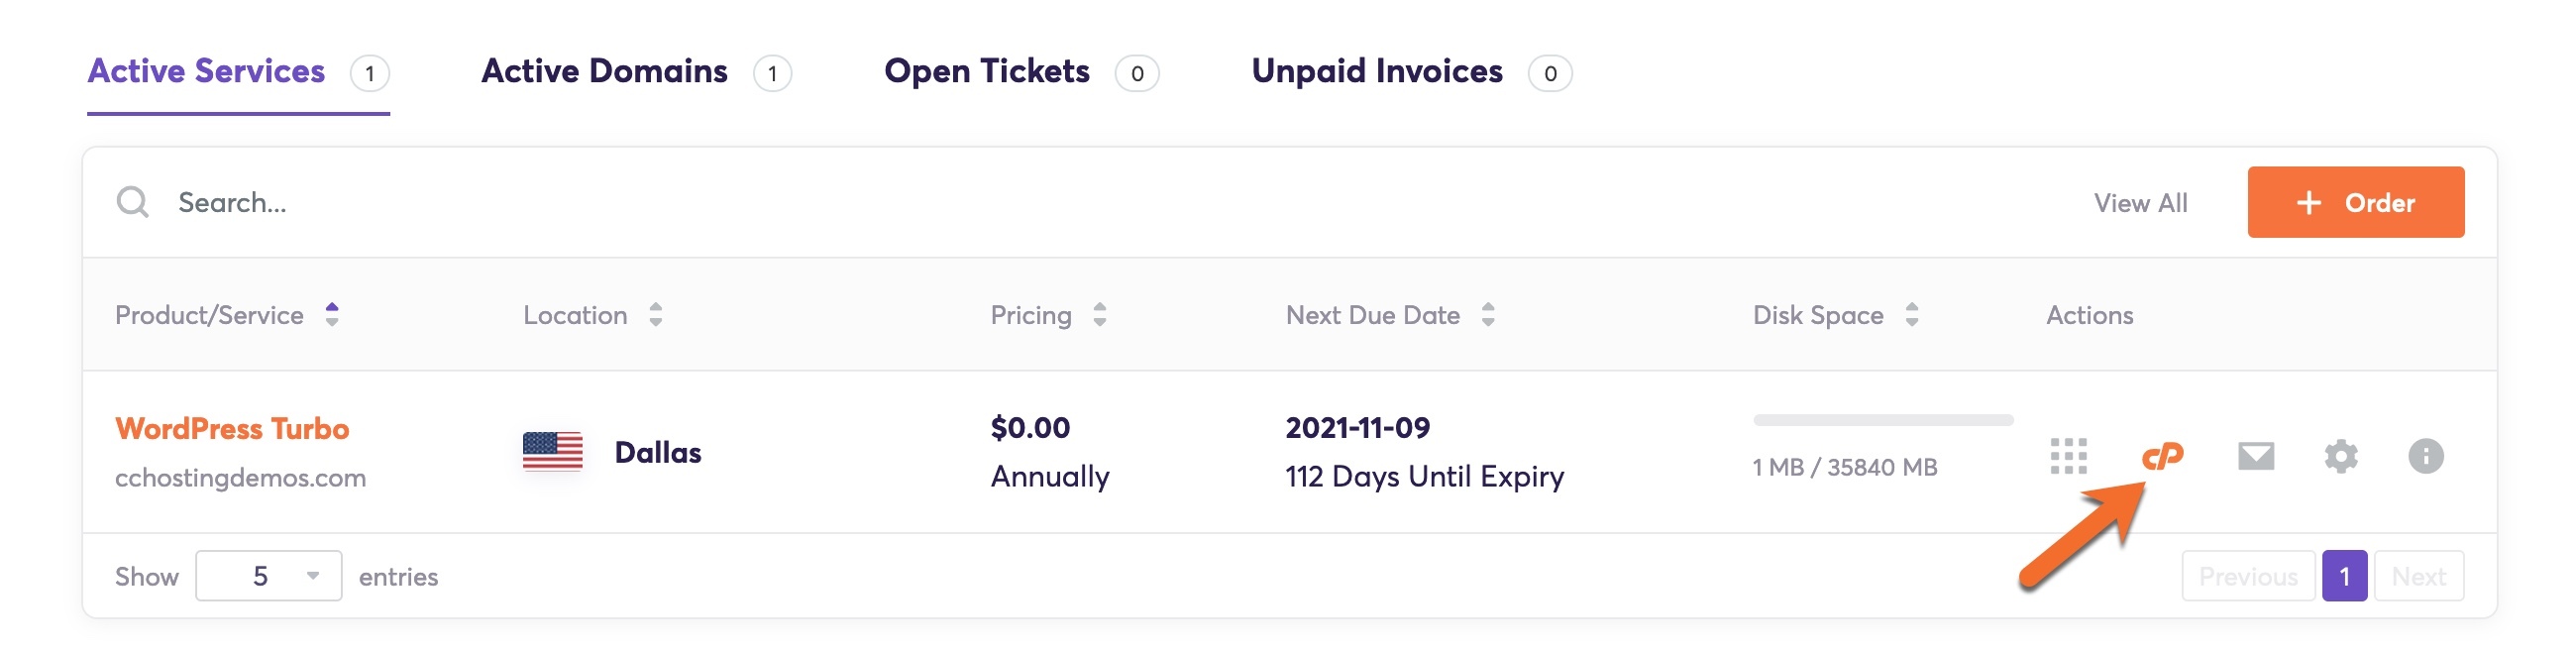
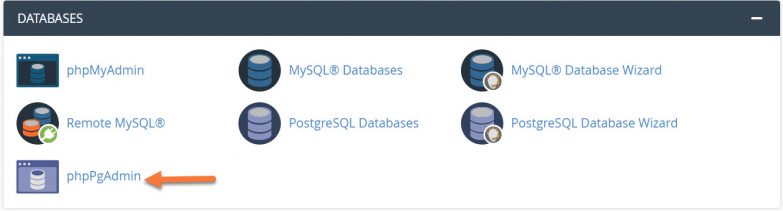
Step 2: Scroll down to the Databases section and open phpPgAdmin.
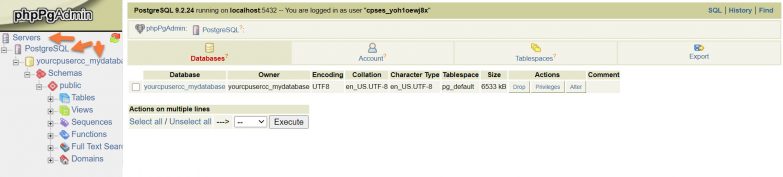
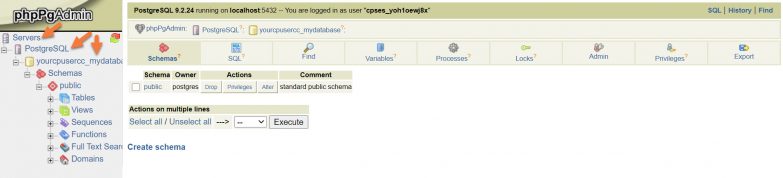
Step 3: When phpPgAdmin opens, expand the Servers area from the left hand side, then expand PostgreSQL, and then click the name of the database you wish to export.
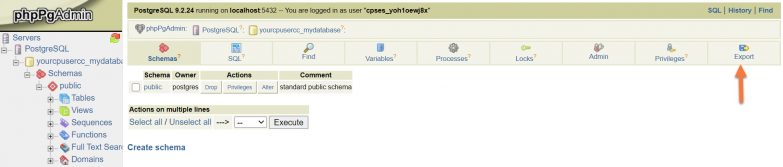
Step 4: From the menu at the top, click the Export button.
Under the Format column, select Structure and data. Under the Options column, in the Format list box, select SQL.
Then beneath Options, select Download.
Finally, click Export.
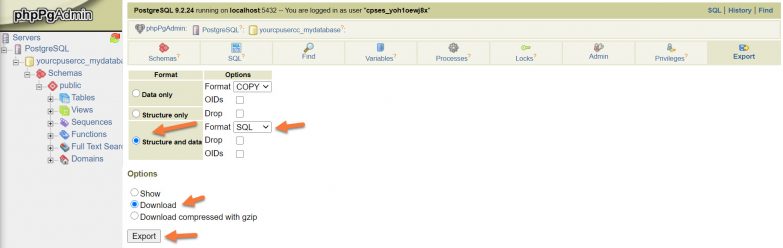
The file will be saved to your computer.
Tired of experiencing issues with your site? Get the best and fastest hosting support with ChemiCloud! 🤓 Check out our web hosting plans!
How to import a PostgreSQL database
Before you can import a PostgreSQL database, you must create a new database in cPanel and assign a user to it.
Method # 1: Use the psql application
Step 1: Using SCP, SFTP, FTP, or the cPanel File Manager > Upload File tool, upload the database you want to import to your hosting account.
Step 2: Connect to your web hosting account via SSH. If you are not familiar with how to do this, click here to review our KB article on the topic.
Step 3: Enter the following command, then press enter/return on your keyboard. Replace ‘username’ with your cPanel username and replace ‘dbname’ with the name of the database you wish to import:
psql -U username dbname < dbexport.pgsql
The ‘dbname’ database should now contain all the data that was in the database file you uploaded.
Method # 2: Use phpPgAdmin
To import a PostgreSQL database using phpPgAdmin, follow the steps below:
Step 1: Login to your cPanel. There’s a lot of ways to do this, but the sure fire easiest way is to login to your Client Area, then open your cPanel.
Step 2: Scroll down to the Databases section and open phpPgAdmin.
Step 3: From the left side of phpPgAdmin, expand the Servers area, then expand PostgreSQL, then click the name of the database you want to import data into.
Next click SQL from the row of options at the top of the page.
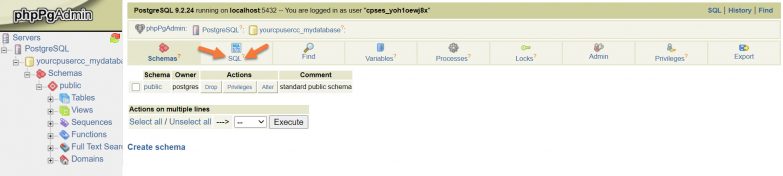
A white box will appear. You are able to enter text into this box, but you won’t need to. Instead, click the “Choose File” button beneath the text box.
When the file picker opens, choose the .postgresql file you wish to upload.
Then click Execute to instruct phpPgAdmin to import the data in that file into the database.
Additional Information
The official documentation for PostgreSQL can be very handy sometimes.
Find official PostgreSQL documentation here.