FTP accounts are useful for a variety of site management tasks. With an FTP account, you can upload or download files directly to your website, allowing you to manage themes, plugins, and media assets without needing to go through the WordPress dashboard. FTP is also helpful for creating site backups, troubleshooting issues by replacing or editing files, and managing large file uploads that may otherwise be restricted within WordPress. For developers, FTP provides easy access for testing or staging changes to a site before they go live.
Follow these steps to create a new FTP account for your WordPress instance using the WordPress Manager:
Step 1: Locate Your Site’s Document Root
To create an FTP account, you first need to know the document root for your site.
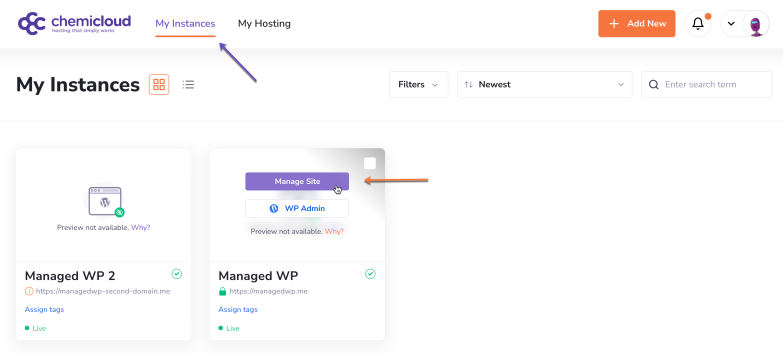
- Log in to your WordPress Manager and select My Instances in the top header.
(If you need help logging in, see this article.) - Find the WordPress instance you want to manage, then click on Manage Site.
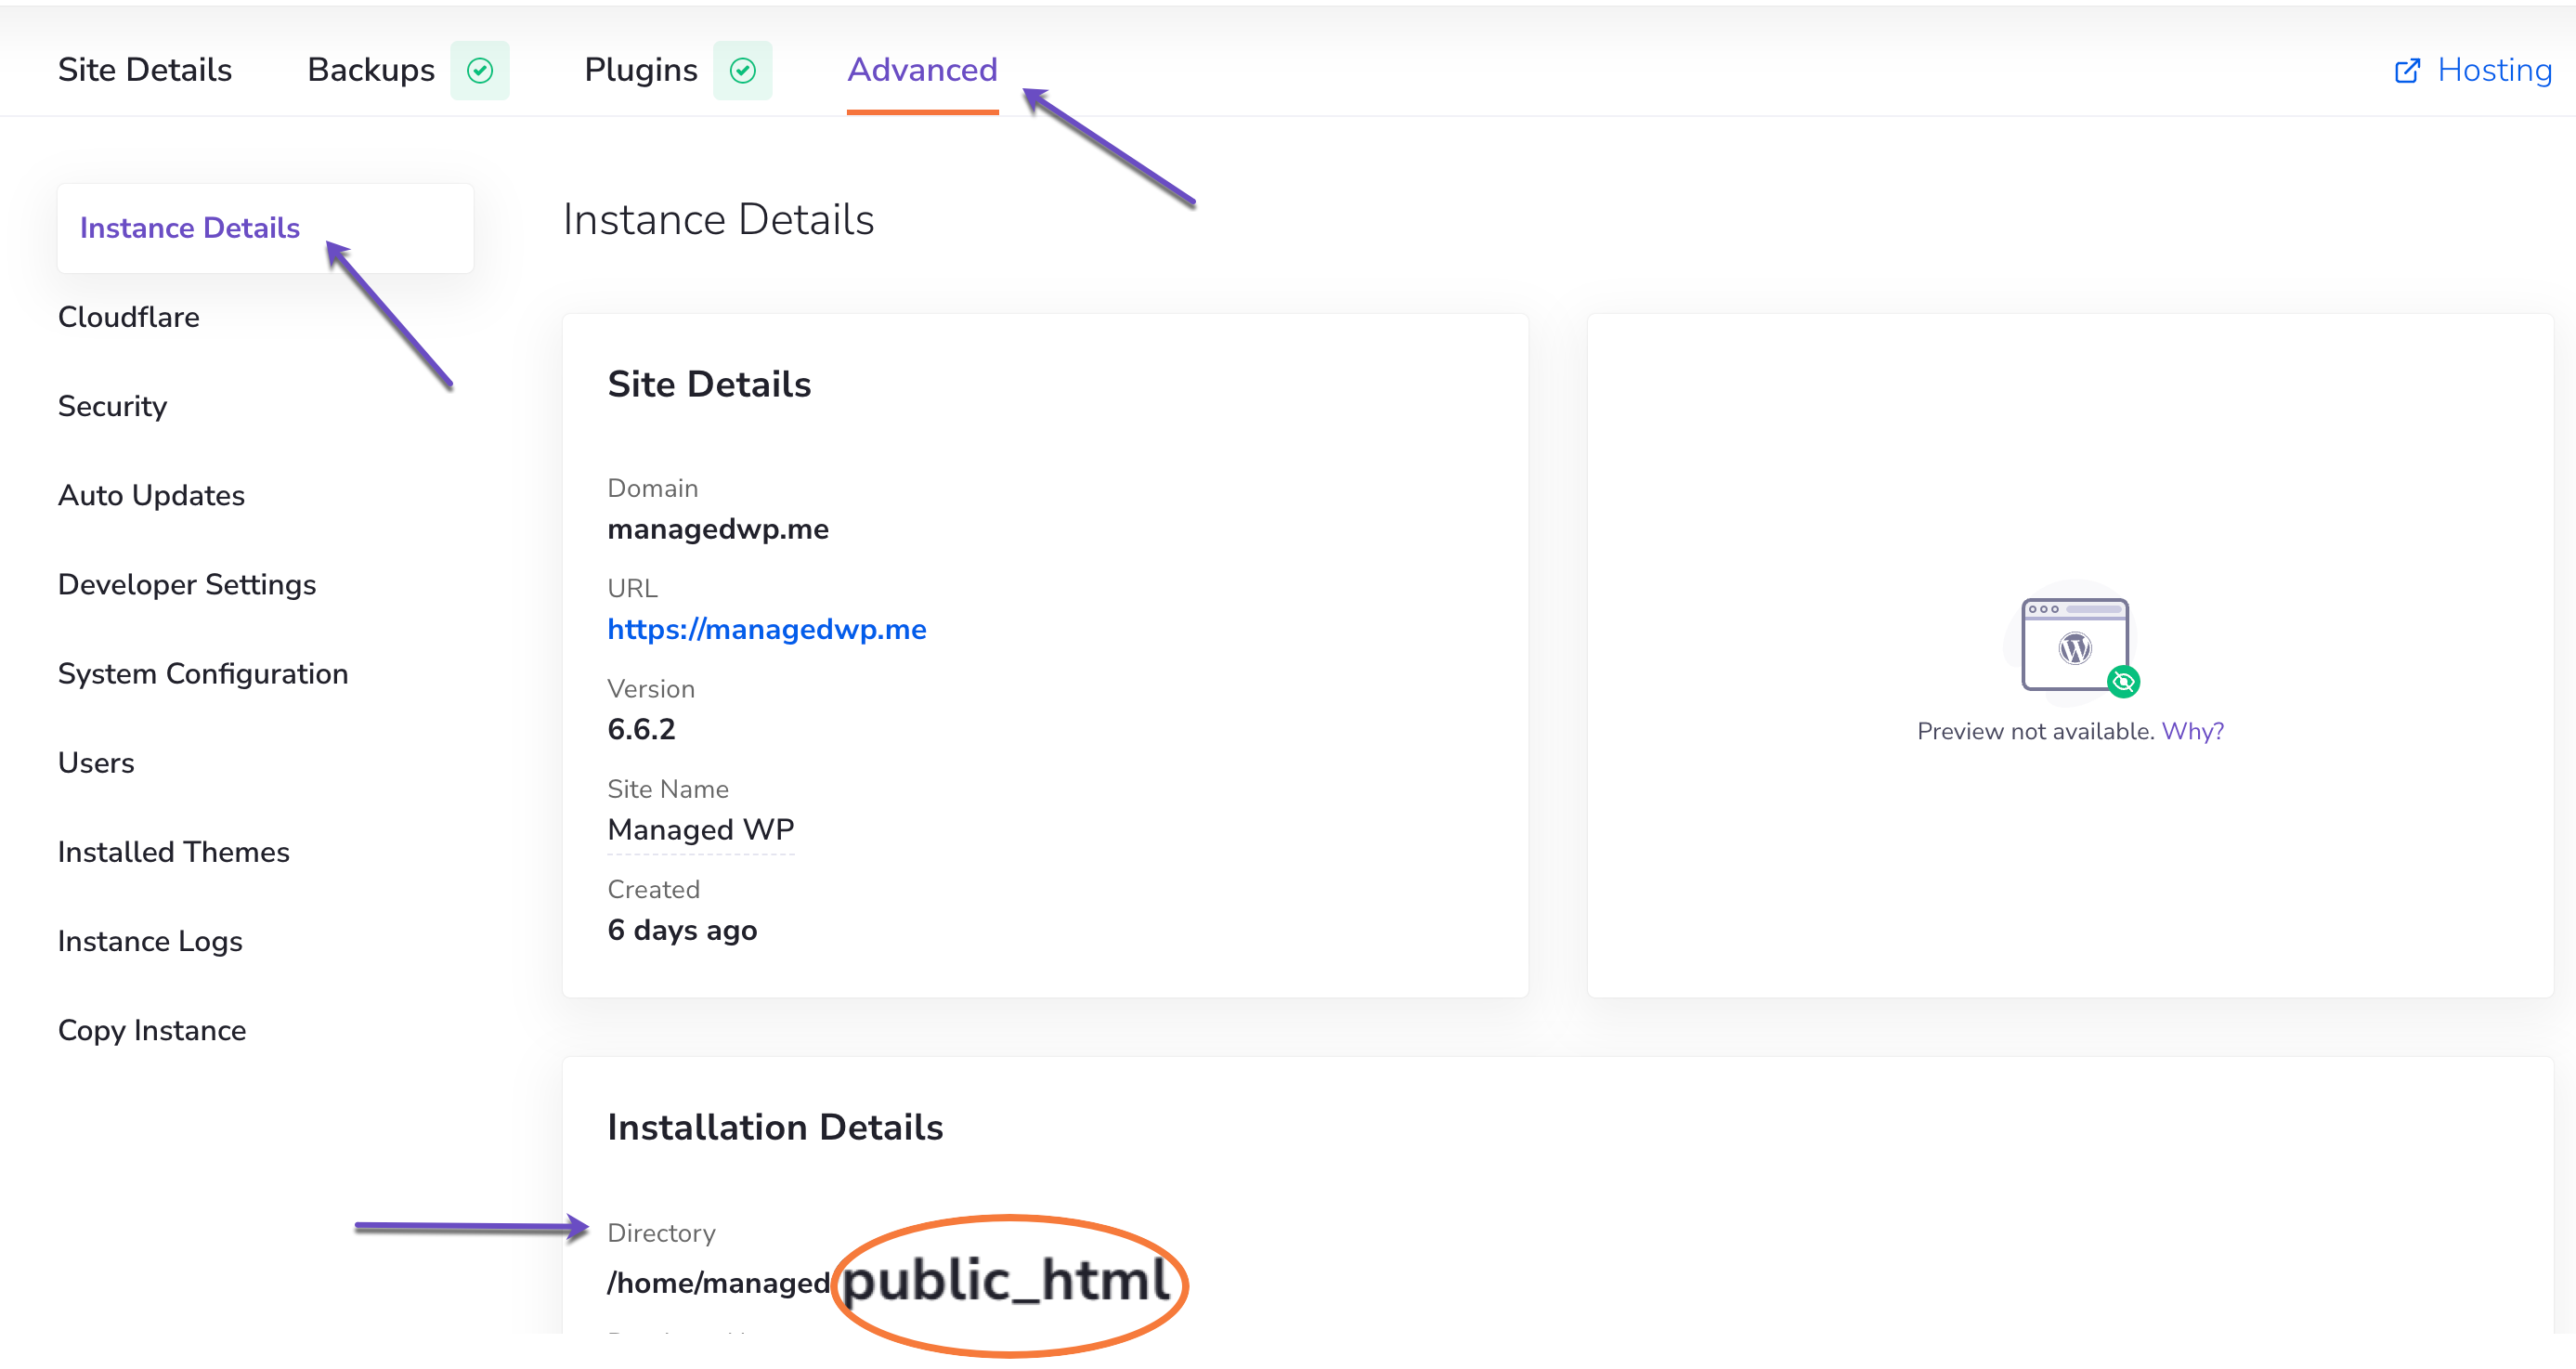
- In the instance’s management panel, click Advanced.
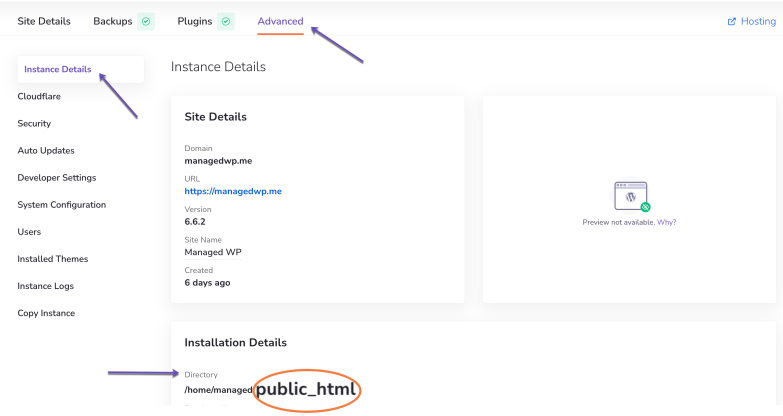
- Scroll down to Installation Details. Here, look for the field labeled Directory—this shows the document root where your site resides (In my example, the directory is “public_html”).
- Copy the directory path for later use.

Step 2: Create a New FTP Account
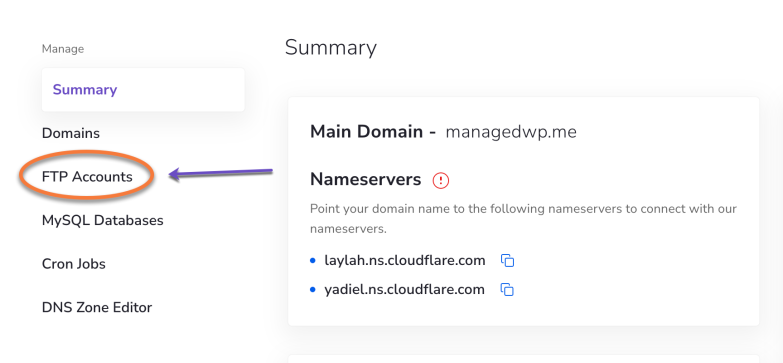
- In your WordPress Manager, click My Hosting in the top header.

- From the left-hand Manage section, select FTP Accounts.
- In the FTP Accounts section, click on the Add Account button.
- Fill in the details for your FTP account:
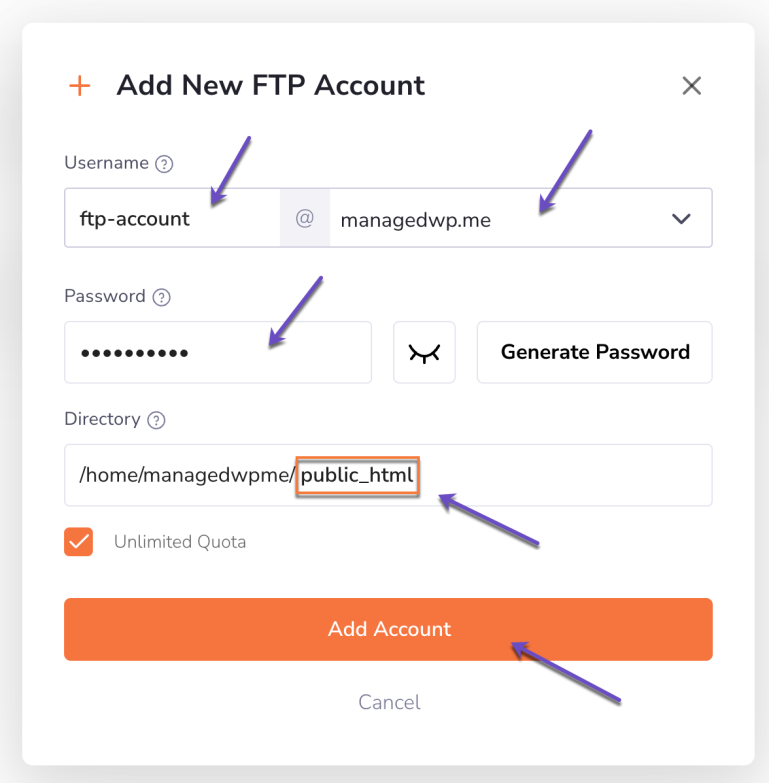
- Username: Enter a username for the FTP account.
- Domain: Choose the domain associated with this FTP account.
- Password: Set a secure password.
- Directory: Paste your site’s document root (e.g., “public_html”).
- To finalize, click Add Account.


After creating the FTP account, you’ll see it listed in a sortable table with the following details:
- User: Username for the FTP account.
- Directory: The directory path the account can access.
- Usage / Quota: Space usage and limits.
- Last Update Time: The last time the account was updated.
- Actions: Options to view access details, change password and quota, or delete the account.
To find a specific FTP account, use the search bar next to the Add Account button.
Step 3: Connect to Your FTP Account
To connect to your new FTP account, you’ll need either the server’s IP address or hostname.
That’s it!
By following these steps, managing FTP accounts is straightforward, giving you flexible access to your site files whenever needed.
If you need further assistance, our support team is always ready to help.