When it comes to hosting your website, think of it as setting up a shop in a bustling digital marketplace. Just like any physical store requires space, utilities, and a well-organized layout to operate smoothly and welcome customers, your online presence needs similar resources in the virtual world.
These resources include processing power to think and execute tasks, memory to remember and manage information, and connections to communicate with visitors and services. But, in the shared environment of a web server, it’s crucial to use these resources wisely and fairly, ensuring your site runs efficiently without overstepping its bounds and affecting others.
This is where understanding resource usage becomes key—setting limits on CPU, memory, processes, data flow, and storage actions ensures a harmonious existence in the shared digital space, allowing everyone’s website to thrive.
CloudLinux is a special type of operating system that we use for shared hosting. It makes sure everyone gets a fair amount of resources, like memory and processing power, on our shared servers. Think of it like dividing a cake equally among a group of friends, so everyone gets a fair slice.
The amount of resources you can use depends on your hosting plan. Each plan has its own recommended resource level.
If you use more resources than your plan allows, CloudLinux will slow down your account’s processes. It’s like if you try to eat too much cake, you have to eat slower to make sure there’s enough for everyone.
Web Hosting/WordPress Hosting Resource Usage Limits
| Starter | Pro | Turbo | |
|---|---|---|---|
| CPU Cores | 1 Core | 2 Cores | 3 Cores |
| RAM Memory | 2 GB | 4 GB | 6 GB |
| EP (Entry Processes) | 10 | 15 | 30 |
| NPROC | 100 | 100 | 100 |
| I/O Usage | 10MB/s | 10MB/s | 10MB/s |
| IOPS | 1024 | 1024 | 1024 |
| Inodes | 250000 inodes | 350000 inodes | 500000 inodes |
Reseller Hosting Resource Usage Limits
| Kickstart | Grow | Expand | Established | |
|---|---|---|---|---|
| CPU per cPanel Account | 2 Cores | 2 Cores | 2 Cores | 2 Cores |
| Memory per cPanel Account | 3 GB | 3 GB | 3 GB | 3 GB |
| EP (Entry Processes) | 20 | 20 | 20 | 20 |
| NPROC | 100 | 100 | 100 | 100 |
| I/O Usage | 10MB/s | 10MB/s | 10MB/s | 10MB/s |
| IOPS | 1024 | 1024 | 1024 | 1024 |
| Inodes | 250000 inodes | 250000 inodes | 250000 inodes | 250000 inodes |
Understanding the Resource Usage Limits
The CPU limit lets you set a maximum number of CPU cores that can be used.
The Memory limit is about how much RAM (memory) the programs running for your website are actually using.
Entry Processes (EP) limit is about how many things can happen at the same time, like people visiting your website, running scripts, or scheduled tasks (cron jobs).
Just a heads up: The number of Entry Processes doesn’t directly tell you how many people can visit your website at once. It’s more about managing how many actions can happen simultaneously to keep things running smoothly.
This limit helps protect your website from overload. Imagine if too many people try to enter a small room all at once, it becomes crowded and uncomfortable. Similarly, a popular way to attack websites (DoS attacks) is by overloading it with too many requests, making the website slow down or even crash by using up all available connections. When your website hits the CPU limit, it starts to slow down, which can make this problem even worse because it takes longer to handle each request, tying up more connections.
To prevent this, we use the Entry Processes limit. It controls how many simultaneous connections can happen. If the number goes too high, the server will show a ‘Resource Limit Reached’ error to stop the overload. This way, we keep your website and the server running smoothly for everyone.
NPROC limit sets the maximum number of tasks, like opening files or running programs (like ssh, cron jobs, or email services), that can happen at once inside your hosting environment.
The IO limit is like a speed limit for how fast data can move in and out of your storage, measured in kilobytes or megabytes per second. If you hit this limit, your tasks don’t stop or get cancelled; they just slow down. It’s like being in a busy hallway but being told to walk slowly so everyone can move smoothly without bumping into each other.
IOPS limits are about how many times you can read from or write to the storage every second. If you reach this limit, your read/write actions have to wait until the next second to continue. Imagine it as a rule where you can only open or close a door a certain number of times per second.
Inode Limits are about the total number of files and folders you can have. An inode is basically a count of these items. So, if you have a lot of files, folders, or emails, each one counts towards this limit. Think of it as having a bookshelf where each book, folder, or note is an inode, and there’s only so much space on the shelf.
How to View Your Account’s Resource Usage History
1) Log into your website’s cPanel
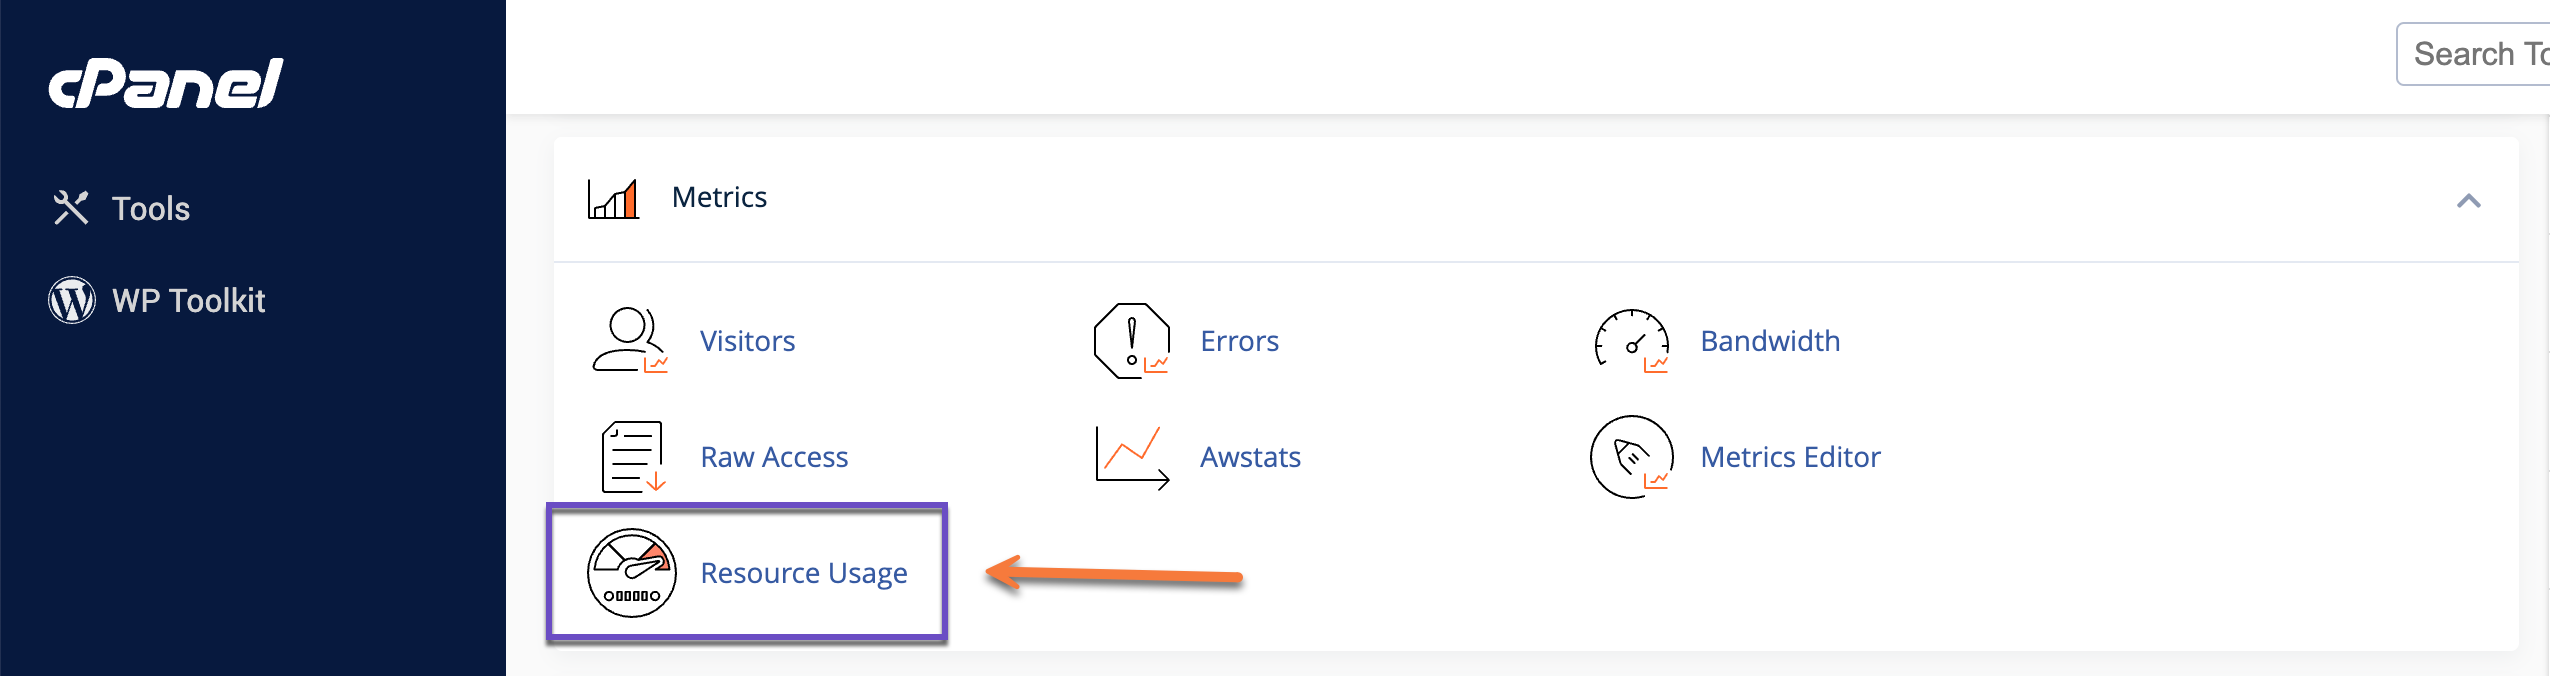
2) Scroll down to the Metrics section and click on “Resource Usage”
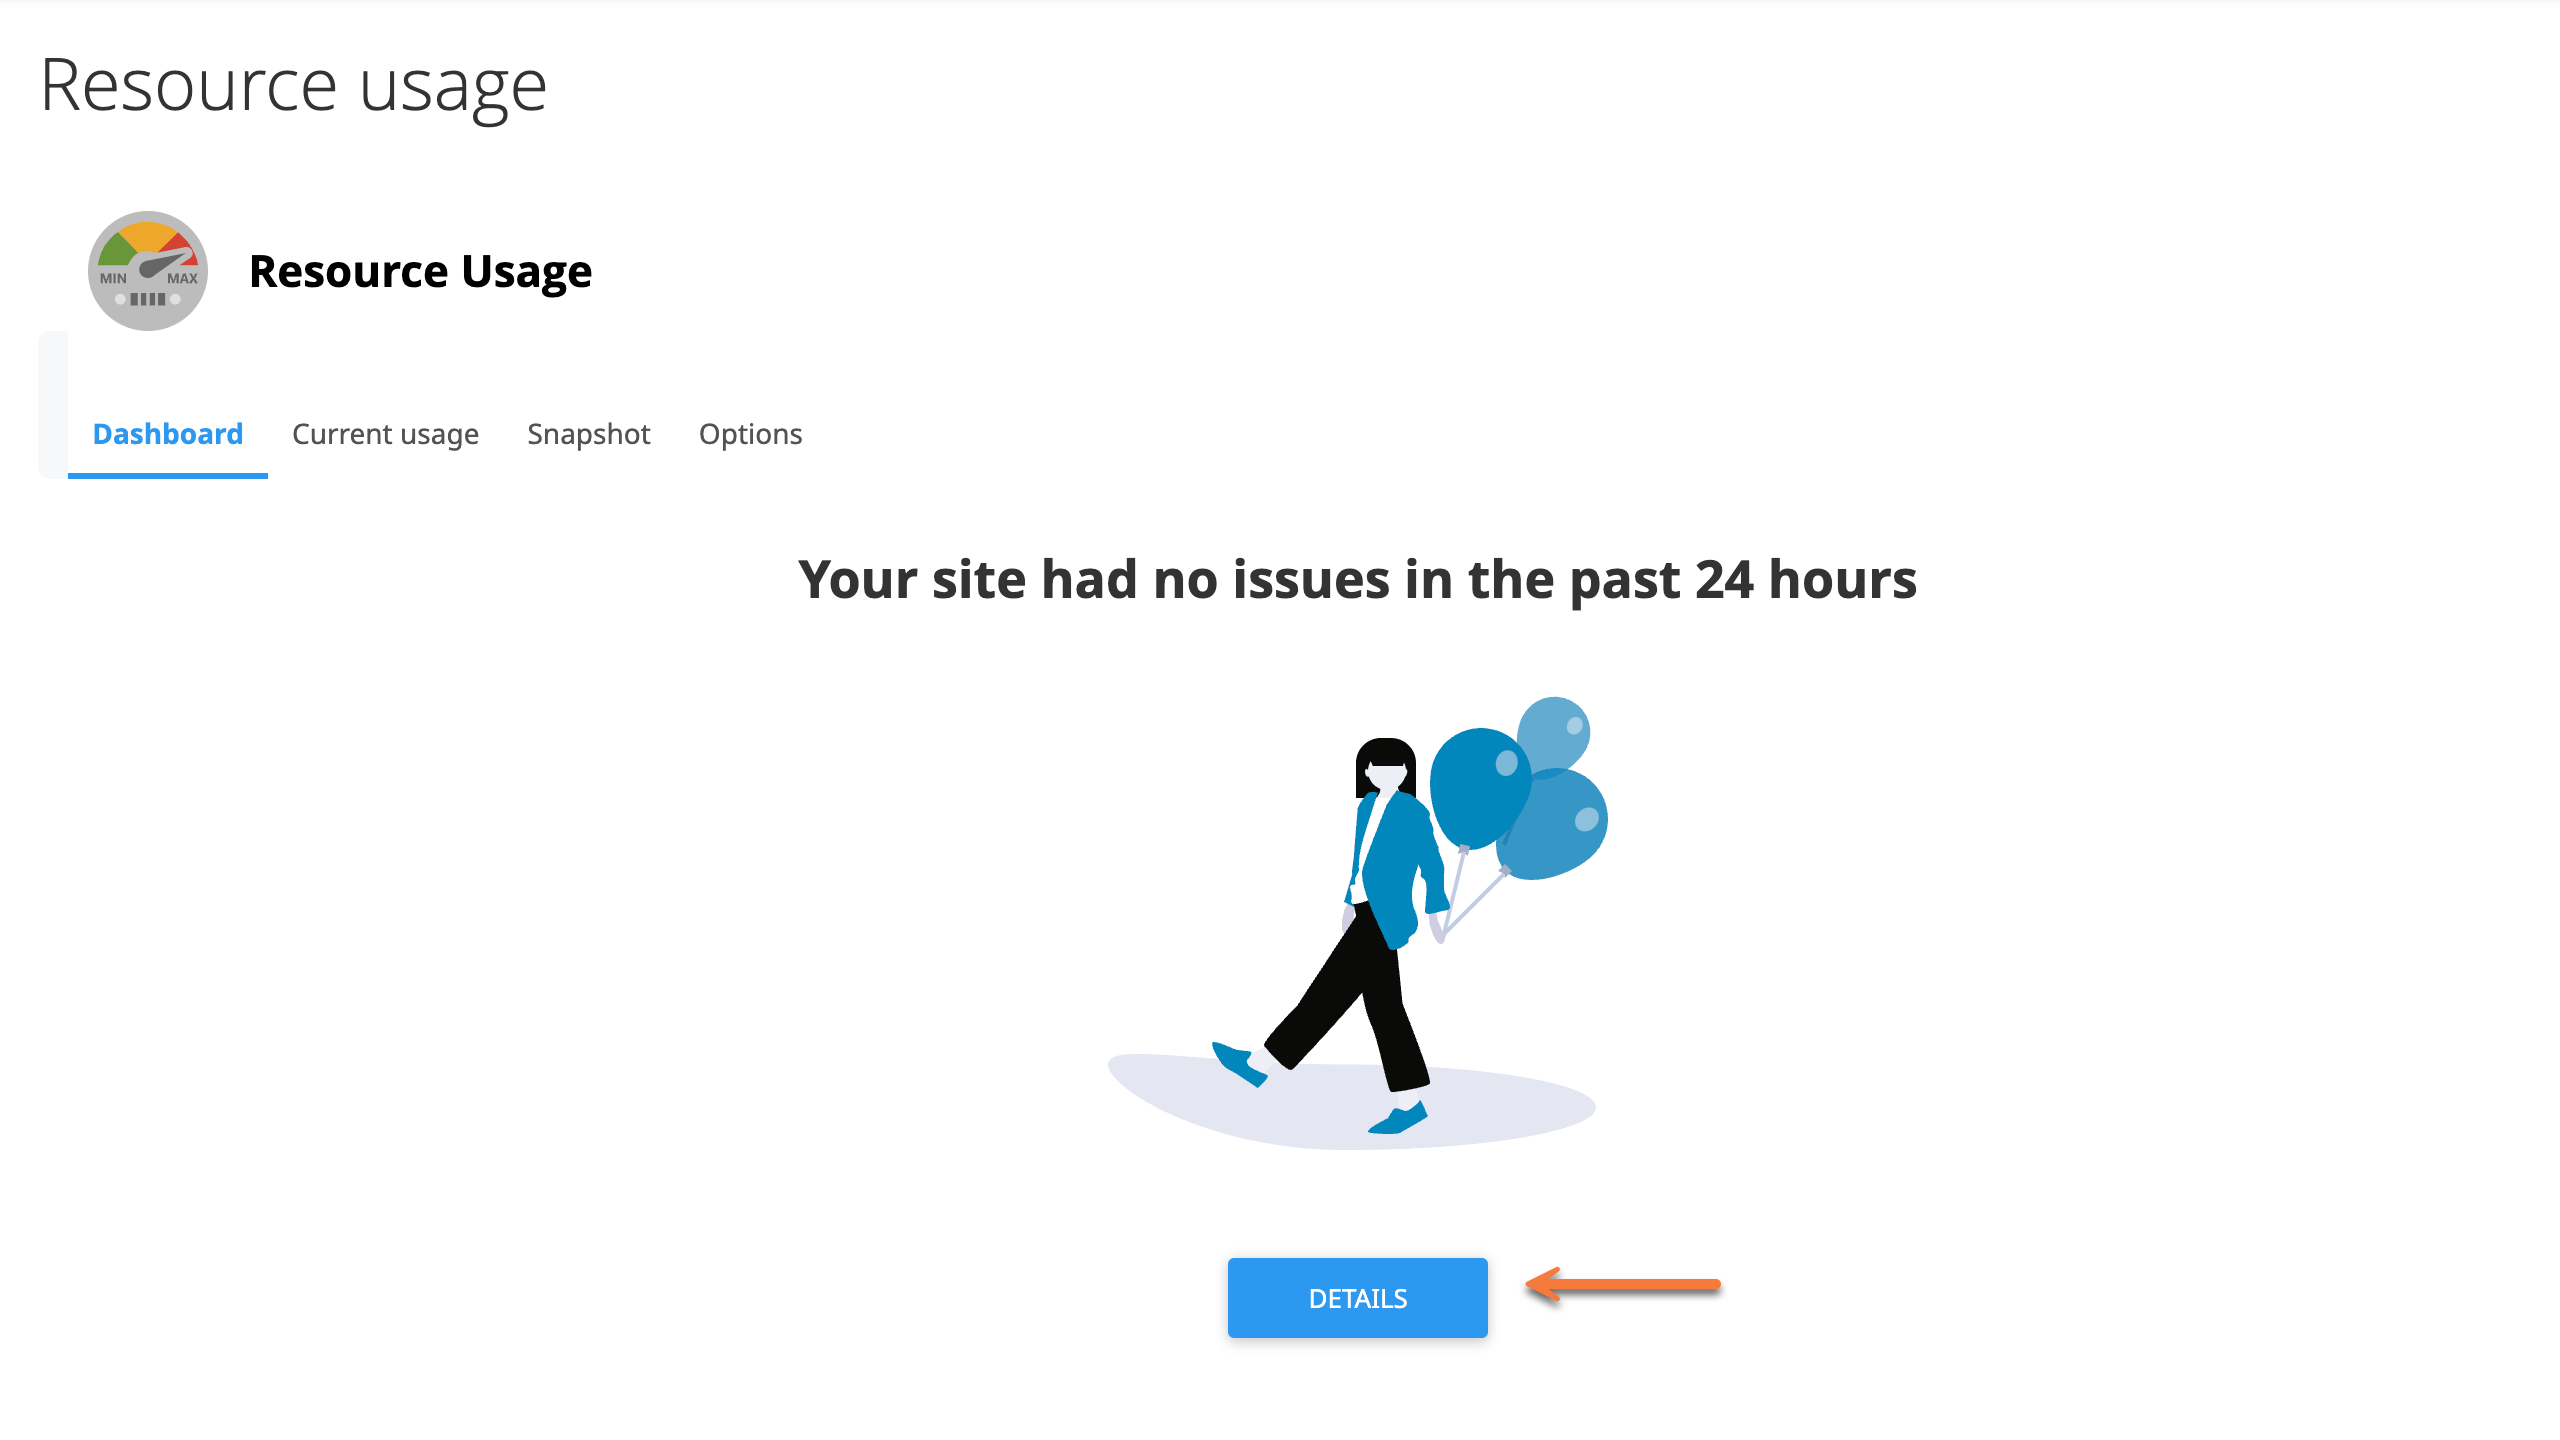
3) Once you are inside the Resource Usage section, the status will be displayed. To know more information, click on “Details“;
4) After clicking “Details”, choose the desired time frame you’d like to inspect and click “Submit“.
That’s all! You now know how to check on your hosting account resource usage in cPanel
Remember that you can always get in touch with our Support team throughout a ticket and ask us to do a resource usage audit for your account.
Practical Recommendations to Manage and Reduce Resource Usage
If you’re encountering high resource usage on your shared hosting account, it can slow down your website, affect user experience, and even lead to temporary downtimes if limits are exceeded.
Here are some practical recommendations to manage and reduce resource usage:
- Optimize Your Website’s Code: Ensure your website’s code is efficient. This includes optimizing CSS, JavaScript, and HTML. Use tools to minify and combine files where possible.
- Use Caching: Implement caching strategies to reduce the load on your server. This means storing copies of frequently accessed content so it doesn’t need to be generated or fetched from the database each time.
- Optimize Images: Large image files can significantly increase load times and resource usage. Use tools to compress images without losing quality and consider lazy loading for images below the fold.
- Limit Plugins and Modules: Each plugin or module adds to the load your server has to handle. Evaluate the necessity of each and disable or remove any that are not essential.
- Database Optimization: Regularly optimize your database to improve efficiency. This can include cleaning up old data, optimizing tables, and using indexes properly.
- Content Delivery Network (CDN): Use a CDN to distribute the delivery of your content. This reduces the load on your server by serving static content (like images, CSS, JavaScript) from locations closer to your visitors.
- Review Your Hosting Plan: If you consistently hit resource limits, it might be time to consider upgrading your hosting plan. A plan with more resources or a move to a VPS might be necessary.
- Monitor and Analyze: Identifying peak times and which parts of your website consume the most resources can help you make targeted improvements.
- Use Lazy Loading: Implement lazy loading for images and videos, loading them only as they’re about to enter the viewport. This can significantly reduce initial page load time and save resources.
By following these steps, you can help ensure your website runs smoothly, efficiently, and within the resource limits of your hosting account, providing a better experience for your visitors while avoiding potential penalties for exceeding your allocated resources.