Rackspace offers email hosting services, very similar to Google’s Workspace, formerly known as G Suite, and Microsoft’s Office365.
If if you have signed up for Rackspace Email, in this tutorial will guide you to configure DNS for Rackspace email in cPanel.
Additionally, this Knowledge Base Article covers Rackspace Email and Email Plus, which use the same server settings at Rackspace, not Office365 or Hosted Exchange Services.[/ht_message]
How To Configure DNS for Rackspace in cPanel
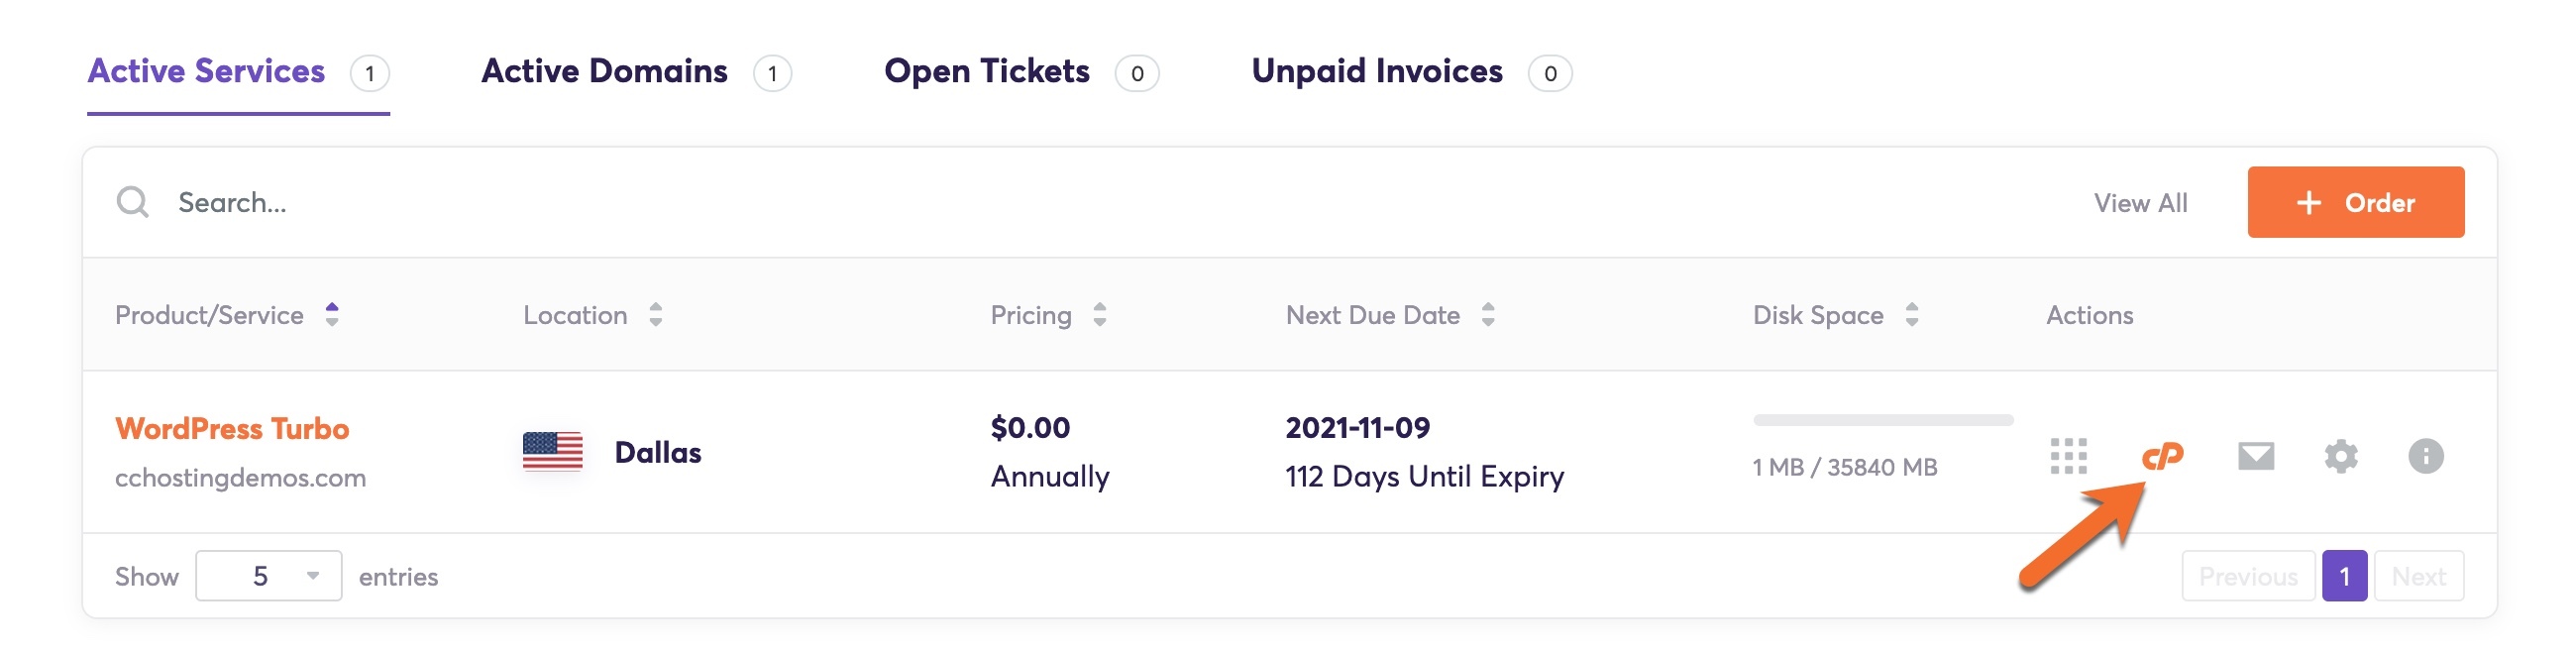
Step 1: Login to your cPanel. There’s a lot of ways to do this, but the sure fire easiest way is to login to your Client Area, then open your cPanel.
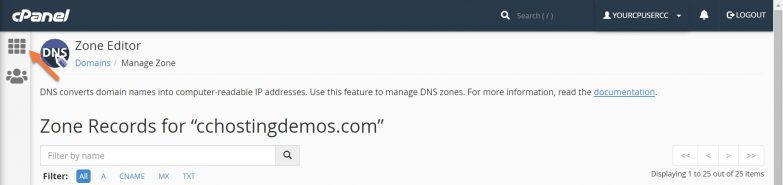
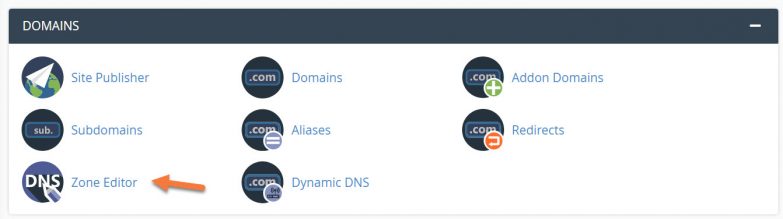
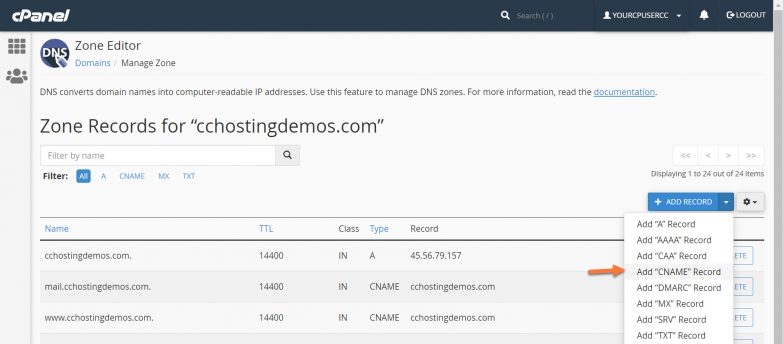
Step 2: In the Domains section of cPanel, click Zone Editor.
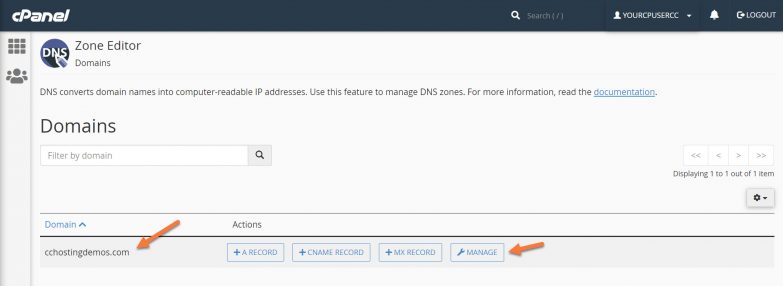
Step 3: When the Zone Editor has opened, choose the domain you want to modify from the Domains list, and click the Manage button on the right side.
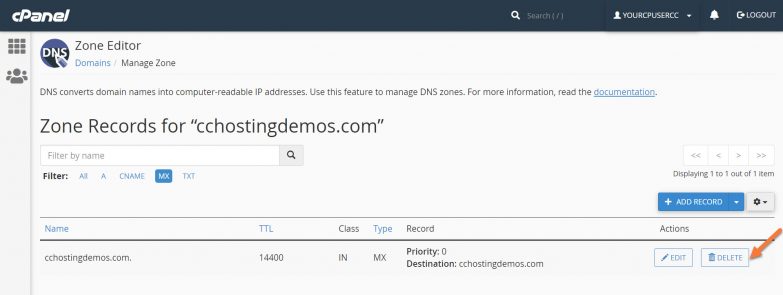
Step 4: Using the Filter at the top, click MX to hide the irrelevant records.

Step 5: Delete the current MX record by clicking the Delete button to the right of the record.
You will be asked to confirm – “Are you sure you wish to delete this record?” Click Continue.
You will be returned to a full view of all your DNS records.
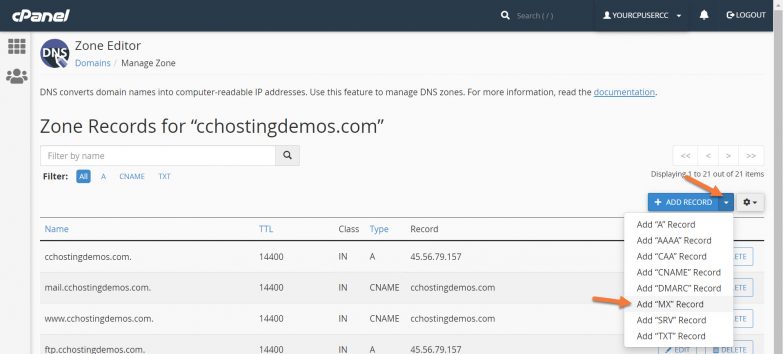
Step 6: Next, we need to add a new MX record. To do this, click the downward facing triangle next to the blue + Add Record button on the right side and choose Add “MX” Record:
You will see the Zone Records screen has created an empty row for the new record:
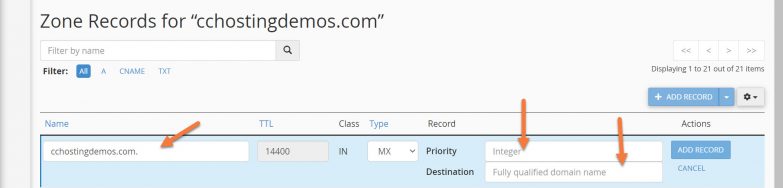
Three of the fields in the new row are editable. Let’s examine these:
Their MX Records are as follows:
| Host Name | MX Record Address | Priority |
|---|---|---|
| @ | mx1.emailsrvr.com | 10 |
Your completed record should look like the one below:

Once you’ve entered the record information, click the blue Add Record button.
You should see a green box appear in the top right corner with the text: Success: You successfully added the MX record for “cchostingdemos.com”.
Next, you need to repeat the process to add the second MX record.
To do this, click the downward facing triangle next to the blue + Add Record button on the right side and choose Add “MX” Record:
You will see the Zone Records screen has created an empty row for the new record:
Three of the fields in the new row are editable. Let’s examine these:
The first field is the name of the record. For this, you can leave it as-is.
The second field is the Priority of the Record. Enter 20 here.
The third field is the destination, which for Rackspace is: mx2.emailsrvr.com
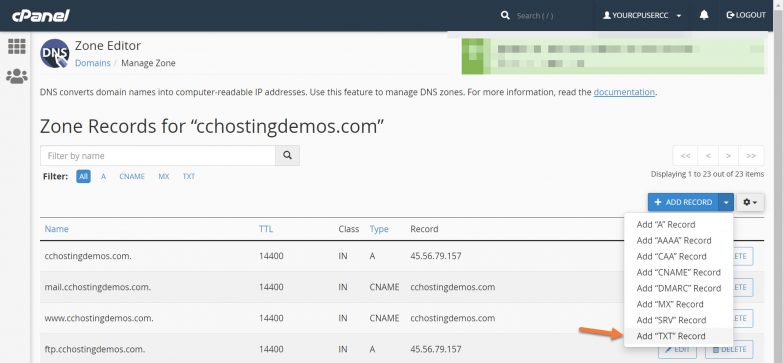
For Type, ensure it is set to TXT.
For Record, copy and paste this text: v=spf1 include:emailsrvr.com ~all
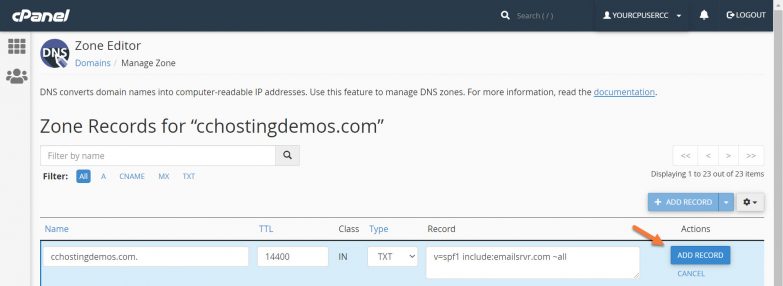
Add the record by clicking the blue Add Record button. You should see a green box appear in the top right corner with the text: Success: You successfully added the following TXT record for “yourdomain.tld”: yourdomain.tld.
And that’s it for DNS record settings. Just one other setting left, the very last one and it’s super easy!