When using Forms on the Website Builder, you want your users to engage with you and for this to happen, you have to make sure the messages they sent are able to reach you. Properly configuring the SMTP Mail settings in the Website Builder is the first step to this.
This Knowledgebase Article will show you how to configure the SMTP Mail settings in the Website Builder.
How to Configure SMTP Mail in the Website Builder
Step 1: Login to your cPanel. There’s a lot of ways to do this, but the sure fire easiest way is to login to your Client Area, then open your cPanel.

Step 2: Scroll down to the Software section and open the Website Builder:

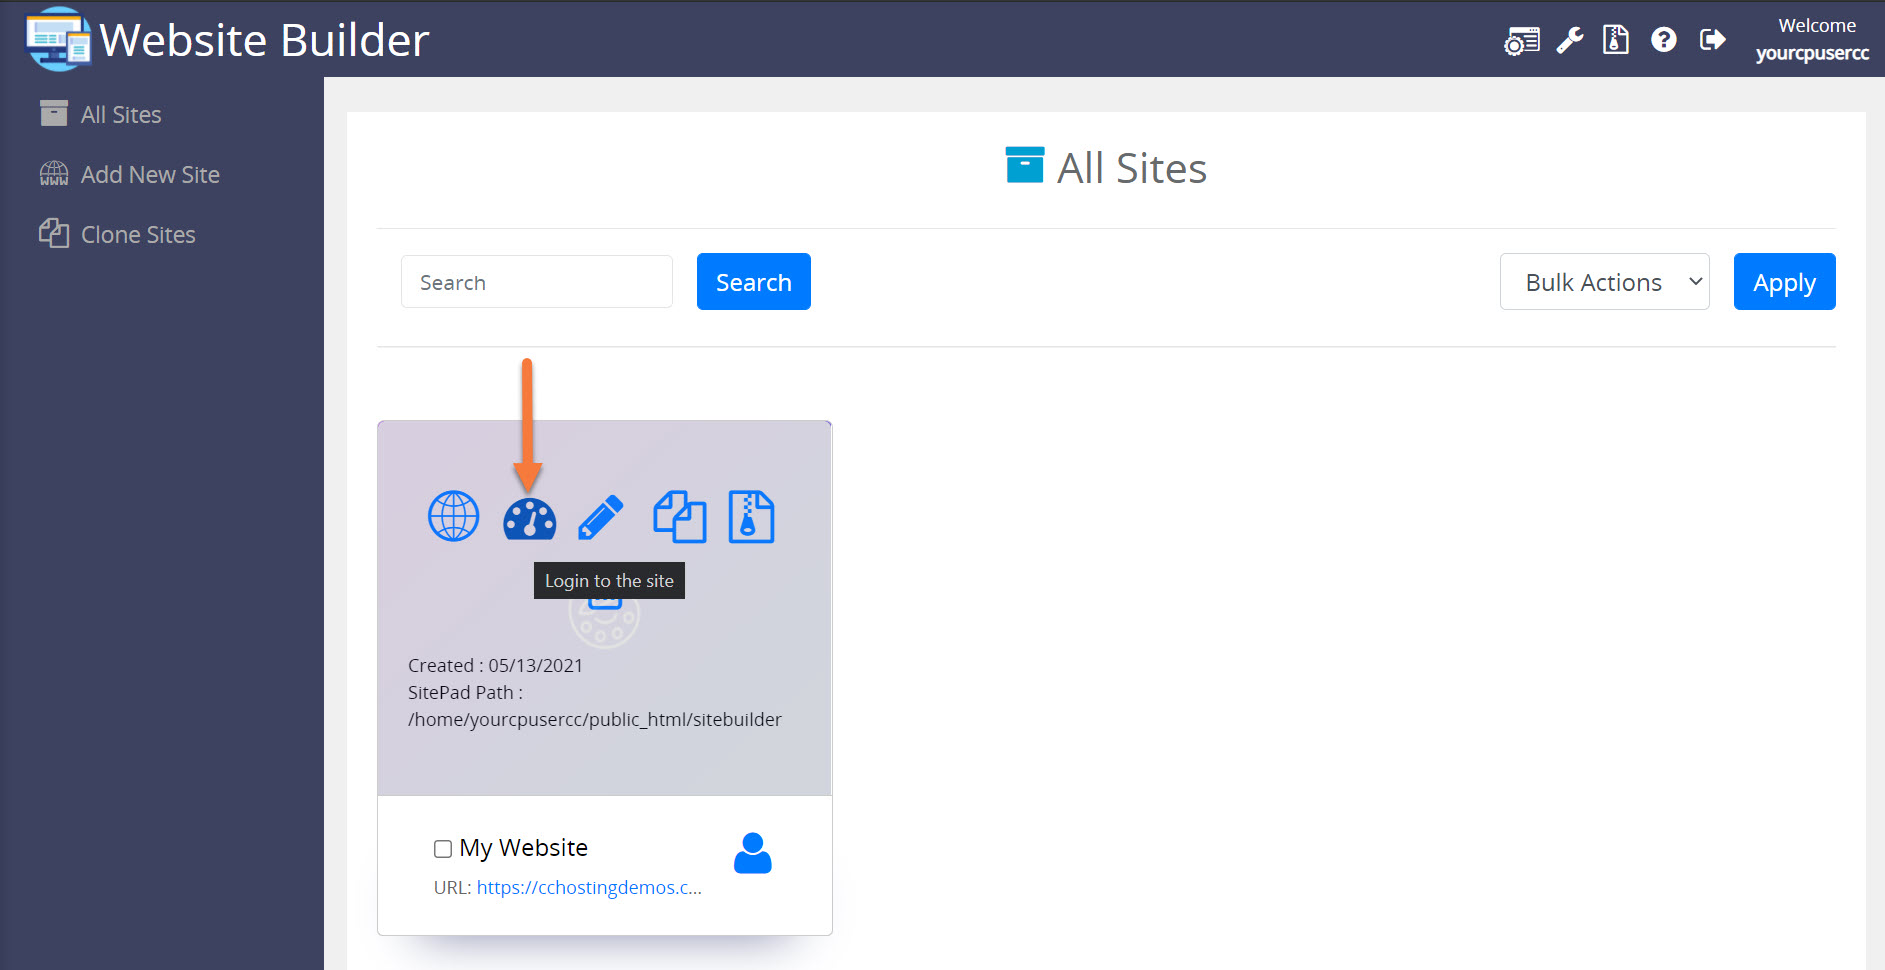
Step 3: Your list of sites will load. Locate the site edit, then hover over that site and click the speedometer icon to login to the site.
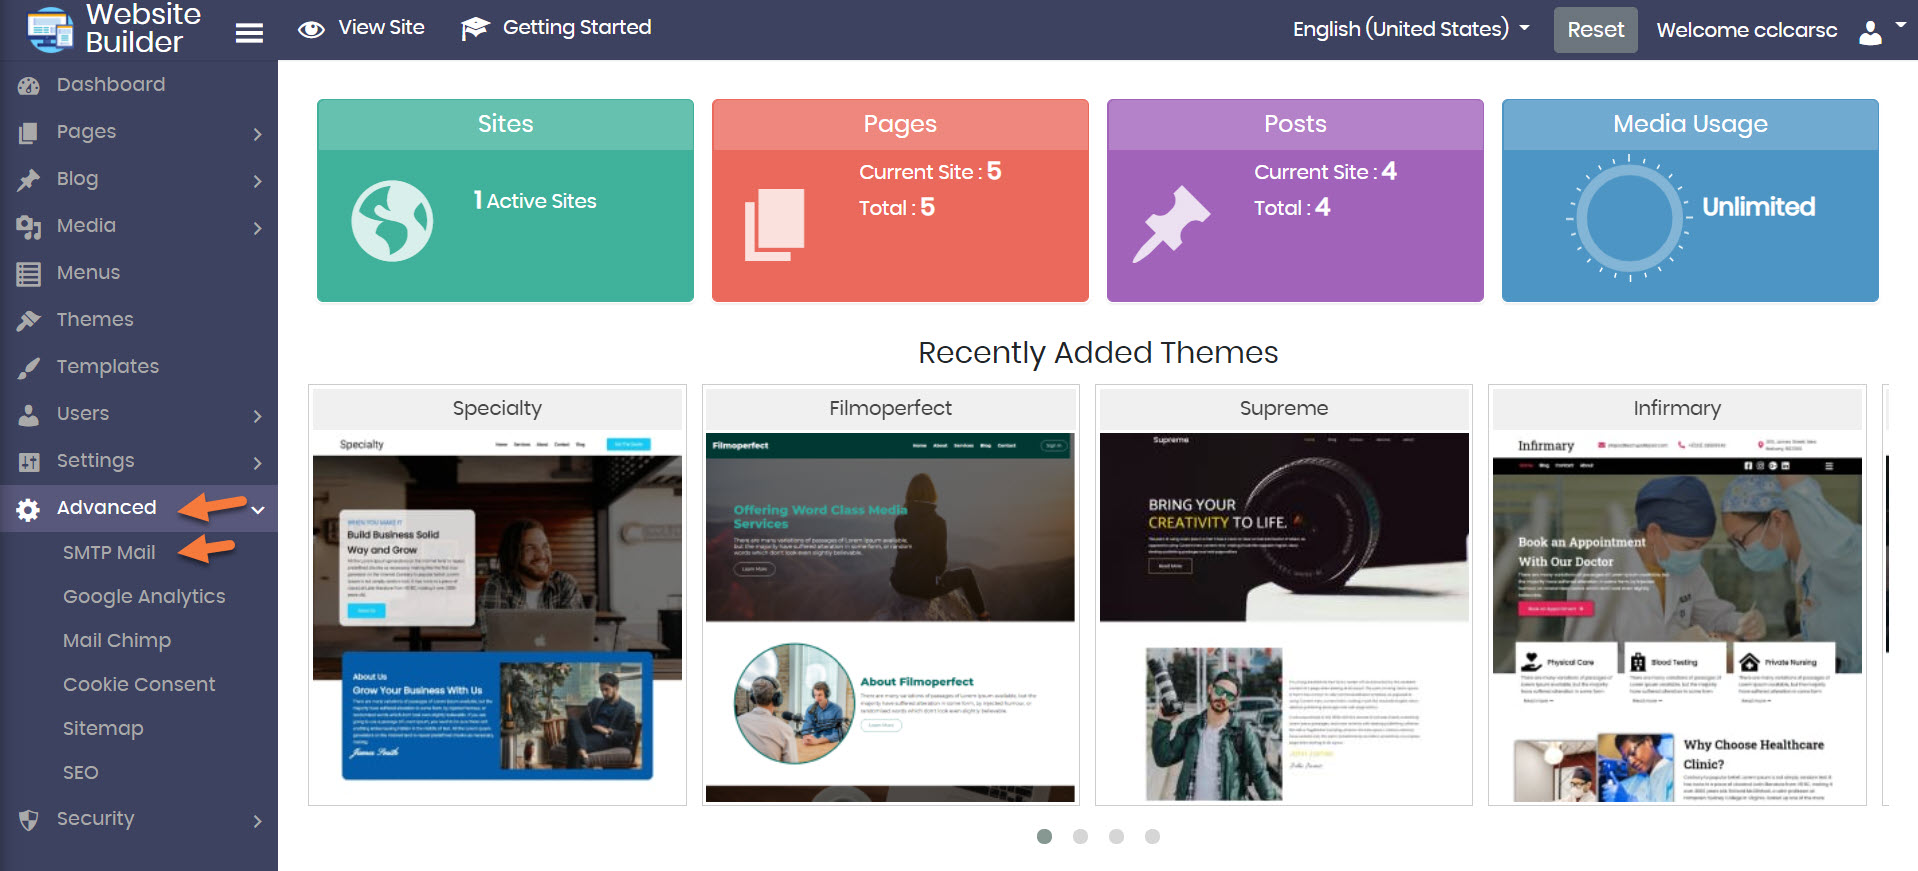
Step 4: When the Website Builder Admin opens, click Advanced from the tool menu on the left side, then click SMTP Mail.
Step 5: The SMTP Mail Settings area will open. On this page, you have a few options, let’s examine them so you can enable and configure them properly.

At the top, there are two tabs. First, is the SMTP Settings. The second is the Test Mail tab. We’ll talk about this later.
Next, you have the following options:
- Enable SMTP: If you have forms on your website, we strongly encourage enabling and configuring this setting, as using SMTP to send the responses from your forms is much more reliable than the alternative, PHPMail.
- SMTP Host: This is the server name, or mail server hostname, of your email server. For example, it could be (and probably is) mail.yourdomain.tld.
- Type of Encryption: You have the option for None, SSL, or TLS. If you are hosting your account at ChemiCloud, you would choose TLS.
- SMTP Port: This should be pre-filled with 465, and if you host at ChemiCloud, this is the port number you should use.
- SMTP Authentication: You have the option for Yes, or No. If you host at ChemiCloud, this should be set to Yes.
- SMTP Username: You should use the full email address here that you’ll be using to send email from your website. For example [email protected].
- SMTP Password: This is the password for the account you are using.
- Disable SSL Certificate Verification: If you host at ChemiCloud, you shouldn’t need to check this setting.
Step 6: Next, let’s test your configuration by clicking the Test Mail tab at the top.
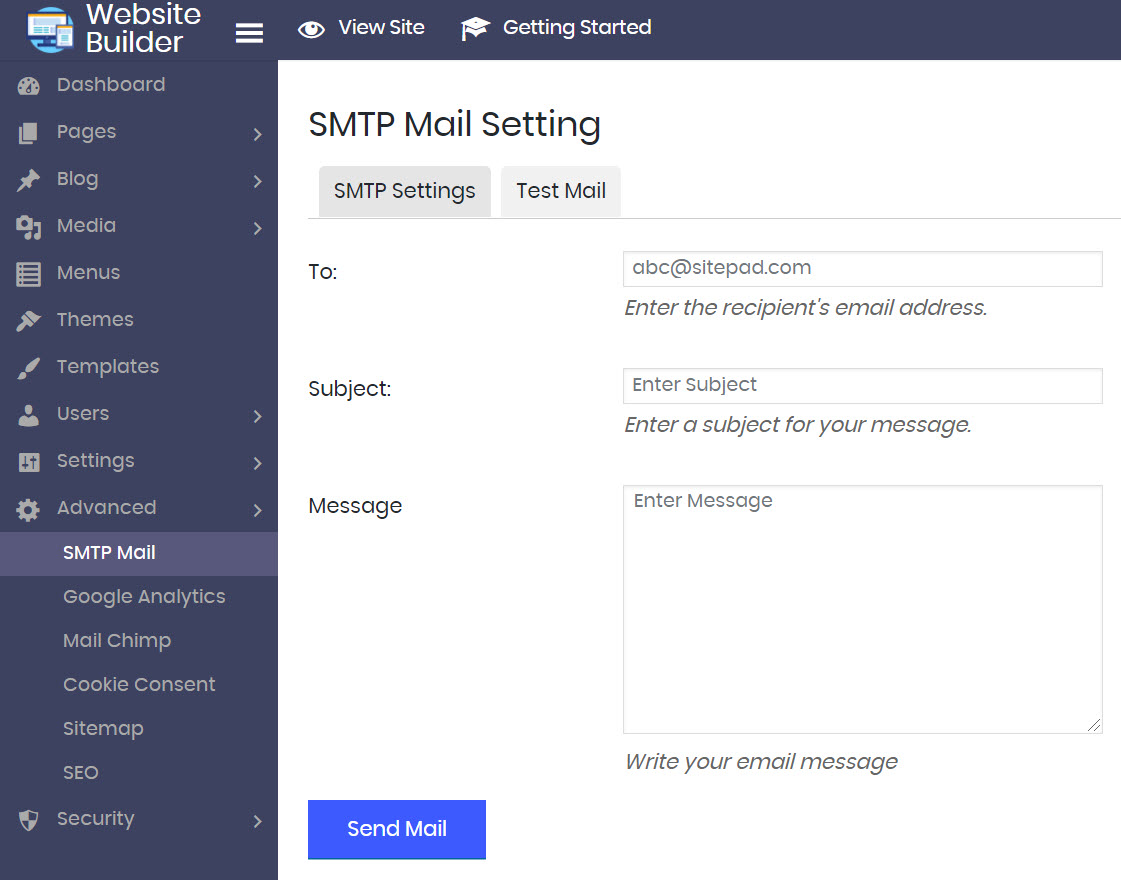
Enter the address to which you want to send the test email, then the Subject, and finally the Message, then click the Send Mail button.
Now, login to the email account you sent that test message to and see if you receive it.
If you receive the message, congrats, your SMTP Mail Configuration is properly setup. If you don’t receive it, or receive an error, go back to the SMTP Settings tab and take a look at the configuration settings.
If you still have questions or trouble, contact us from your Client Area by opening a ticket, or o pen a chat with our team 24×7.