Thanks to new GDPR Rules, for your visitors from the European Union, you need to let them know about the cookie types your site uses + if your site is using cookies. This can be a pain sometimes and involve custom code, but fortunately, the Website Builder includes a module for you to do this!
This Knowledgebase Article will cover how to enable the Cookie Consent in the Website Builder.
How to Enable the Cookie Consent in the Website Builder
Step 1: Login to your cPanel. There’s a lot of ways to do this, but the sure fire easiest way is to login to your Client Area, then open your cPanel.

Step 2: Scroll down to the Software section and open the Website Builder:

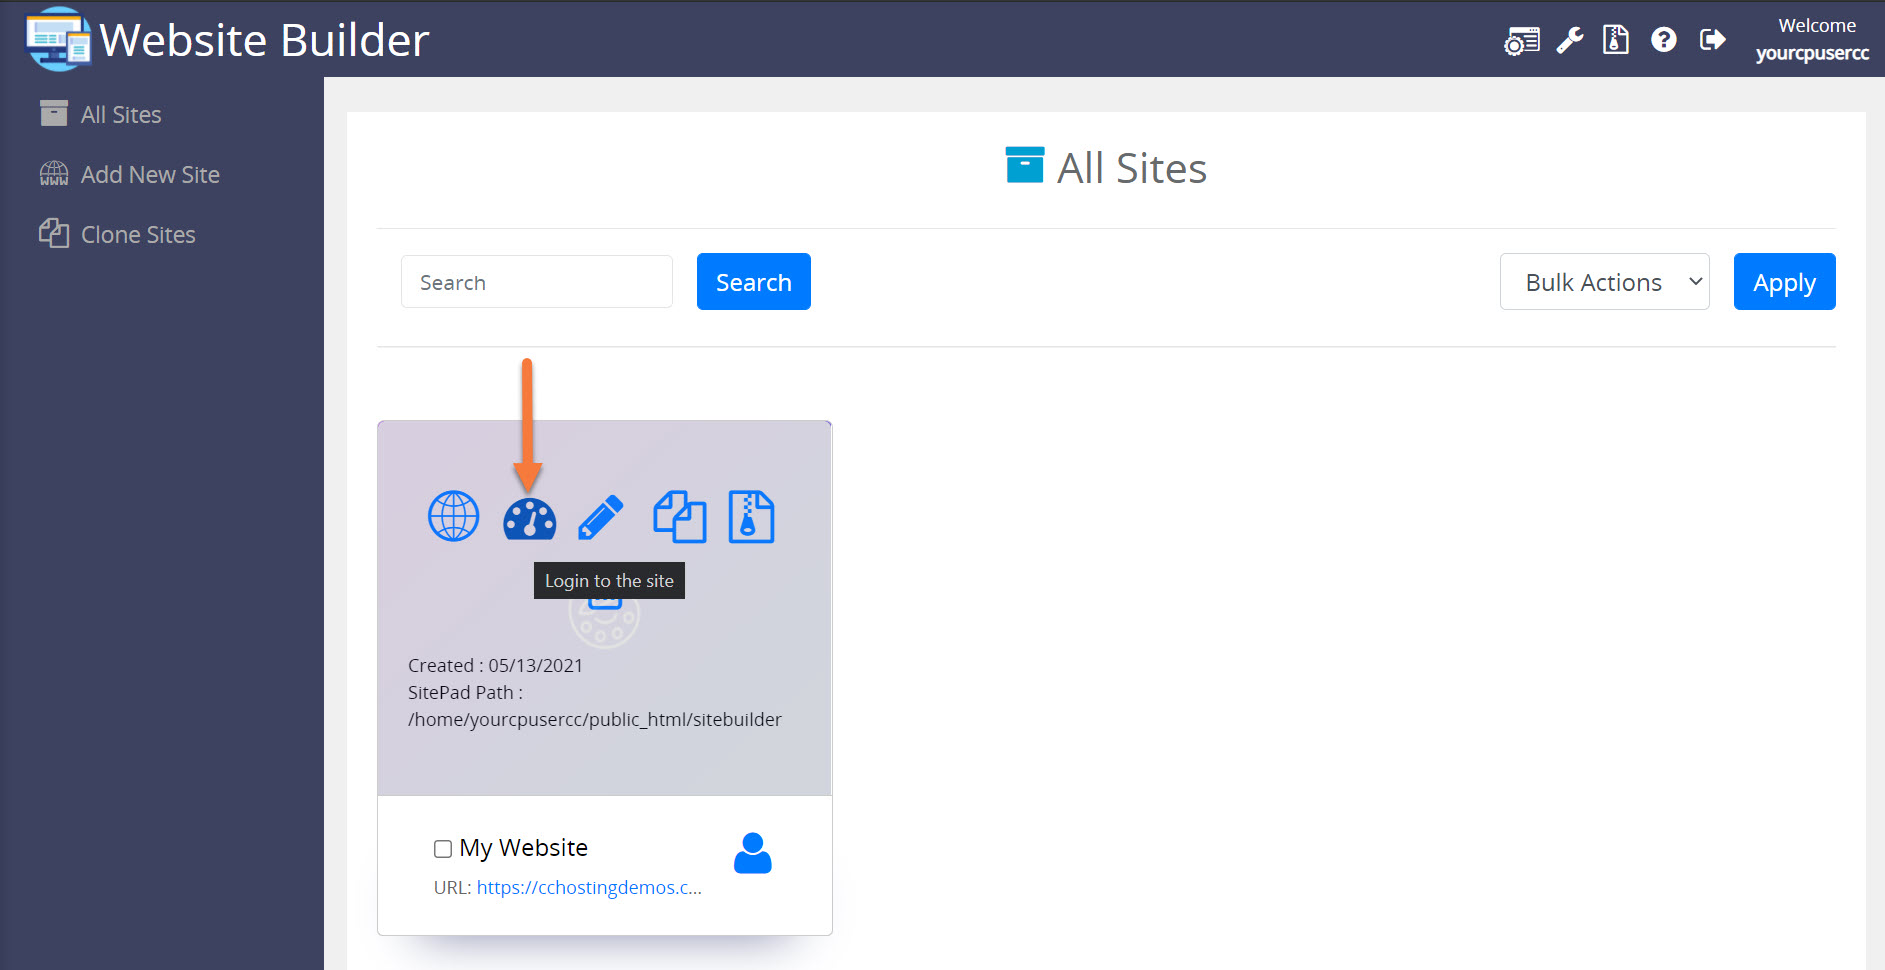
Step 3: Your list of sites will load. Locate the site edit, then hover over that site and click the speedometer icon to login to the site.
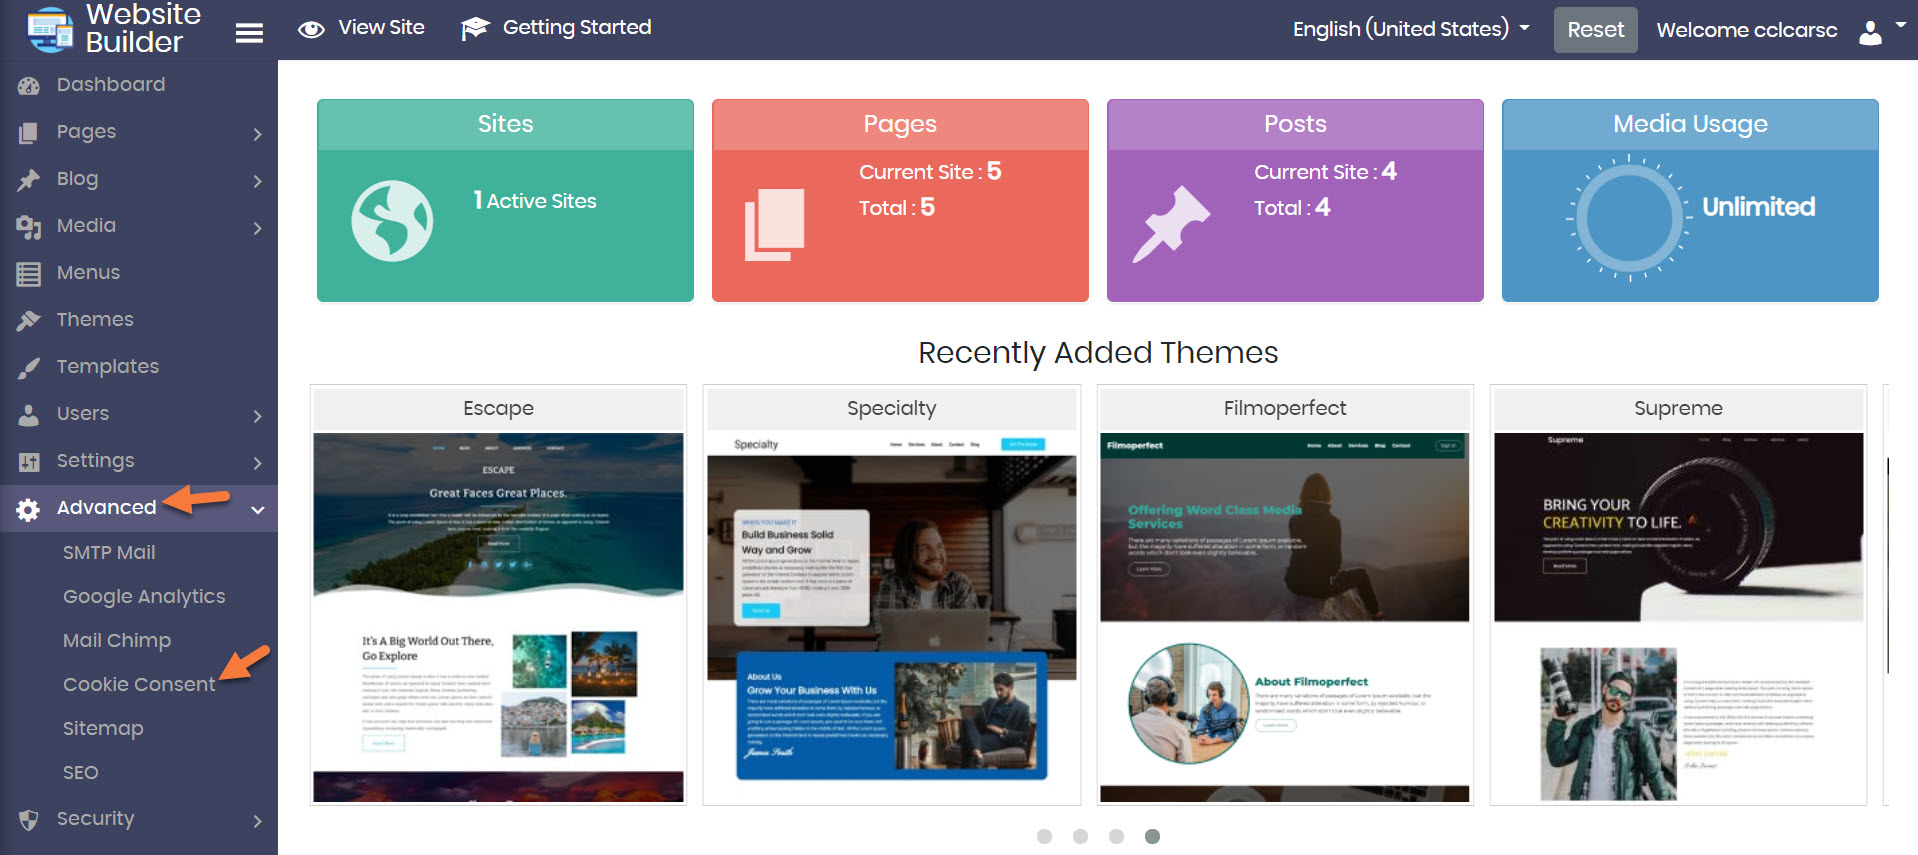
Step 4: When the Website Builder Admin opens, click Advanced from the tool menu on the left, then click Cookie Consent.
Step 5: The Cookie Consent settings page will load. There’s quite a few settings on this page, so let’s review them.
You can enable cookie consent with the above form or with the Website Editor. The above form is a simple wizard while the Website Editor will allow you to do a visual edit of your cookie consent. If you edit your cookie consent from here, it will overwrite the contents of the cookie consent settings of the Website Editor and vice versa.
For this example, we’ll be using the form.
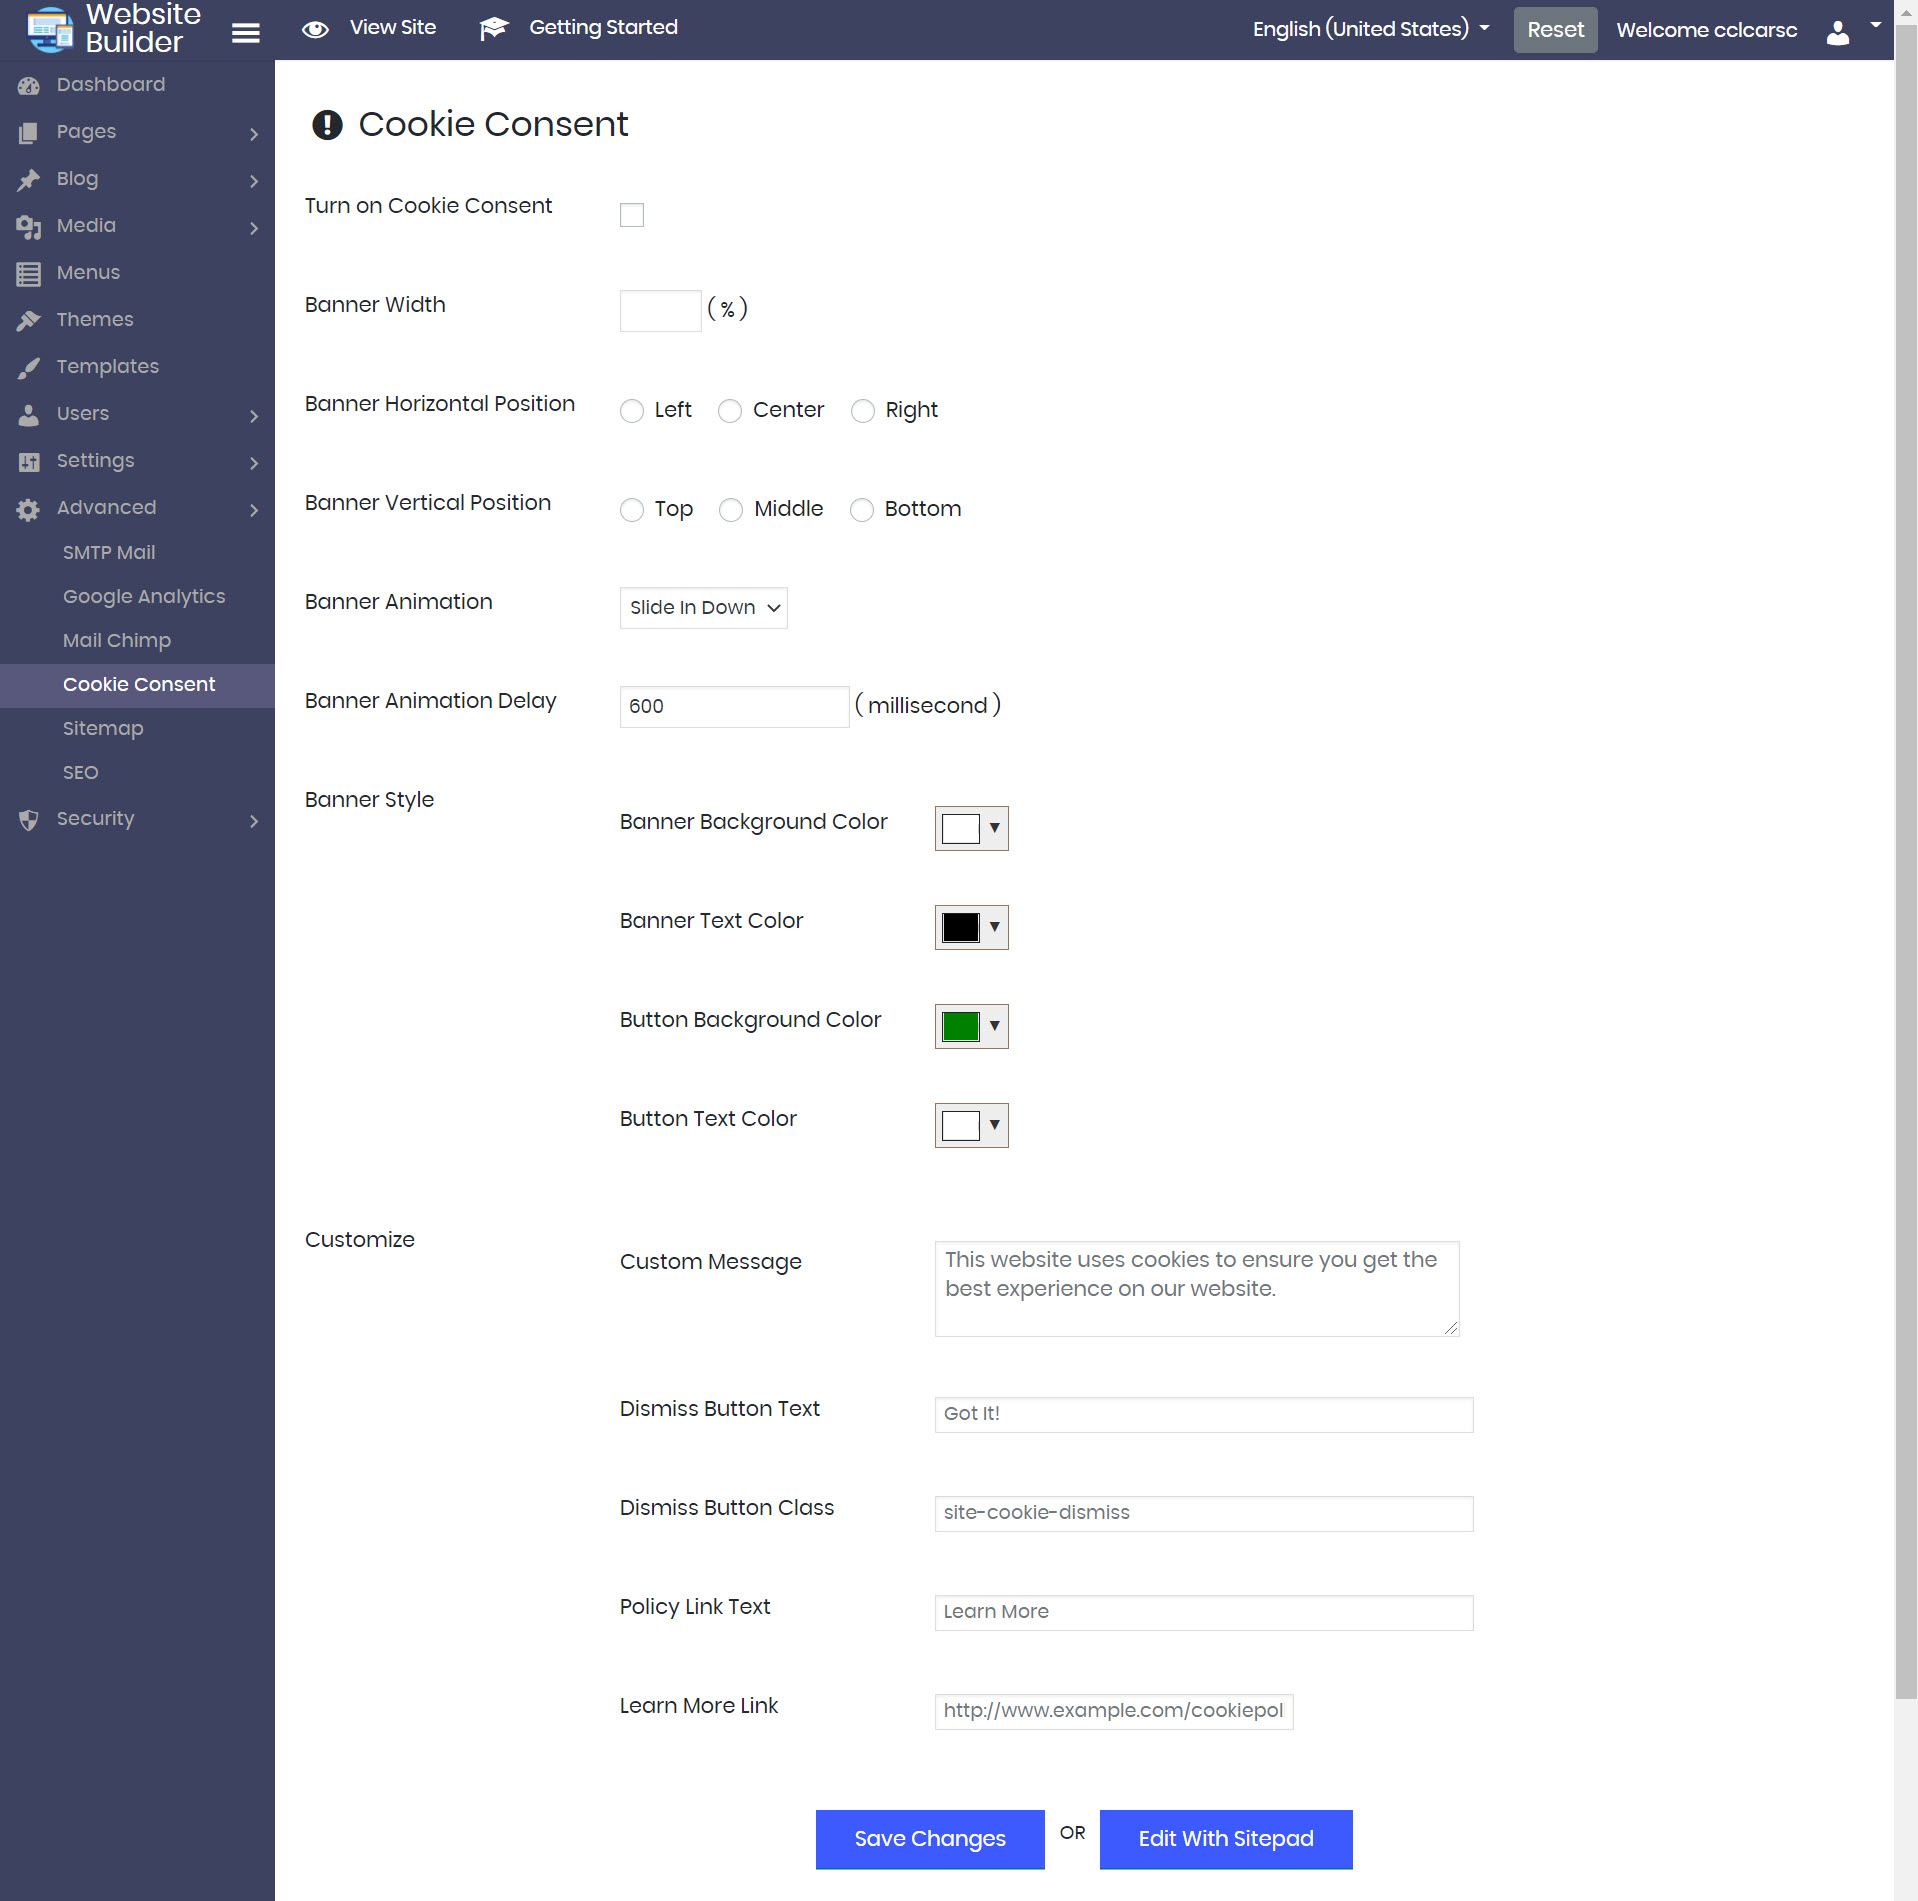
- At the very top is the option to enable or disable the Cookie Consent.
- Banner width will give you the option to adjust the width of the cookie consent banner.
- Banner Horizontal Position will give you control over where the banner appears on your site. You can choose from Left, Center, or Right.
- Banner Vertical Position gives you some additional control over where the banner appears in the top, middle, or bottom.
- Banner Animation lets you adjust the animation which is used when the banner appears. You can choose from:
- Slide in Down
- Slide in Up
- Slide in Left
- Slide in Right
- Banner Animation Delay lets you control how long the page has loaded before the cookie consent banner appears.
- Banner style lets you customize the way the banner looks. Typically the default colors will match the design of the theme you have chosen, but you can customize this to your liking.
- Customize – this section gives you some options to adjust the appearance of the banner, including:
- You can change the text that appears in the banner notice.
- You can change the text that appears as the dismiss button.
- If you are using custom CSS, you can change the class used for the dismiss button.
- You can also change the privacy policy link text, and the URL link to your privacy policy page.
Be sure to click the Save Changes button when you’ve finished!