
If your website runs on PHP and you need it to send email, order confirmations, password resets, contact-form notifications, or account alerts — PHPMailer is the most popular and dependable library for the job. Instead of relying on PHP’s built-in mail() function, which is unauthenticated and frequently lands in spam folders, PHPMailer lets you send mail through a proper authenticated SMTP connection.
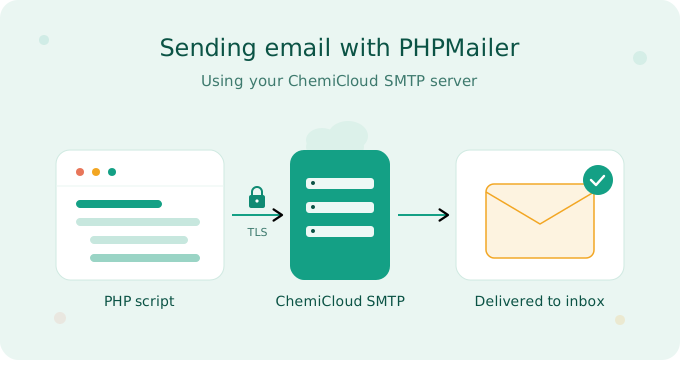
In this guide, we’ll walk through installing PHPMailer, pointing it at the SMTP server on your ChemiCloud hosting account, and sending everything from a simple plain-text message to HTML emails with attachments and embedded images. We’ll also cover how to troubleshoot the connection when something doesn’t work.
The examples below use PHPMailer 6.x, which works with PHP 7.x and newer. We recommend running a currently supported PHP version, which you can select from PHP Selector in cPanel.
Table of Contents
- What is PHPMailer?
- Before you begin: create an email account
- Your ChemiCloud SMTP settings
- Installing PHPMailer
- Sending a plain-text email
- Sending an HTML email
- Sending to multiple recipients (To, CC, BCC)
- Sending emails with attachments
- Embedding images in the email body
- Looping through a list of recipients
- Debugging connection problems
- A note on sending limits and deliverability
- Wrapping up
What is PHPMailer?
PHPMailer is a free, open-source PHP class that handles the heavy lifting of composing and transmitting email. It has been around for years, ships inside platforms like WordPress, and integrates cleanly with frameworks such as Laravel and Symfony.
A few of the reasons it’s the go-to choice:
- It connects to SMTP servers with full authentication, so your mail is far more likely to be accepted and delivered than mail sent through
mail(). - It supports SSL and TLS encryption, keeping your credentials and message contents private in transit.
- It builds proper HTML emails with a plain-text fallback, handles file attachments and inline images, and validates recipient addresses automatically.
- It guards against email header injection, a common attack vector on web forms.
For a website hosted with us, the most reliable approach is to send through one of your own email accounts using your ChemiCloud mail server. That’s exactly what we’ll set up.
Before you begin: create an email account
PHPMailer authenticates to the mail server using a real email account, so you’ll want a dedicated address for your application to send from — something like [email protected] or [email protected].
To create one:
- Log in to your cPanel.
- Under the Email section, open Email Accounts.
- Click Create, choose the domain, enter the username and a strong password, and save.
Keep the full email address and password handy — those are the SMTP credentials your script will use.
Your ChemiCloud SMTP settings
When you send through an email account hosted on your ChemiCloud account, use the following outgoing (SMTP) settings:
| Setting | Value |
|---|---|
| SMTP host | mail.yourdomain.com (replace with your actual domain) |
| SMTP port | 465 for SSL |
| Encryption | SSL (with port 465) |
| Authentication | Required |
| Username | Your full email address, e.g. [email protected] |
| Password | The password for that email account |
A few things worth knowing:
- The username must be the complete email address, not just the part before the
@. Sending with only the mailbox name is the single most common cause of authentication failures. - Our servers require authenticated, encrypted submission. Plain unencrypted connections will be rejected, so always set an encryption type.
- If you’re unsure of the exact hostname, you can confirm it in cPanel under Email Accounts → Connect Devices (the “Set Up Mail Client” page), which lists the manual settings for your account.
If mail.yourdomain.com doesn’t resolve yet — for example because your domain isn’t fully pointed to us — you can substitute your server’s hostname, which is also shown on the same Connect Devices page.
Installing PHPMailer
The recommended way to add PHPMailer to a project is with Composer, the PHP dependency manager. From the directory of your project, run:
composer require phpmailer/phpmailerThis downloads PHPMailer into a vendor/ folder and generates vendor/autoload.php, which you’ll include in your scripts.
You have SSH access to your hosting account so you can run this command directly on the server. Composer is available on our servers, so in many cases you can install dependencies without uploading anything by hand.
Prefer not to use Composer? You can download the library from its GitHub repository, upload the src folder to your account, and include the class files manually:
<?php
use PHPMailer\PHPMailer\PHPMailer;
use PHPMailer\PHPMailer\SMTP;
use PHPMailer\PHPMailer\Exception;

require 'path/to/PHPMailer/src/Exception.php';
require 'path/to/PHPMailer/src/PHPMailer.php';
require 'path/to/PHPMailer/src/SMTP.php';
Including the Exception class is worthwhile even though it’s optional — without it, errors surface as vague messages, whereas with it you get readable details that make problems much easier to diagnose.
Sending a plain-text email
Here’s a complete, minimal script that connects to your ChemiCloud SMTP server and sends a plain-text message. Replace the placeholder credentials and addresses with your own.
<?php
use PHPMailer\PHPMailer\PHPMailer;
use PHPMailer\PHPMailer\Exception;

require 'vendor/autoload.php';

$mail = new PHPMailer(true); // "true" turns on exceptions for easier debugging

try {
    // --- SMTP configuration ---
    $mail->isSMTP();
    $mail->Host       = 'mail.yourdomain.com'; // your ChemiCloud mail server
    $mail->SMTPAuth   = true;
    $mail->Username   = '[email protected]'; // full email address
    $mail->Password   = 'your-email-password';
    $mail->SMTPSecure = PHPMailer::ENCRYPTION_SMTPS; // SSL
    $mail->Port       = 465;

    // --- Addresses ---
    $mail->setFrom('[email protected]', 'Your Website');
    $mail->addAddress('[email protected]', 'Customer Name');

    // --- Content ---
    $mail->isHTML(false); // plain text
    $mail->Subject = 'Thanks for getting in touch';
    $mail->Body    = "Hi there,\n\nWe received your message and will reply soon.\n\nBest regards,\nYour Website Team";

    $mail->send();
    echo 'Message sent successfully.';
} catch (Exception $e) {
    echo "Message could not be sent. Error: {$mail->ErrorInfo}";
}
When the script runs without errors, you’ll see “Message sent successfully” and the email will arrive in the recipient’s inbox within a few seconds.
Sending an HTML email
For richer messages, switch the format to HTML with isHTML(true) and provide both an HTML body and a plain-text alternative. The alternative is shown by mail clients that can’t (or won’t) render HTML, and including it also helps with deliverability.
<?php
use PHPMailer\PHPMailer\PHPMailer;
use PHPMailer\PHPMailer\Exception;

require 'vendor/autoload.php';

$mail = new PHPMailer(true);

try {
    $mail->isSMTP();
    $mail->Host       = 'mail.yourdomain.com';
    $mail->SMTPAuth   = true;
    $mail->Username   = '[email protected]';
    $mail->Password   = 'your-email-password';
    $mail->SMTPSecure = PHPMailer::ENCRYPTION_SMTPS;
    $mail->Port       = 465;

    $mail->setFrom('[email protected]', 'Your Website');
    $mail->addAddress('[email protected]', 'Customer Name');
    $mail->addReplyTo('[email protected]', 'Support Team');

    $mail->isHTML(true);
    $mail->Subject = 'Welcome aboard!';
    $mail->Body    = '<h1>Welcome!</h1><p>Your account is ready. We\'re glad to have you.</p>';
    $mail->AltBody = 'Welcome! Your account is ready. We\'re glad to have you.';

    $mail->send();
    echo 'HTML message sent.';
} catch (Exception $e) {
    echo "Message could not be sent. Error: {$mail->ErrorInfo}";
}
Sending to multiple recipients (To, CC, and BCC)
PHPMailer lets you add as many recipients as you need across the To, CC, and BCC fields. Simply call the relevant method once per address:
$mail->addAddress('[email protected]', 'First Recipient');
$mail->addAddress('[email protected]', 'Second Recipient');

$mail->addCC('[email protected]', 'A Manager');

$mail->addBCC('[email protected]');
$mail->addBCC('[email protected]');
Everyone in the To and CC fields can see each other’s addresses; anyone in BCC stays hidden from the rest. If you’re emailing a list of people who don’t know one another, put them in BCC — or, better, send individual messages (see the loop example further down).
Sending emails with attachments
To attach a file that already exists on your server, point PHPMailer at its path. The optional second argument sets the filename the recipient sees:
$mail->addAttachment('/home/username/invoices/invoice-1042.pdf', 'invoice.pdf');You can attach more than one file by calling the method again:
$mail->addAttachment('/home/username/reports/summary.xlsx', 'summary.xlsx');If the data you want to attach isn’t a file on disk — say it’s stored in a database or generated on the fly — use a string attachment instead. This avoids having to write a temporary file:
// Attach data pulled from a database (e.g. a stored PDF)
$mail->addStringAttachment($pdfData, 'document.pdf');
You can also attach the contents of a remote URL:
$mail->addStringAttachment(file_get_contents('https://example.com/report.pdf'), 'report.pdf');Embedding images in the email body
Sometimes you want an image to appear inside the message rather than as a downloadable attachment — a logo in a header, for instance. PHPMailer handles this with embedded (inline) images referenced by a content ID, or “CID.”
$mail->addEmbeddedImage('/home/username/assets/logo.png', 'logo_cid');
$mail->isHTML(true);
$mail->Body = '<img src="cid:logo_cid" alt="Logo"><p>Welcome to our store.</p>';
Here’s how that fits into a full script:
<?php
use PHPMailer\PHPMailer\PHPMailer;
use PHPMailer\PHPMailer\Exception;

require 'vendor/autoload.php';

$mail = new PHPMailer(true);

try {
    $mail->isSMTP();
    $mail->Host       = 'mail.yourdomain.com';
    $mail->SMTPAuth   = true;
    $mail->Username   = '[email protected]';
    $mail->Password   = 'your-email-password';
    $mail->SMTPSecure = PHPMailer::ENCRYPTION_SMTPS;
    $mail->Port       = 465;

    $mail->setFrom('[email protected]', 'Your Website');
    $mail->addAddress('[email protected]', 'Customer Name');

    $mail->isHTML(true);
    $mail->Subject = 'Our latest newsletter';
    $mail->addEmbeddedImage('/home/username/assets/logo.png', 'logo_cid');
    $mail->Body    = '<img src="cid:logo_cid" alt="Logo"><h2>This month\'s updates</h2><p>Here is what is new.</p>';
    $mail->AltBody = 'This month\'s updates - here is what is new.';

    $mail->send();
    echo 'Newsletter sent.';
} catch (Exception $e) {
    echo "Message could not be sent. Error: {$mail->ErrorInfo}";
}
Looping through a list of recipients
When you need to send a personalized message to several people, reuse a single PHPMailer instance and clear the recipient list between sends. Turning on SMTPKeepAlive keeps the connection open so you’re not reconnecting for every message, which is noticeably faster.
<?php
use PHPMailer\PHPMailer\PHPMailer;
use PHPMailer\PHPMailer\Exception;

require 'vendor/autoload.php';

$mail = new PHPMailer(true);

$mail->isSMTP();
$mail->Host         = 'mail.yourdomain.com';
$mail->SMTPAuth     = true;
$mail->Username     = '[email protected]';
$mail->Password     = 'your-email-password';
$mail->SMTPSecure   = PHPMailer::ENCRYPTION_SMTPS;
$mail->Port         = 465;
$mail->SMTPKeepAlive = true; // keep the connection open between messages

$mail->setFrom('[email protected]', 'Your Website');
$mail->isHTML(true);

$recipients = [
    ['email' => '[email protected]', 'name' => 'Alice'],
    ['email' => '[email protected]',   'name' => 'Bob'],
];

foreach ($recipients as $person) {
    try {
        $mail->addAddress($person['email'], $person['name']);
        $mail->Subject = 'A quick update, ' . $person['name'];
        $mail->Body    = "<p>Hi {$person['name']}, here is your update.</p>";
        $mail->AltBody = "Hi {$person['name']}, here is your update.";

        $mail->send();
        echo "Sent to {$person['email']}\n";
    } catch (Exception $e) {
        echo "Failed for {$person['email']}: {$mail->ErrorInfo}\n";
    }

    $mail->clearAddresses(); // reset for the next recipient
}

$mail->smtpClose();
If you anticipate sending a high volume of mail, do the actual sending in the background through a queue rather than during a page load, and pace your sends so you stay within your account’s hourly limits (more on that below).
Debugging connection problems
When mail won’t send, PHPMailer’s built-in SMTP debugging is the fastest way to see what’s happening. Add this line to your configuration:
$mail->SMTPDebug = 2;The debug levels are:
- 1 – shows messages your script sends to the server.
- 2 – adds the server’s replies (this is usually the most useful setting).
- 3 – adds connection-level details, helpful for diagnosing TLS/STARTTLS issues.
- 4 – very low-level, verbose output.
Two of the most common errors and what they mean:
“SMTP connect() failed” / connection timed out. Usually the host or port is wrong, or the connection is being blocked. Double-check that the host is your real mail hostname and that the port matches your encryption type (465 with SSL, 587 with STARTTLS). Note that some office networks and public Wi-Fi hotspots block outbound SMTP ports — if you’re testing from such a network, try from the server itself instead.
“535 Authentication failed” / “Could not authenticate.” The username or password is wrong. Confirm that the username is the full email address and that the password matches the one set in cPanel. If you’re not certain, reset the mailbox password under Email Accounts and try again.
If you’re still stuck after checking these, our support team is available 24/7 via live chat and can help confirm the correct settings for your account.
A note on sending limits and deliverability
To protect every customer on the server and keep our IPs in good standing, our mail servers enforce hourly sending limits. For routine transactional email — confirmations, resets, contact forms — these limits are generous and you won’t notice them. If your application sends large newsletters or bulk campaigns, however, a dedicated bulk/transactional email service is the better tool, and you can route PHPMailer through it by simply swapping in that provider’s SMTP host, port, and credentials.
A few quick wins for staying out of spam folders:
- Publish SPF, DKIM, and DMARC records for your domain. DKIM and SPF are configured for you on our platform; you can review them in cPanel under Email Deliverability.
- Send from a real address on your own domain, not from a free webmail address like Gmail or Yahoo.
- Always include a plain-text alternative alongside your HTML.
Wrapping up
PHPMailer plus your ChemiCloud SMTP server is a solid, secure foundation for any PHP application that needs to send email. Once you’ve created a sending account, plugged in your mail host and credentials, and confirmed a test message arrives, you can extend the same setup to HTML emails, attachments, inline images, and personalized batches.
If you run into trouble, enable SMTP debugging to see exactly where the conversation with the server breaks down — and remember that our support team is one chat away whenever you need a hand.