In this tutorial, we will show you how to change the name servers for your domain registered with ChemiCloud.
The basics of how Nameservers works
Think of name servers as specialized directory assistance operators in the big city of the internet. When you’re trying to find a website, these operators direct your computer to the right part of the city.
Here’s how it works with name servers, using a simple analogy:
- You Ask for Directions: You type a website name like “google.com” into your browser. It’s like calling directory assistance to ask for the address of a specific place in the city.
- Your Request Goes to a Name Server: Your request first reaches a name server assigned by your internet service. Think of this name server as a specialized operator who knows where all the website “addresses” are stored.
- Finding the Specific Operator: This name server might not have the specific address you need, so it refers your request to another name server that specifically manages addresses for the “.com” area of the internet. It’s like being transferred to an operator who specializes in a specific part of town.
- Getting the Exact Address: The “.com” name server looks up its records and finds the IP address for “google.com”. This name server is like a local expert who knows every street in the “.com” area.
- Directing You There: The name server sends back the IP address to your computer. Now, your computer knows how to reach “google.com”, much like how you’d start your journey after getting an address from directory assistance.
This system ensures that your internet journey to find a website is smooth and quick, just like how city directory assistance helps you navigate to your destination in a big city.
How to Change the Nameservers for Your Domain with ChemiCloud
Step 1: Go to chemicloud.com/login and log in to your ChemiCloud customer account.
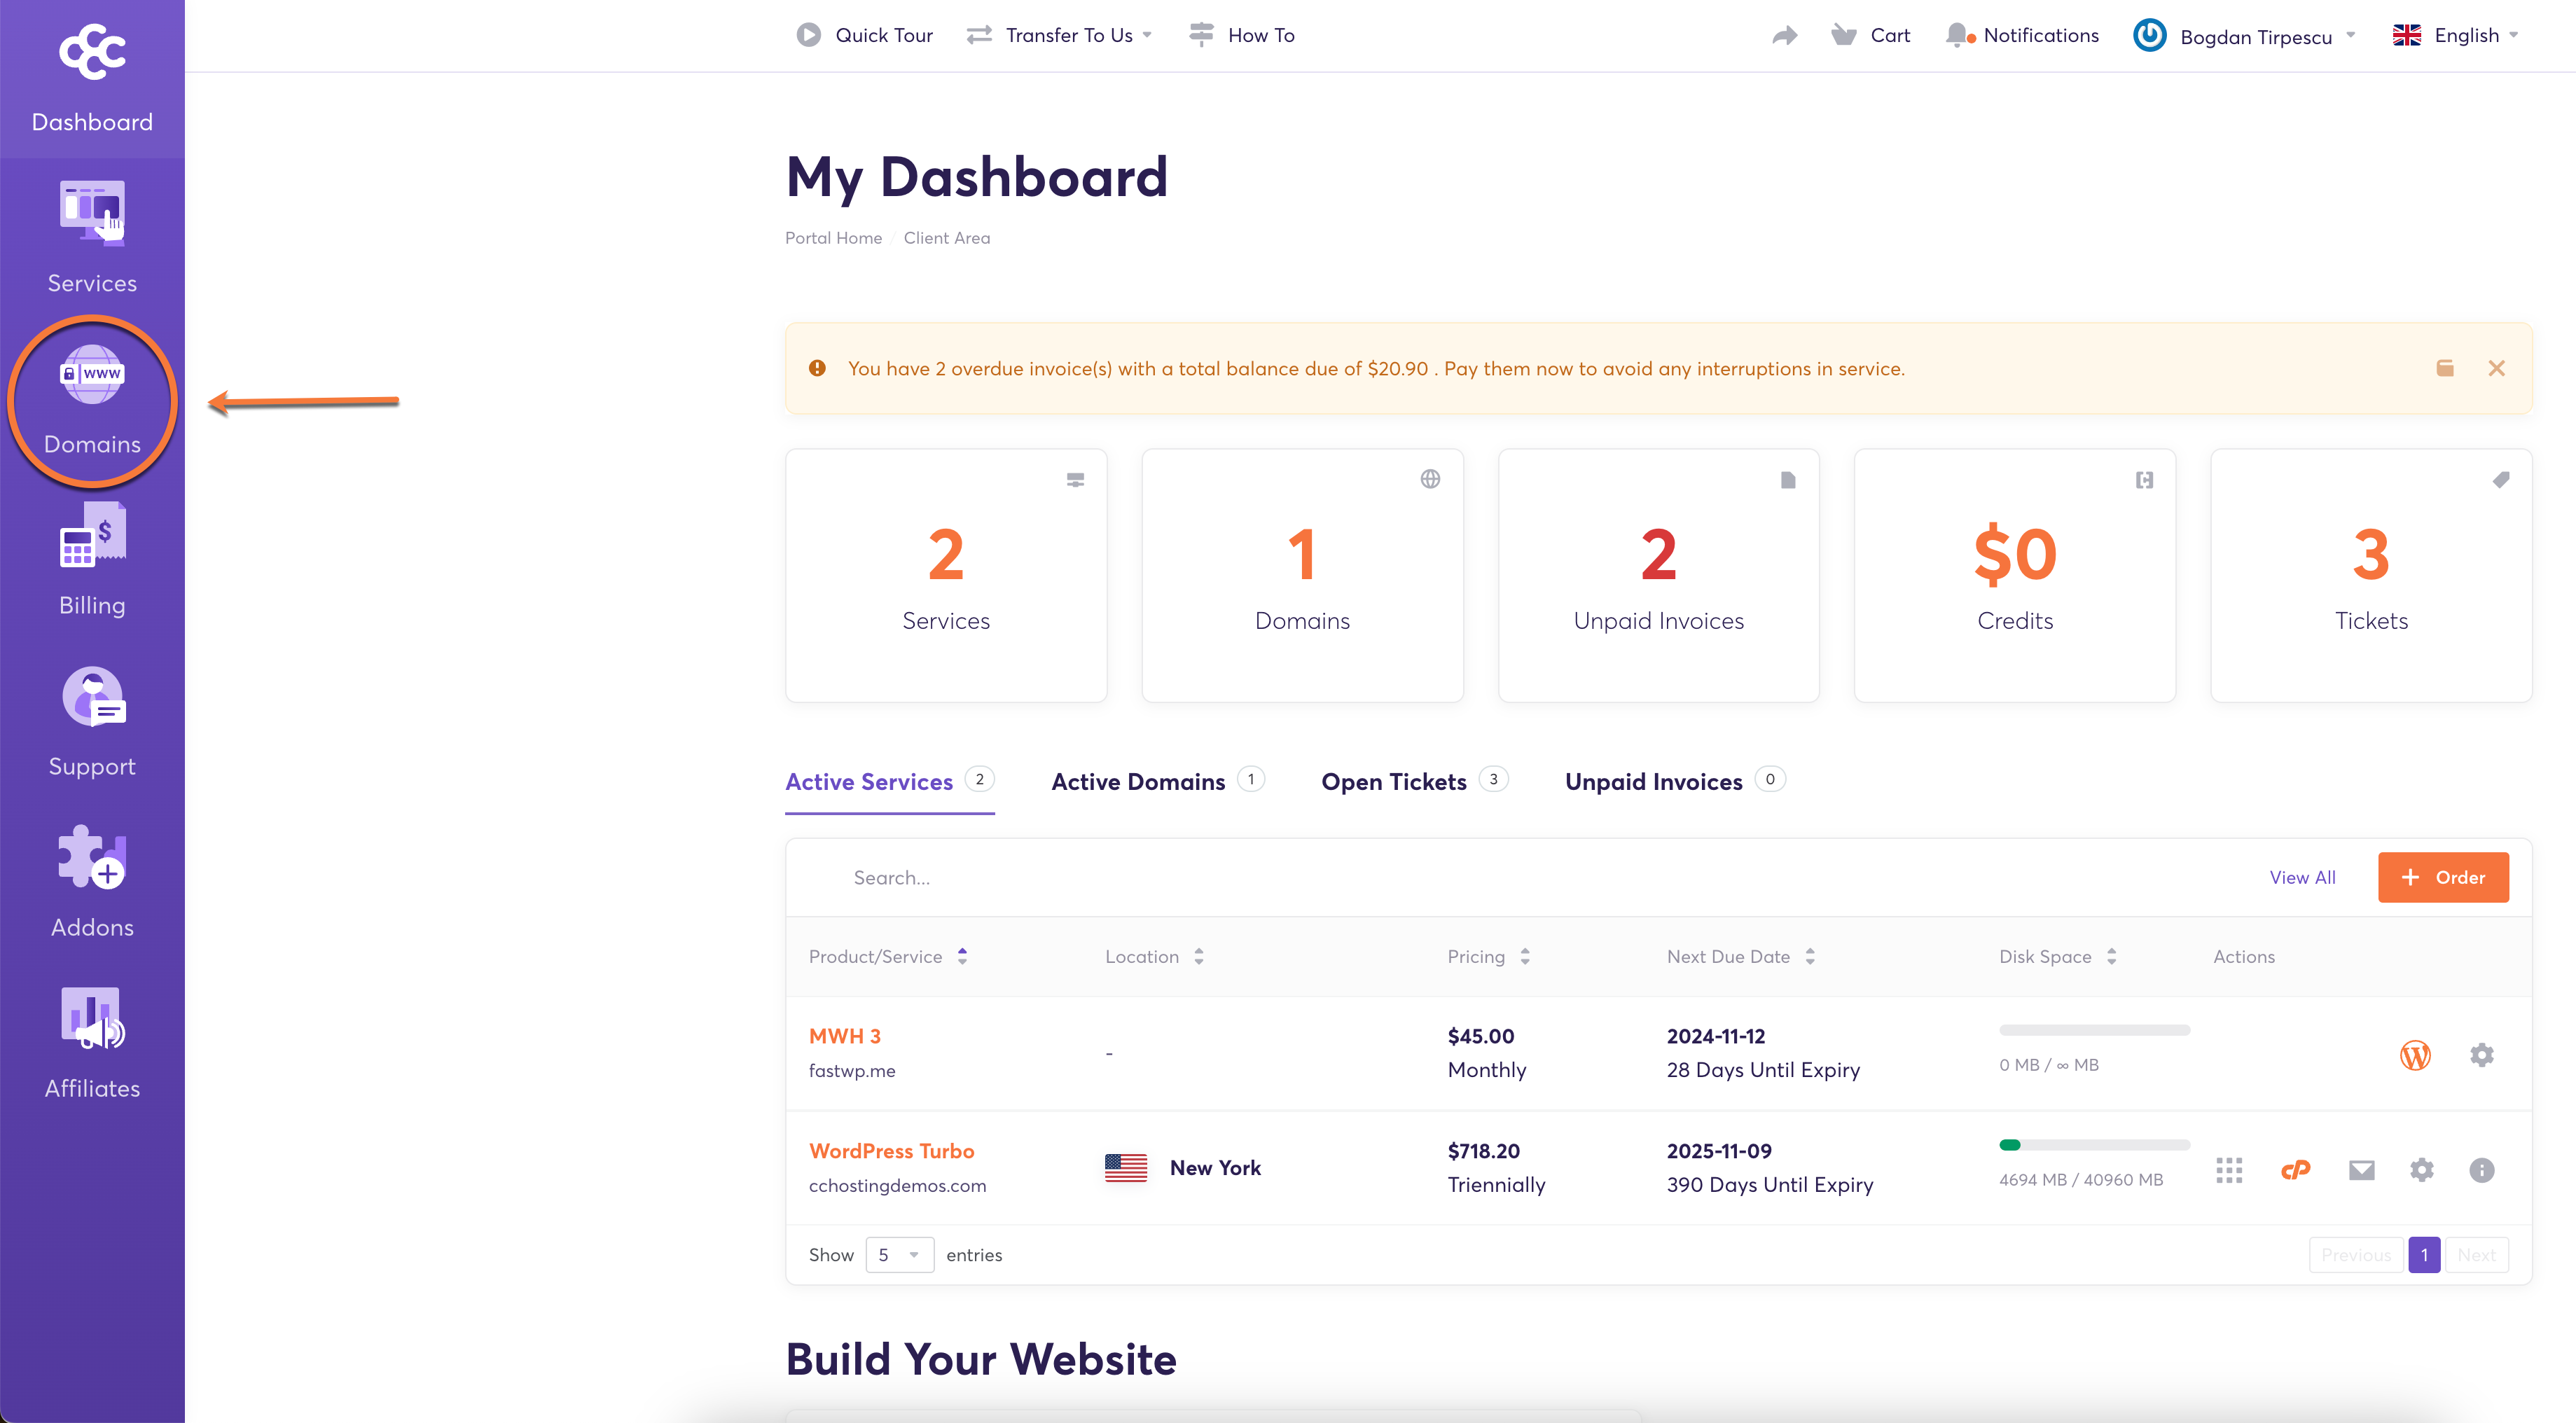
Step 2: In your Client Area Dashboard, click the “Domains” icon located on the left-hand side menu.
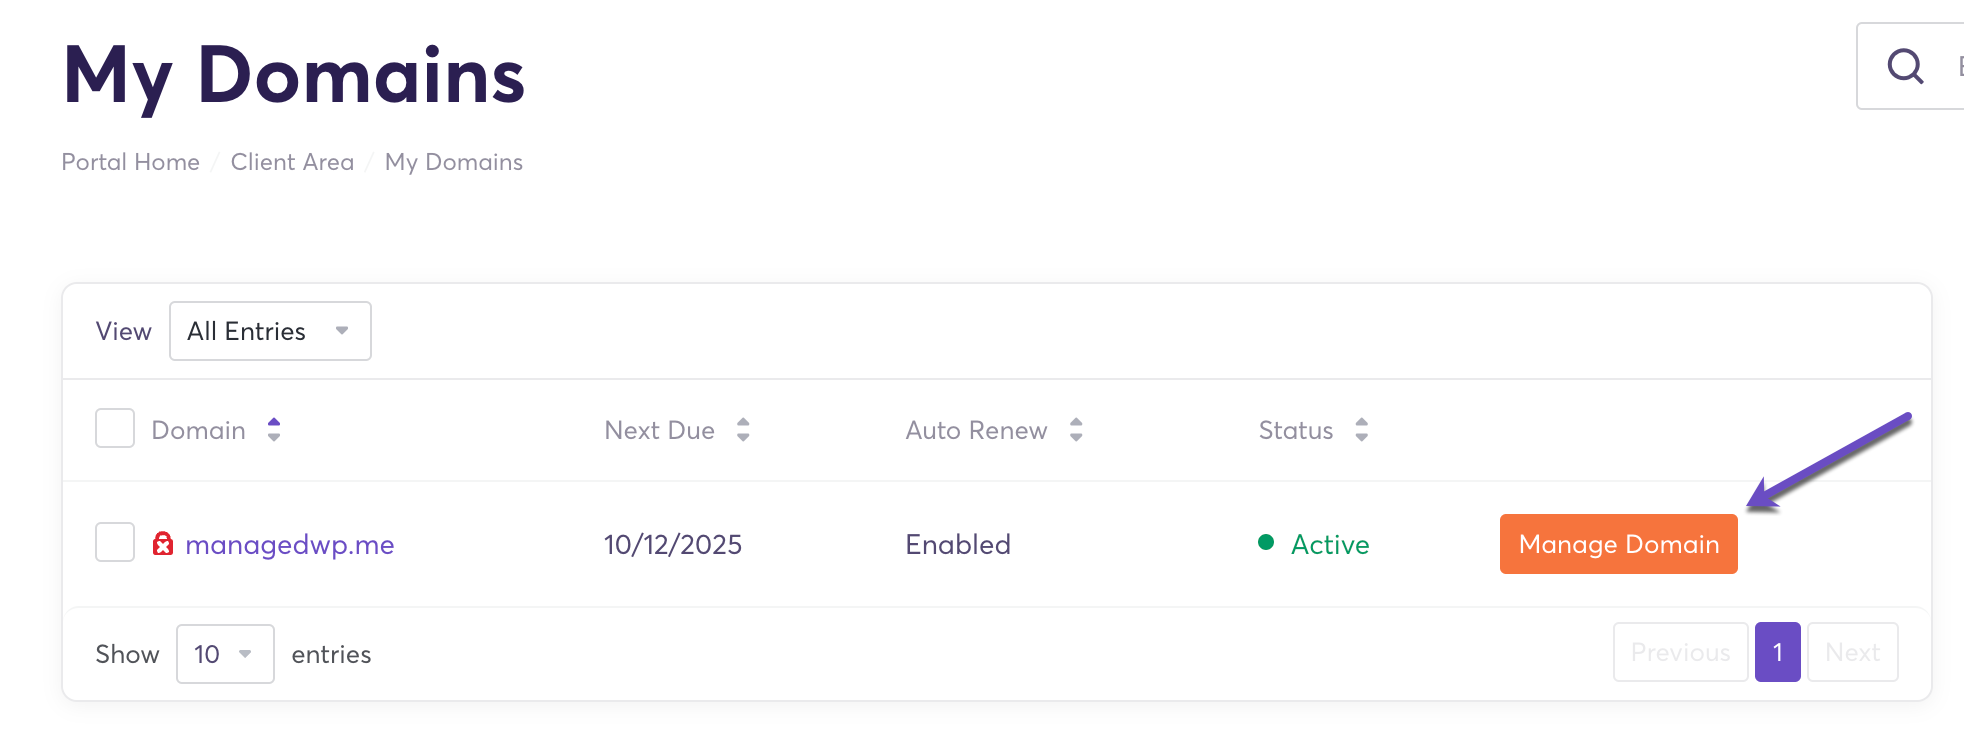
Step 3: From the list, locate the domain you want to manage and click the “Manage Domain” button.
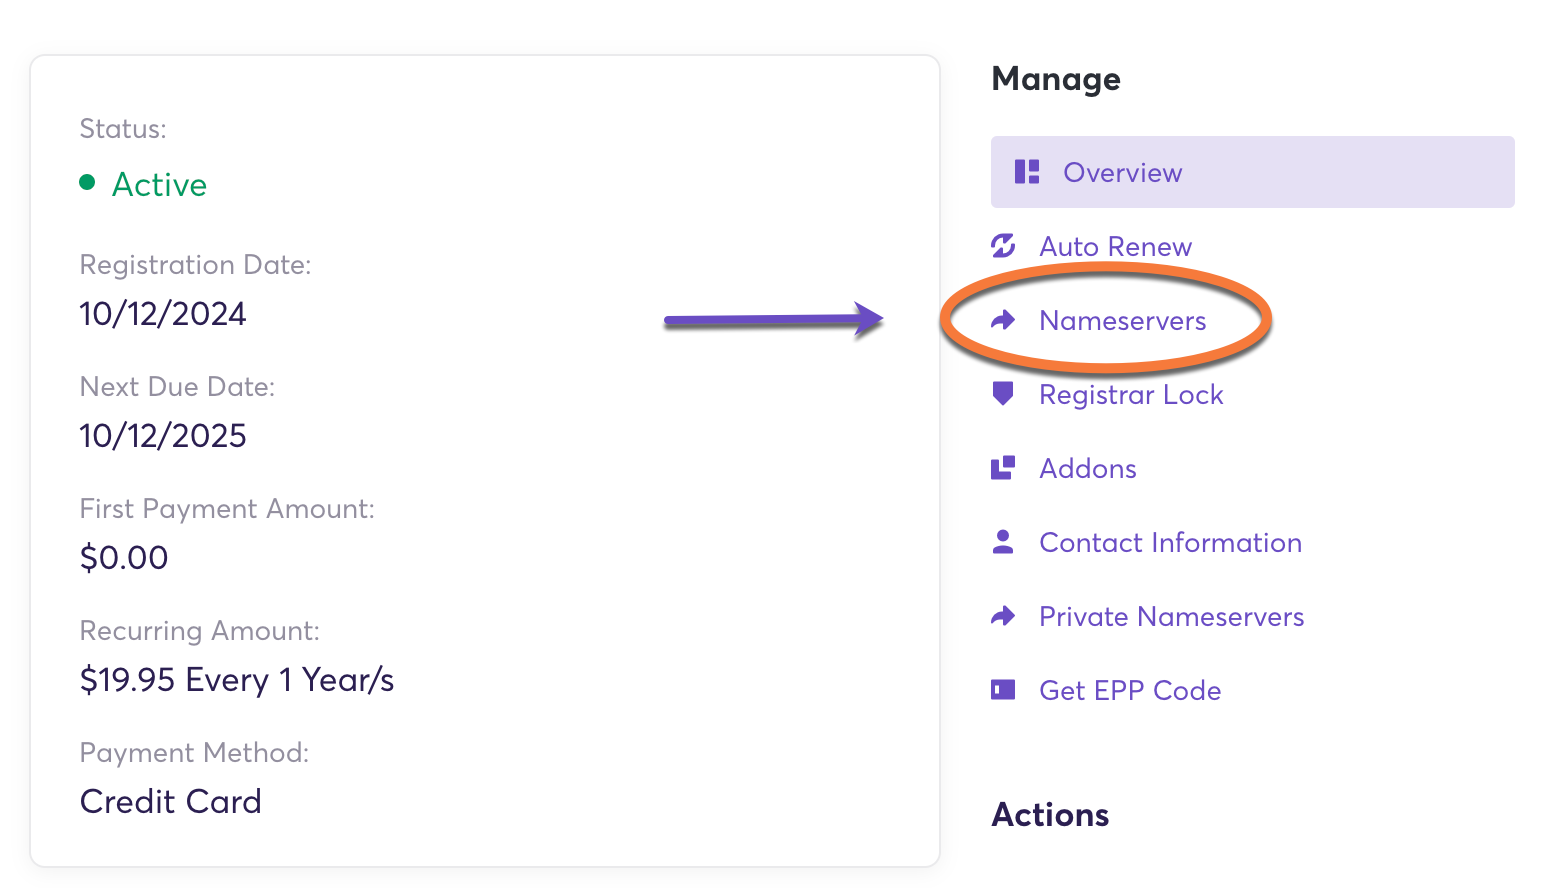
Step 4: In the “Manage” action menu on the right-hand side, click on the Nameservers option.
Step 5: Select the “Use custom nameservers” option and enter the nameservers you wish to use for your domain.
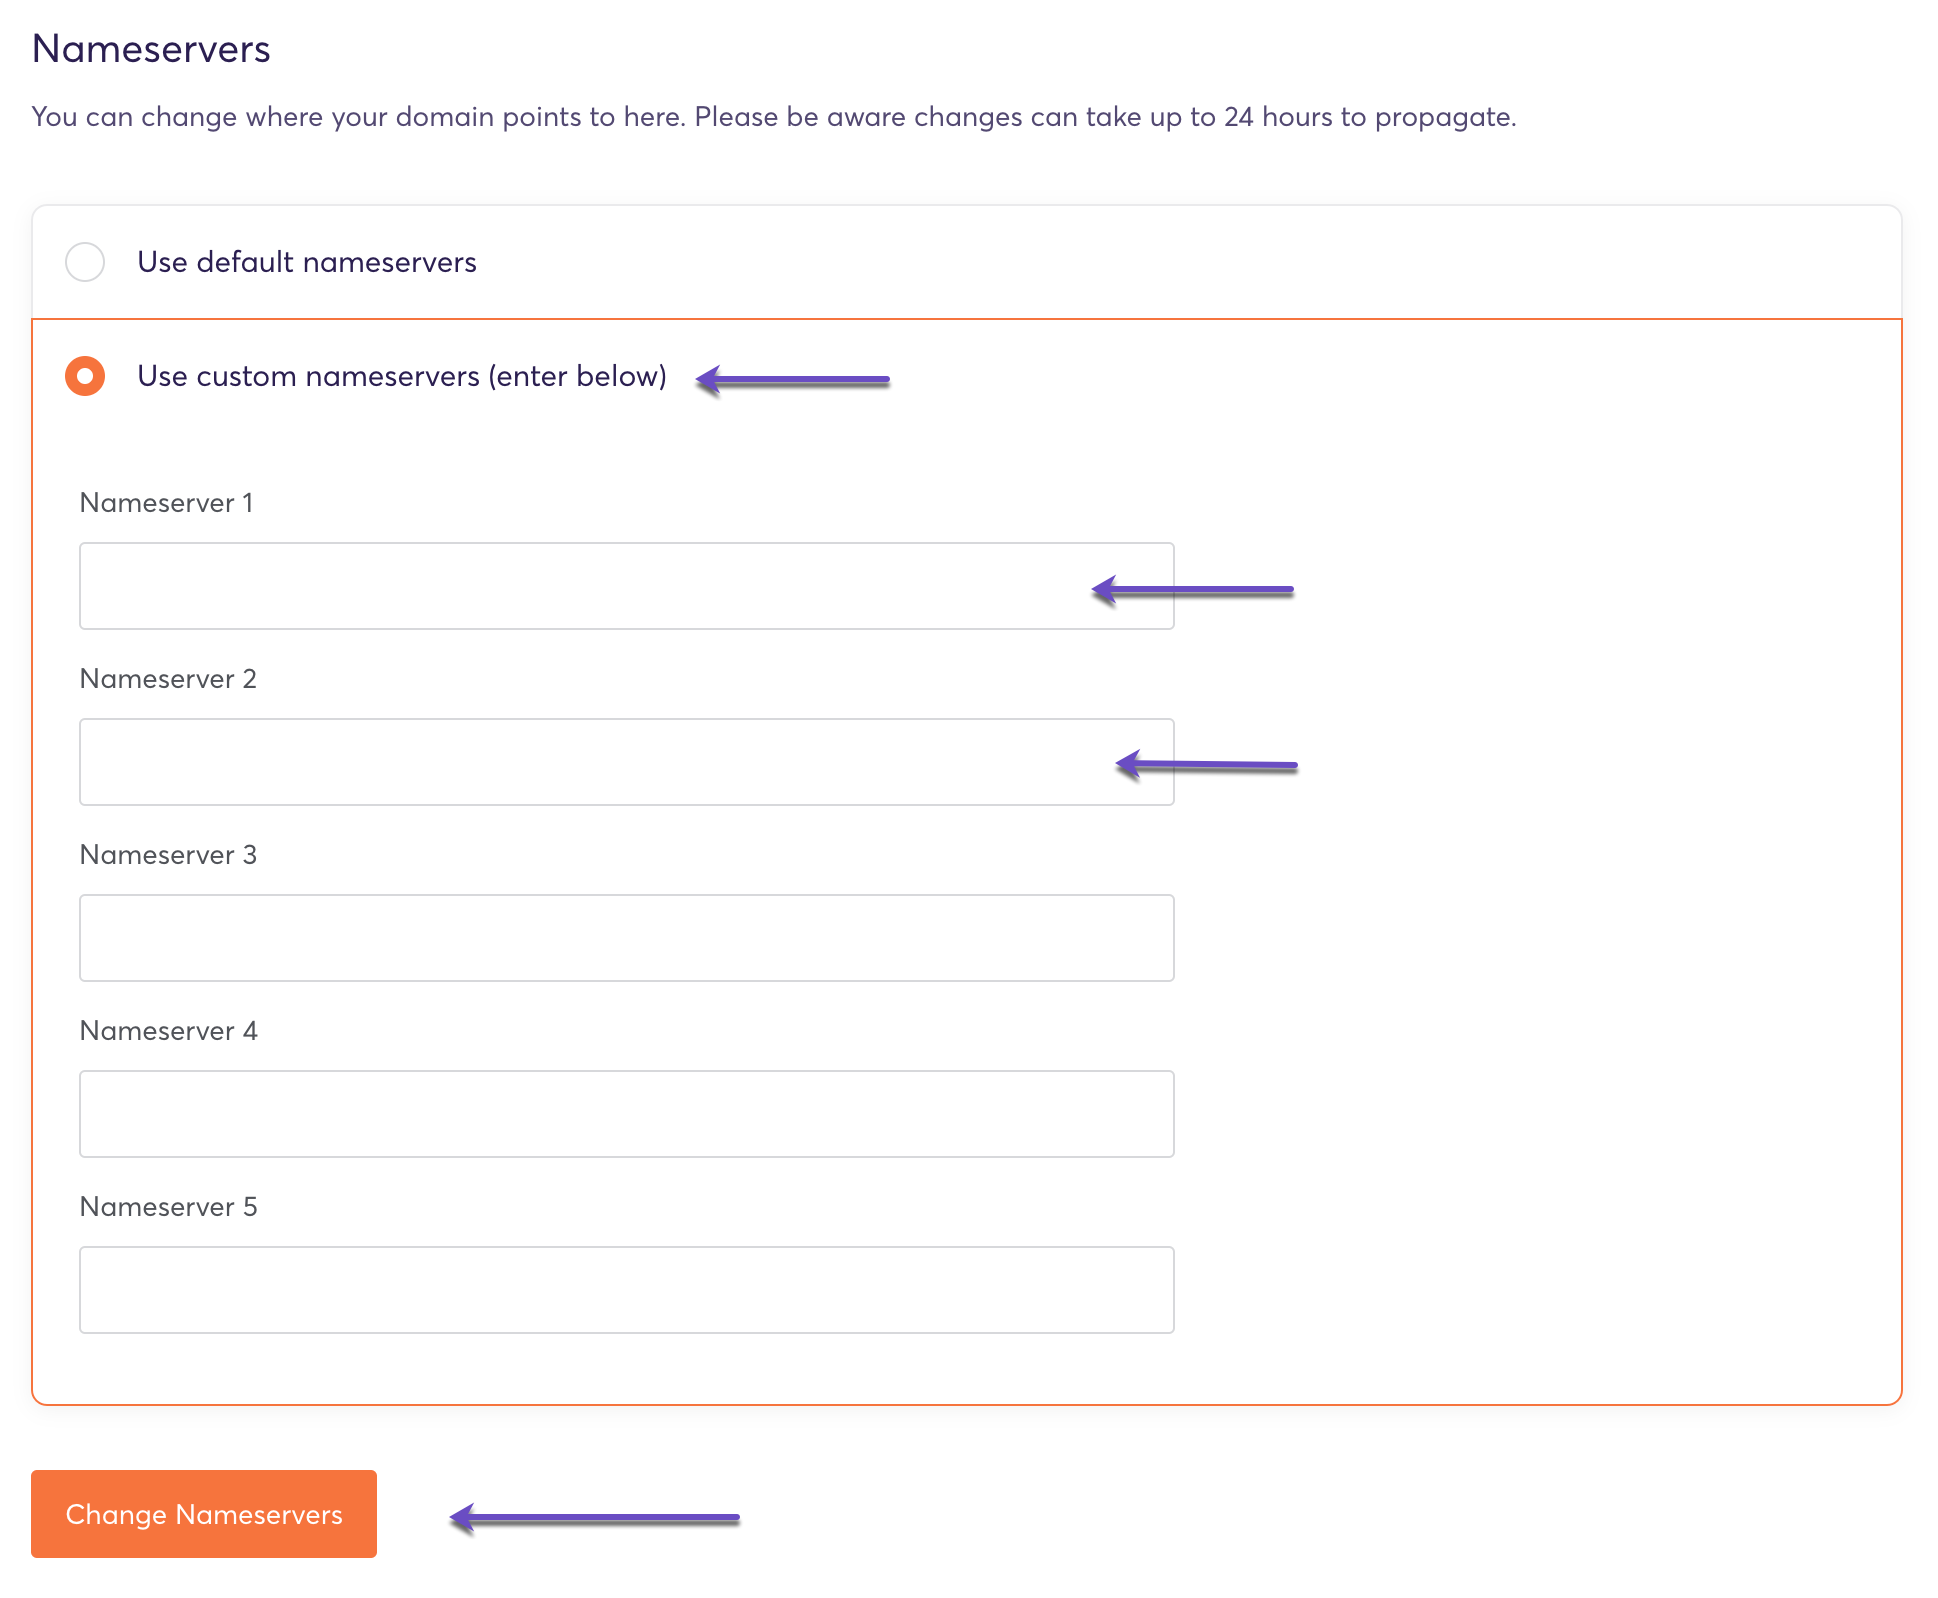
Step 6: Click the “Change Nameservers” button to apply the new nameservers.
Please note that it can take up to 24 hours for the nameserver changes to fully propagate worldwide. While it often takes just a few hours, it’s good to be aware of this timing. You can use a DNS propagation checker to monitor the global propagation status.
That’s all! You now know how to change the nameservers for your domain registered with ChemiCloud.