A subdomain is a subsection of your website that can exist as a new website without a new domain name. Use them to create memorable URLs for different content areas of your site.
For example, you can create a subdomain for your blog that is accessible through blog.domain.com.
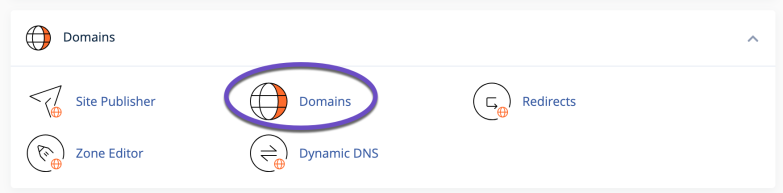
How to create a Subdomain in cPanel
1) Locate the ‘DOMAINS’ section and click the Domains icon
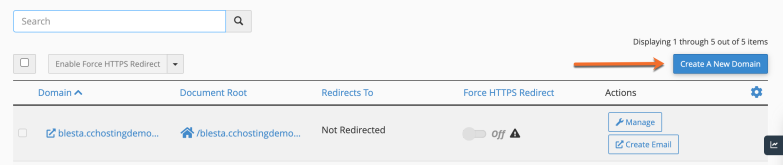
2) Click on the Create A New Domain button
3) Enter the following information:
Domain: enter the subdomain that you want to create
Document root: leave the checkmark empty for the Share document root option.
Home icon: choose a subdirectory for it in your account’s home directory (above public_html). This subdirectory will store your subdomain’s files.
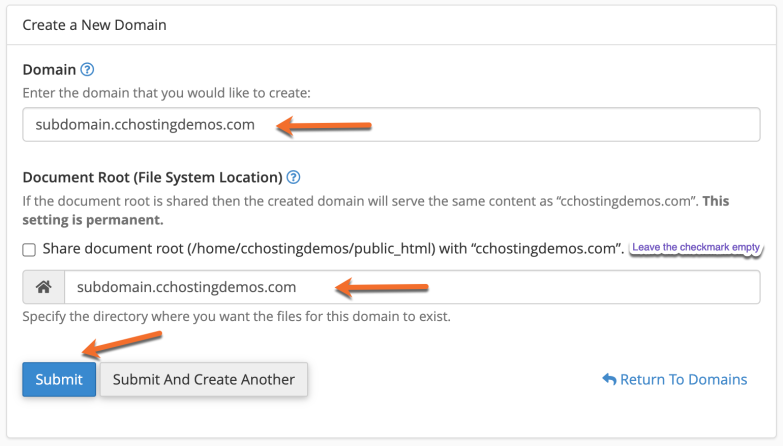
5) The last step is to click Submit button. The subdomain will be created.
From cPanel > Domains area, you can see the list of subdomains under your main account, and you can manage or delete these subdomains anytime needed.
That’s it! You now know how to create subdomains in cPanel.
this service is quite bad in general, you need to study cloudways who does this but easier and better for less the money
It didn’t identify or fix the problem.
Very clear and concise. Thanks