In the following article, we will share some valuable information about how to keep your website secure for your users and potential clients, through the usage of SSL certificates. You will learn how to generate a CSR (Certificate Signing Request) in cPanel, how to use it to obtain an SSL certificate and how to add it to our domain.
What is a CSR and why would I need to generate one?
CSR stands for Certificate Signing Request. This is actually a preliminary step that any website owner must complete in order to obtain an SSL Certificate for their domain. The CSR form contains identification data about the company owning that domain, and other secure cryptographic information. This data is used when you purchase a SSL Certificate.
Now that we know what a CSR is and how it is used, let’s dive in and generate a CSR Request within cPanel and see how to use that certificate in order to activate a SSL Certificate.
1. Log-in to your cPanel account.
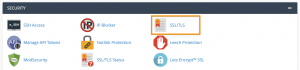
2. Scroll down the page until the Security section and click on SSL/TLS.
3. In the next window, locate Certificate Signing Request (CSR) and click on Generate, view, or delete SSL certificate signing requests link.
4. Complete the form to generate a new CSR for your domain with the data required in each field.
5. Click on the Generate button to create your CSR. Now you can provide the CSR to the Certificate Authority who will use this to generate and send you the SSL certificate and CA bundle for browser compatibility.
We hope that this has been helpful, so please feel free to let us know by liking or sharing this article!