Having a reCAPTCHA protecting any forms on your site is a great way to stop spam from trickling in. Fortunately, the Website Builder supports adding a reCAPTCHA to your site.
This Knowledgebase Article will cover how to add a reCAPTCHA to your site created by the Website Builder.
How to Add reCAPTCHA to your Website Built with the Website Builder
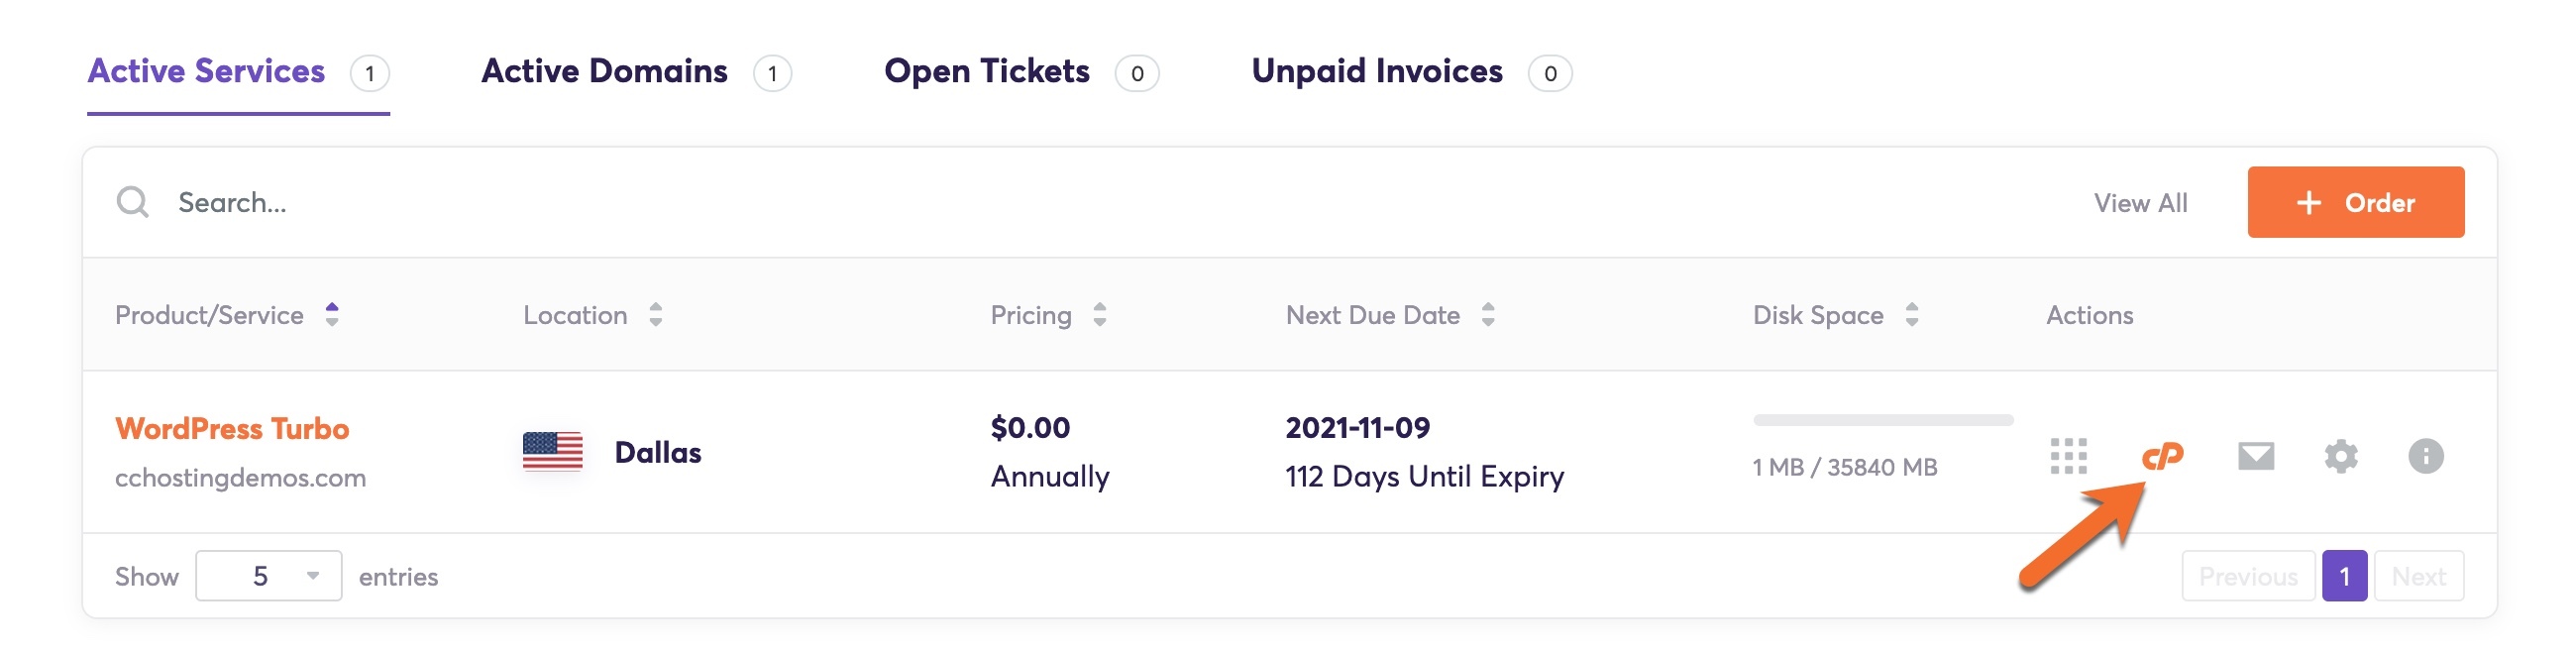
Step 1: Login to your cPanel. There’s a lot of ways to do this, but the sure fire easiest way is to login to your Client Area, then open your cPanel.
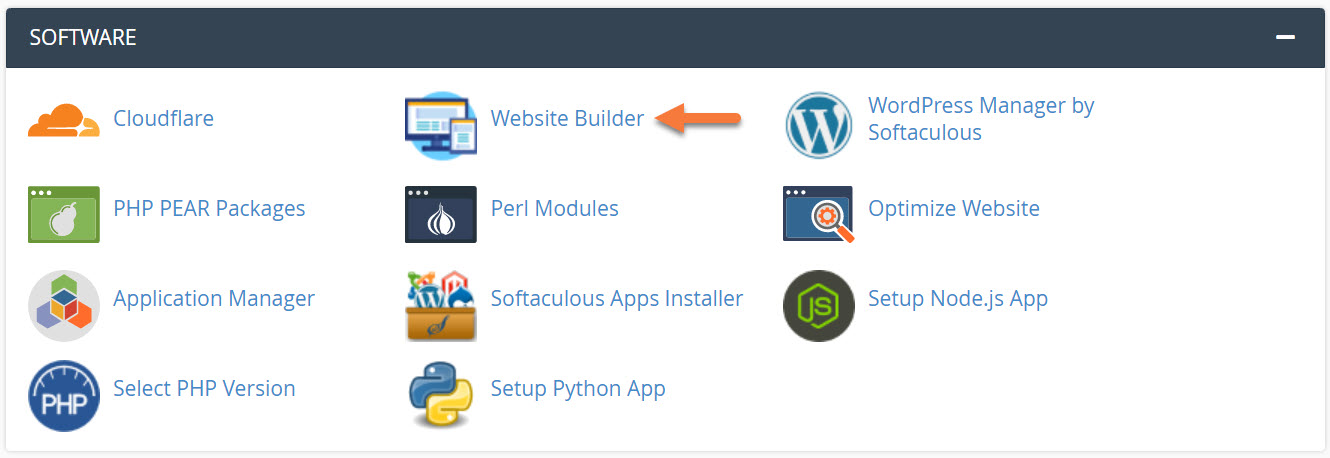
Step 2: Scroll down to the Software section and open the Website Builder:
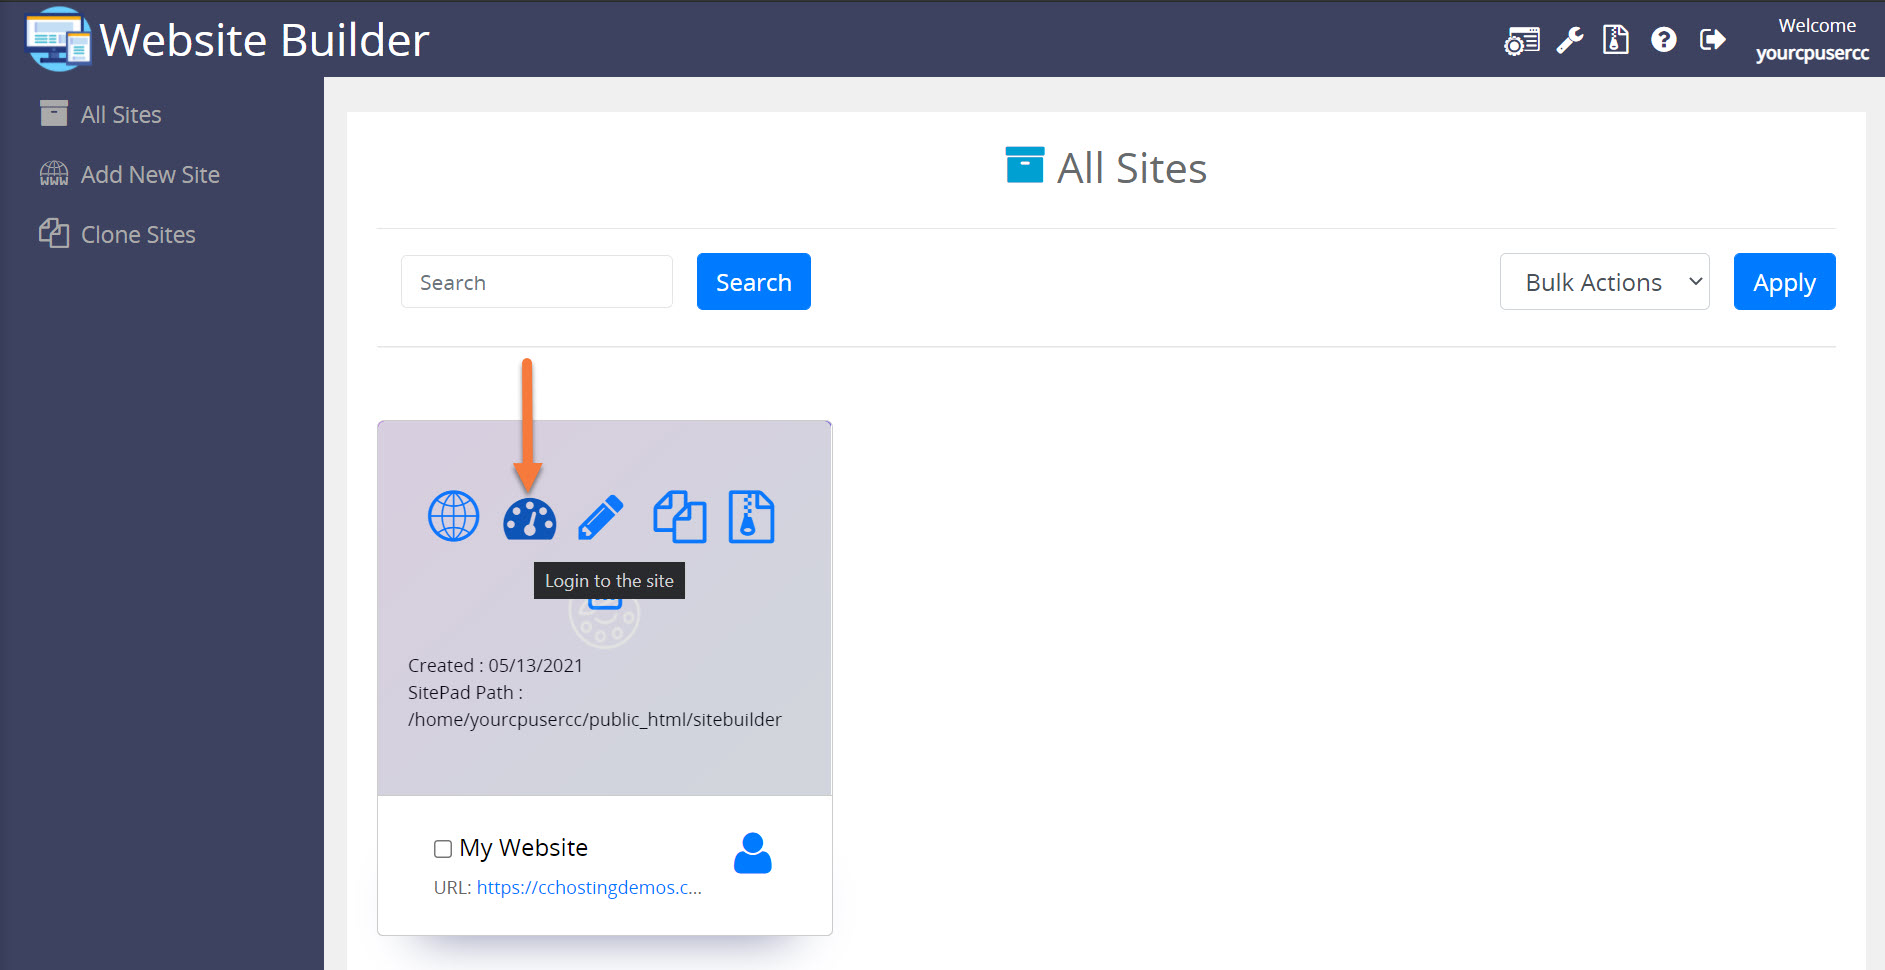
Step 3: Your list of sites will load. Locate the site edit, then hover over that site and click the speedometer icon to login to the site.
Step 4: Once the Website Builder Admin opens, click Security from the tool menu on the left, then click reCAPTCHA.

Step 5: The reCAPTCHA Settings area will open.
You have a couple options when it comes to reCAPTCHAs.
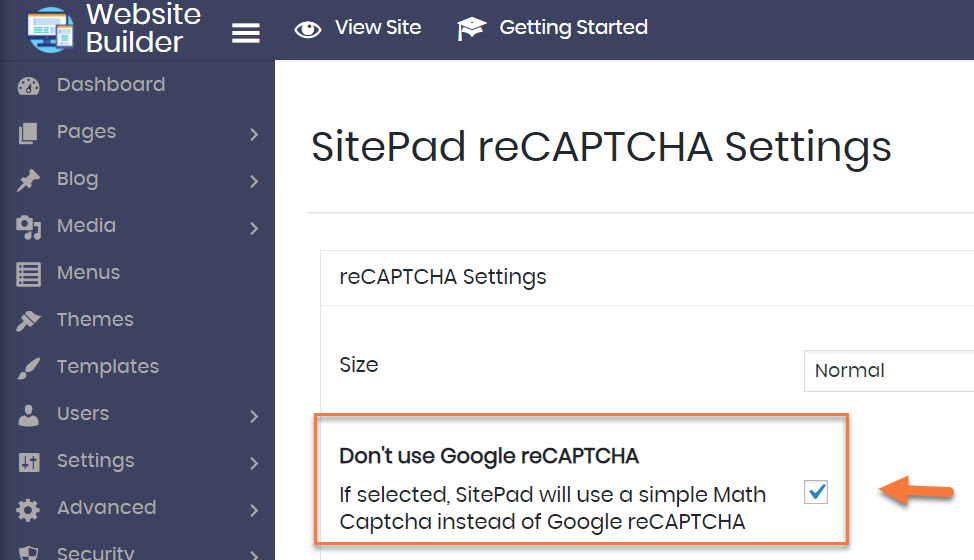
The default setting is to use a simple Math Captcha, where the visitor will be asked to solve a simple math problem, such as “What is 4+2?”. This is what you see above and is what will happen if you leave that box checked.
If you uncheck that box, you have the option to use Google reCAPTCHA.
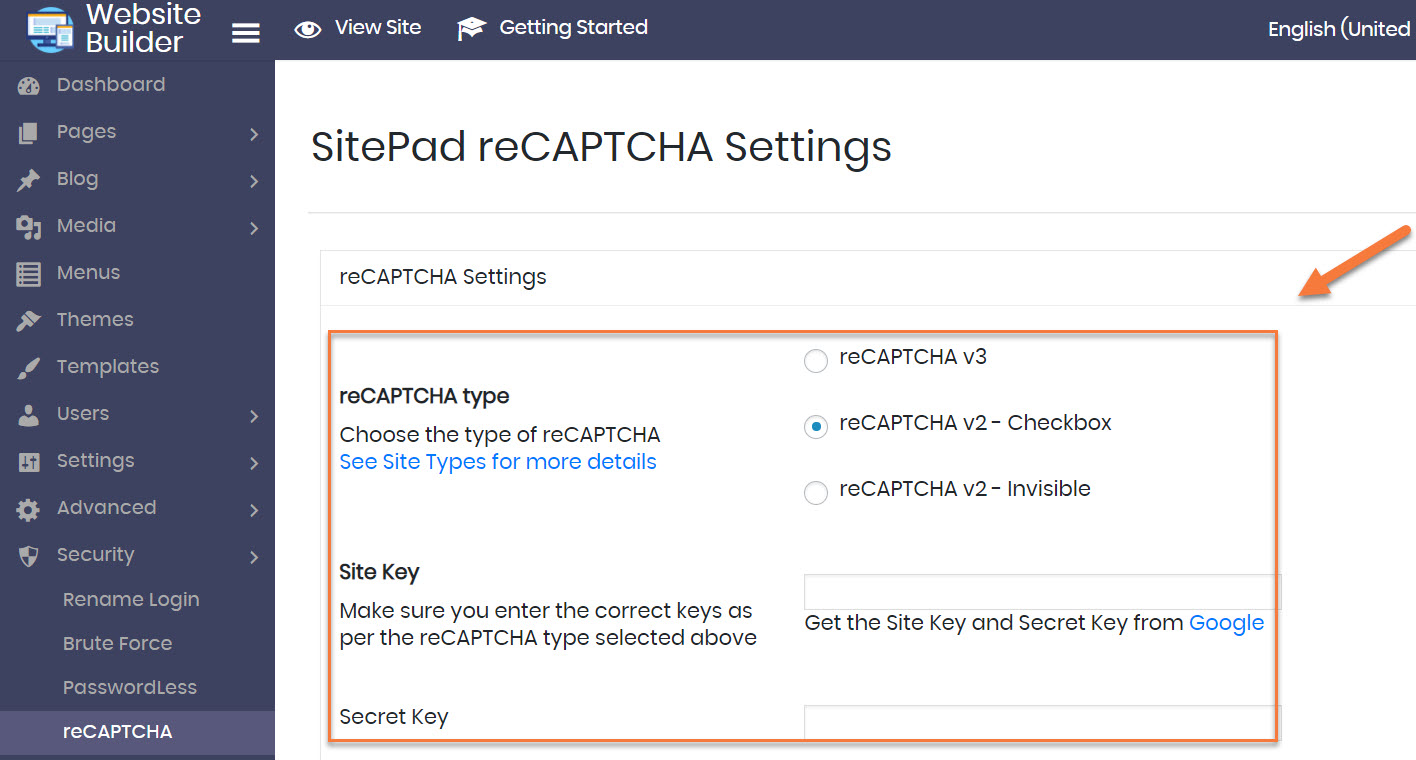
To use a Google reCAPTCHA, you first need to sign up for one (they’re free) by clicking here.
Once you have your Site Key and Secret Key from Google’s reCAPTCHA Admin, you can enter that information, then choose a reCAPTCHA version, 2 or 3, and it will be displayed on your site.
Step 6: Next, you need to configure a few other options. Let’s take a look:
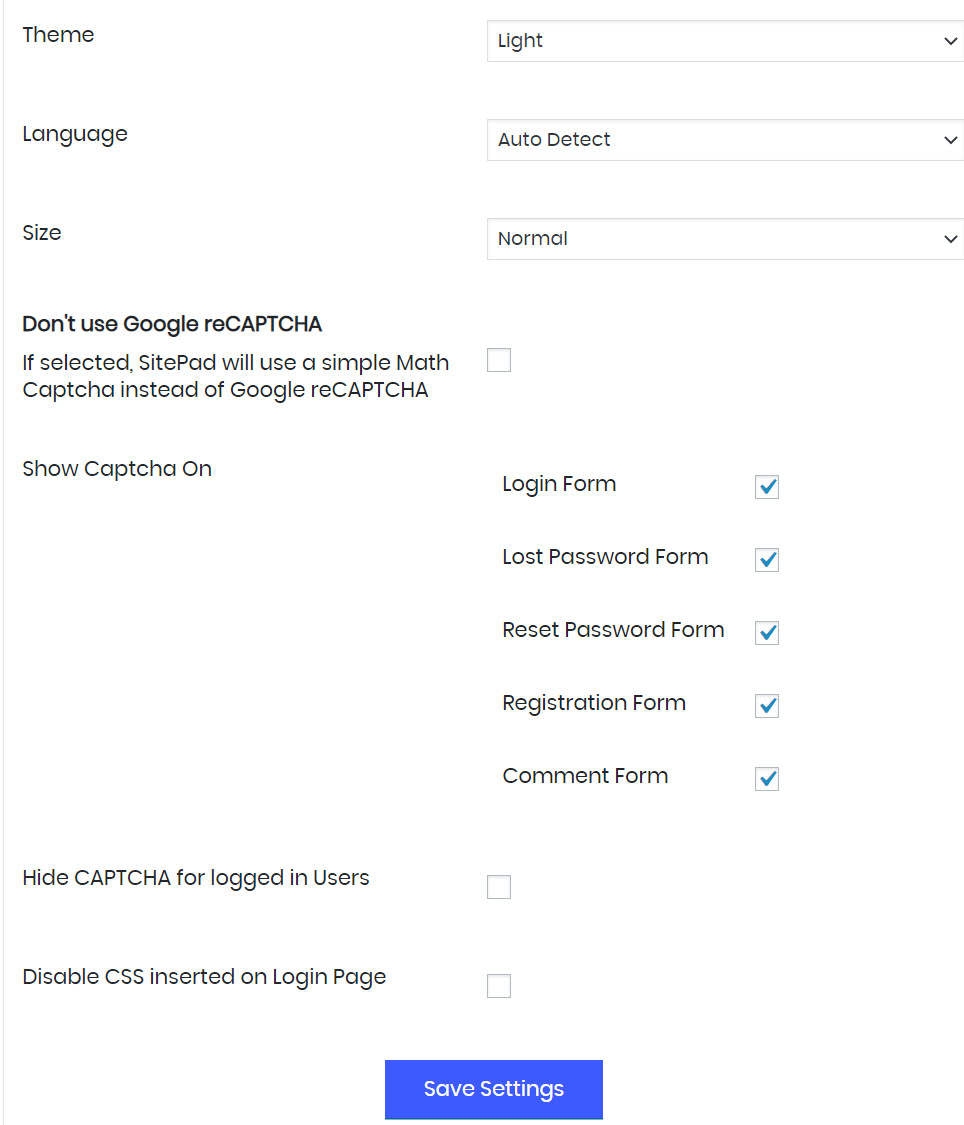
- First you need to choose a Theme. You have the option to use Light or Dark here. Light is the most commonly used reCAPTCHA type as it’s easily spotted.
- Next, you need to choose a language for the reCAPTCHA. You can leave it in Auto Detect and the reCAPTCHA will appear in the native language of the visitor, based on their region.
- Following this, you need to choose a size for your reCAPTCHA. I find that normal is just right, but compact is an option available to you as well.
- Lastly, you need to choose the pages on which the reCAPTCHA will show:
- Login Form – this is the form you use the login to the Website Admin of your website.
- Lost Password Form – this is the lost password form which appears if you click “Forgot Password” on the login form to your website.
- Reset Password Form – this is the reset password form which appears after you use the “Forgot Password” link.
- Registration Form – if your site is open to registration and other users, this refers to the form that is used to register those new users/members.
- Comment Form – if your blog posts are open to comments, you can require a reCAPTCHA to post comments.
At ChemiCloud, we advise that you enable the reCAPTCHA for all forms, if you are opting to use a reCAPTCHA.
Be sure to click Save Changes at the bottom of the page to save your changes.
And that’s how you add a reCAPTCHA to a website built with the website builder.