Your FavIcon is the teeny tiny image that gets shown in the address bar next to your URL. Many sites opt not to have one, but you can set one in the Website Builder if you like.
This Knowledgebase Article will cover how to set your FavIcon in the Website Builder.
How to add your FavIcon in the Website Builder
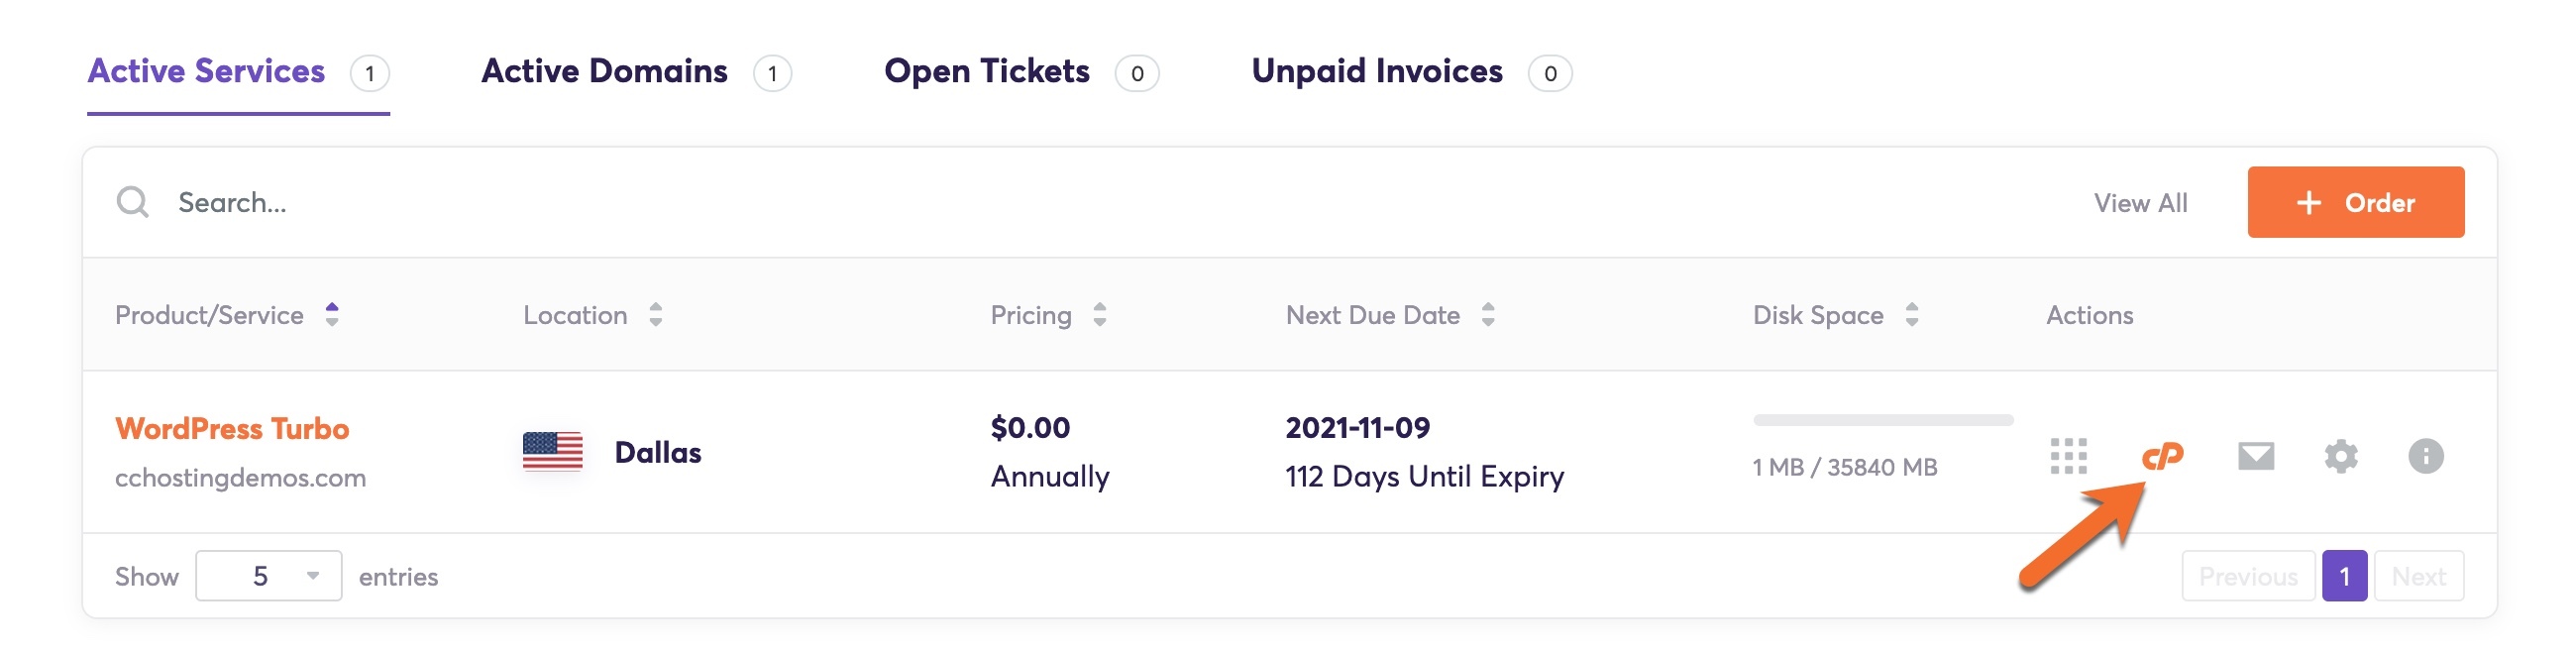
Step 1: Login to your cPanel. There’s a lot of ways to do this, but the sure fire easiest way is to login to your Client Area, then open your cPanel.
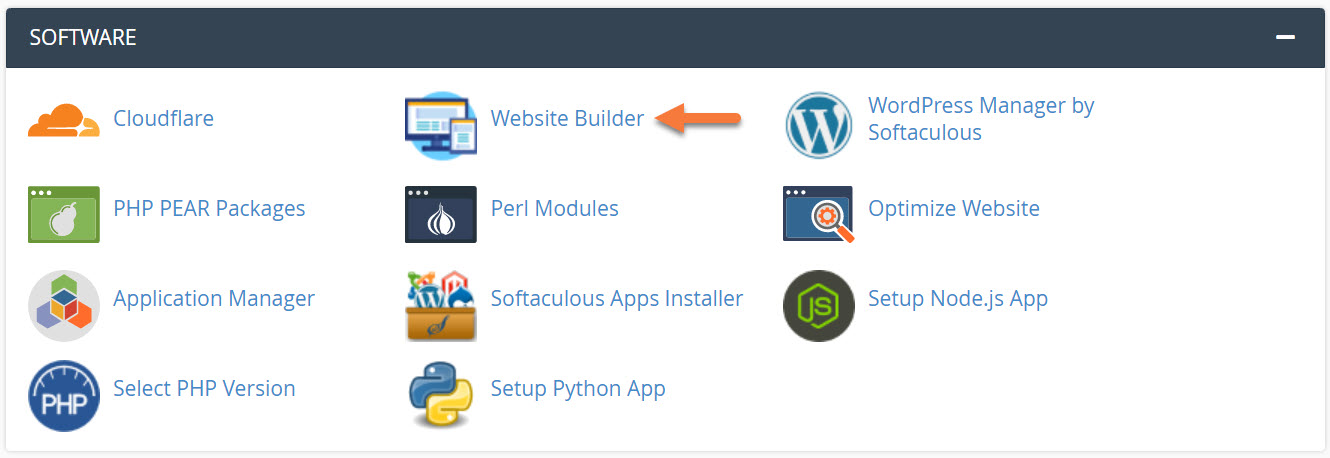
Step 2: Scroll down to the Software section and open the Website Builder:
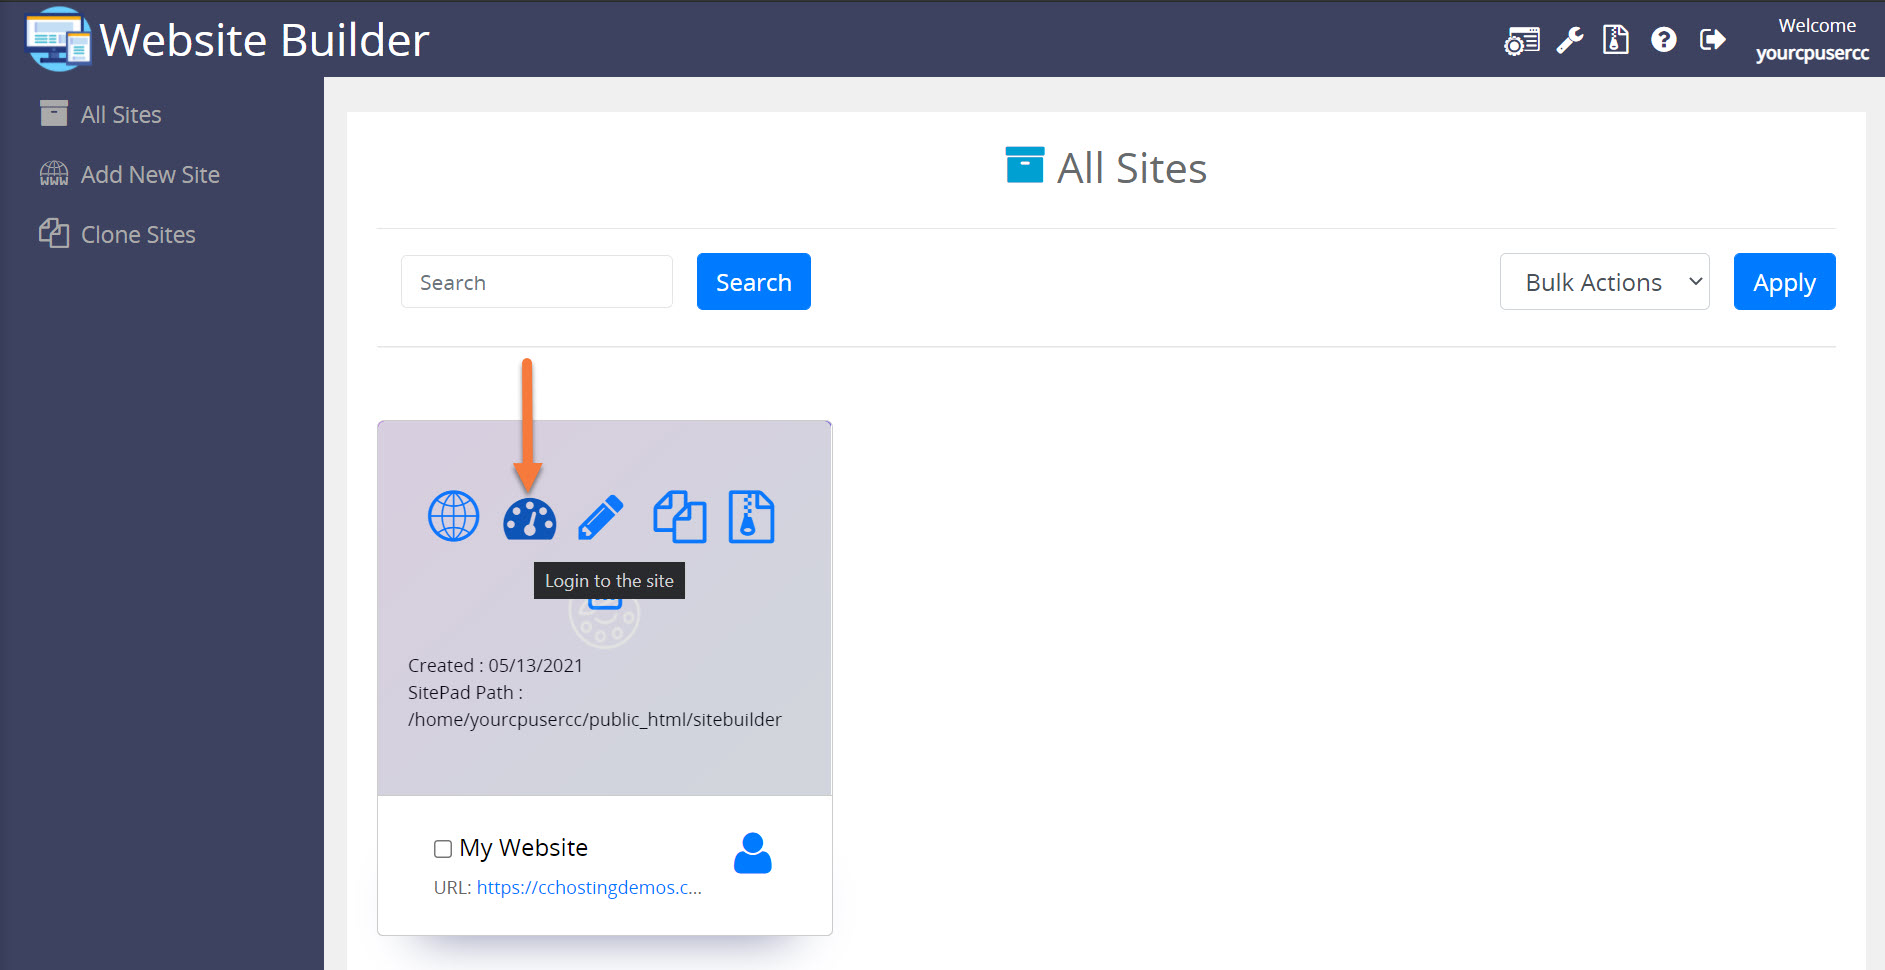
Step 3: Your list of sites will load. Locate the site edit, then hover over that site and click the speedometer icon to login to the site.
Step 4: When the Website Builder Admin opens, click Settings from the tool menu on the left, then click General.

Step 5: The General Settings area will open. Scroll down to the bottom and look for the Site Icon section:

Keep in mind, typical FavIcons are 512×512 pixels.
Step 6: The Media Library will open and you will have the option to upload a new file or choose one from your Media Library.
When you’ve selected your image, be sure to click the Select button in the bottom right corner.

After clicking Select, you’ll be returned to the General Settings area. Be sure to click Save Changes at the bottom of the page to update your site with the new FavIcon selection!