Did you know your ChemiCloud Hosting plan includes access to a pretty cool website builder which you can use to create fully featured sites, even a blog? Yep!
In this Knowledgebase article, we’re going to cover how to create your site using the Website Builder.
Let’s begin!
How to Create Your Website Using the Website Builder
Step 1: Login to your cPanel. There’s a lot of ways to do this, but the sure fire easiest way is to login to your Client Area, then open your cPanel.

Step 2: Scroll down to the Software section and open the Website Builder:

Step 3: The Website Builder will open in a new tab. To create a new site, click create a new site.

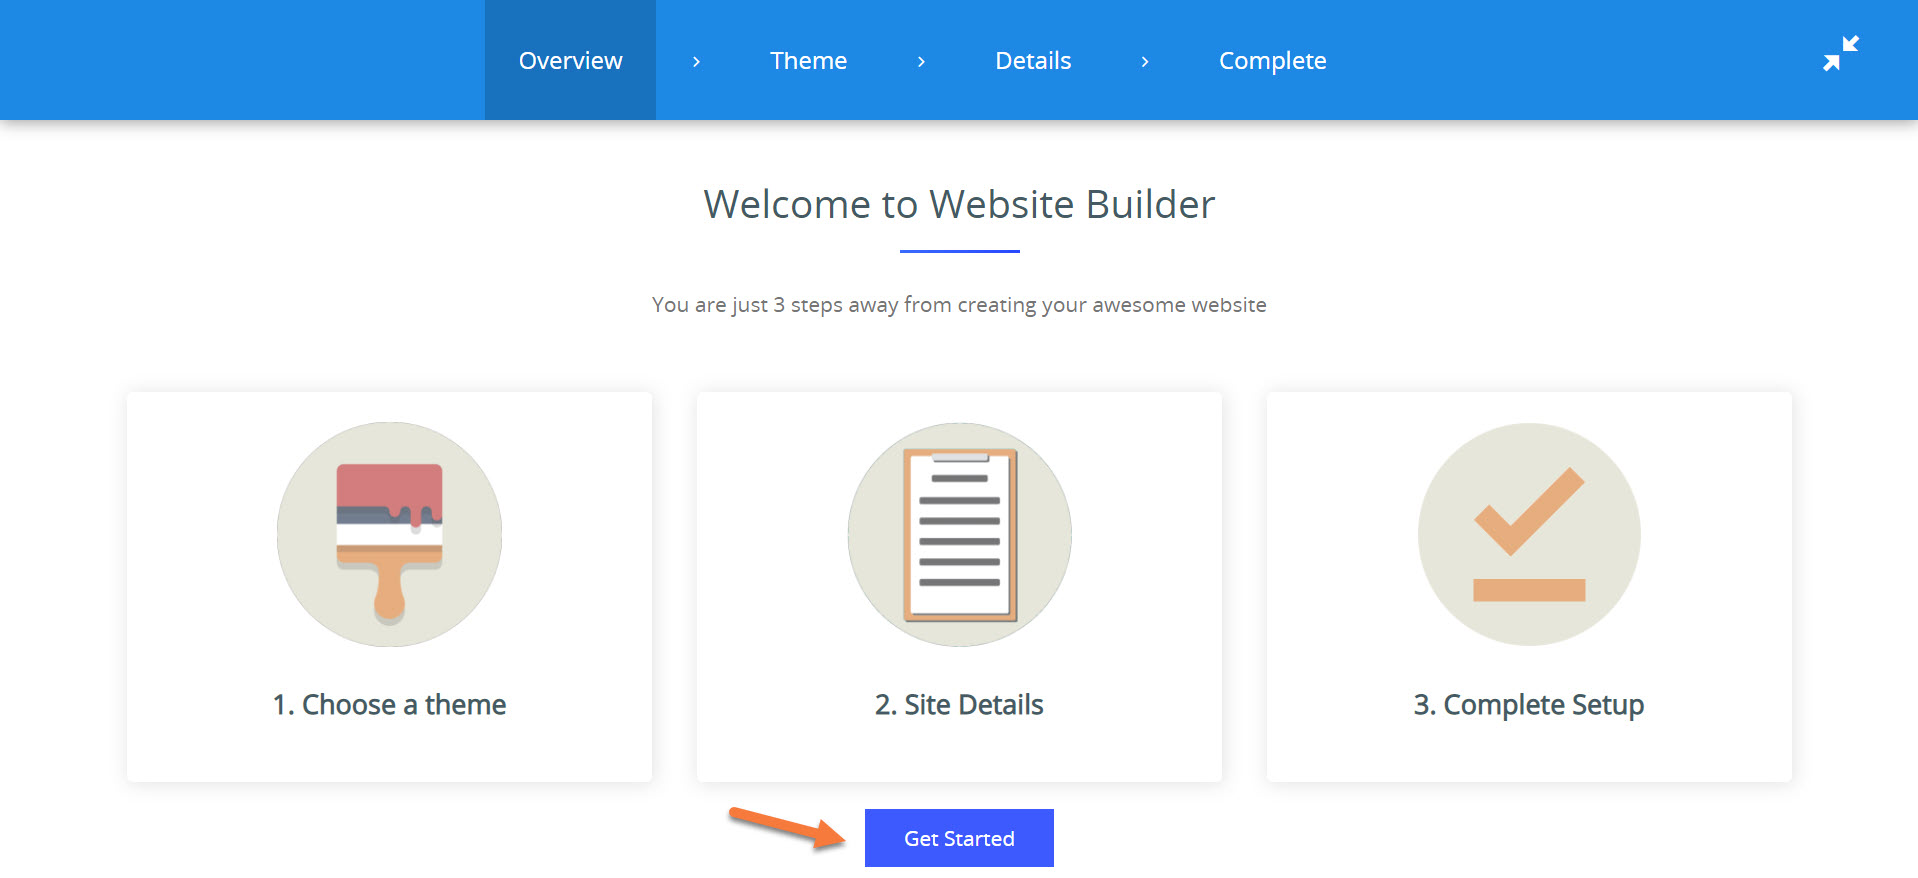
Step 4: The Website Builder New Site Wizard will open. Click the blue Get Started button to proceed.
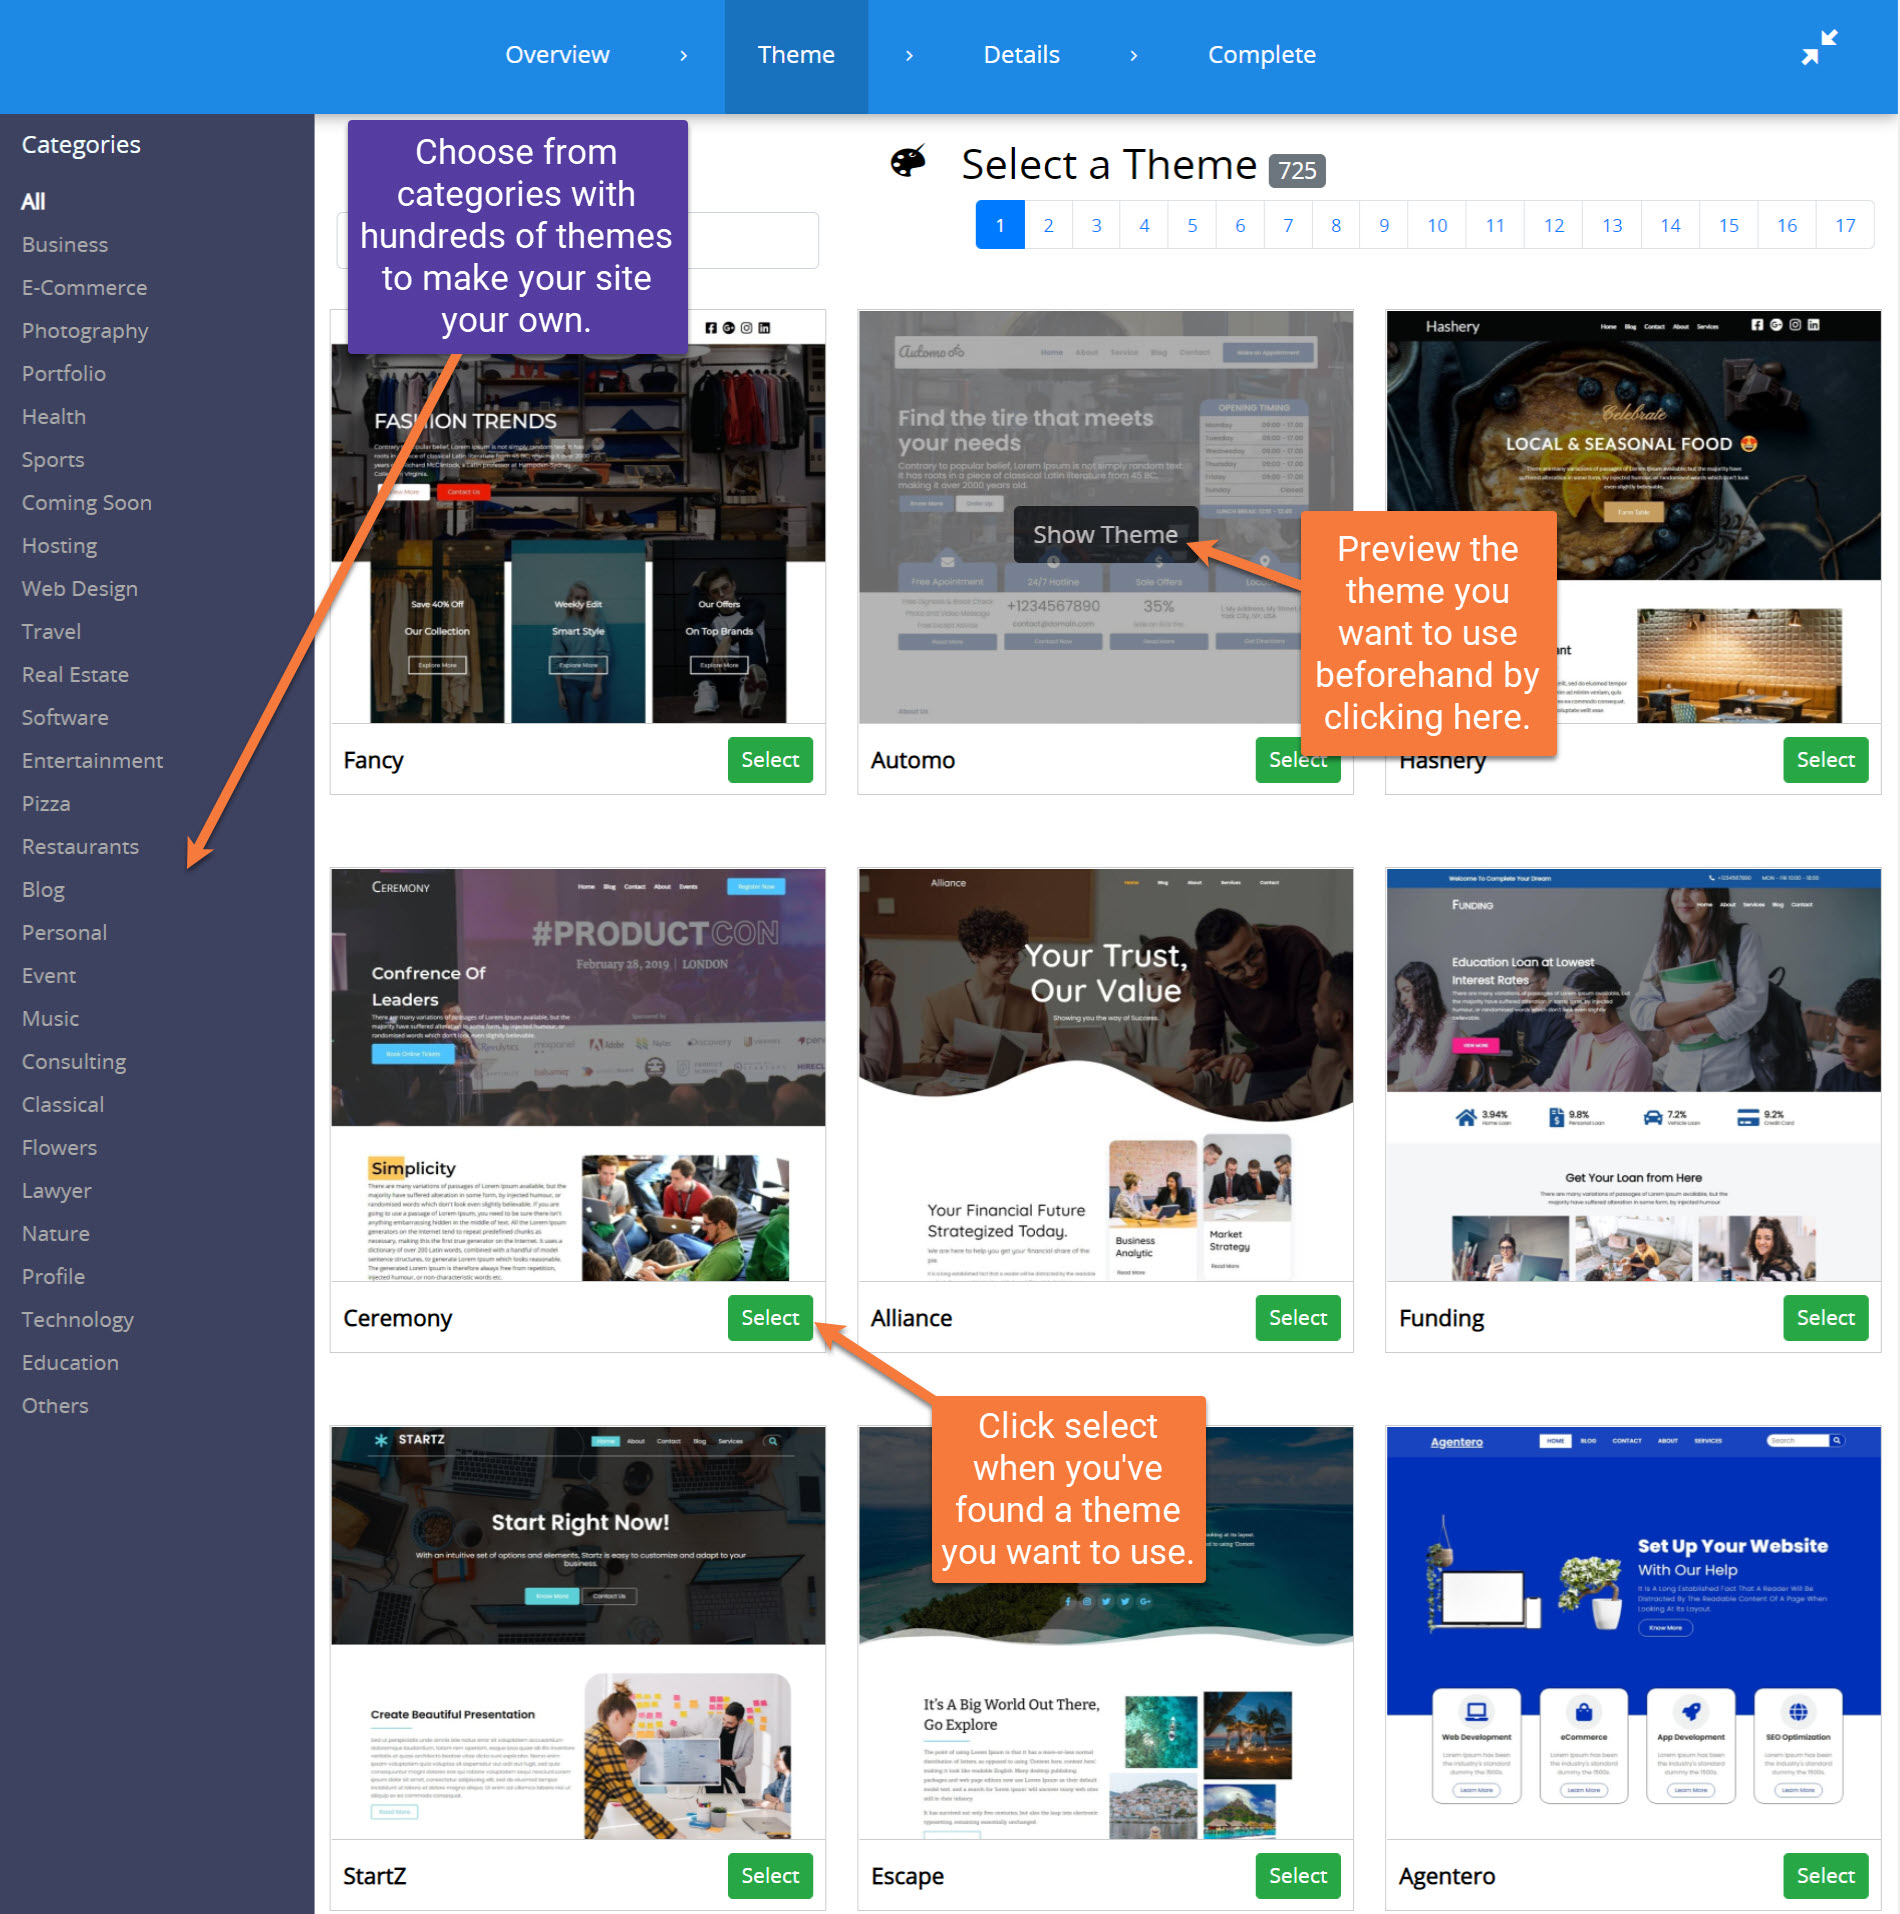
 Step 5: Next you need to choose a theme. There are over 700 themes to choose from in the Website Builder. To make finding a them you want to use easier, you can choose from the categories on the left.
You can also hover over a theme then click Show Theme to preview it in a new tab.
When you’ve found a theme you want to use, click Select, below the theme preview thumbnail.
Step 6: Now you need to enter your Site Details, such as the directory in which you want the site installed, what the administrative email for the account is, along with other pertinent details, such as title, description, and contact details.

When you’ve entered the requested information, click Proceed with Install.
Step 7: You may see a modal window which looks like this:
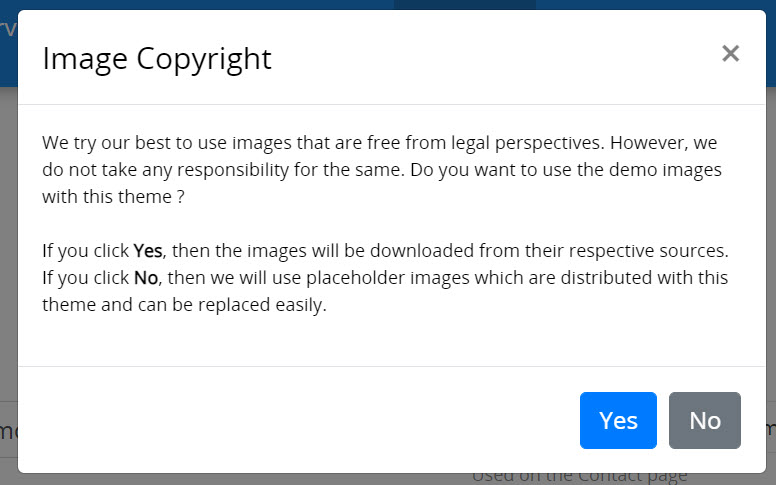 This modal means the Website Builder theme you have chosen contains stock photography, and to the best of the knowledge of the developers of the theme and the website builder application, these images are not copywritten.
By clicking Yes, you agree that you want to use that imagery in the site (at least, for now, until you replace it later, if you so desire) and therefore as part of the site installation, the website builder will download those media assets.
However, if you are not comfortable with this, you can click No, and they will not be downloaded. Your site will just be filled with blank image placeholders for you to add content when you’re ready.
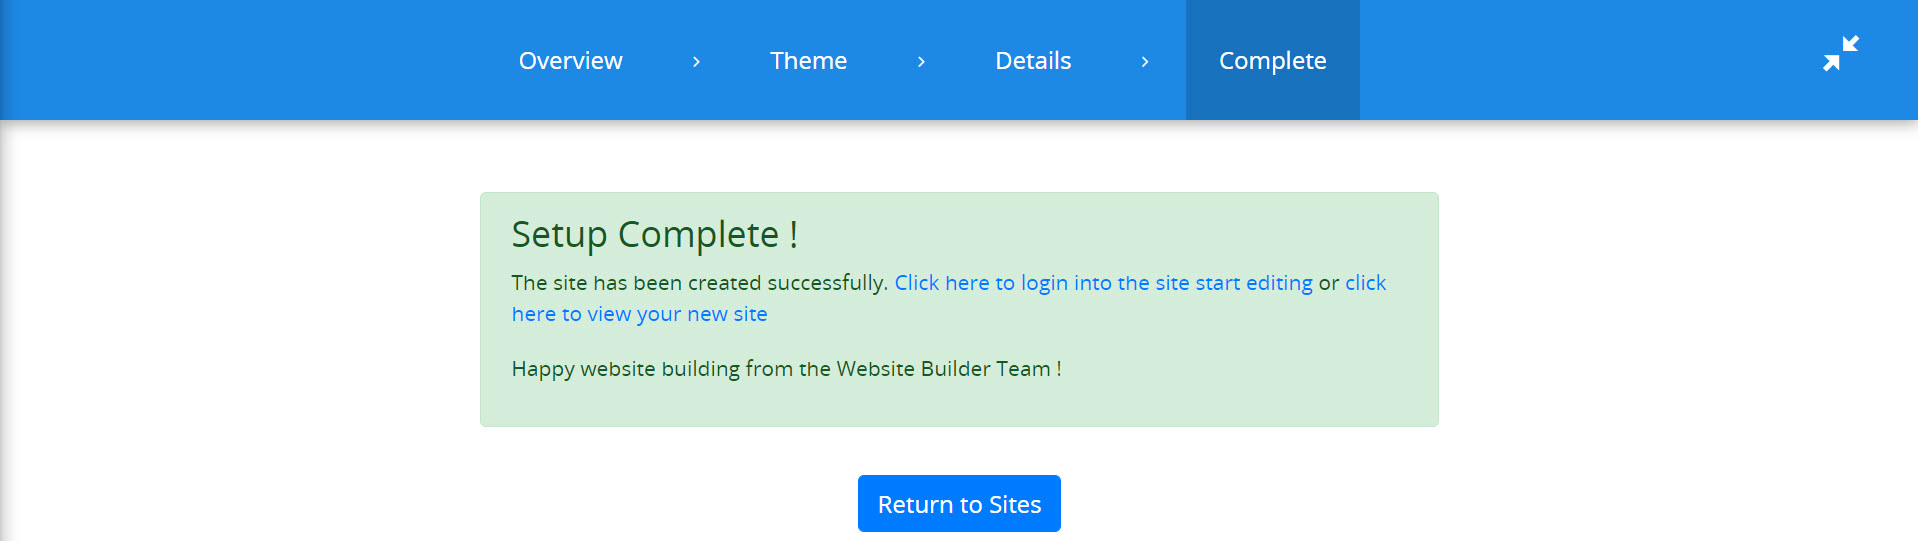
Step 8: Your site should now be installed.
You will be given a link to login and edit your site, as well as a link to view your site.
And that’s how you create your site using the Website Builder!