MailChimp is a powerful solution for sending newsletters or other transactional emails to your subscribers or website members. The Website Builder definitely supports this so you can use the feature as a way to grow your website’s viewership!
This Knowledgebase Article will cover how to link your Mailchimp Setup.
How to Link your MailChimp Configuration with Your Website Built with the Website Builder
Step 1: Login to your cPanel. There’s a lot of ways to do this, but the sure fire easiest way is to login to your Client Area, then open your cPanel.
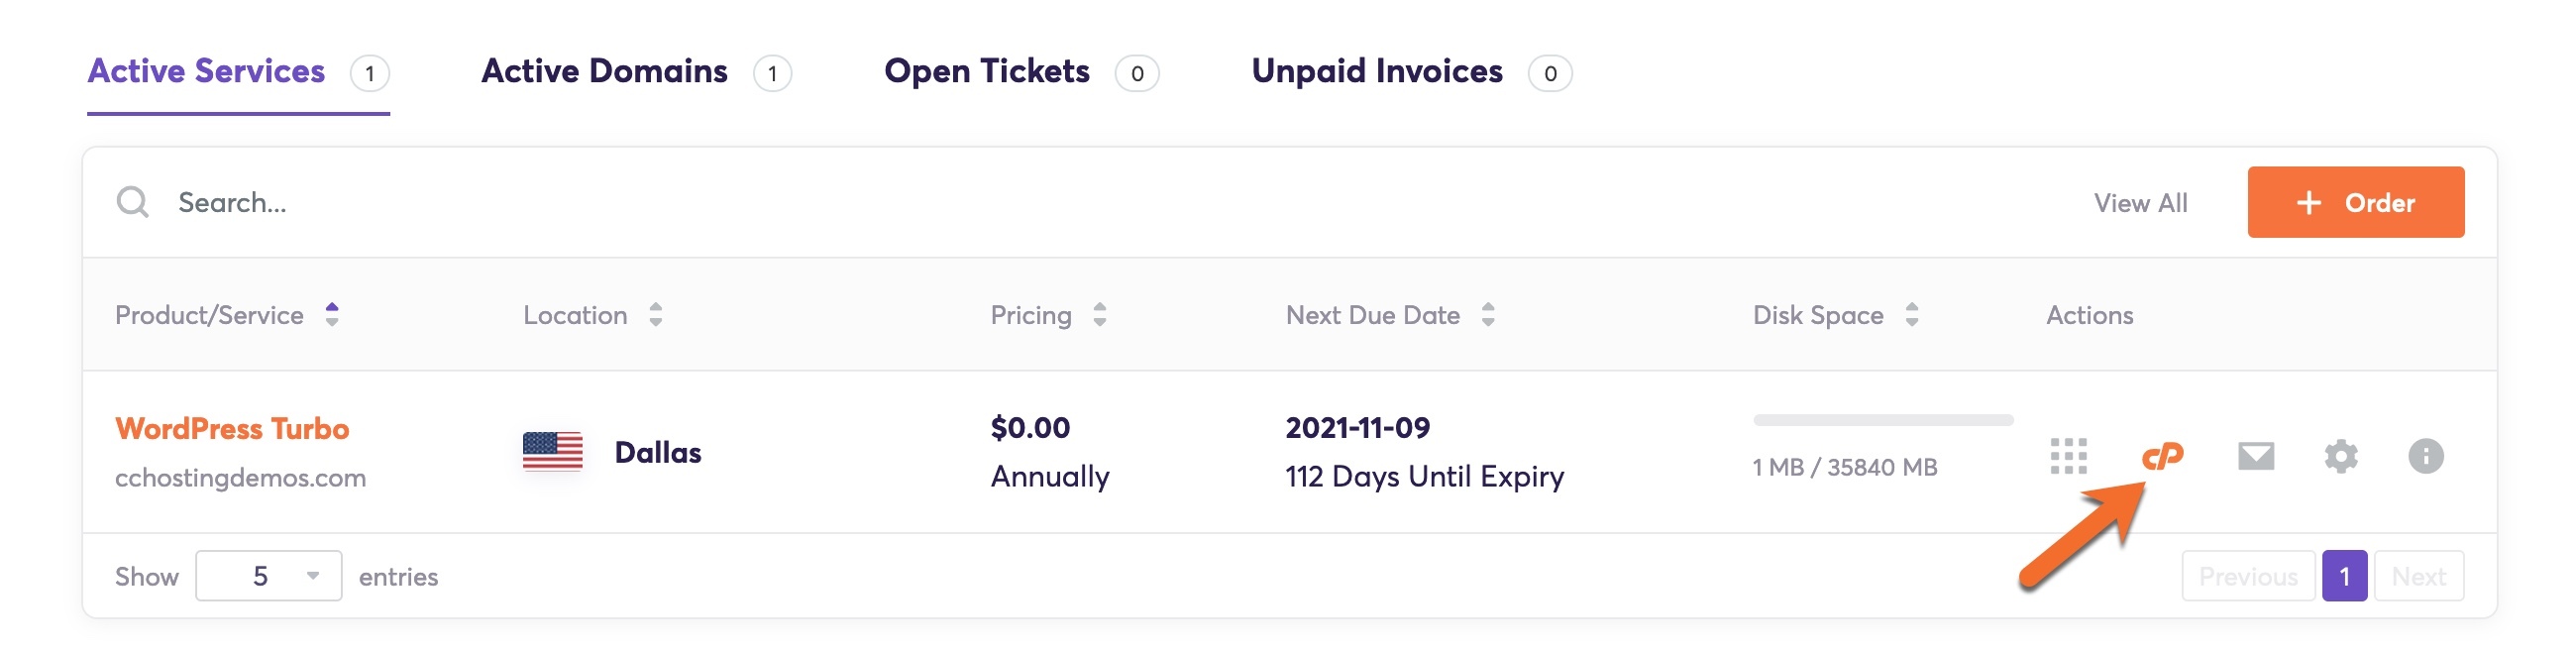
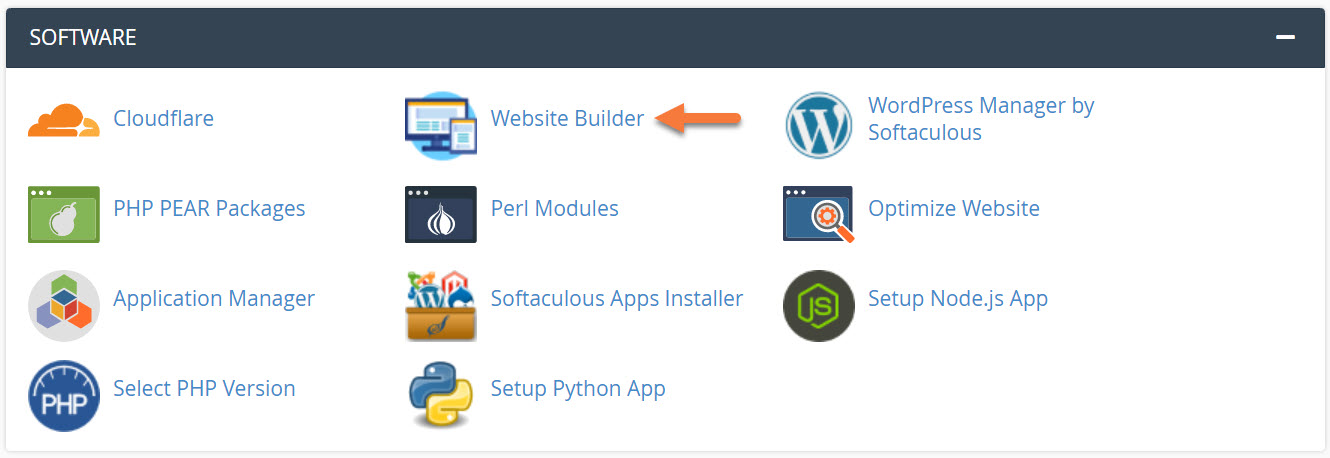
Step 2: Scroll down to the Software section and open the Website Builder:
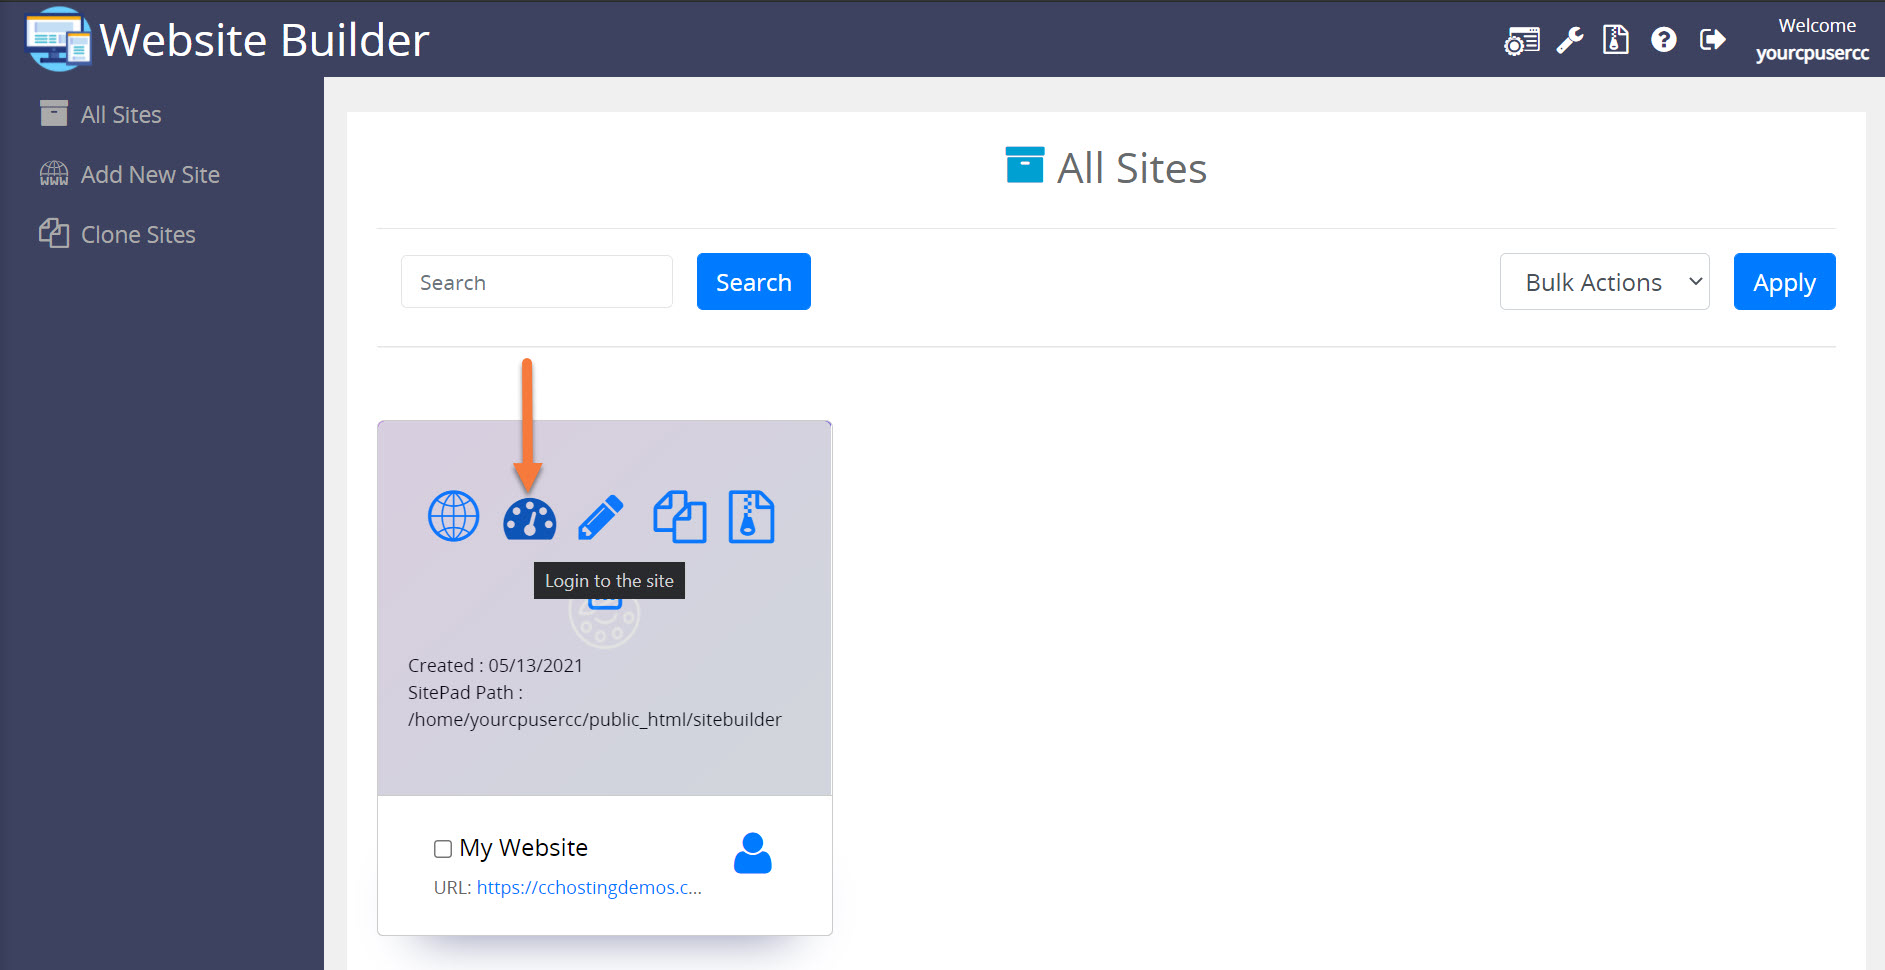
Step 3: Your list of sites will load. Locate the site edit, then hover over that site and click the speedometer icon to login to the site.
Step 4: Once the Site Admin for your Website is open, click Advanced from the menu on the left, then click MailChimp.

Step 5: Choose whether you want the Subscriber dialog to show on All pages or Selected pages. Then paste in the code you got from the MailChimp site to show that dialog in the Subscriber pop-up box.

Be sure to click the blue Save Changes button when you’re finished.
And that’s how you link your MailChimp setup with your Website using the Website Builder!