Menus are an important part of navigation on a website. Without them, your users won’t know which parts of your website would be considered your main pages for your content. The Website Builder gives you numerous options when it comes to menus.
This Knowledgebase Article covers how to manage menus in the Website Builder and how to create a new menu.
Managing Your Menus and Creating a New Menu
Managing Your Menus
Step 1: Login to your cPanel. There’s a lot of ways to do this, but the sure fire easiest way is to login to your Client Area, then open your cPanel.

Step 2: Scroll down to the Software section and open the Website Builder:

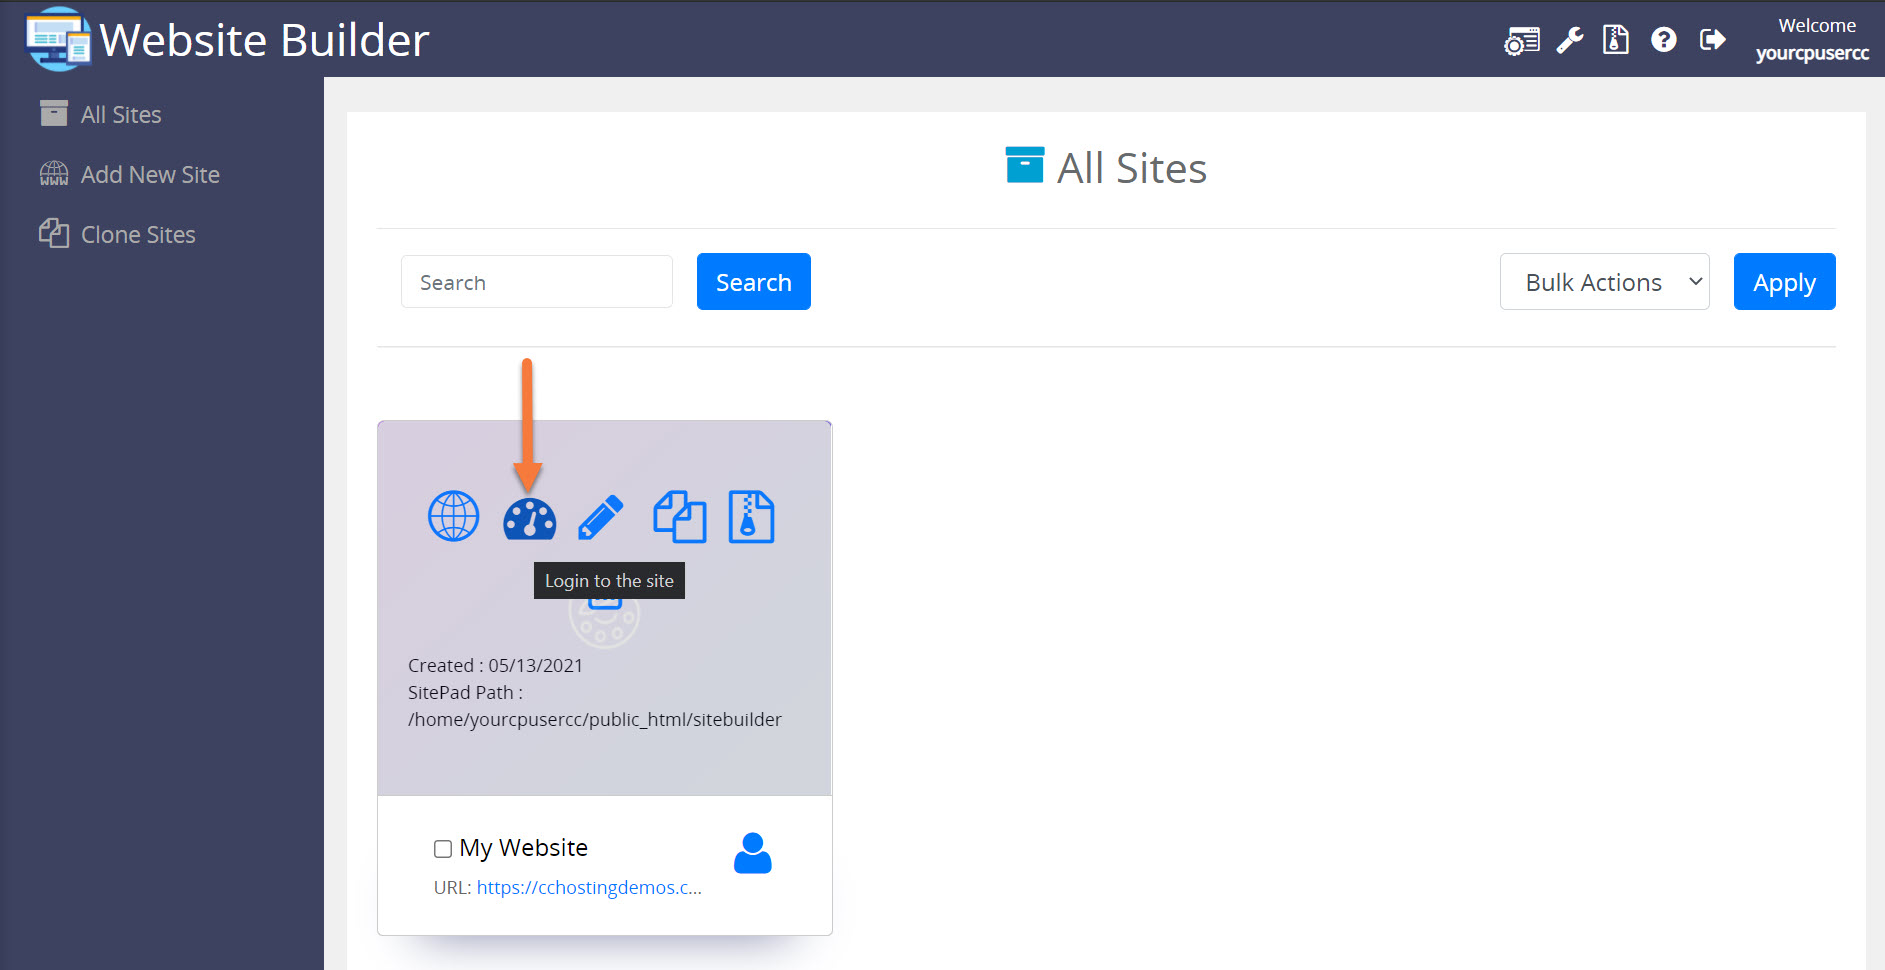
Step 3: Your list of sites will load. Locate the site edit, then hover over that site and click the speedometer icon to login to the site.
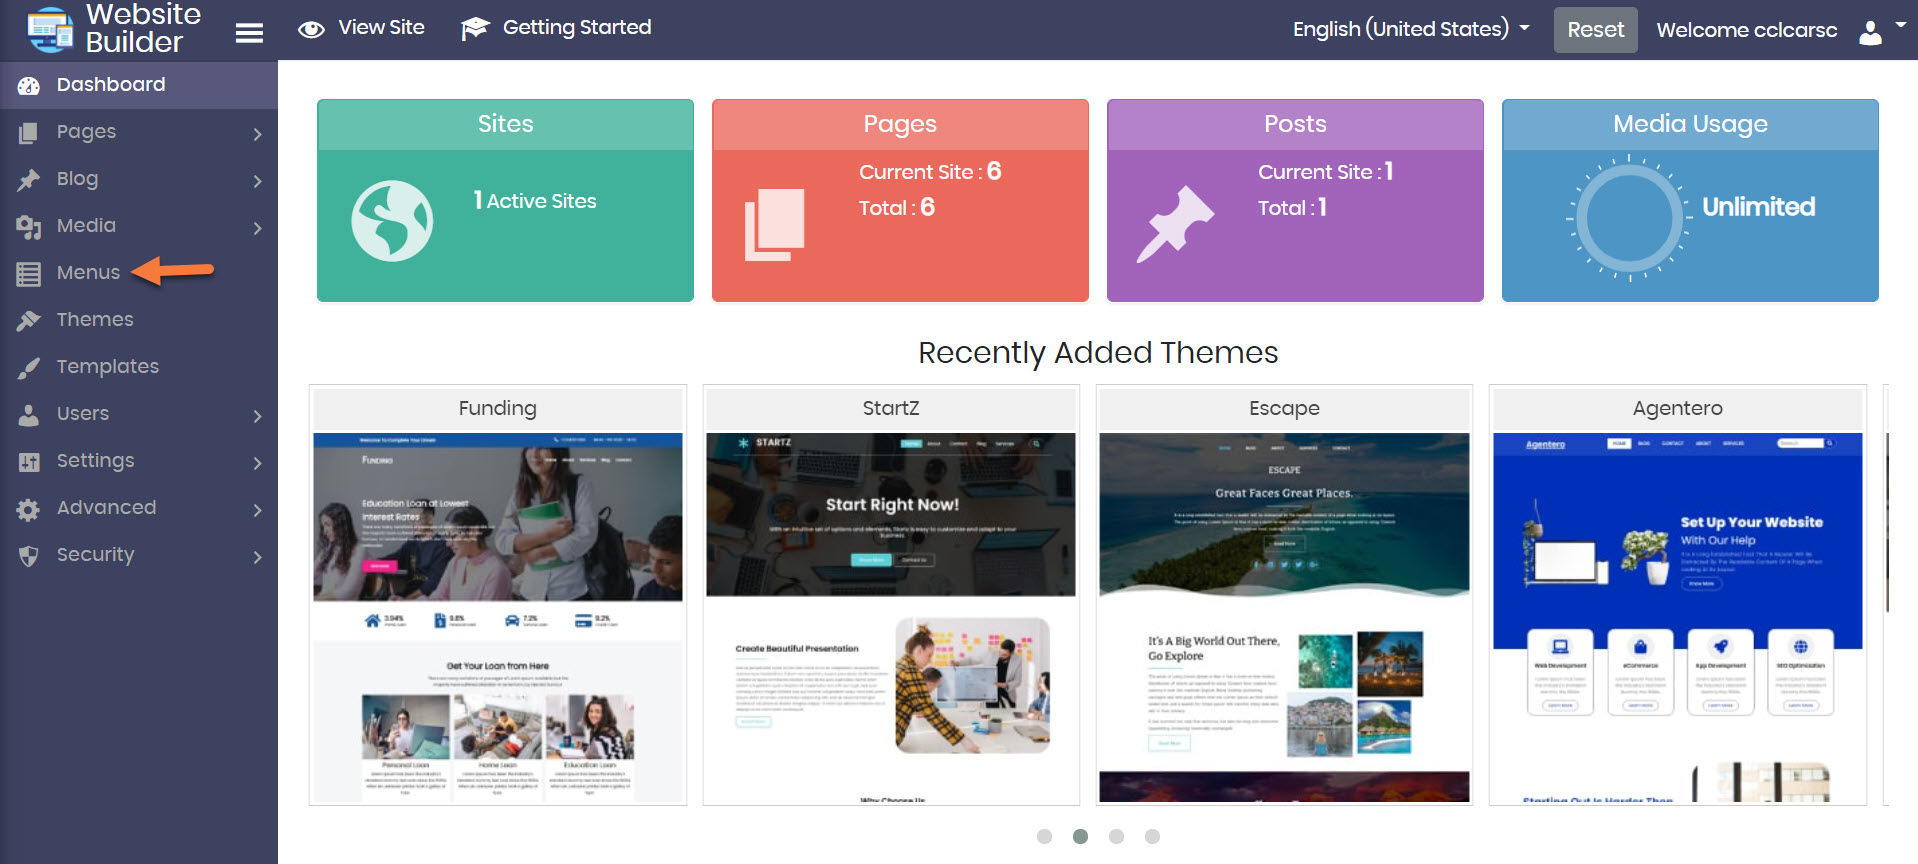
 Step 4: Once the Website Admin page comes up, click Menus from the row of options on the left.
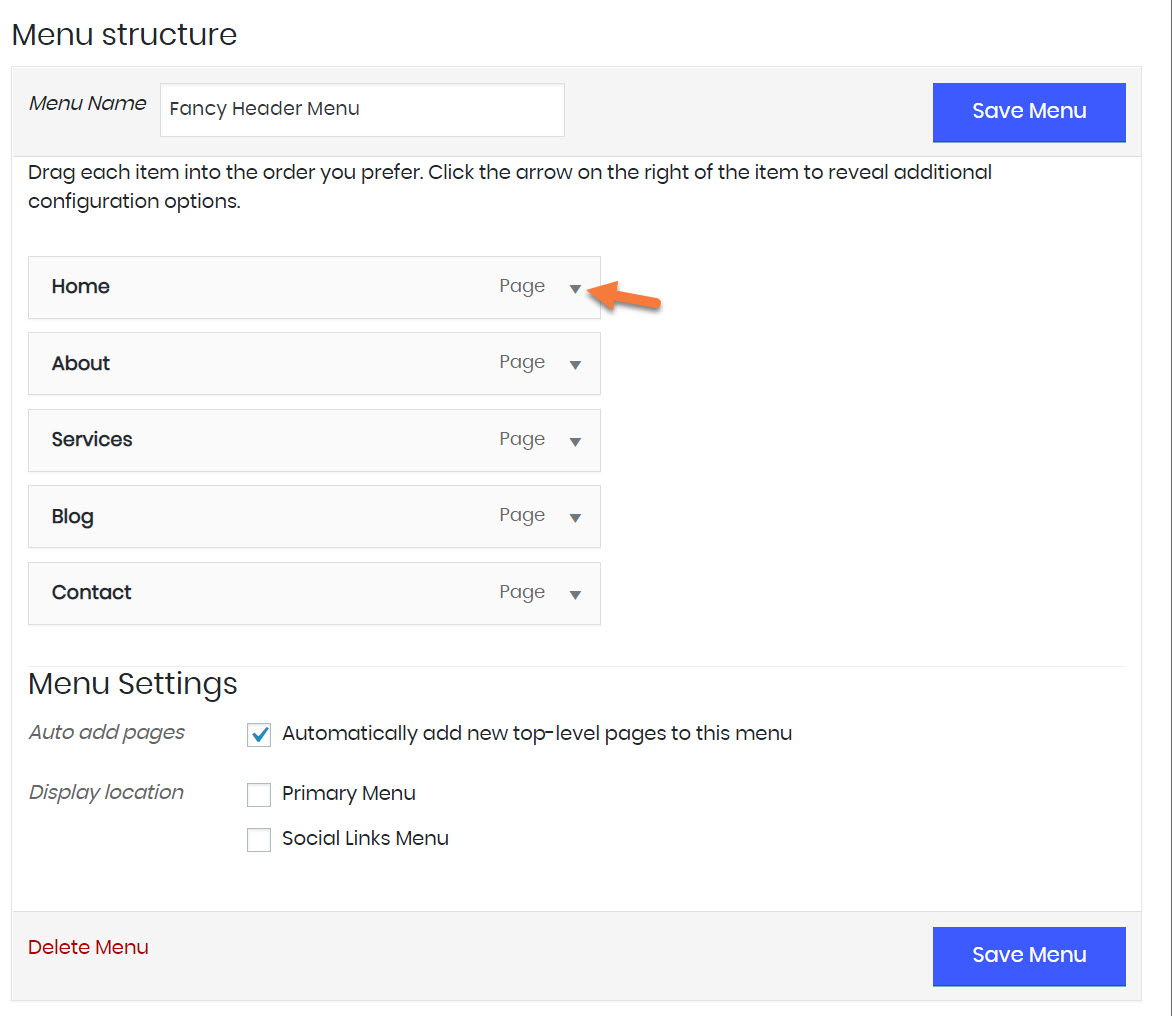
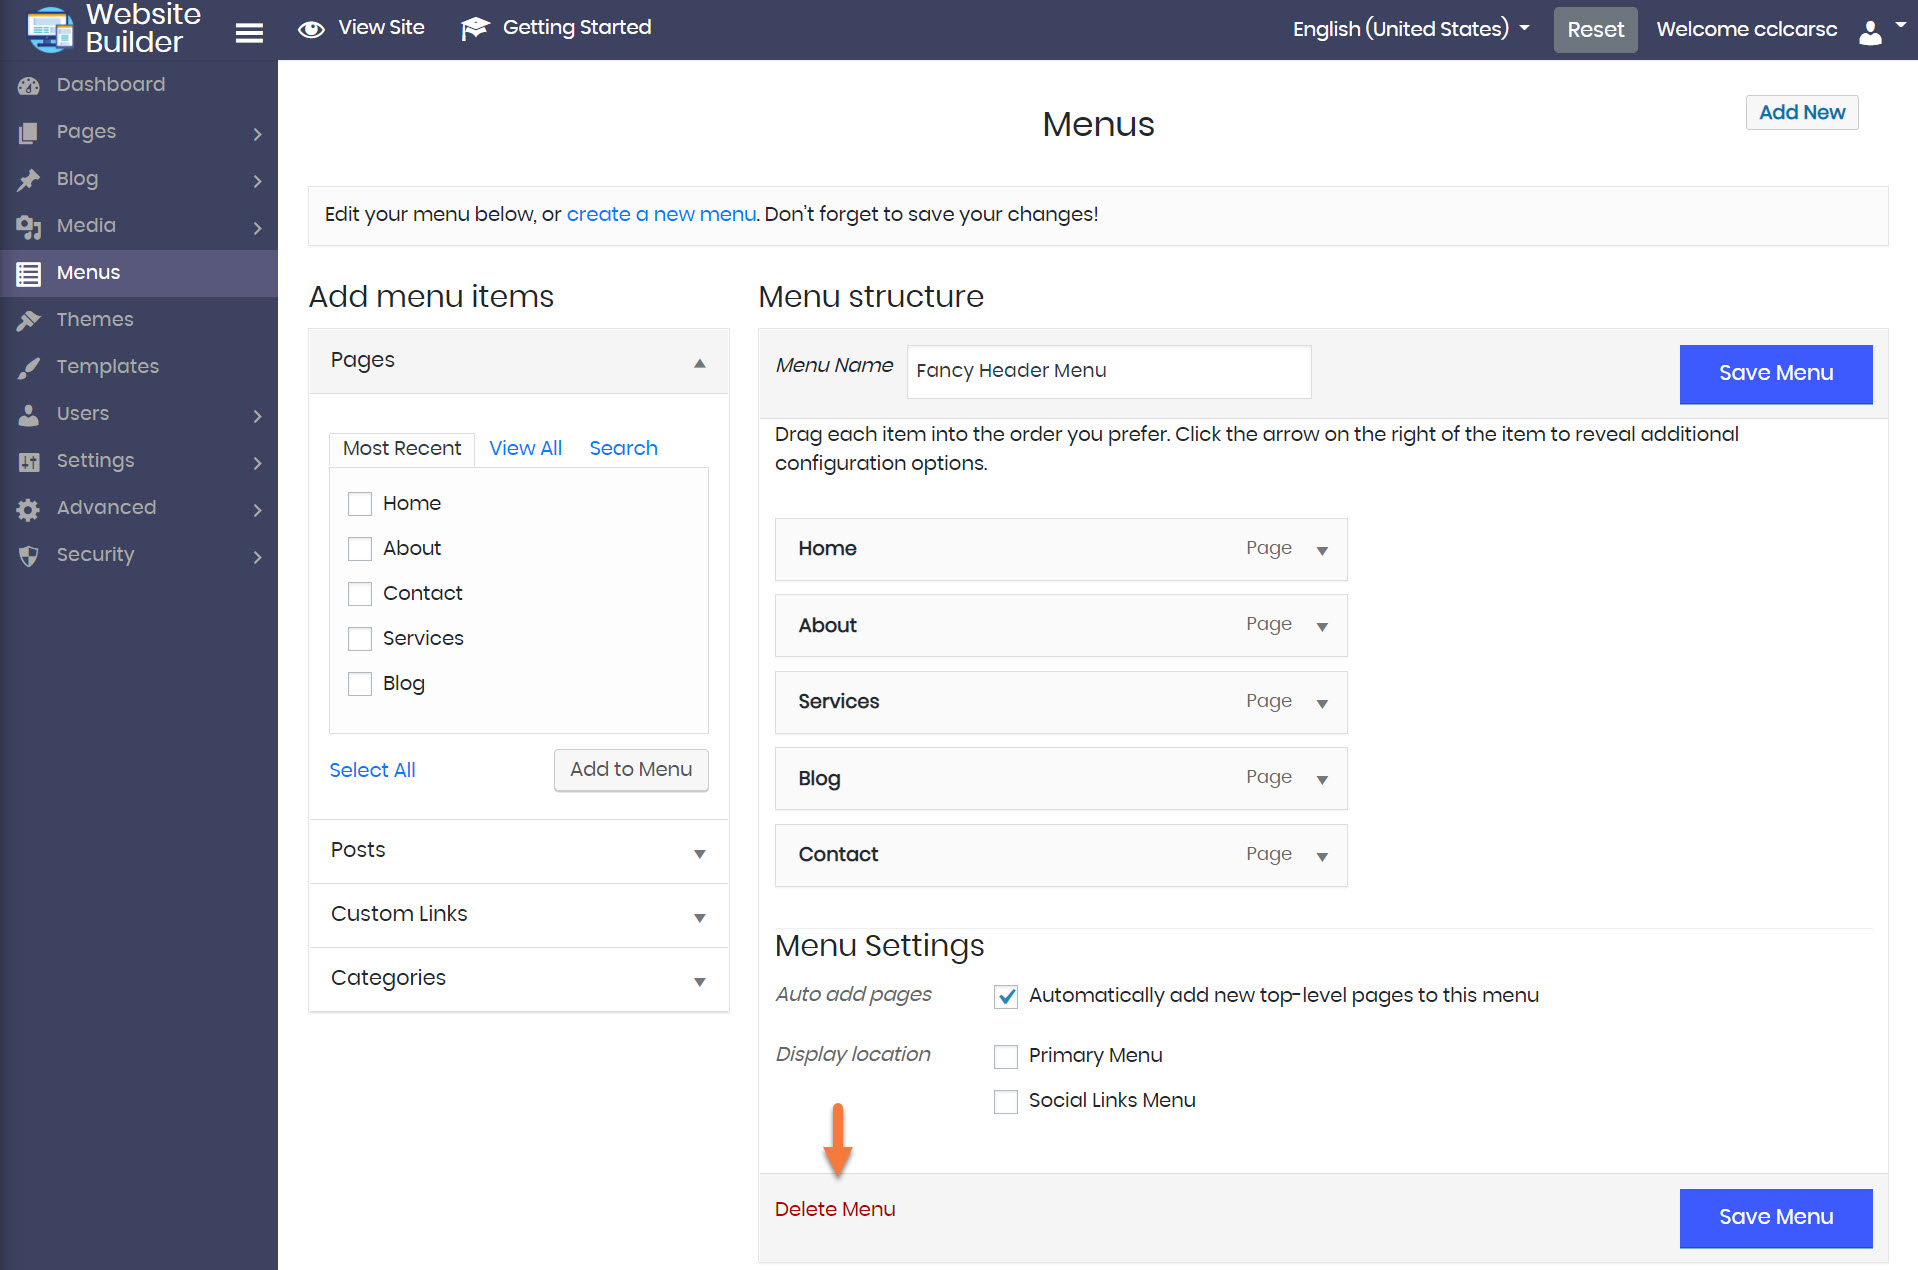
Step 5: Keep in mind, most of the themes in the Website Builder have a default Header Menu, which is the default menu. You can edit this menu from the Menus area:
 Take note of the menu structure. This is the order in which the menu items will appear on all of your pages wherever the menu appears. For the menu above, this is the Header Menu, so it’s the menu that appears at the top of the page.
You can edit the menu items individually and control individual aspects of them. To do this, click the downward facing arrow at the end of the menu item title.
When it comes to editing a menu, there are a lot of options.
 Let’s take a look at these options and what they mean:
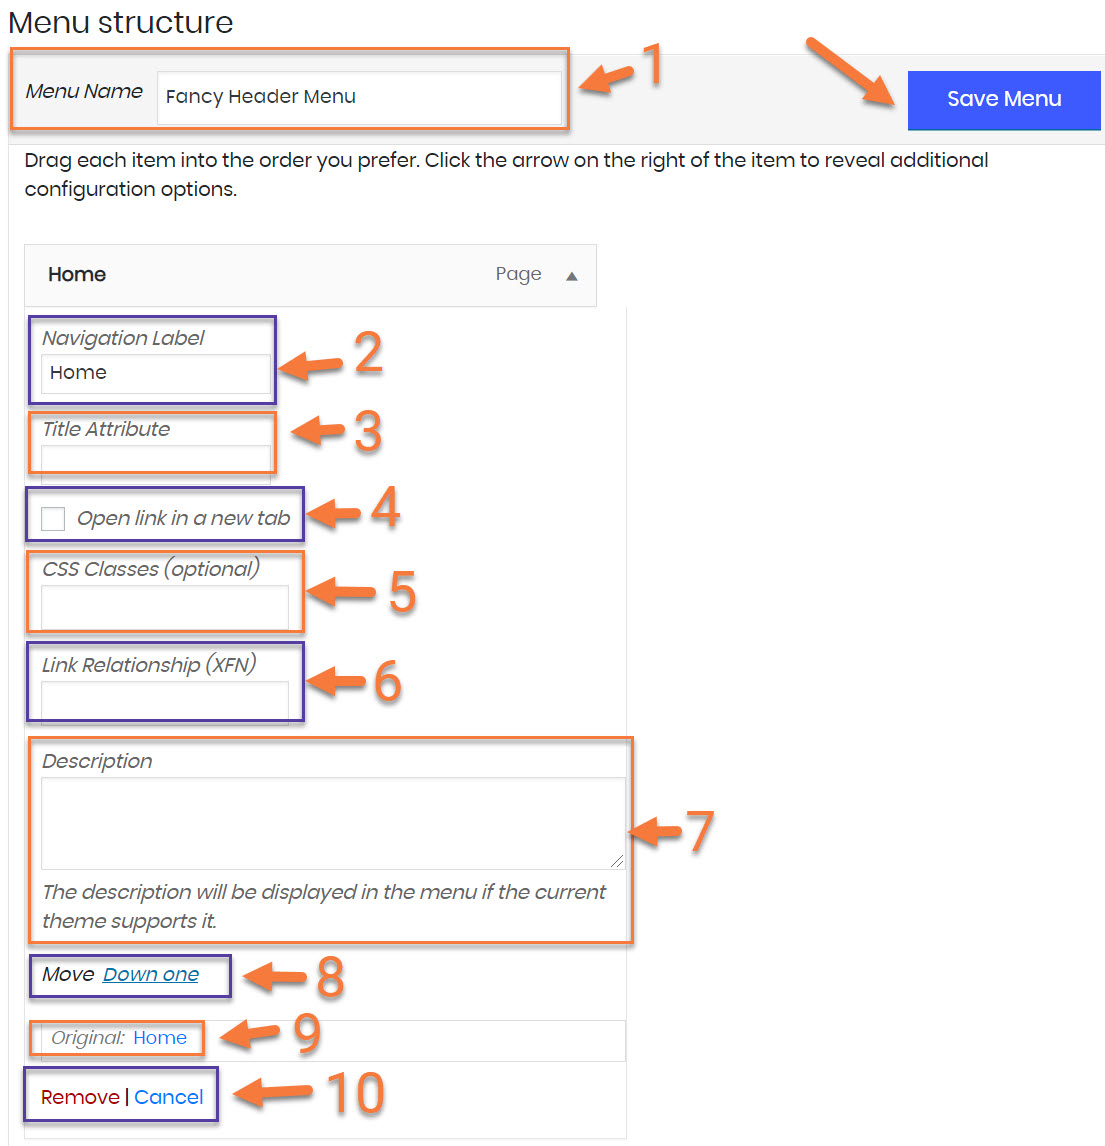
- The menu name gives you the option to change the name of the menu for easier identification.
- The Navigation Client Areael indicates the title of the item as it appears in the menu.
- Title Attribute gives you the option to use custom code with CSS to change the appearance or other attributes of the title as defined by CSS.
- Open link in new tab allows you to set this menu item so that when people click on it, the URL referenced by the menu item opens in a new tab.
- With CSS Classes, you have the option to assign a specific class to this menu item using Custom CSS.
- The Link Relationship (XFN) field allows you to enter the value for your link relationships, if you are using these. You can read more about them here.
- You can enter a description for the menu, if you wish. This is an interesting use of SEO, and depending on the theme you selected, the description may show. Therefore, be sure to use something that is relevant to the description being shown. Perhaps you can use this as a subtitle or caption to your menu.
- The move option allows you to move the menu item up or down the menu.
- This text indicates the original title of the menu item.
- You have the option to remove the menu item or cancel your changes with these options.
Adding Items to an Existing Menu
You have several options when it comes to adding items to your menu.

As you can see from the image above, you can choose from the following sections of your website to add it as a menu item:
- Pages
- Posts
- Custom Links
- Categories
This makes menus very versatile, and not just for linking to pages. You can link to categories, specific URLS, even those that aren’t located on your own site.
When selecting one of these items, use the checkbox, then select Add to Menu.
Be sure to click Save Menu in the lower right corner to save your menu changes.
Deleting a Menu
If you find you no longer need this menu and don’t wish to rebuild it, you can delete it by clicking delete menu:
You will be asked to confirm if you are 100% sure you wish to delete the menu, so don’t live in fear about accidentally clicking this link and destroying your menu.
Rearranging Items on a Menu
You can rearrange the items in a menu by dragging and dropping them into your desired order. See the GIF below for an example:
 Be sure to click Save Menu when you’ve finished arranging the items as desired.
Creating a Menu
If you need additional menus, you can create them by clicking ‘create a new menu’.
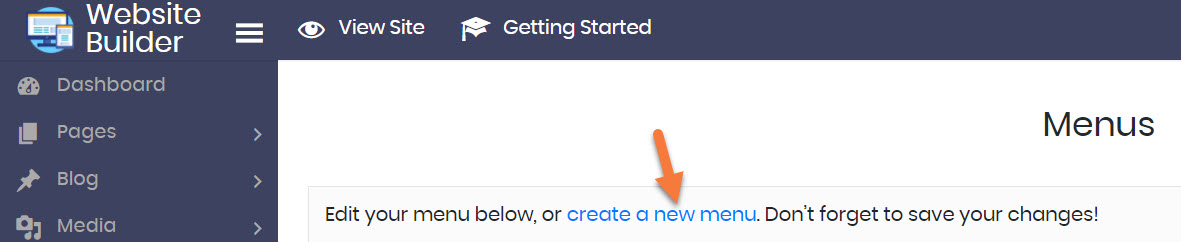
After clicking create a new menu, you’ll need to give your menu a name:
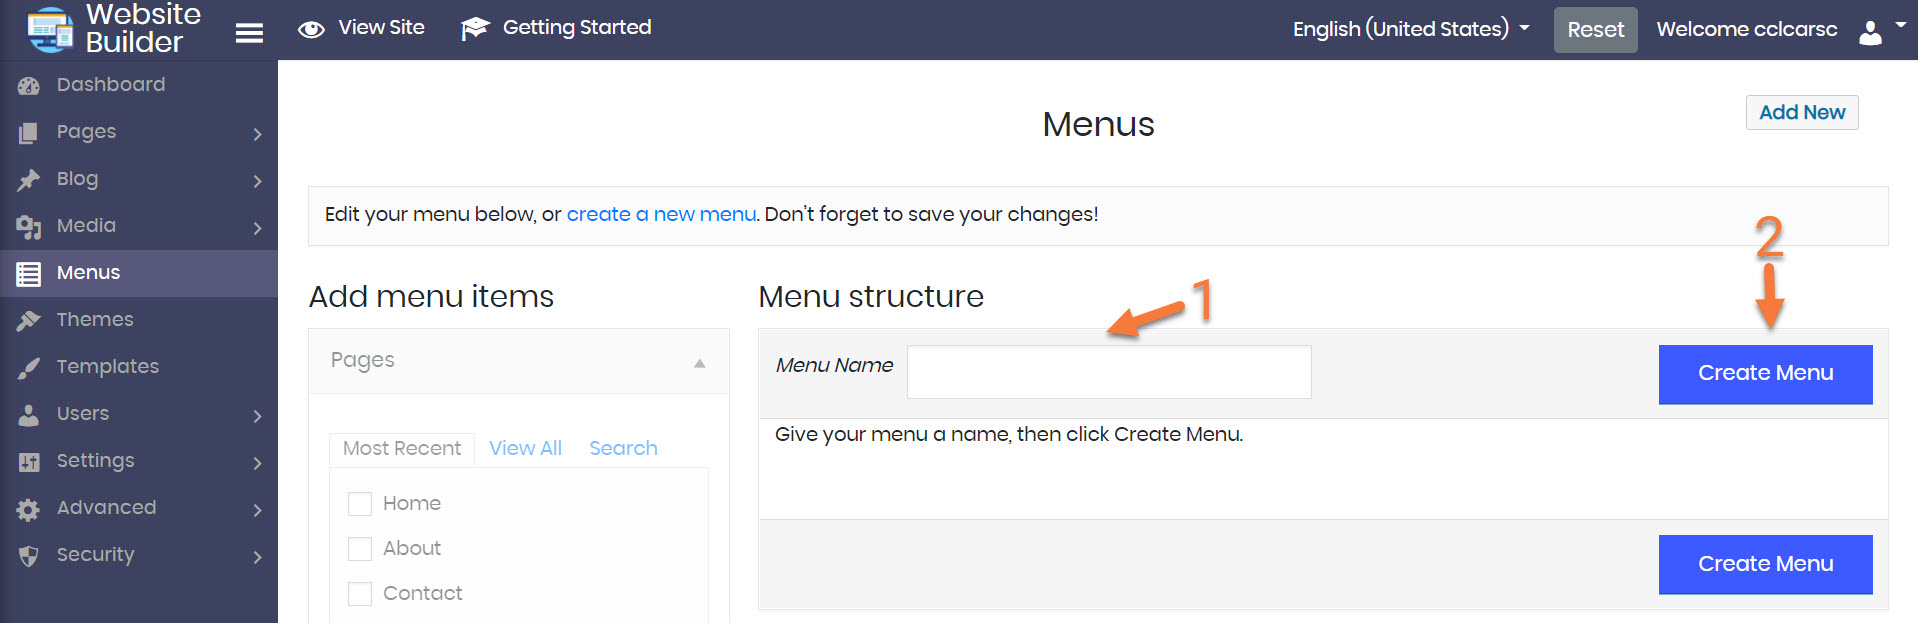
Be sure to click Create Menu when you’ve given it a name.
Now you can add items into the menu:
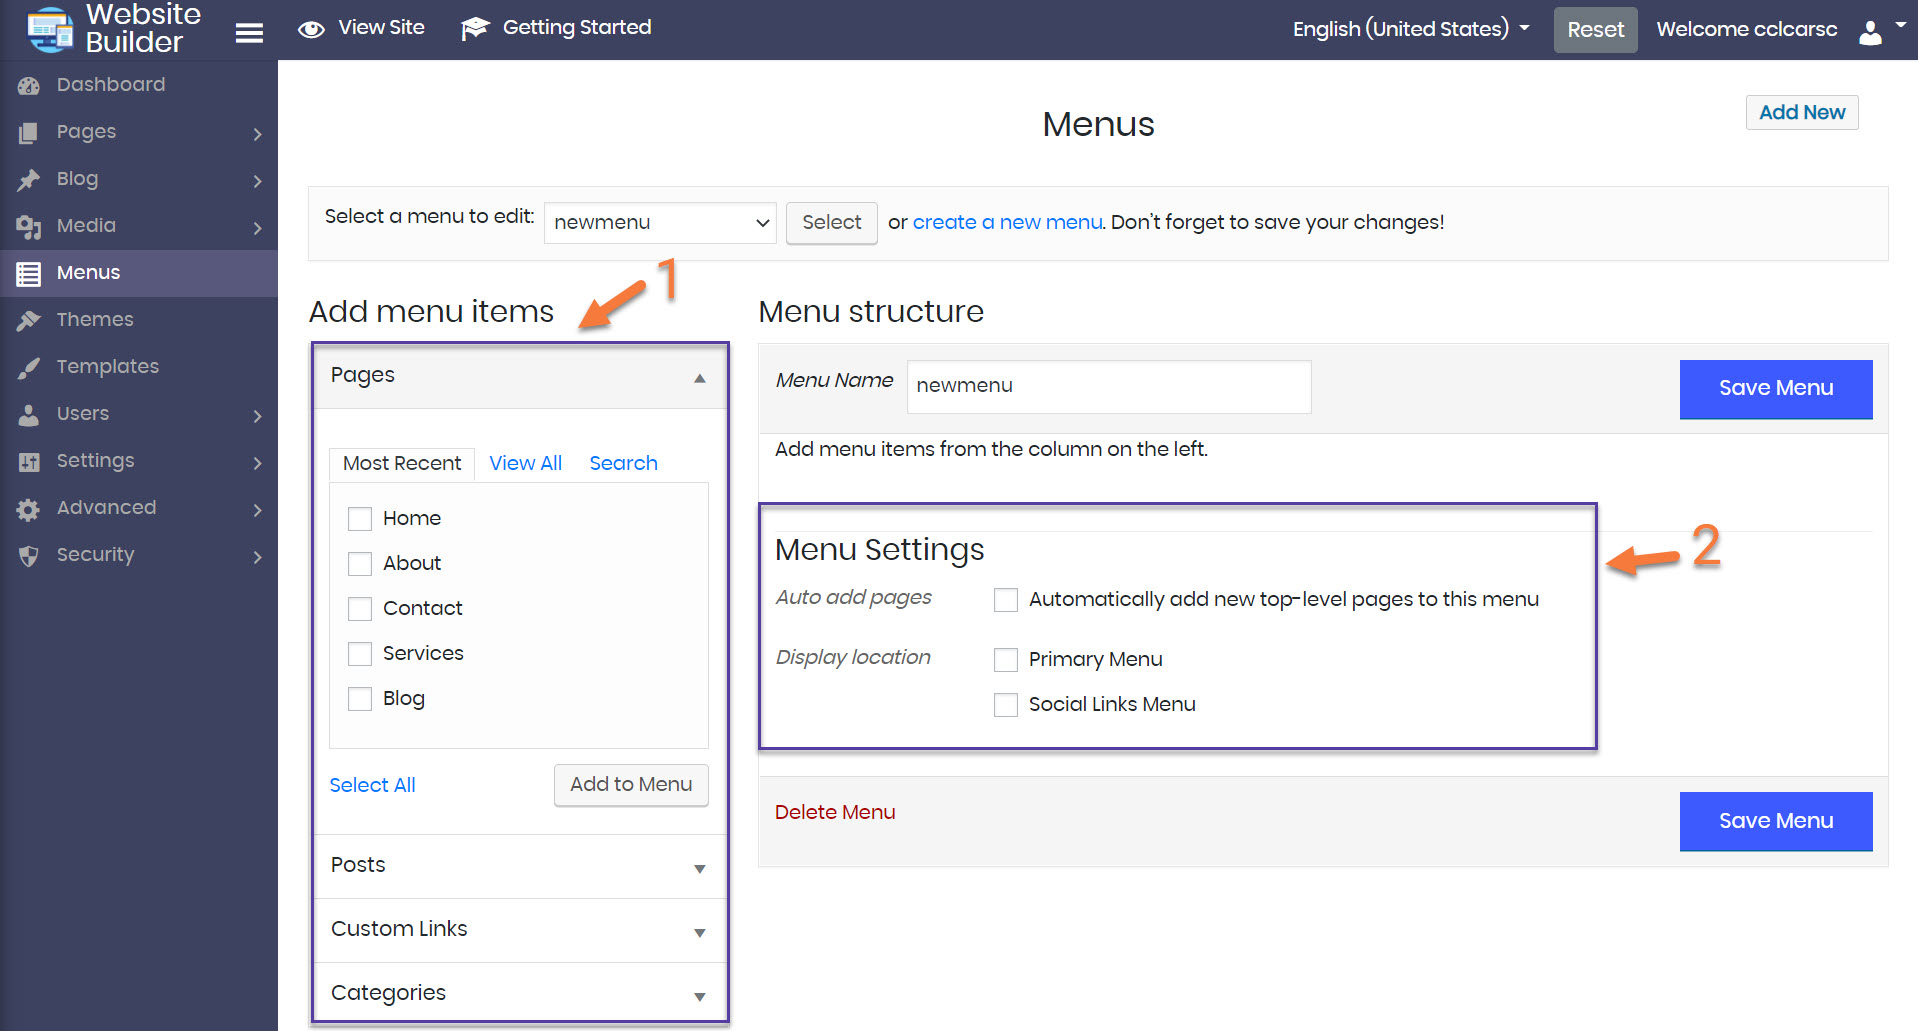
- You can add items from this area into your menu.
- The Menu Settings allow you to control certain settings, such as:
- Whether you want new, top level pages (meaning pages that aren’t beneath another; top-level pages are your main pages) to be automatically added to the menu.
- Where you want the menu to appear. The theme you’ve chosen will dictate where you can add your menu. If you want to make it your primary menu, you can use the settings here to do that. Alternatively, as you can see, I can make this new menu my Social Links menu.
Be sure to click Save Menu to save your changes!
And that is how you manage your menus and create new ones in the Website Builder!