Managing a busy WordPress site shouldn’t be a burden. Sometimes you may need to make some minor changes which only take a few minutes, but other times you may find yourself updating a LOT of assets on your site one after the other, a task that you should automate to make your life easier.
WordPress calls this a Search & Replace.
Other circumstances in which you may find a Search & Replace to be very useful are if you migrated from HTTP to HTTPS or have recently changed your domain name.
In this Knowledge Base article we will cover how to do a WordPress Search & Replace using 3 easy methods!
Let’s go!
How to Perform a WordPress Search and Replace Using a Pugin (Better Search Replace)
The Better Search Replace plugin is a fantastic choice and my go-to plugin when it comes to performing a search and replace for a lot of items. The plugin is free and from the noted WordPress plugin developers over at Delicious Brains (mmm 🧠🧠🧠). The plugin consolidates a lot of features from other plugins into one plugin and supports the following features:
- Serialization support for all tables.
- The ability to select specific tables.
- The ability to run a “dry run” to see how many fields will be updated.
- No server requirements aside from a running installation of WordPress.
- WordPress Multisite support.
With the Pro version you get these additional features:
- View exactly what changed during a search/replace.
- Backup and import the database while running a search/replace.
- Priority email support from the developer of the plugin.
- Save or load custom profiles for quickly repeating a search/replace in the future.
- Support and updates for 1 year.
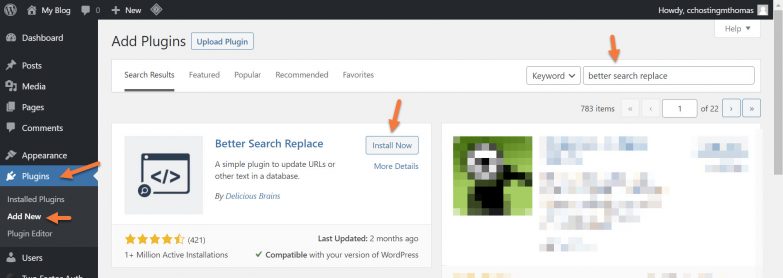
Step 1: Download, install and activate the Better Search Replace plugin by navigating to your /wp-admin > Clicking Plugins > Add New and searching for Better Search Replace.
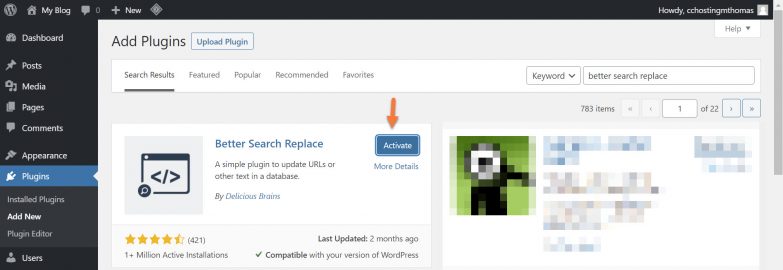
Once the plugin is installed, click Activate to enable Better Search Replace.
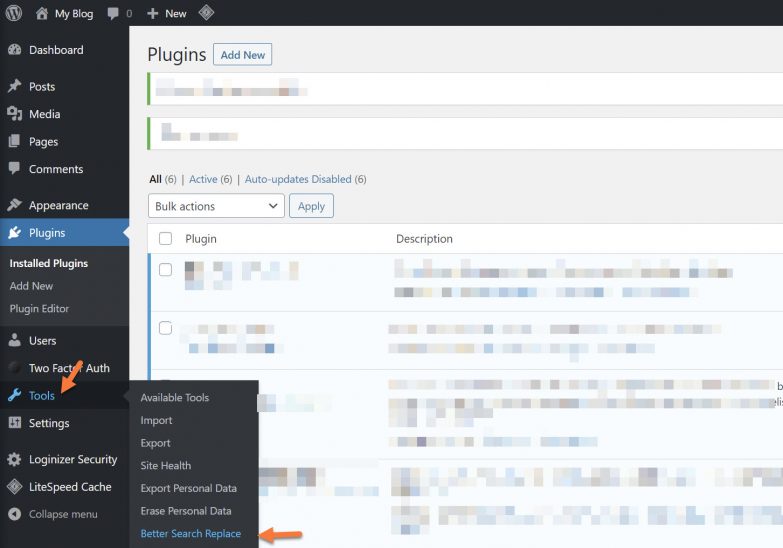
You will be returned to your Plugins area where you will see all of your plugins.
Step 2: To open Better Search Replace, hover over Tools on the left side and in the little menu which appears click Better Search Replace.
Step 3: When the Better Search Replace page opens, you will see you have a few options. Let’s examine them.
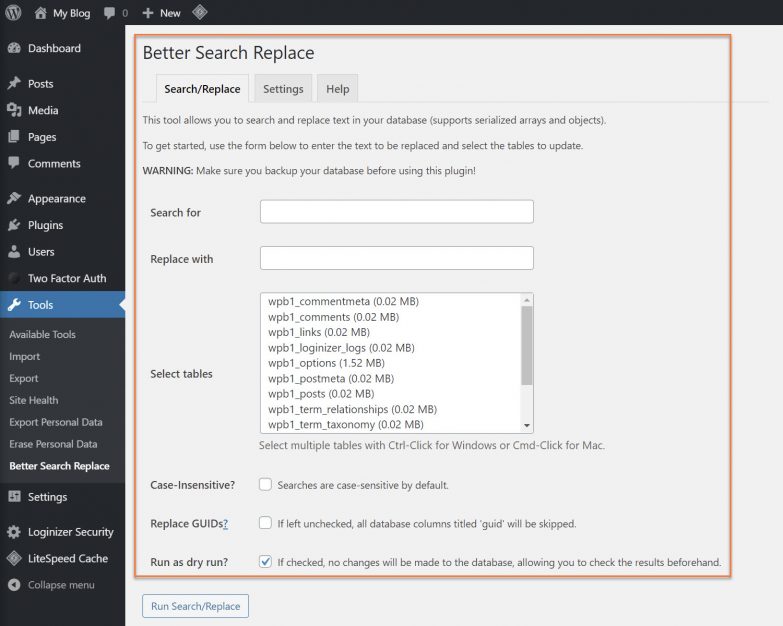
- In Search for you have will enter the text you want to change.
- In Replace with you will enter the text that will replace the original text.
- In Select tables you would select the tables you want Better Search Replace to query and update.
- Case-insensitive means Better Search Replace won’t care if you are searching for chemicloud or ChemiCloud.
- Replace GUIDs should generally be left alone. Please see the important note below regarding this.
- Run as dry run will just run the query and search, but no updates or changes will be made.
For my Search and Replace, I want to change the references to posts that contain the term cchosting to ChemiCloud. To do this, I’m going to configure my settings as follows:

After clicking Run/Search Replace, I can see it was successful and updated the references to cchosting in my posts database to ChemiCloud:
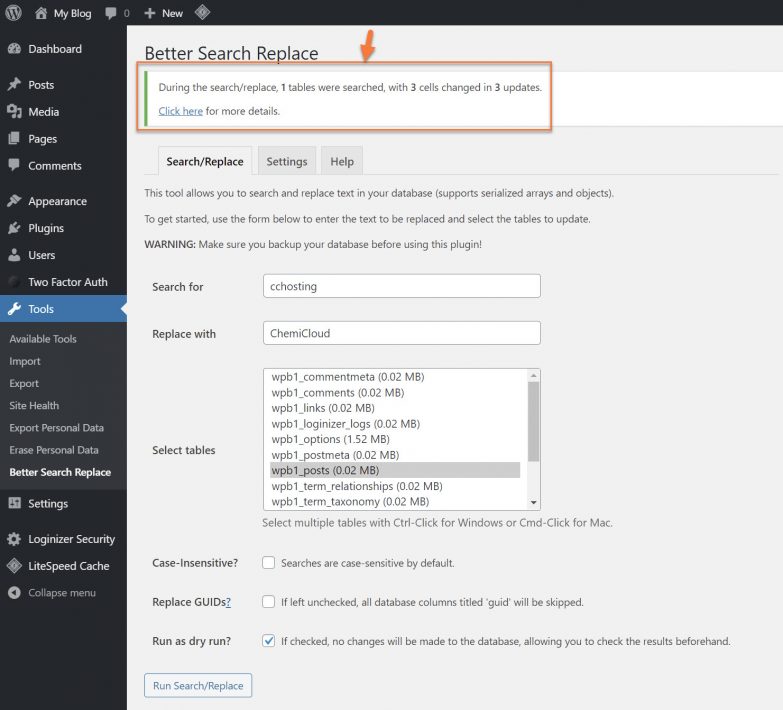
Success! And that is how you use Better Search Replace plugin to update content on your website quickly and easily!
How to Perform a WordPress Search and Replace Using the wp-cli
WP-CLI is a set of command-line tools for managing WordPress installations, without using a web browser.
Step 1: Open up an SSH connection to your hosting account. If you are not familiar with how to do this, please review our KB on the topic here.
Step 2: Once you are connected via SSH, you would use the following command to perform a search and replace:
wp search-replace 'original text' 'new text' --skip-columns=guid
By default, the search-replace command does the tables registered with $wpdb. You may have some custom tables that also need to be updated and then the –all-tables flag is very useful.
wp search-replace 'original text' 'new text' ---skip-columns=guid --all-tables --recurse-objects --precise
Note, we are using the flag –skip-columns=guid to ensure our GUIDs are not modified.
| Parameter | Description |
|---|---|
| –precise | Force the use of PHP (instead of SQL) which is more thorough, but slower. |
| –recurse-objects | Enable recursing into objects to replace strings. |
For more commands and examples for tasks, you can perform using wp search-replace, reference the official documentation on the subject here.
Struggling with WordPress troubleshooting? ChemiCloud is the hosting solution designed to save you time and money! 🤓 Try our Managed WordPress Hosting plans for just $1!
How to Perform a WordPress Search and Replace Using phpMyAdmin
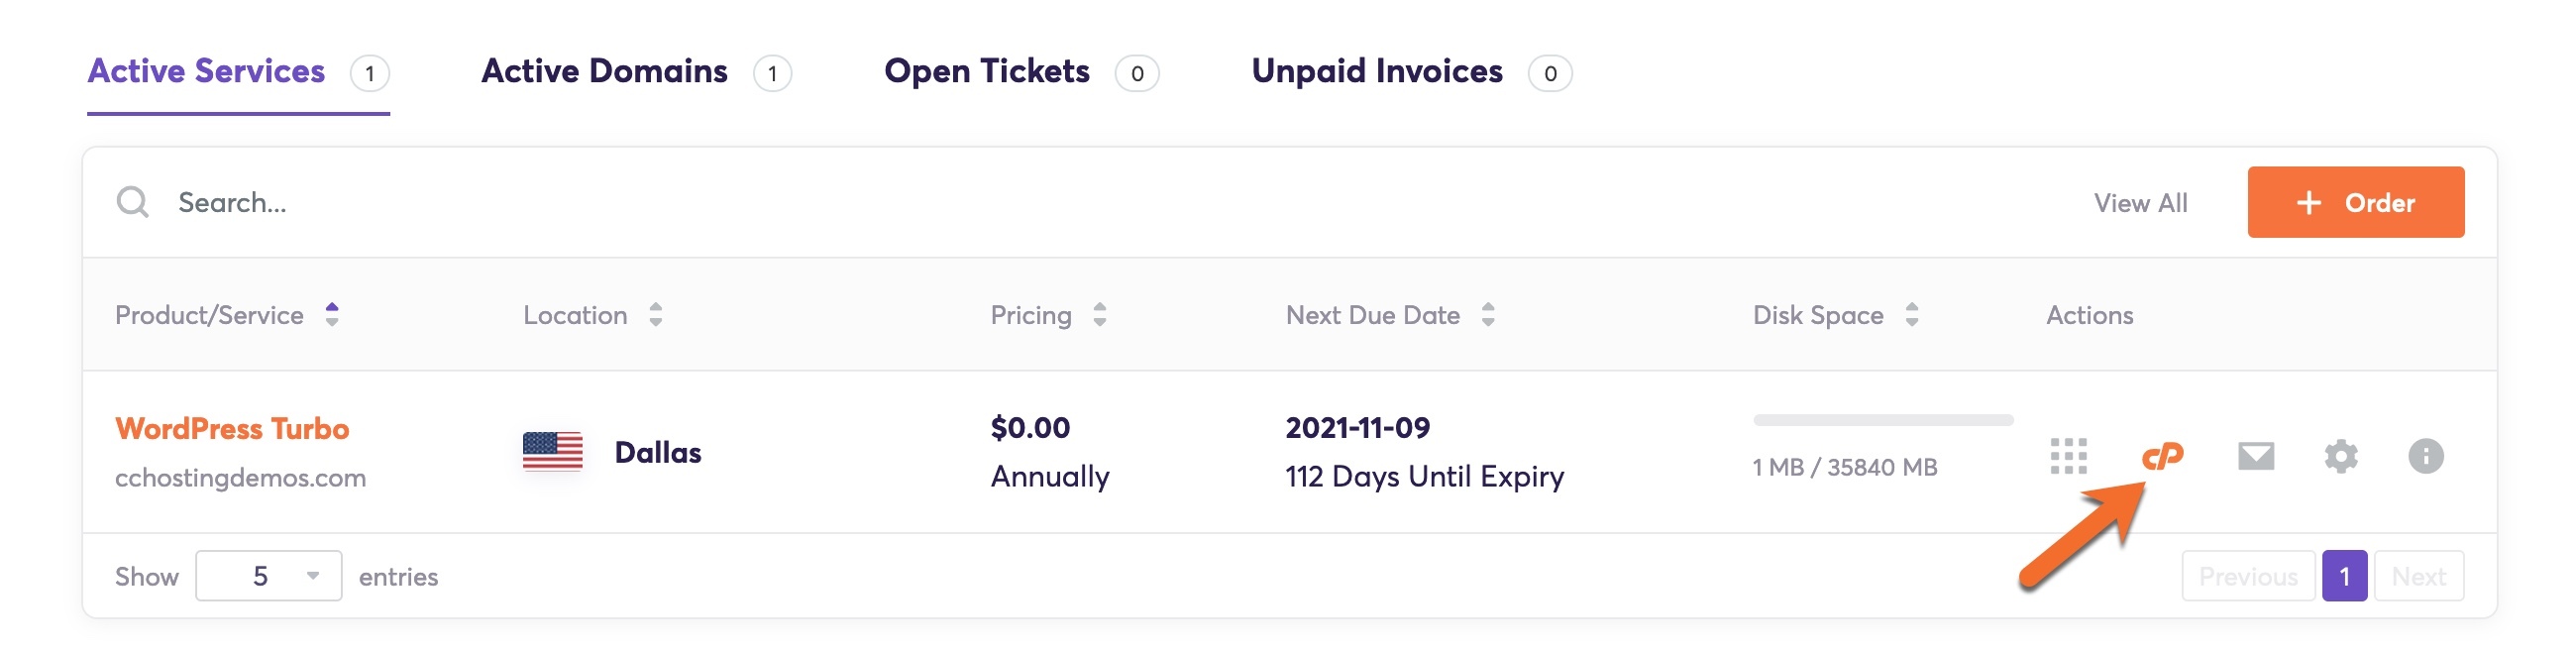
Step 1: Log in to your cPanel. There’s a lot of ways to do this, but the sure-fire easiest way is to log in to your Client Area, then open your cPanel.
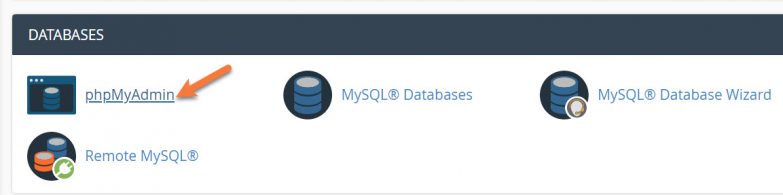
Step 2: Under the Databases section, click phpMyAdmin to open the utility.
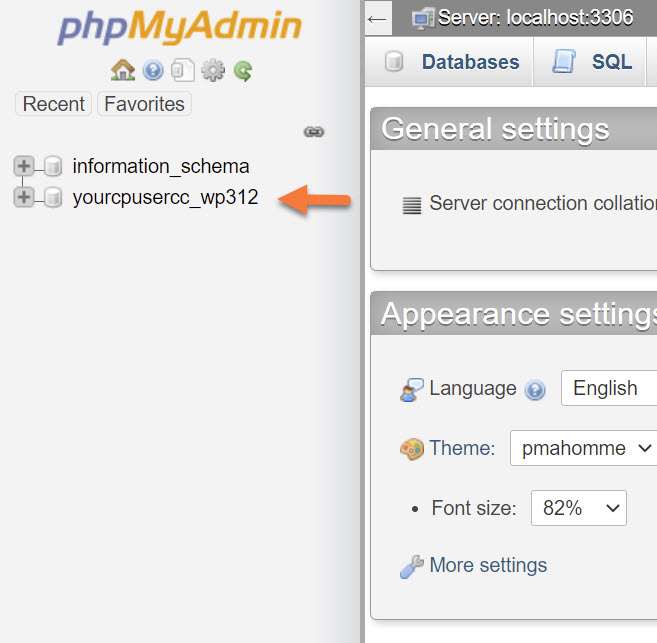
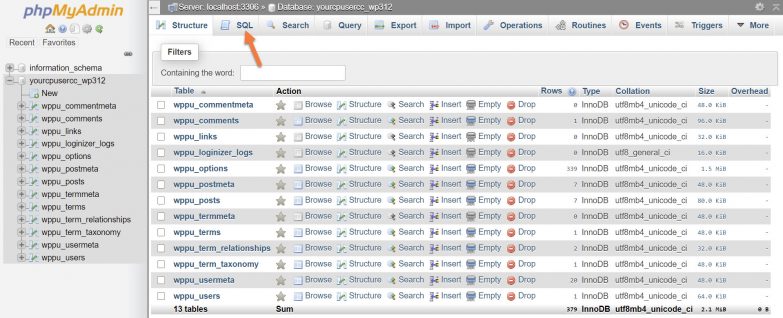
Step 3: Once phpMyAdmin is open, click on the database containing your WordPress installation on the left to select the database.
The list of tables in the database will be displayed to indicate the database has been selected.
Once you have selected the database for your WordPress installation, click SQL at the top of phpMyAdmin.
Step 4: Once you have clicked SQL, the phpMyAdmin app will display a text box which looks very much like the one below:
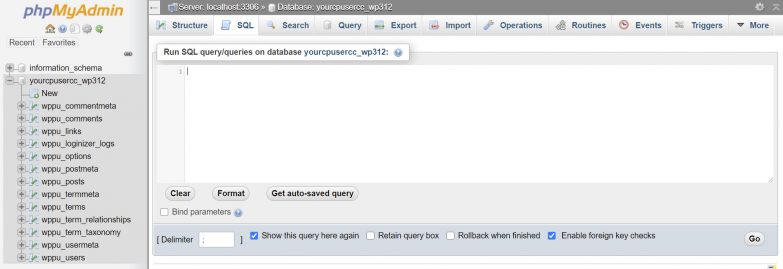
You can think of this text box as a console, similar to SSH. Using valid mySQL commands, you can make changes to your database tables and content within the tables with ease.
The commands you want to use to perform a search and replace via the SQL command line is as follows:
update TABLE_NAME set FIELD_NAME = replace(FIELD_NAME, 'Text to search for, 'Text to replace it with');
Simply update the appropriate areas of the command with the right table name, field name, and the text to search for and replace with, then press return on your keyboard to run the command.
When the process is finished, and depending on the amount of changes you are making, it could take a few minutes, you will see a message indicating the number of instances updated or changed. You can then visit your WordPress site to make sure the changes have been made successfully!
If you enjoyed this tutorial, then you’ll love our support! All ChemiCloud’s hosting plans include 24/7 support from our amazing support team.
Check out our Managed WordPress hosting plans and have your website migrated today!