If you’ve looked into web hosting or any «How To» articles for related topics like WordPress, you’ve probably seen a service called Cloudflare. If you’ve wondered what that is, wonder no more! Cloudflare is an Infrastructure and Website Security company, which also happens to provide some neat services, like Content Delivery Network (CDN), DDoS Mitigation, security services, and DNS Hosting. Cloudflare is also known for another service they offer called https://1.1.1.1, a free DNS lookup service for Home and SOHO Users.
If you run a website, you probably want it to load as fast as possible. Maybe that’s why you host your website with ChemiCloud, our hosting is already lightning fast as is, but with the addition of Cloudflare, it becomes even faster. Cloudflare offers a free plan that will suit the needs of most users and includes one really cool perk – unlimited CDN transfer. Yep, that’s right!
In this article, we’re going to examine how to get started with Cloudflare, and explore other items of note, such as using Cloudflare on your WordPress site, using Under Attack and Development mode, purging the CloudFlare Cache, as well as configuring multiple users and the differences the 3 SSL/TLS encryption modes offered by Cloudflare.
Let’s dive in!
Table of Contents
How to Get Started with Cloudflare
Cloudflare offers a number of different plans for customers, but most users will find their free plan is a great start. To get started, you’ll need to create a free account. Head over to this link to do just that.
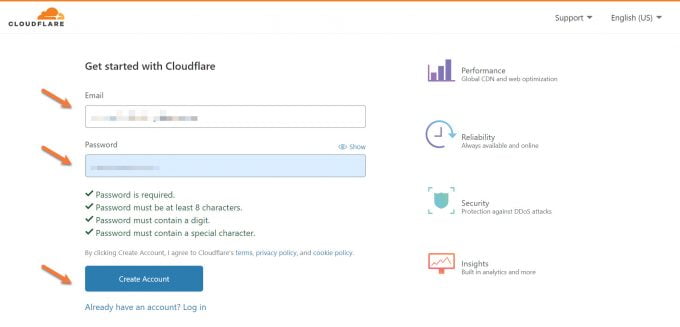
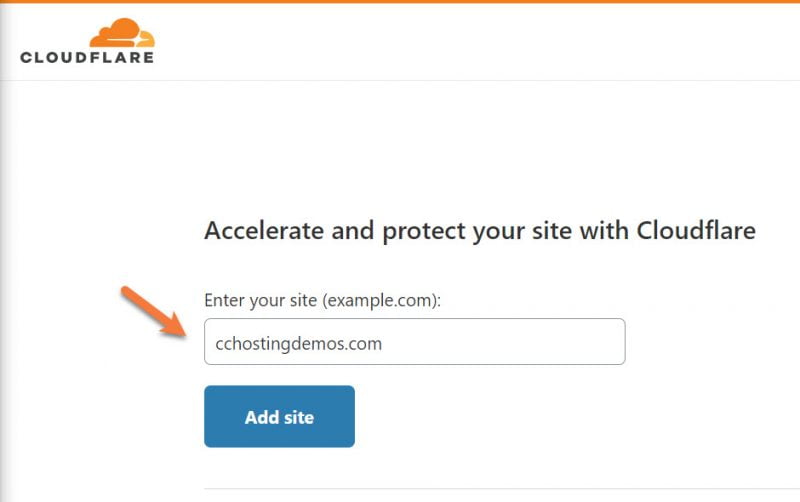
After entering your email and password, Cloudflare will ask you for your domain name:
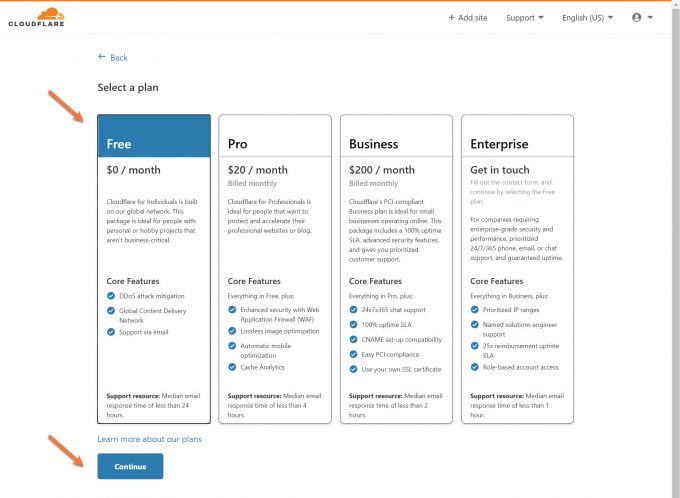
Next, you’ll see a list of the Cloudflare plans. To proceed with the free plan, click on Free, then click Continue.
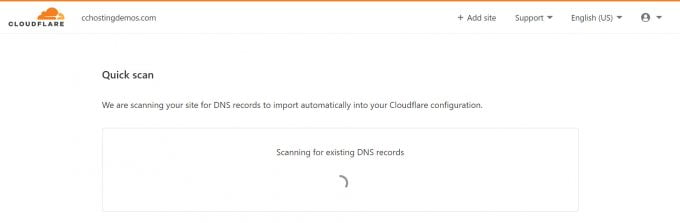
Cloudflare will scan the DNS records of your website based on the domain you previously entered.
After your records are scanned, they will be presented to you. You’ll also have the option to add any records which may have missed.
On this page, you can also see which DNS record types will be proxied (or placed behind) by Cloudflare and which ones cannot be proxied.

After verifying, click continue to proceed to the last step.
The last step is to change the DNS nameservers for your domain from your web hosts or domain registrar’s DNS to Cloudflare. You will be assigned two random DNS nameservers from the Cloudflare network. In the example below, you can see mine are matteo and walk.
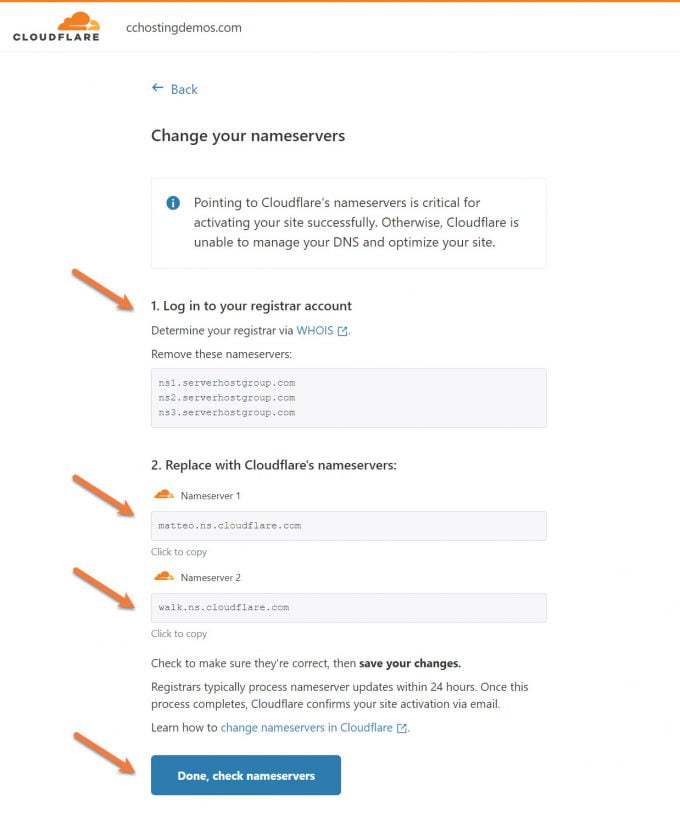
After you have changed the DNS nameservers with your domain registrar, it may take a few minutes to a few hours to update, but you can click the blue «Done, check nameservers» button to proceed.
Congrats! You’ve just signed up and configured your domain for Cloudflare.
Cloudflare Quick Start Guide
Next, you will be prompted to complete the Cloudflare Quick Start Guide.
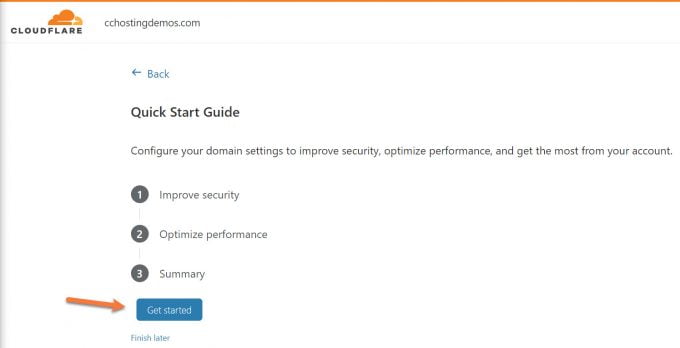
The Cloudflare Quick Start Guide will help you improve security, optimize performance, and get the most from the free plan.
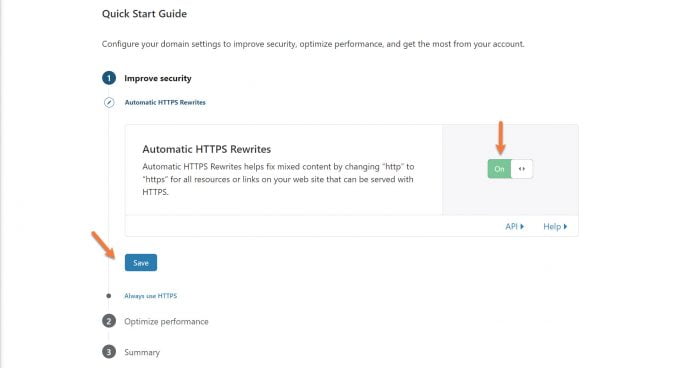
Step one is to improve security by turning on Automatic HTTPS Rewrites. This is for sites that may have mixed content on them, such as a link you inserted where you may have forgotten to link it as https://. You’ll definitely want this feature enabled:
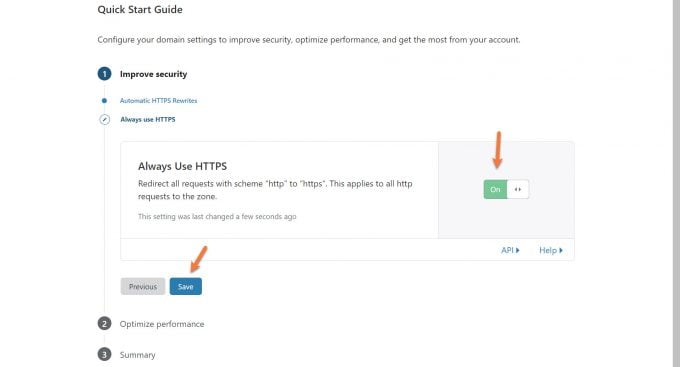
Next is the Always Use HTPS feature. This means if someone types your website in their browser as http://www.yourwebsite.tld, Cloudflare will automatically reroute them to https://www.yourwebsite.tld, the secure version of your site. This feature is toggled off by default. You also want this one enabled, so click the toggle to enable this feature. Then click save.
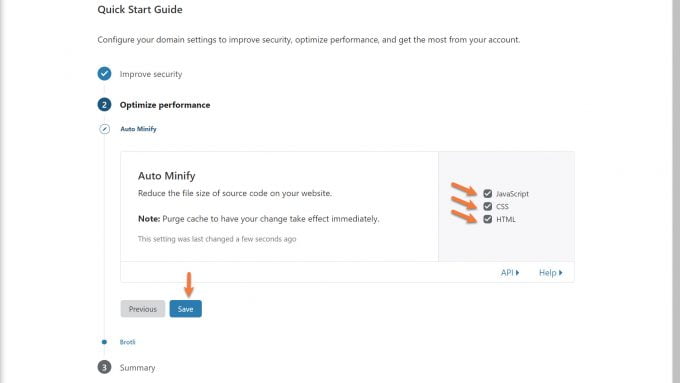
The next performance feature is to enable Auto Minify for your JavaScript, CSS, and HTML. This is a really handy feature that can speed up delivery of code on your website by removing unnecessary characters, like whitespaces, comments, and more from the code without changing the functionality of the code.
The three features are unchecked by default. For this configuration, let’s enable them, then click the blue save button.
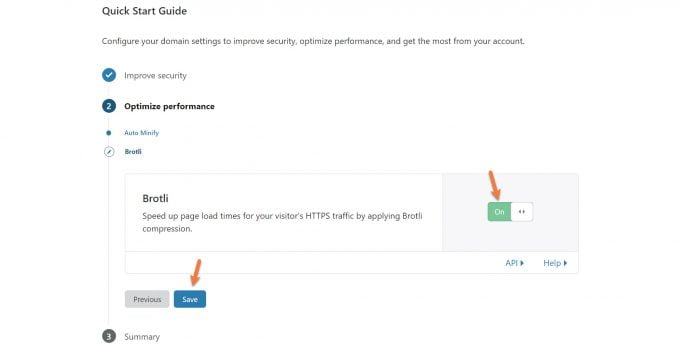
The final performance option you can enable is Brotli Compression. Brotli, not to be confused with Broccoli, is a fairly new web standard which uses data compression techniques to compress data as it is requested by the web browser, and can actually outperform gzip in many situations. Brotli is commonly used to compress fonts as they are delivered to the browser, but it’s also important to know, Brotli is being used a a general compression method by Chrome and Firefox, rather than being one just used for fonts. For on the fly, dynamic content compression Brotli may have some performance issues. Cloudflare did some testing and published their findings which is an interesting read if you have some time.
Ensure this option is toggled to on, then click the blue Save button to continue.
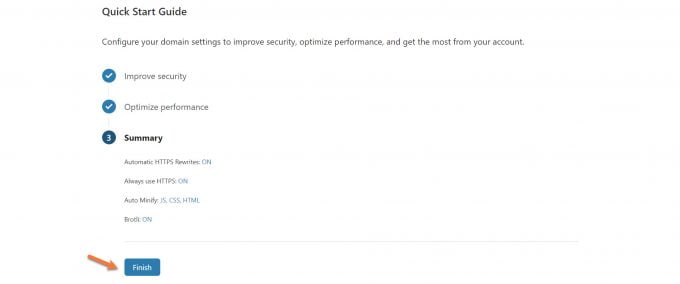
On the summary page, you’ll see a recap of the changes you’ve made, just click the blue Finish to complete the quick start guide.
Complete Cloudflare Setup
After you complete the Quick Start Guide, you’ll be directed to your Cloudflare Dashboard. By now, your Domain Registrar has probably updated their DNS records to reflect your changes to CloudFlare, so it’s a great time to re-check your nameservers using the tool at the bottom of the Cloudflare Dashboard:

After clicking re-check, your request will be placed in the queue for Cloudflare to check in a few hours. It probably won’t take that long though. If you refresh the page a few minutes after clicking «Re-check now», you’ll likely see this:
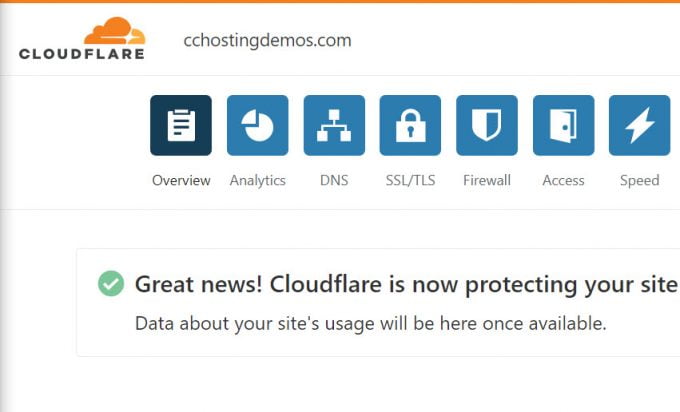
Congrats! Your site is now protected by Cloudflare!
Important Cloudflare Features To Be Aware Of
Development Mode
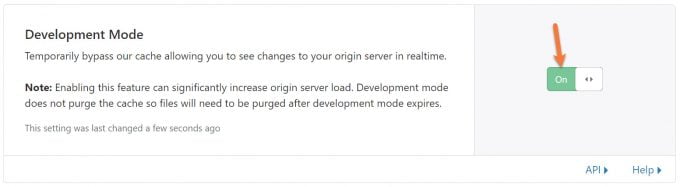
Development Mode temporarily suspends Cloudflare’s edge caching, minification, polish, and railgun features for 3 hours unless disabled beforehand. Development Mode allows customers to immediately observe changes to their cacheable content (like images, CSS, or JavaScript).
To enable Development Mode:
- Log in to your Cloudflare account.
- Select your domain.
- Select the Caching tab.

Toggle Development Mode to On.
«I’m Under Attack» Mode
Enable I’m Under Attack mode via the following steps:
- Log in to your Cloudflare account.
- Select the domain to protect.
- Click the Overview tab.

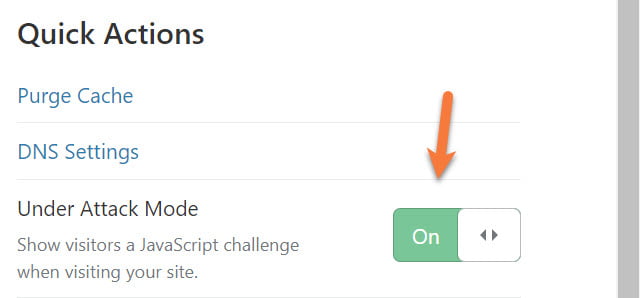
- On the right side beneath Quick Actions, toggle the Under Attack Mode toggle to the On position.
Purging The Cloudflare Cache
Let’s say you update an image on one of your WordPress posts and when you load that new post in your browser after publishing, you still see the old image. Even after clearing your browser cache, that darned image is still there. What do you do?
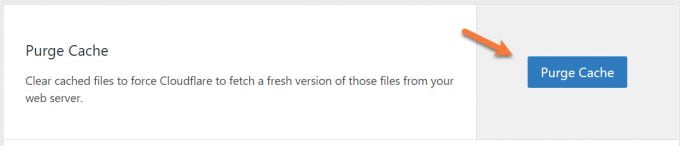
Well, if you’re using Cloudflare, you may need to purge their cache. If you have the Cloudflare WordPress plugin installed, you can purge the cache from the /wp-admin menu on the left by clicking Settings then Cloudflare.
To purge the cache, click the blue Purge Cache button.
Alternatively, you can also purge the Cloudflare Cache from the Cloudflare Control Panel.
At the top of their control panel, click the Caching tab. Then click the Configuration tab.

You’ll have the option to purge everything or do a custom purge.

Managing DNS Records
Adding DNS Records
From time to time you may need to add DNS records. For example, if you add a subdomain to your website, you’ll need to add that record manually inside of Cloudflare. Fortunately, their DNS Manager makes it easy to do this.
When you first add a domain to Cloudflare, a scan of common DNS records is performed in an attempt to automatically add all of the domain’s DNS records to the Cloudflare DNS app. If you need to add records manually for a domain, follow the procedure below:
- Log in to the Cloudflare dashboard.
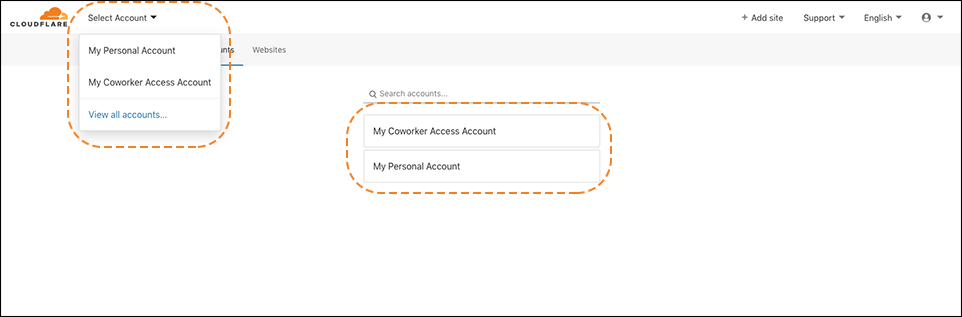
- Click the appropriate Cloudflare account for the domain where you will add records.
- Ensure the proper domain is selected.
- Click the DNS app.
- The UI interface for adding DNS records appears under DNS Records:
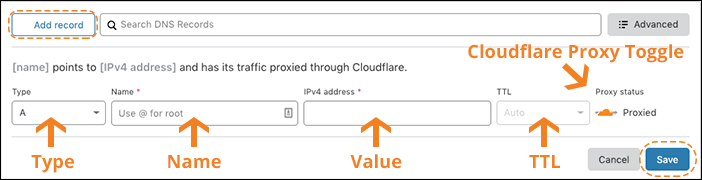
6. Replace the Name with a subdomain or the root domain.
Per Internet standards, Name must:* be 63 characters or less,
- start with a letter,
- end with a letter or digit,
- and contain only letters, digits, or a hyphen as the interior characters.
- Additionally, Cloudflare allows an underscore _ in the A and CNAME record **Name** since some modern web services support an underscore. However, Cloudflare discourages using underscores due to limited browser support.
7. (Optional) Some record types such A, AAAA, and CNAME allow a customer to toggle the Cloudflare proxy on or off. For the Cloudflare Proxy Toggle:
- An orange cloud icon proxies traffic through Cloudflare for the DNS record Name.
- A grey cloud icon ensures traffic for the DNS record Name is not proxied to Cloudflare. Cloudflare still serves DNS for a grey clouded DNS record, but no other Cloudflare features such as SSL, page rules, caching, WAF, etc are applied.
8. The Type selection defaults to A records. Expand the DNS record types in the tables below for further instructions pertaining to each record type.
Deleting DNS Records
1. Log in to the Cloudflare dashboard.
2. Choose the appropriate Cloudflare account associated with the domain where you will delete records.
3. Choose the domain for which you will delete records
4. Click the DNS app.
5. Identify the record to delete and click Edit.
6. Click Delete. A confirmation dialog appears.
7. Click Delete again to confirm.
For more information regarding managing DNS records on the Cloudflare platform, refer to their documentation here and here.
Setting Up Multi-User Accounts
With a multi-user account, you can control multiple websites and invite users to manage Cloudflare settings on those websites. A user can access multiple accounts and have different permissions for each account that they can access.
There are two user roles: Super Administrator and Administrator. Super Administrators can edit all Cloudflare settings, make purchases, update billing, manage memberships and revoke access of other Super Administrators. As the account owner, you are automatically assigned the Super Administrator role.
Administrators can edit all Cloudflare settings except for membership management and billing. When setting up your Cloudflare account, you are automatically assigned the Super Administrator role. For Free, Pro, and Business accounts, each additional member will be automatically assigned the Administrator role.
To set up a multi-user account:
1. Log in to the Cloudflare dashboard.
2. Choose the account that you would like to update.
3. Click the Members tab.
4. Enter the email address of the member you want to invite to your account. Click Invite. That member will receive an email invitation from Cloudflare to join your account.

User roles and permissions
All roles and permissions have access to the Overview app. For a detailed breakdown of available user roles and permissions, see below.
| Role | Apps with permissions |
| Administrator (Access the full account, except for viewing payment information, adding/removing account members, or canceling subscriptions) |
|
| Super Administrator – All Privileges (Edit any Cloudflare setting, make purchases, update billing, and manage memberships, revoke access of other Super Administrators) |
|
| Administrator Read Only Can access the full account in read-only mode. |
|
| Analytics (Read analytics) |
|
| DNS (Edit DNS records) |
|
| SSL/TLS, Caching, Performance, Page Rules, and Customization (Edit most Cloudflare settings except for DNS and Firewall) |
|
| Firewall (Edit WAF, IP Firewall, and Zone Lockdown settings) |
|
| Cloudflare Access (Edit Cloudflare Access policies) |
|
| Cloudflare Workers (Edit Cloudflare Workers) |
|
| Cache Purge (Purge the edge cache) |
|
| Stream (Can edit Cloudflare Stream media) |
|
| Load Balancer (Edit Load Balancers, Pools, Origins, and Health Checks) |
|
| Log Share (Edit Enterprise Log Share configuration) |
|
| Billing (Edit the account billing profile and subscriptions) |
|
| Audit Log Viewer (Can view audit logs) |
|
Cloudflare has additional documentation regarding Multi-User Accounts here.
Understanding the Differences Between The 3 SSL/TLS Encryption Modes
The SSL section of the Cloudflare SSL/TLS app contains several options that determine whether Cloudflare securely connects to your origin web server.
After reviewing the description of each SSL option, refer to Cloudflare’s list of recommended SSL options depending on your origin web server SSL configuration:
- Off
- Flexible
- Full
- Full (strict)
Off
Off disables secure HTTPS connections between both visitors and Cloudflare and between Cloudflare and your origin web server. Visitors can only view your website over HTTP. Any connections attempted via HTTPS result in an HTTP 301 redirect to unencrypted HTTP.
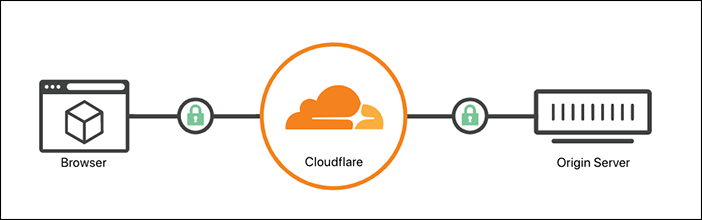
Flexible

The Flexible SSL option allows a secure HTTPS connection between your visitor and Cloudflare but forces Cloudflare to connect to your origin web server over unencrypted HTTP. An SSL certificate is not required on your origin web server and your visitors will still see the site as being HTTPS enabled.
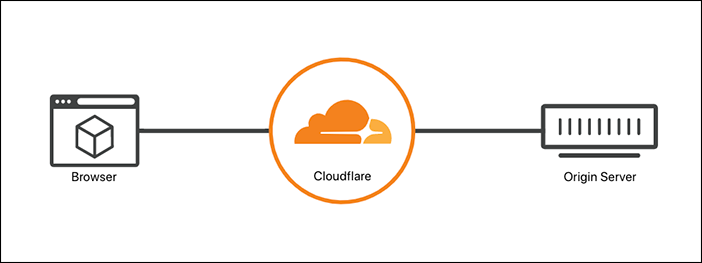
Full
Full ensures a secure connection between both the visitor and your Cloudflare domain and between Cloudflare and your web server.
To avoid 525 errors, before enabling Full SSL option, configure your origin web server to allow HTTPS connections on port 443 and present either a self-signed SSL certificate, a Cloudflare Origin CA certificate, or a valid certificate purchased from a Certificate Authority.
Full (Strict)
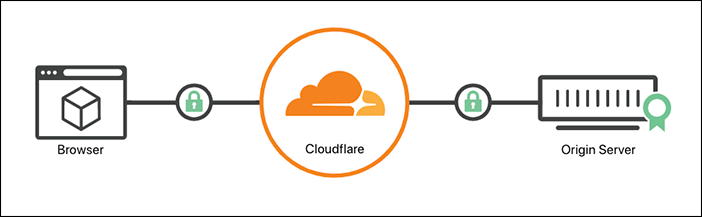
Full (strict) ensures a secure connection between both the visitor and your Cloudflare domain and between Cloudflare and your origin web server. Full (strict) support SSL hostname validation against CNAME targets.
Configure your origin webserver to allow HTTPS connections on port 443 and present either a Cloudflare Origin CA certificate or a valid certificate purchased from a Certificate Authority. This certificate must be signed by a Certificate Authority that is trusted by Cloudflare, have a future expiration date, and cover the requested domain name (hostname).
SSL/TLS Recommender
To check if your domain is compatible with a more secure SSL/TLS mode, enable the SSL/TLS Recommender. The SSL/TLS Recommender checks for content differences in your site when served over HTTP and HTTPS. It also checks if your site is configured with a valid TLS certificate. Based on this and recursive crawls over encrypted and unencrypted connections, it recommends the mode that maximizes security while preserving content.
When enabled, the SSL/TLS Recommender sends the zone owner an email with an SSL/TLS mode recommendation if one is available. A «Recommended by Cloudflare» tag displays next to the recommended mode on the SSL/TLS page. If you do not receive an email, the recommendation is to keep the current mode. You are not required to use the recommendation. The Recommender runs periodically and sends notifications if new recommendations become available. The recommendation is never lower than your current SSL/TLS mode.
The SSL/TLS Recommender is not intended to resolve issues with website or domain functionality. The Recommender will not be able to complete its scan and show the «Recommended by Cloudflare» tag if any of the following apply:
- the domain is not functional
- you enable Cloudflare Workers® for your website
- you block all bots
- there are no active SSL-specific Page Rules.
Configuring Cloudflare Plugin for WordPress
The Cloudflare for WordPress plugin is super handy, though it is not required. To install the plugin, navigate to your /wp-admin area and click Plugins on the left side, then click Add New.
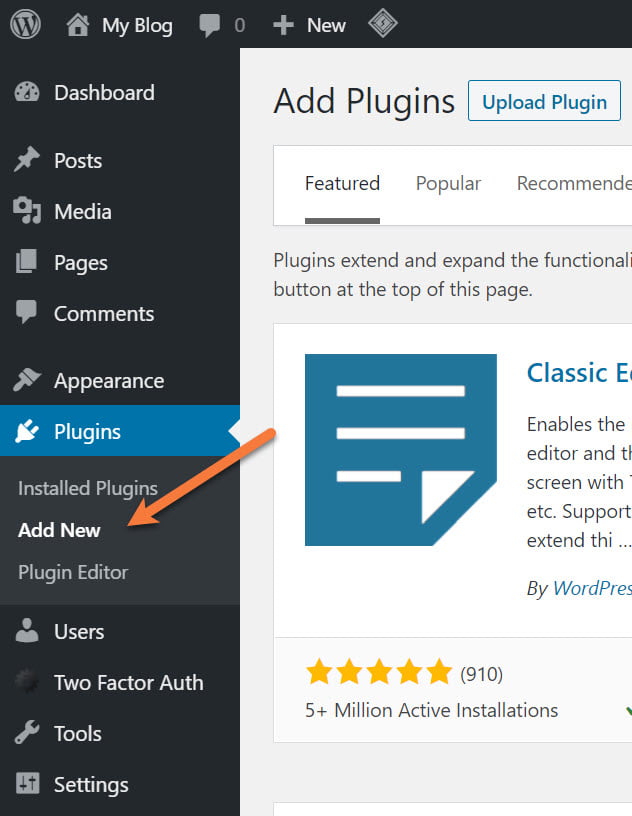
In the top right of the Plugins area, look for the search box and search for Cloudflare. Click Install Now to download and install the plugin.
Once the plugin has downloaded, click Activate to enable the Cloudflare plugin.
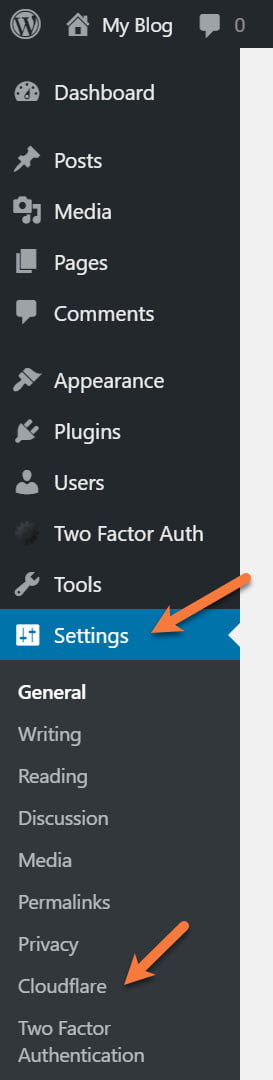
Next, you’ll need to connect your Cloudflare account to your WordPress site. To do that, click Settings on the left of your /wp-admin, then click Cloudflare.
Next, you’ll need to connect your Cloudflare account. Click Sign In.
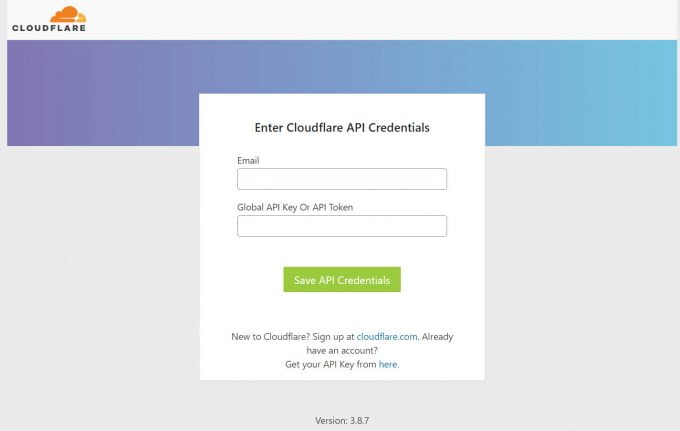
Next, enter your email address and your Global API key:
You’ll need to obtain your Global API Key inside of Cloudflare to fully enable this feature. To do that, click here to open the API tokens area of Cloudflare in a new tab.
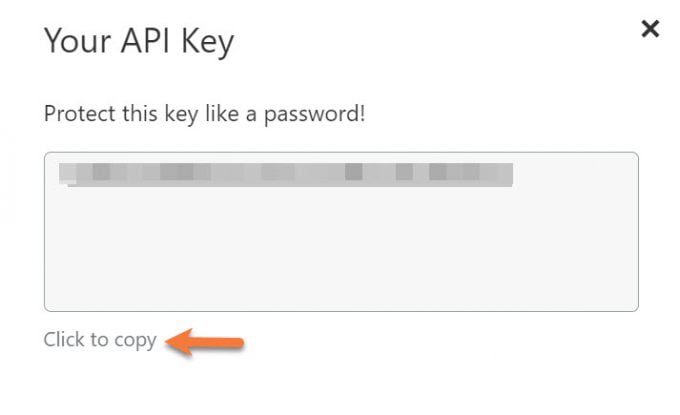
Click «View» next to Global API Key to view this key.
You’ll need to enter your Cloudflare password in order to obtain this key. Also, don’t share this key with anyone, it’s private and specific to your account.
Once the key is displayed, click the «Click to copy» link to copy it to your clipboard.
Return to your WordPress page and paste it into your «Enter Cloudflare API Credentials» box, then click the green Save API Credentials button.
Next, you’ll want to make use of the Apply Recommended Cloudflare Settings for WordPress settings.
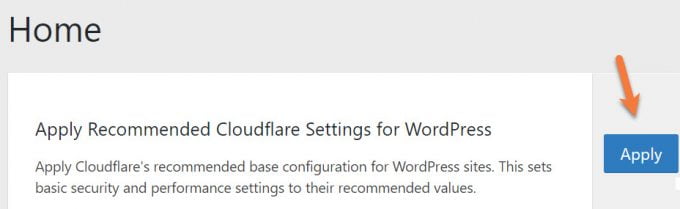
And that’s it! Now you’ve installed the Cloudflare plugin for WordPress, linked it to your account, and applied the automatic WordPress settings!
Configuring Cloudflare In LiteSpeed Cache Plugin for WordPress
If you’re hosting your website with ChemiCloud, or your web host uses LiteSpeed Web Server, and you’re running WordPress, the LiteSpeed Cache Plugin for WordPress is a must-have for your website. Not only does it leverage the superfast caching made possible by LiteSpeed Web Server, but it also features integrated CDN functionality with CloudFlare.
If you don’t have the LiteSpeed Cache Plugin installed, navigate to your /wp-admin and click Plugins on the left side, then click Add New.
In the top right of the Plugins area, look for the search box and search for LiteSpeed Cache. Click Install Now to download and install the plugin.
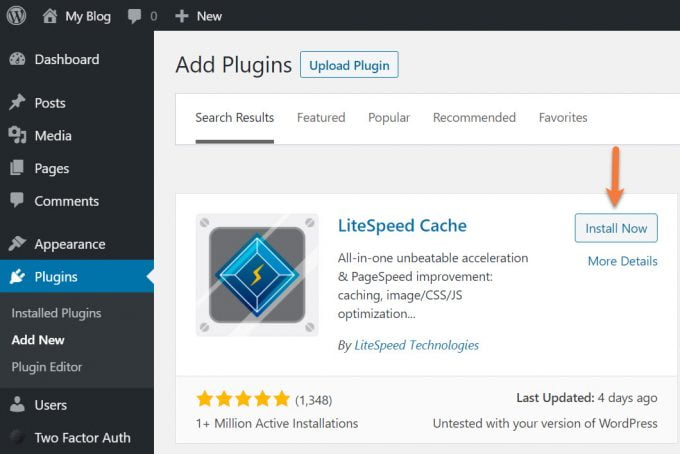
Once it’s downloaded, click Activate to enable the plugin.
Next, click the LiteSpeed Cache option that appeared on the left side of your /wp-admin Dashboard. When the menu for LiteSpeed Cache expands, click the CDN option.

Scroll down on the page until you see the Cloudflare API section. Click the On button to enable the Cloudflare CDN settings in LiteSpeed Cache.
You’ll need to obtain your Global API Key inside of Cloudflare to fully enable this feature. To do that, click here to open the API tokens area of Cloudflare in a new tab.
Click «View» next to the Global API Key to view this key.
You’ll need to enter your Cloudflare password in order to obtain this key. Also, don’t share this key with anyone, it’s private and specific to your account.
Once the key is displayed, click the «Click to copy» link to copy it to your clipboard.
Return to your WordPress site and paste the key into the Global API Key field, then enter your email address (the one associated with your Cloudflare account) and your domain name.
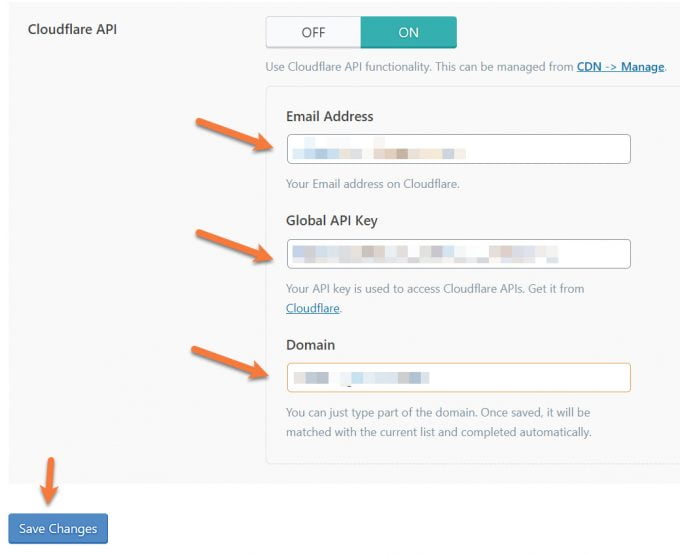
Click the blue Save Changes button to enable the Cloudflare API with the LiteSpeed Plugin.
And that’s it! Now your WordPress Site is linked to your Cloudflare account and the LiteSpeed Cache plugin will utilize the Cloudflare CDN for assets and content on your WordPress site! Pretty cool, eh?
And that’s pretty much it!
We really hope you enjoyed this post on getting started with Cloudflare. It’s a super-powerful platform that can save your bacon when you’re under attack, make it easy to update DNS records, and speed up your website so visitors from all around the world can read your content!
Speaking of fast hosting and places to host your content, ChemiCloud offers the best customer service in the hosting industry and runs on a secure, lightning-fast hosting platform with support from Happiness Engineers available 24×7. Check our web hosting plans today!