Hello and welcome to this ChemiCloud hosting tutorial!
Today we’re going to show you how you can install the modern and ultra powerful Concrete CMS directly to your ChemiCloud hosting account!
Install Concrete CMS on ChemiCloud
First, be sure to log into your ChemiCloud cPanel. This is your hosting control panel.
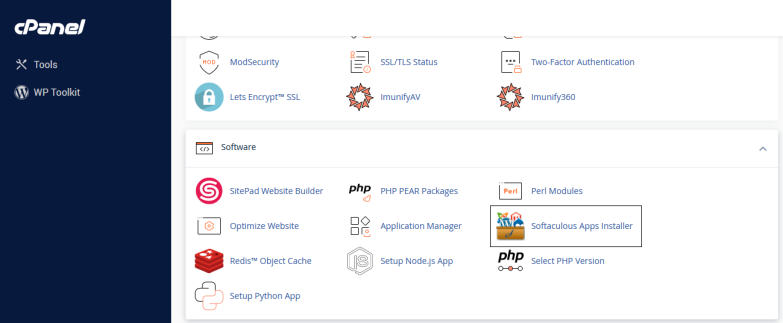
Now that you’re in, scroll down. Find the Softaculous App Installer icon here in the cPanel. Now – click or select it.
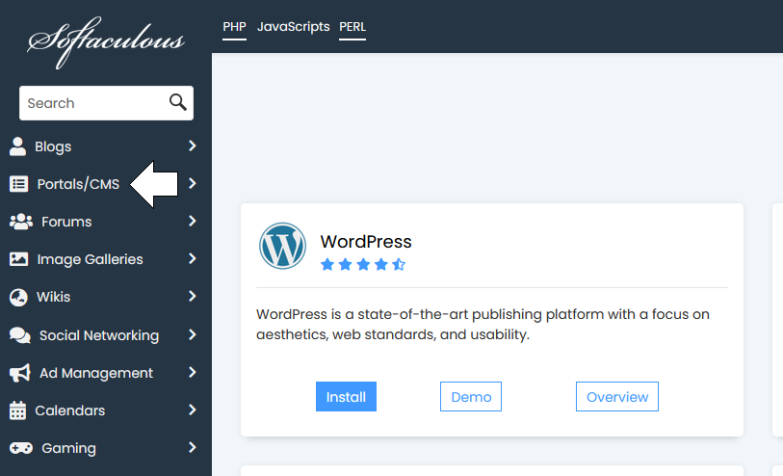
A new page will load, with a menu down the left side of the screen. On that menu, select ‘Portals/CMS’. When that sub-menu expands, we’ll find Concrete CMS on it. Click on Concrete CMS!
Take a moment to review the page.
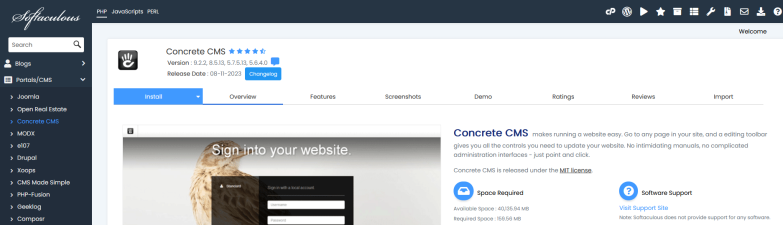
Concrete CMS offers an overview of their product, with a direct link to their support site.
Further, tabs along the top of this page allow you to read up on popular Features, view screenshots, and even demo the software ahead of an install. Concrete CMS offers great transparency too, with Ratings and Reviews just a click away – allowing you to see just what other users have to say!
If you have an existing Concrete CMS installation, the Import tab allows you to start the process of moving your CMS here to ChemiCloud!
Install Concrete CMS, Step-by-Step.
To install Concrete CMS – click the Install or Install Now button on the Overview.

During setup, you’ll get to choose where to install Concrete. You can choose a domain, or even a specific directory of your site. And, you can choose from several versions of the software to fit your taste and requirements.
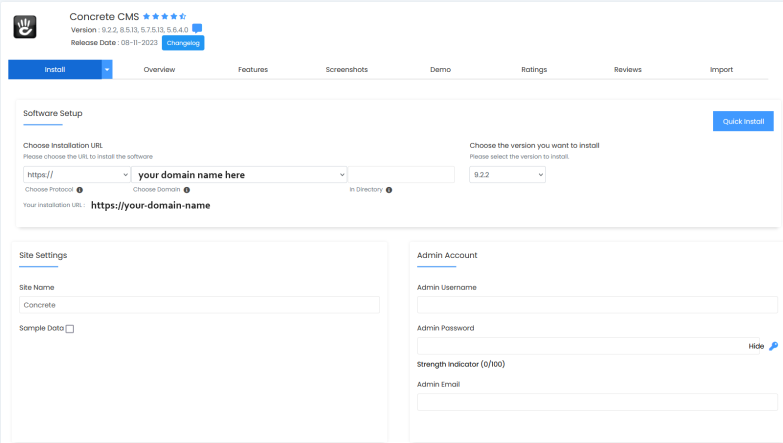
Under Site Settings, you can choose a common name for your Concrete installation, and add a check to the box if you’d like sample data to be generated in your new CMS.
For the Admin Account, choose a username and password and be sure to include a working Admin Email address, which you can use for password recovery.
If you have a specific database to use or configure, use the Advanced Options to make those selections.
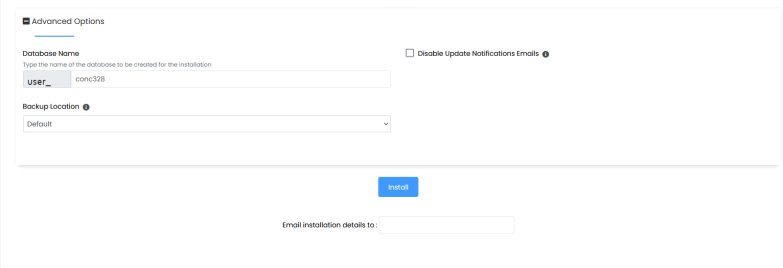
Finally, when you’re all ready – click ‘Install‘ at the bottom of the page. This will kick off the installation process.
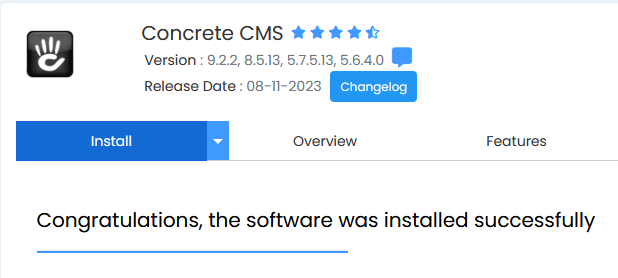
All your input will be checked and if all is good – you’ll see this Congratulations message!
In Closing – Mission Accomplished!
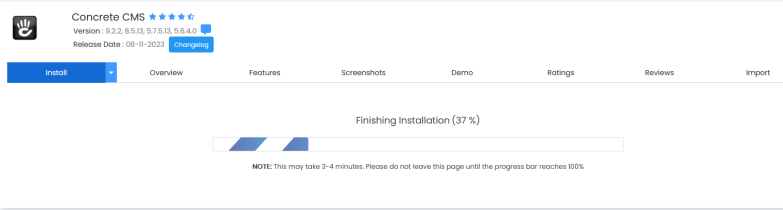
Congratulations – it only took a few minutes to install Concrete CMS to your ChemiCloud account!
Use the details on this final page for logging in and managing your new site! If you provided an email address during installation, you’ll also receive an email with the login details as well.
Thanks so much for checking out this walk through, and have a fantastic day!