Suppose you want to early renew your hosting service with us, to manage your finances more effectively or you want to align the renewal with your cash flow or budget cycle, avoiding last-minute payments or unexpected expenses.
This guide will show you how to easily do it—without needing help from our support team.
Early renewing your hosting service before the due date can offer several benefits:
- Avoid Service Interruption: If there are issues with your payment method (e.g., expired card, insufficient funds, or payment gateway delays), early renewal ensures your service continues uninterrupted. This is especially important as downtime can affect your clients or your business reputation.
- Simplify Billing and Cash Flow Management: Renewing early allows you to manage your finances more effectively. You can align the renewal with your cash flow or budget cycle, avoiding last-minute payments or unexpected expenses.
- Lock in Current Pricing: By renewing early, you might lock in the current rate, avoiding potential price hikes that could occur if you wait until the due date.
Who Can Use This Guide?
This tutorial applies to the following hosting services:
Need assistance? Our 24/7 Support Team is always here to help if you have any questions along the way.
Step-by-Step Guide to Early Renew Your Hosting Service
Step 1: Log into Your ChemiCloud Account
- Open your browser and go to chemicloud.com/login.
- Enter your email address and password, then click Log In.
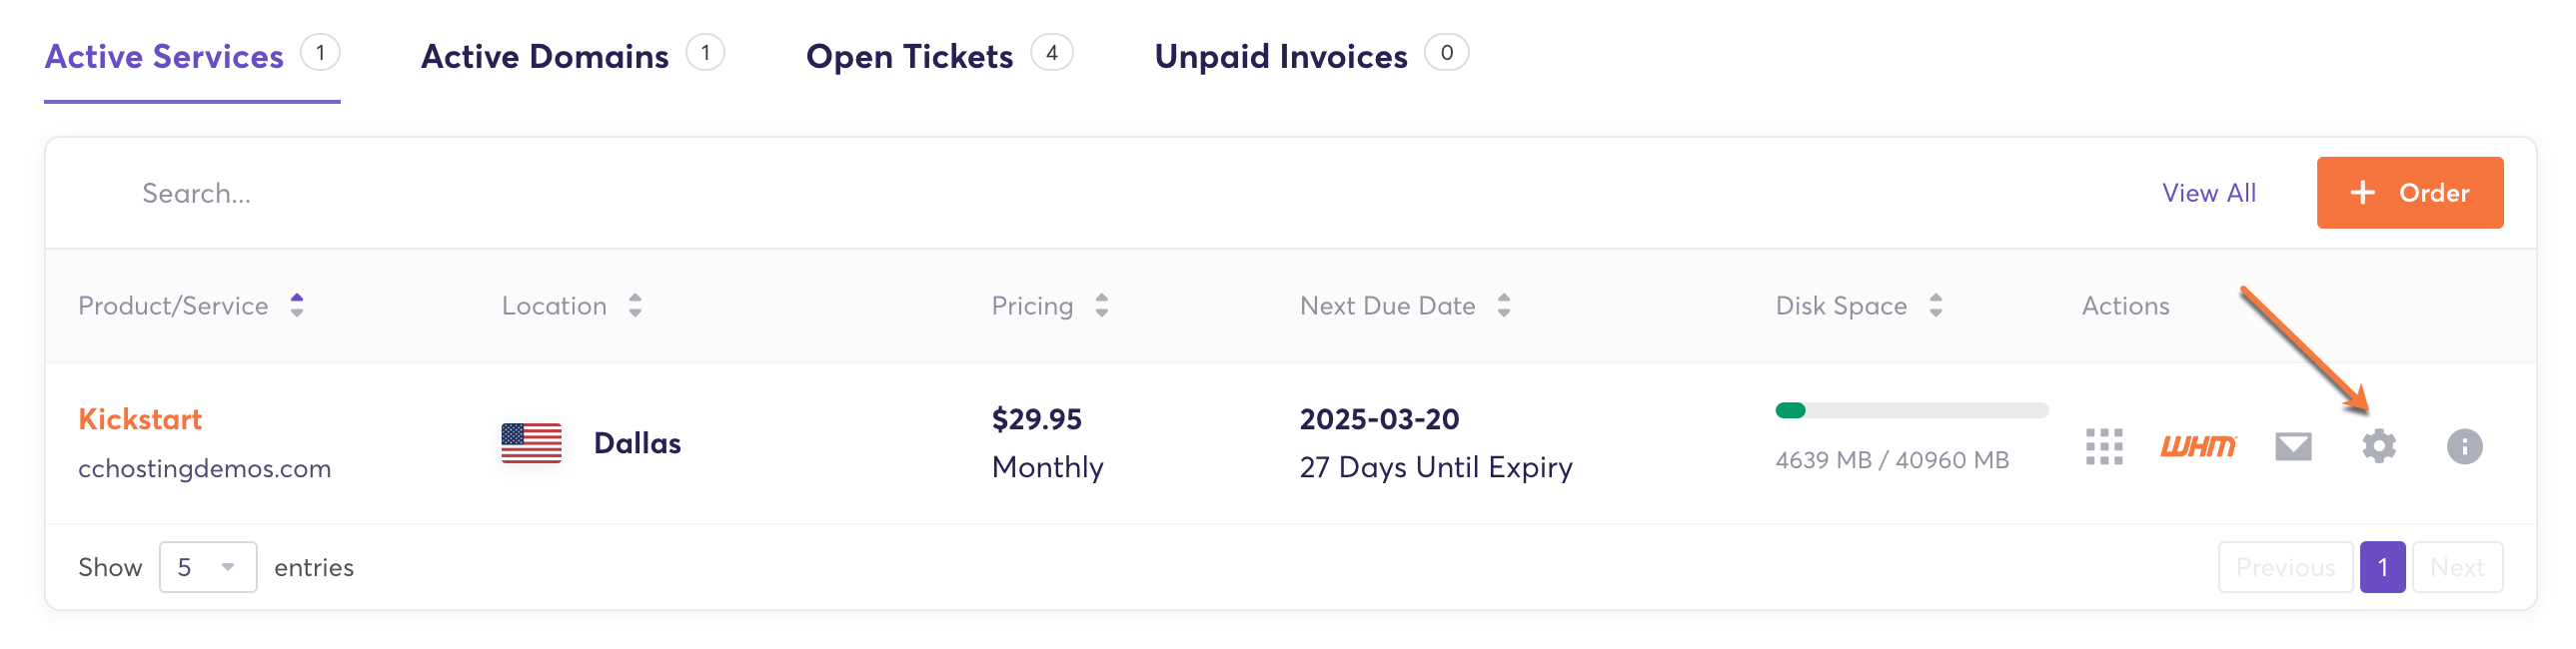
Step 2: Navigate to Your Active Services
- Once logged in, you’ll be in your Client Area Dashboard.
- Look up after the “Active Services” to view your current hosting services.
- Locate the service you want to update and click the gear icon (⚙️ “Manage Product”) on the right side.
Step 3: Access the Renewal Option
- On the Product Details page, look for the “+ Renew Service For” button. Click on it to proceed.

Step 4: Review Billing Details
Next, you’ll see the billing details about your renewal:
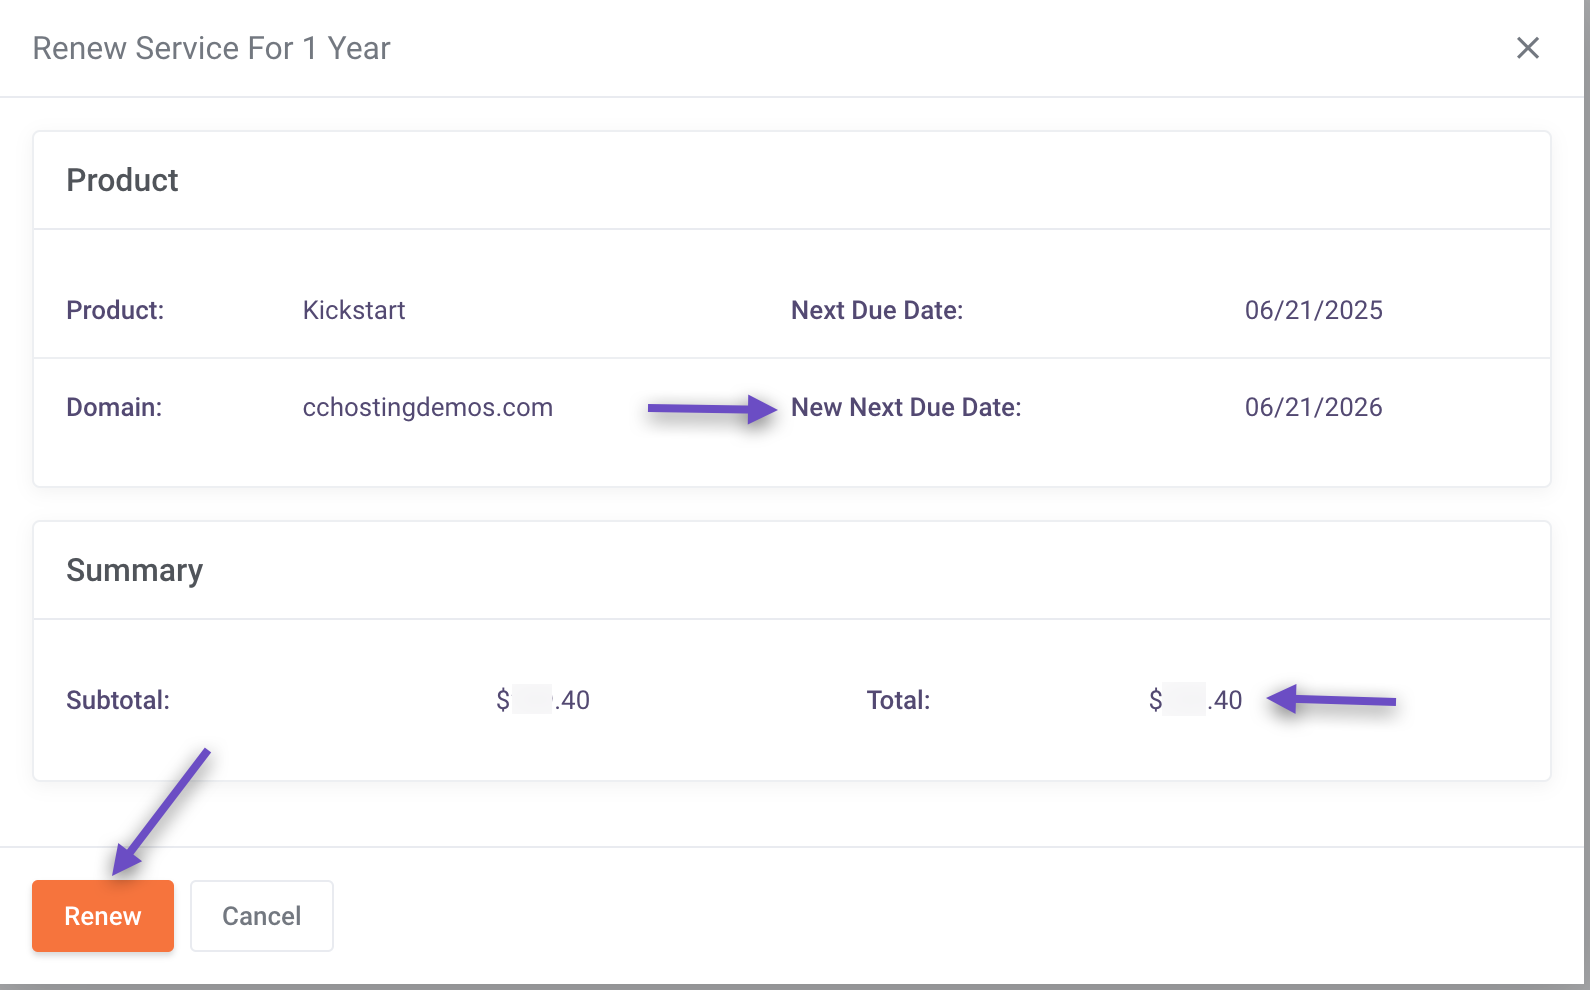
- Next Due Date → The current expiration date of your service.
- New Next Due Date → The updated expiration date after the billing cycle switch.
- Total Amount → The total cost for the early renewal.
For example:
- Suppose your current due date is March 1, 2025, and you make an early renewal 10 days before your due date.
- Once the invoice generated is paid, your service will be renewed by 12 months.
- Your new expiration date will be March 1, 2026.
Step 5: Confirm and Pay
- Click the “Renew” button to finalize your renewal.
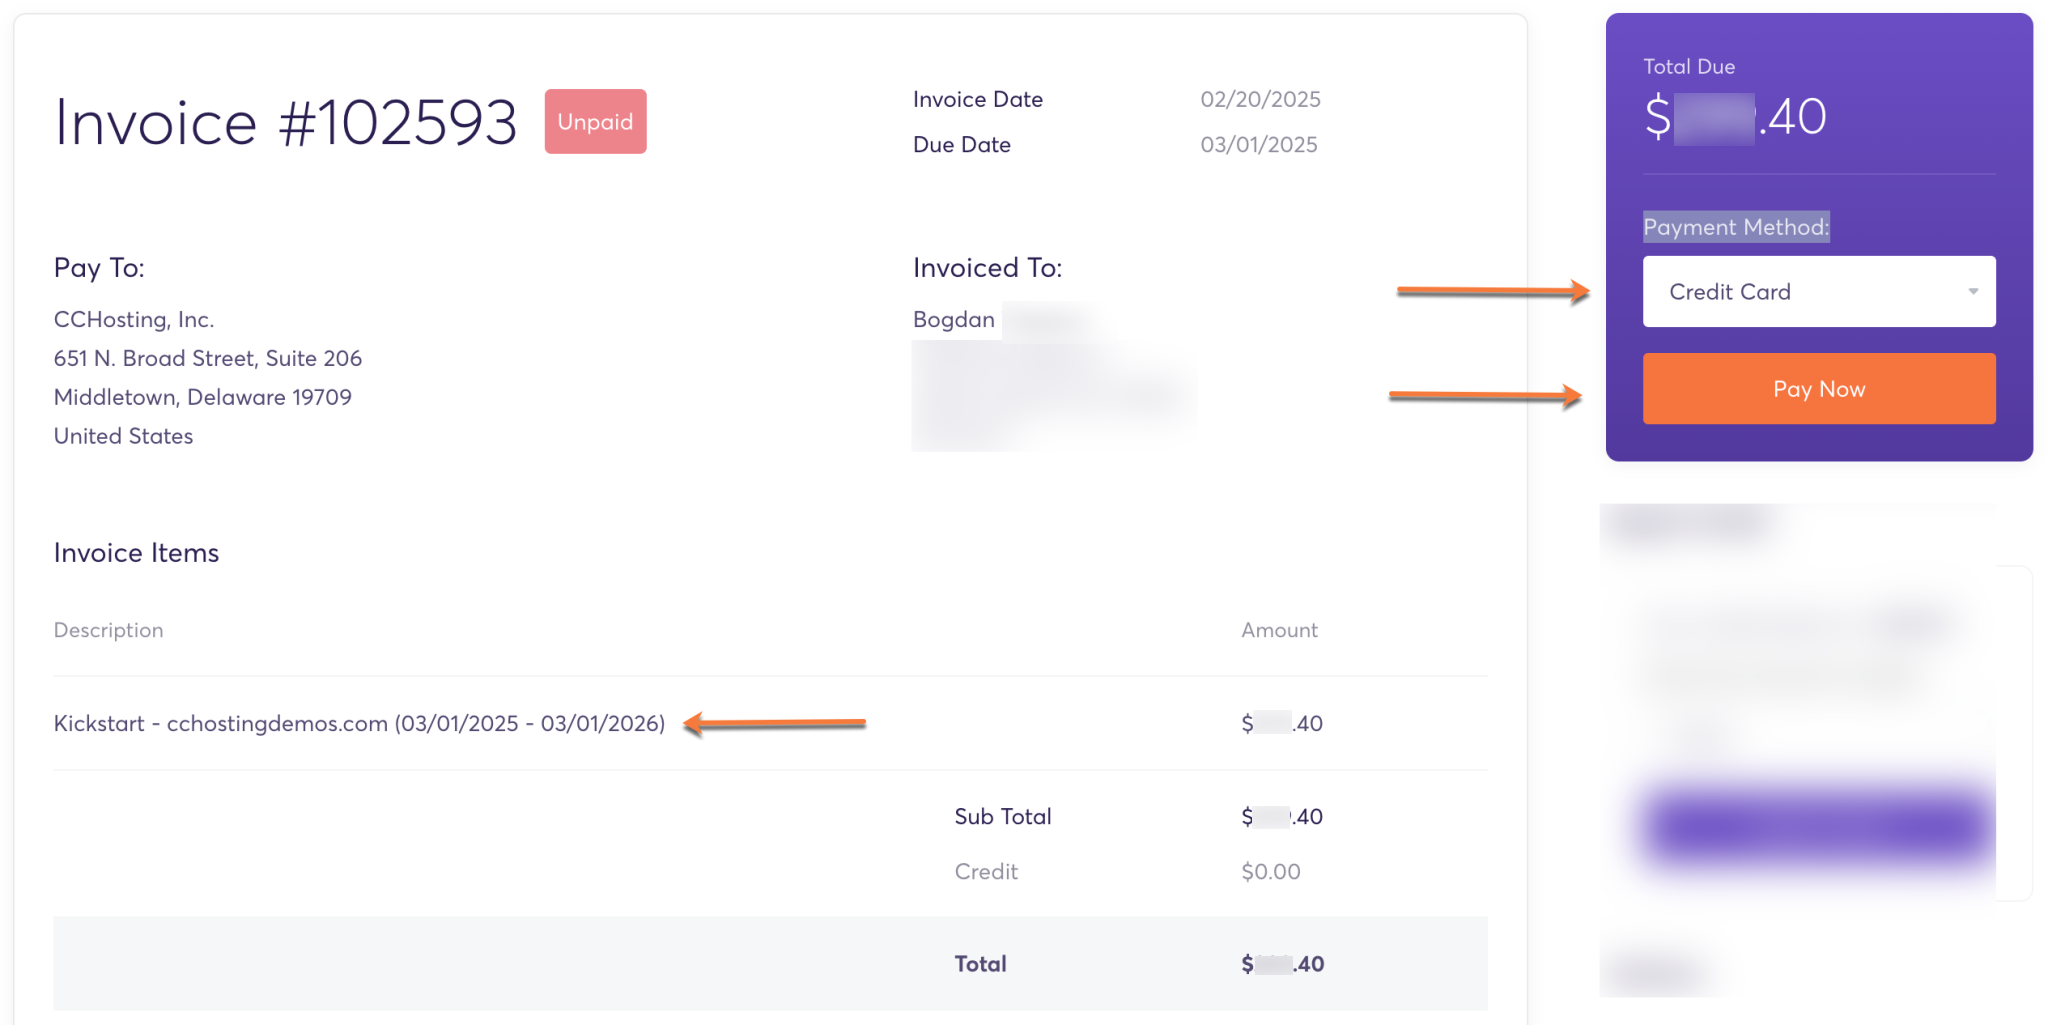
- The pop-up window will close, and you will see an invoice for your service billing period.

- Under the Invoice Items section, you can verify the period covered by your payment.
- Choose your preferred Payment Method and click “Pay Now” to complete the process.
🎉 That’s it! You’ve successfully renewed your hosting service—no support ticket needed!
Wasn’t that simple?
I was referred by ChatLine to this article. I am happy with the service and I want to renew at the best possible price. The current Summer Promo is very attractive. How can I lock in the current promo price?