In this Knowledge Base article, we will cover how to change Cloudflare DNS records and point your domain to ChemiCloud servers.
What Is My ChemiCloud Server IP Address?
You can find your ChemiCloud Server IP address by clicking on the Server Information icon inside the ChemiCloud dashboard. A pop up will appear with the Server Information, among other information as well. See below:
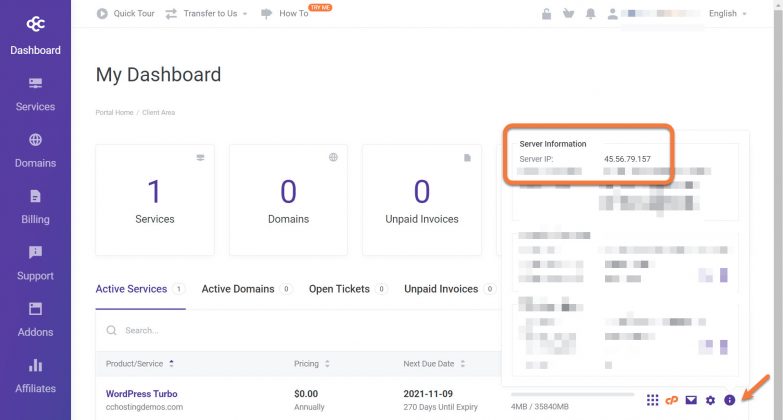
To learn more, we published an easy guide explaining how to locate your Server IP Address inside of Client Area here.
Tired of experiencing issues with your site? Get the best and fastest hosting support with ChemiCloud! 🤓 Check out our web hosting plans!
How to Change Cloudflare DNS Records
Step 1: Log in to your Cloudflare Control Panel and open the DNS Settings by clicking the DNS tab at the top of the Cloudflare Dashboard.

Step 2: Your DNS Management area for the domain will open and a list of your DNS records will be displayed. Let’s use the example below as a reference:
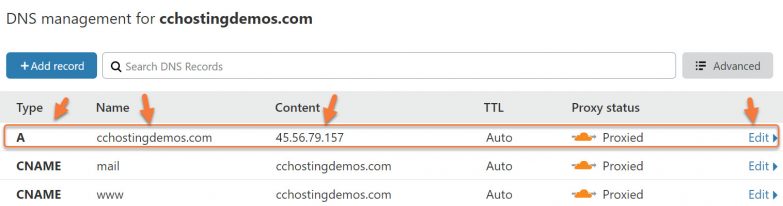
You will want to look under the Type Column for the A Record for your website, the domain name for which will appear in the Name Column.
Once you find this record, click Edit (located on the right side).
After clicking Edit, the record will expand and you will be given the option to enter the new Server IP Address of the server on which your account resides at ChemiCloud.
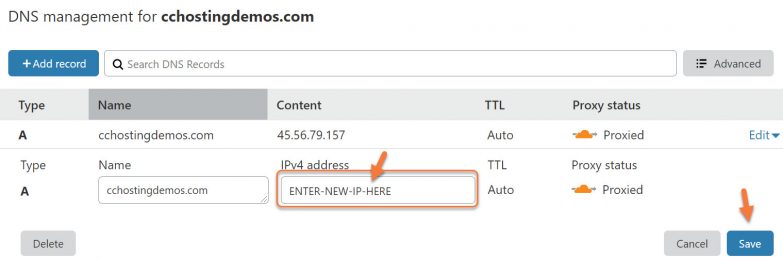
After entering the new IP address, be sure to click Save to save the update.
And that’s how you update the A Record for your domain and point your DNS to ChemiCloud!