In this tutorial, you’ll learn how to change Hostinger nameservers for your domain to those of a different provider, such as ChemiCloud, Cloudflare, or others.
The basics of how Nameservers works
Think of name servers as specialized directory assistance operators in the big city of the internet. When you’re trying to find a website, these operators direct your computer to the right part of the city.
Here’s how it works with name servers, using a simple analogy:
- You Ask for Directions: You type a website name like “google.com” into your browser. It’s like calling directory assistance to ask for the address of a specific place in the city.
- Your Request Goes to a Name Server: Your request first reaches a name server assigned by your internet service. Think of this name server as a specialized operator who knows where all the website “addresses” are stored.
- Finding the Specific Operator: This name server might not have the specific address you need, so it refers your request to another name server that specifically manages addresses for the “.com” area of the internet. It’s like being transferred to an operator who specializes in a specific part of town.
- Getting the Exact Address: The “.com” name server looks up its records and finds the IP address for “google.com”. This name server is like a local expert who knows every street in the “.com” area.
- Directing You There: The name server sends back the IP address to your computer. Now, your computer knows how to reach “google.com”, much like how you’d start your journey after getting an address from directory assistance.
This system ensures that your internet journey to find a website is smooth and quick, just like how city directory assistance helps you navigate to your destination in a big city.
Things to Consider Before Changing the Name Servers for Your Domain
There are several important considerations to keep in mind before changing the nameservers for your domain:
- Propagation Time: Changes to nameservers can take anywhere from a few minutes a few hours to fully propagate across the internet. During this period, your website might be temporarily inaccessible or behave unpredictably.
- Email Service Disruption: If your email is hosted at the same domain, changing nameservers could disrupt your email service. Make sure you know the correct MX records to update at the new nameserver to avoid any email downtime.
- DNS Record Migration: Ensure that all necessary DNS records (like MX for mail servers, TXT for verification purposes, A records for addresses, etc.) are correctly set up at the new nameserver. This helps prevent services linked to your domain from breaking.
- SSL/TLS Certificates: If your website uses SSL/TLS certificates for HTTPS, changing nameservers might require reconfiguring or reissuing your certificates, depending on how they’re managed.
- Backup: Always have a backup of your DNS records. If anything goes wrong, you’ll be able to restore the previous settings without much hassle.
- Timing: Consider the timing of the nameserver change. Avoid making changes during peak business hours or major updates to minimize the impact on your users.
Taking these steps helps ensure a smooth transition when changing nameservers and reduces the risk of downtime or service disruption.
What Are the Preps for Changing Hostinger Nameservers?
When preparing to change Hostinger nameservers, here are some steps to follow to ensure a smooth transition:
- Access Hostinger Account: Log in to your Hostinger account where your domain is registered.
- Backup DNS Records: Before making any changes, document or take screenshots of your current DNS settings, including A, MX, CNAME, TXT records, and any other configurations. This will be crucial if you need to revert or re-enter these settings in the new nameserver environment.
- Prepare New Nameserver Information: Have the details of the new nameservers ready. Typically, you will need at least two nameserver addresses from the new hosting provider.
- Check Email Settings: If your email is hosted using the same domain, ensure you have the MX records and any other necessary email configuration details at hand to set up on the new nameservers to avoid disruption.
- Plan the Timing: Schedule the nameserver change during a low-traffic period for your website to minimize the impact on visitors and services. Overnight or during the weekend can be ideal, depending on your audience.
- Registrar Login Details: Ensure you have login credentials handy for both your current registrar (Hostinger) and potentially for the new nameserver provider if it’s different from your domain registrar.
- Propagation Delay Awareness: Remember that DNS changes can take anywhere from a few hours to up to 48 hours to propagate fully. During this time, your website and email services may experience inconsistencies.
- Technical Support: Know how to contact technical support from both Hostinger and your new hosting provider in case you encounter any issues during or after the change.
By following these steps, you’ll be well-prepared to change your Hostinger nameservers with minimal disruption to your services.
Why You Should Change Hostinger Nameservers
The DNS service you use for your domain can have a significant impact on the TTFB performance of your website. Using a highly scalable and available DNS service ensures high performance all around the world. All ChemiCloud plans include a premium DNS service.
Typically, domain registrars do not provide customers with a premium DNS service like ChemiCloud DNS. For this reason, we recommend switching nameservers to ours if your domain is registered with Hostinger and you are hosting your website with us.
What are my ChemiCloud Nameservers?
You can find your ChemiCloud nameservers by clicking on the Server Information icon inside the ChemiCloud dashboard.
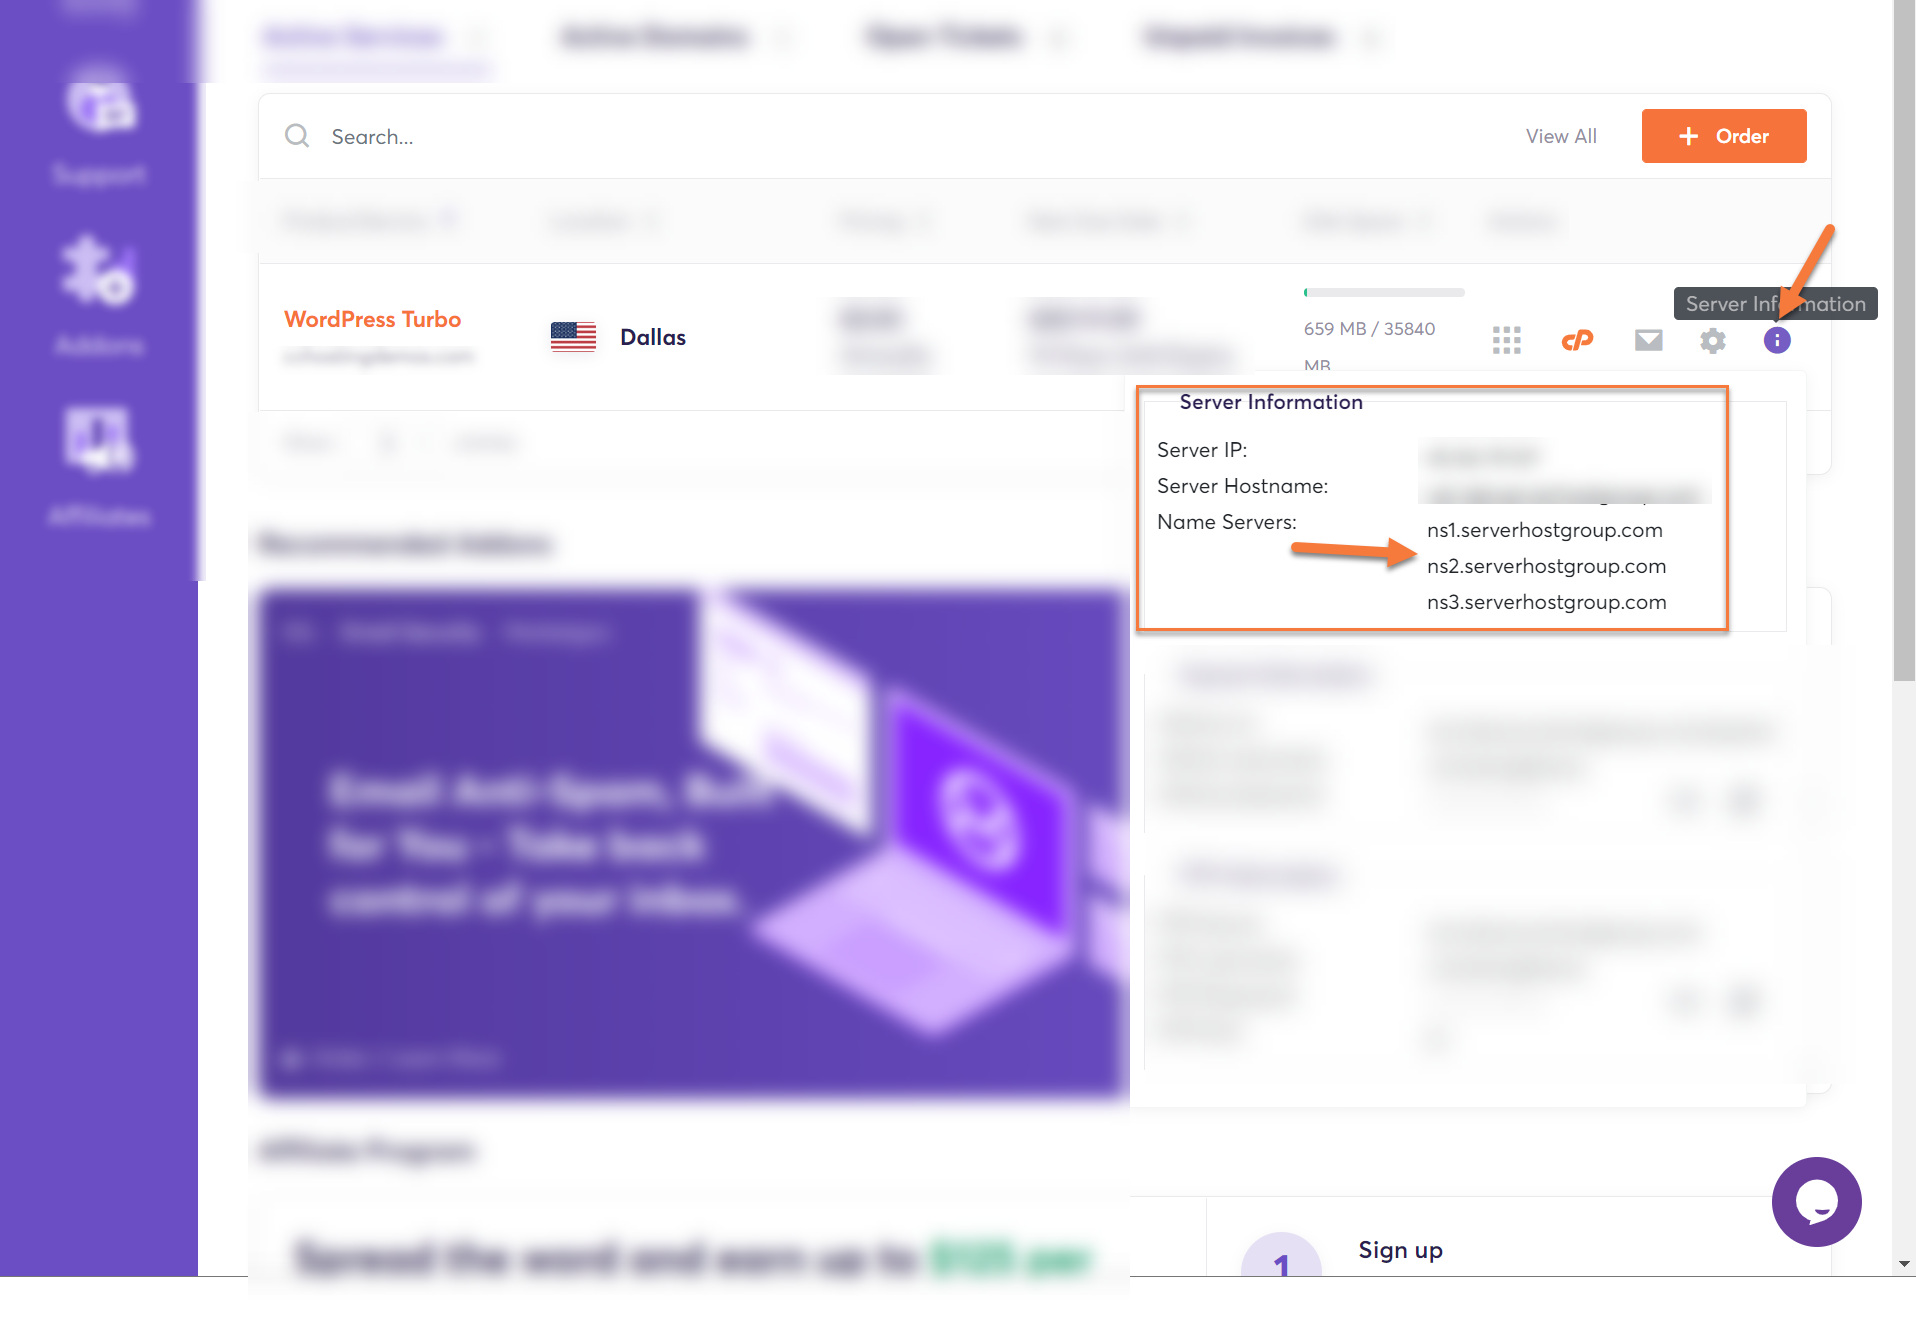
To learn more, we published an easy guide explaining how to locate your Nameservers inside of the Client Area here.
How to Change Hostinger Nameservers
Step 1: Click here to open the Hostinger login page. You will be prompted to login into your Hostinger Account.
Step 2: After signing into your Hostinger Account, click on Domains from the top menu.
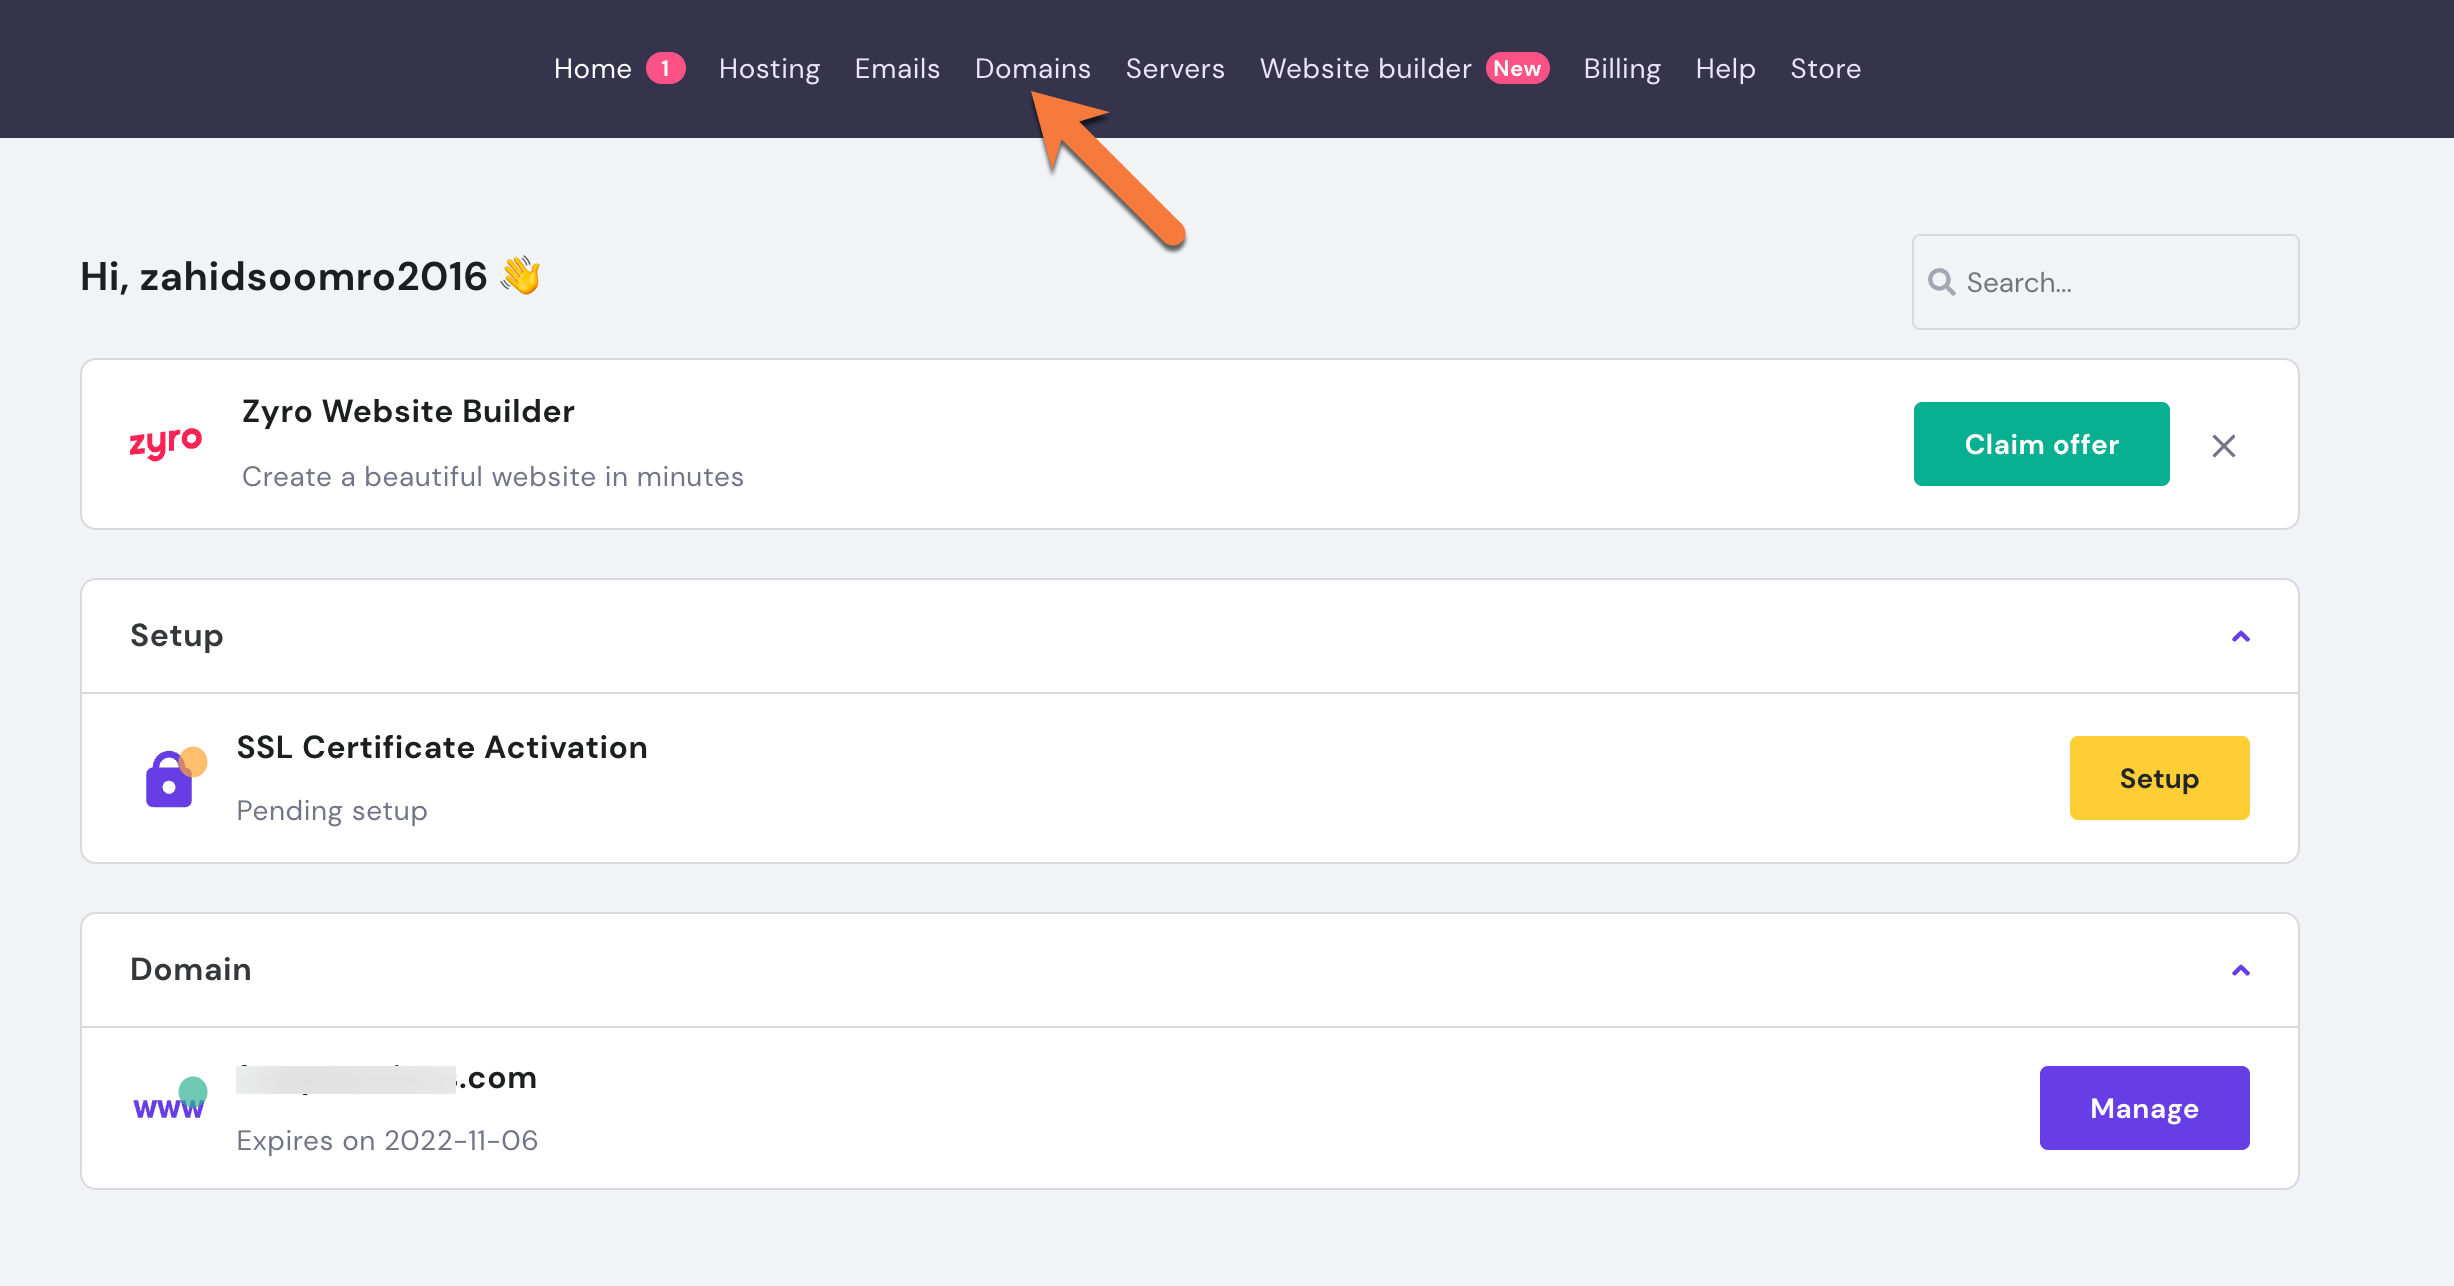
On the next page, you will see a list of all domains registered in your Hostinger account.
Find the domain for which you wish to manage the Nameservers and click on it.

Step 3: While you are on the Domain Overview page, see the Nameservers option and click on the Change button.

Step 4: The Custom name servers page will load. Here you will have the option to use the default Hostinger Name servers or to enter your own name server records. Enter your nameservers and click the Save button.
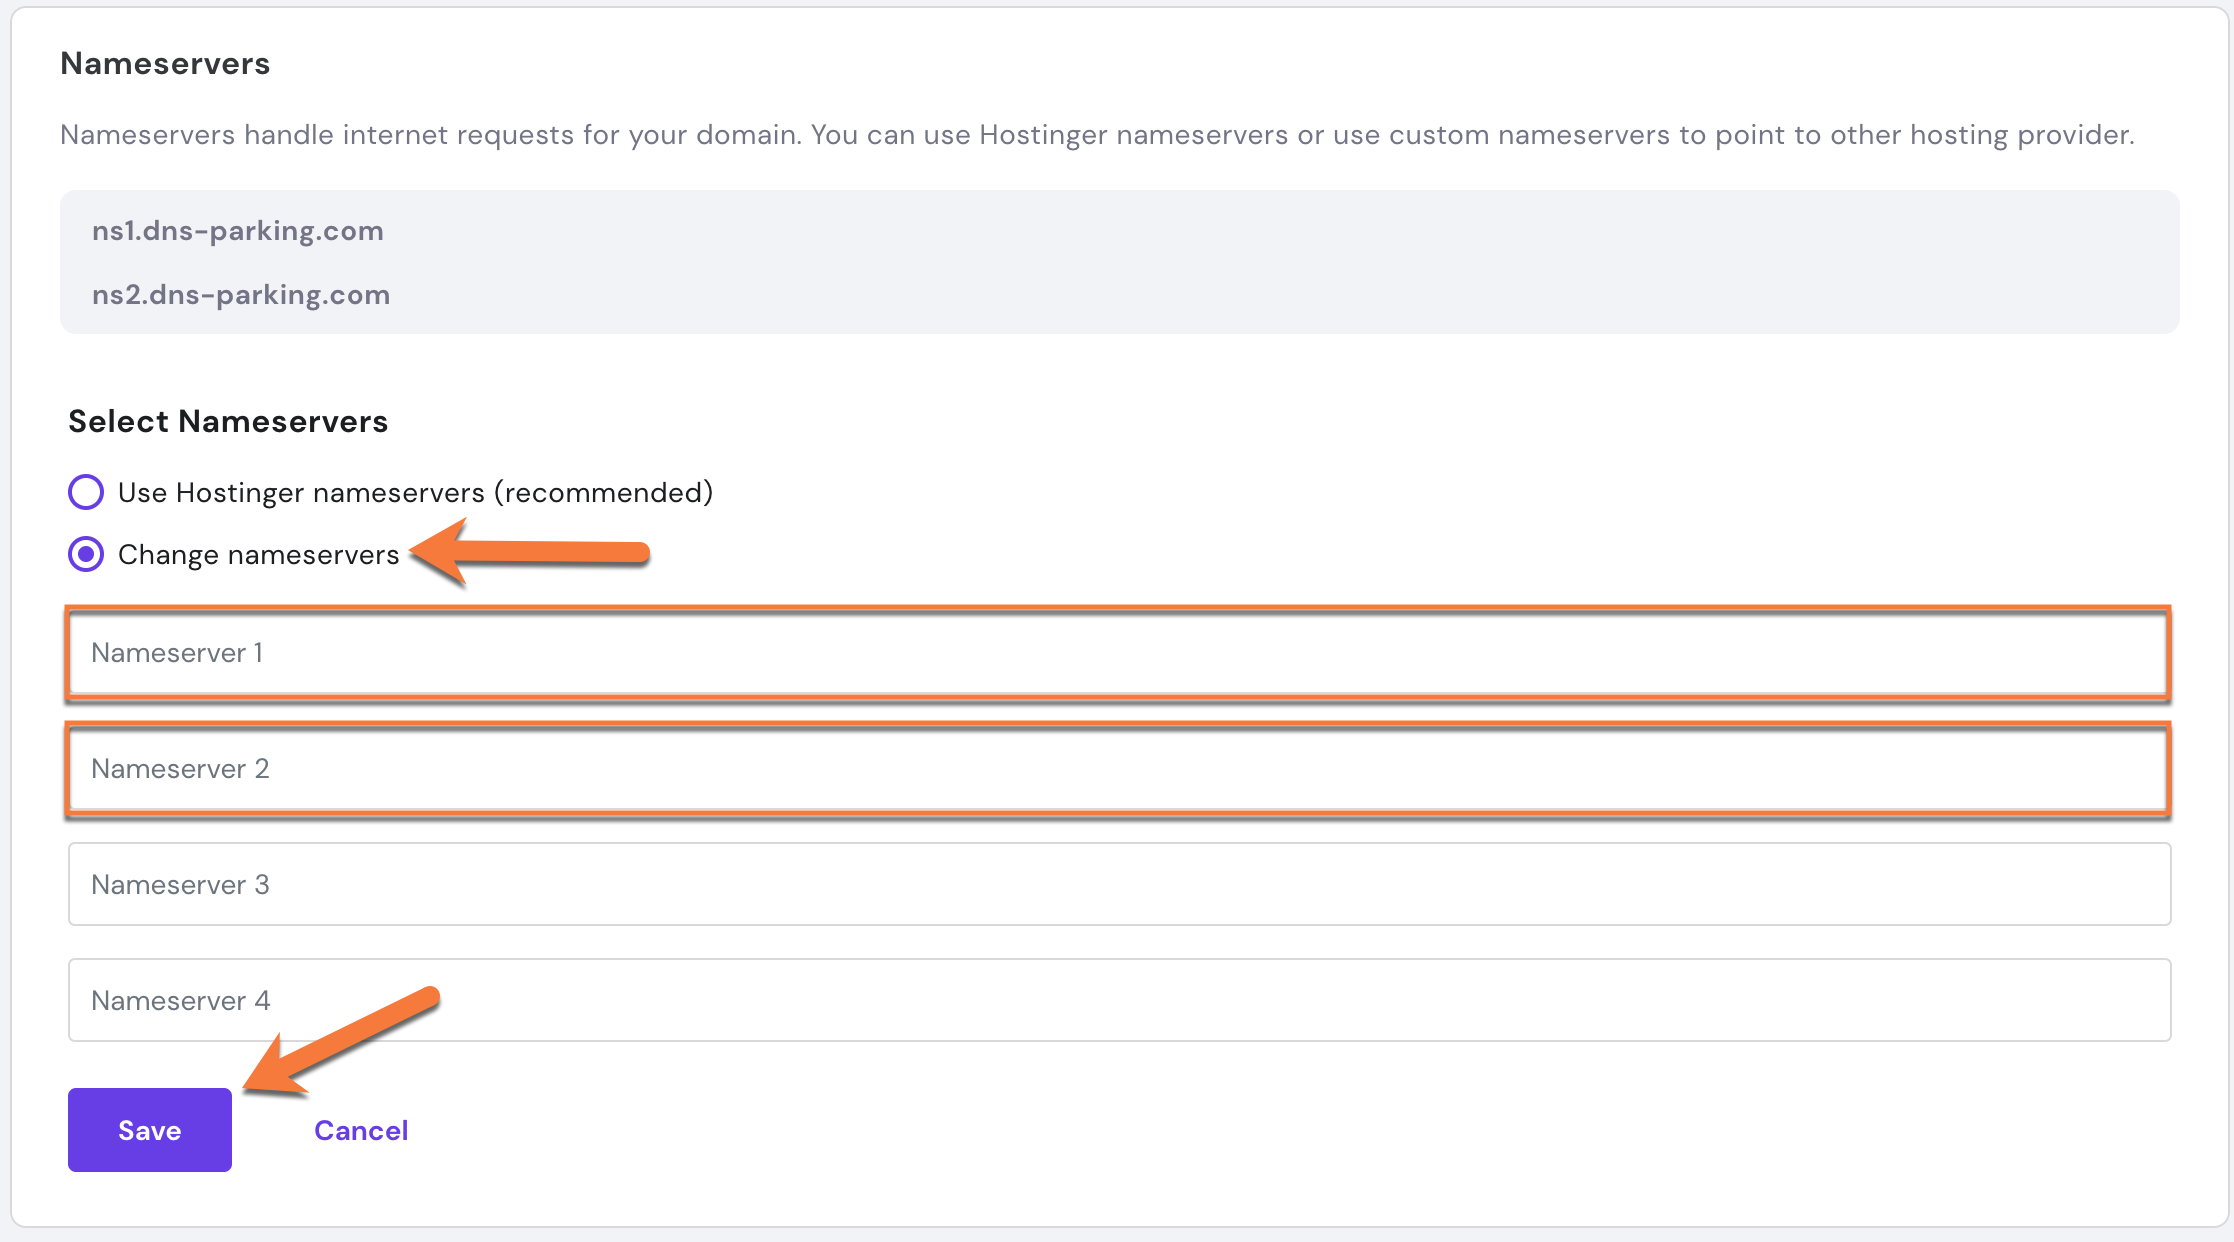
Your changes will now propagate.
How about transferring your domain for free?
Grab an annual hosting plan which you’ll need anyway, and get a free domain transfer. Moreover, we’ll migrate your website(s) free of charge and with zero downtime from Hostinger to us.
You’ll get more than a free domain transfer:
- Great renewal rates: When renewing your domain, you’ll never have to worry about breaking the bank.
- User-friendly domain management: Manage your domain with an easy-to-use control panel and dashboard.
- Industry-leading Customer Support – Day or night, our 24/7 happiness engineers are here to offer struggle-free support when you need it.
👉🏻 Claim your free domain transfer now.