1. Home
  2. Hosting Management
  3. WHM
  4. How to Create a Package in WHM

How to Create a Package in WHM

In this article, we will show you how to create a package in WHM.

Having several different hosting packages which come with various functions and limitations allows you to provide a wide selection of hosting plans to your clients based on particular features, this way you can set different prices for your plans based on these features and options.
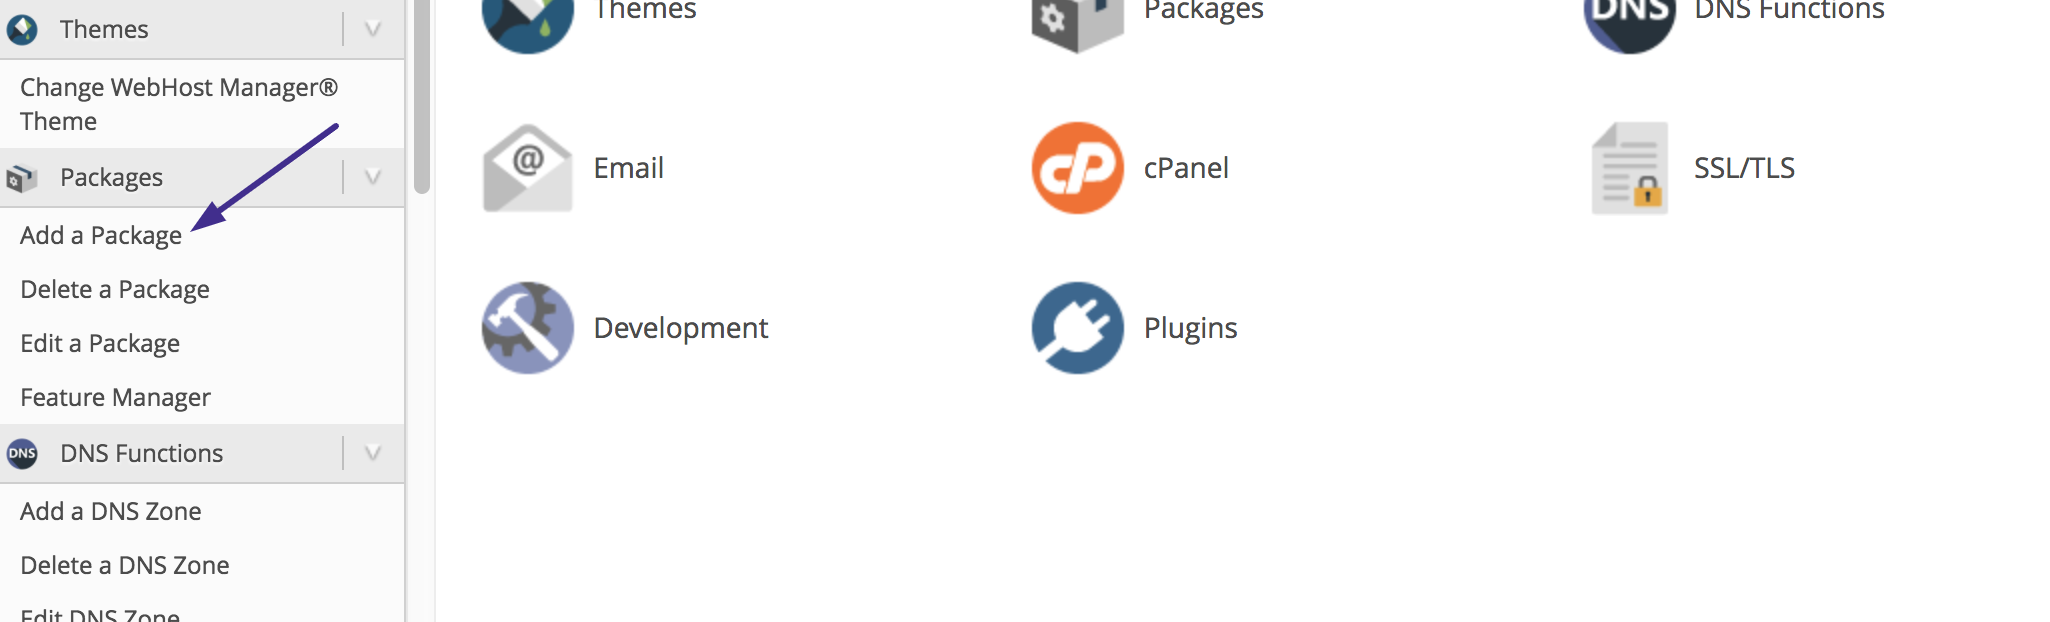
1) Log into WHM.

2) Look for the Add a Package button located under the Packages section.

whm add a package

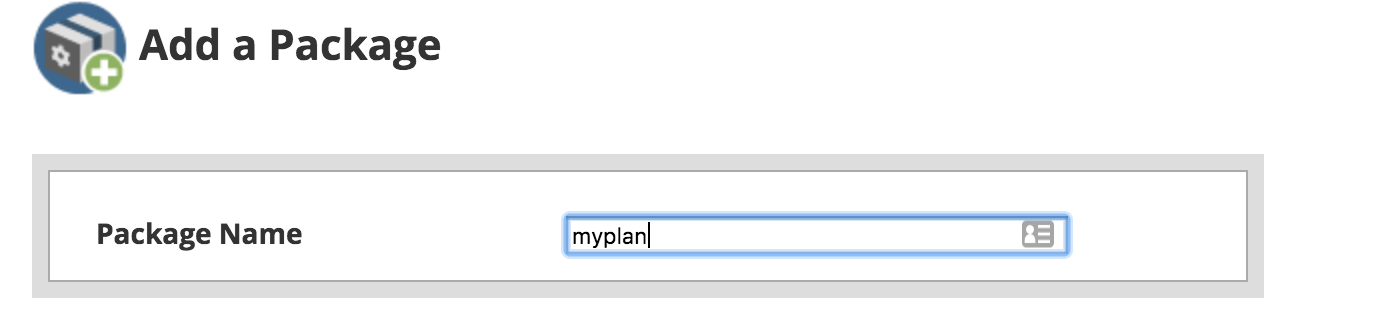
3) Enter the desired package name in the Package Name text box.

add package whm reseller

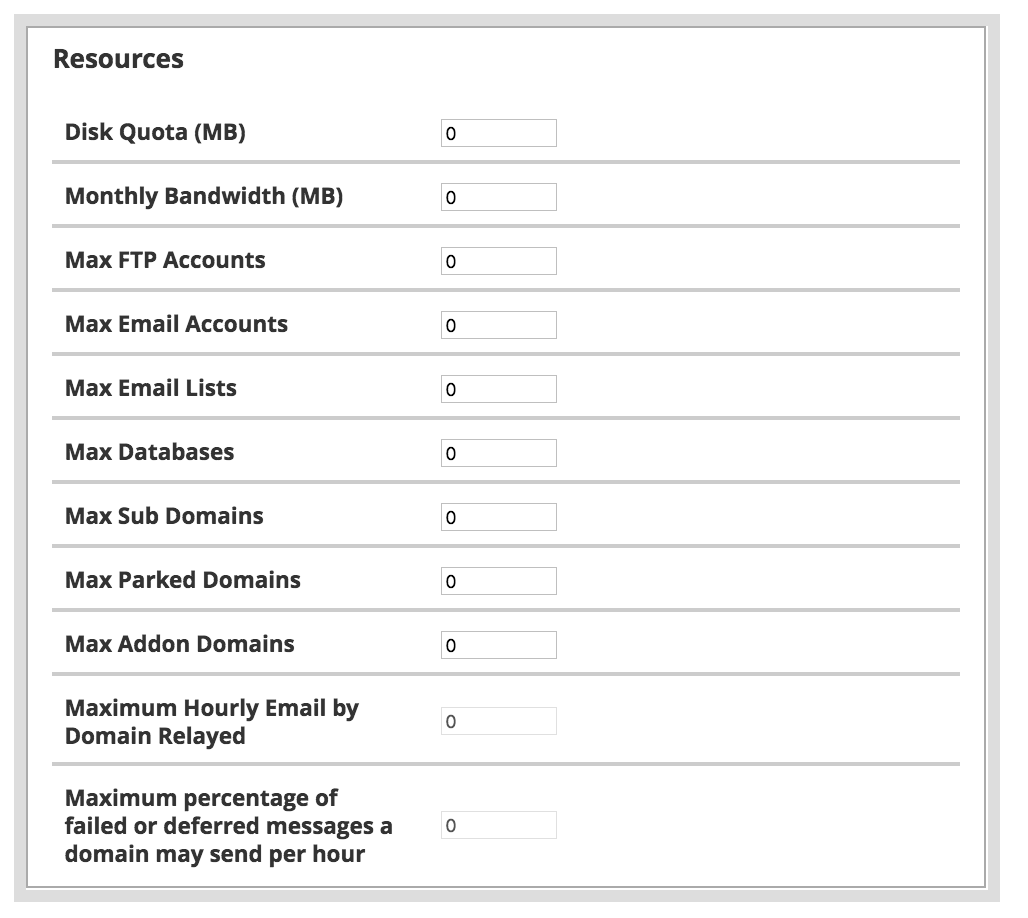
4) In the Resources section, you can specify the resources and limitations set for the plan.

create a hosting plan whm

Disk Quota (MB): Enter in MB the maximum amount of space on the server’s hard drive that the account can use.

Monthly Bandwidth (MB): Enter in the bandwidth (in MB) assigned for this package. This refers to the amount of information that the account can transfer each month, measured in MegaBytes (MB).

Max FTP Accounts: Enter the maximum number of FTP accounts allowed for in this package.

Max Email Accounts: Enter the maximum Email accounts allowed in this package.

Max Email Lists: Enter the maximum number of Mailman mailing lists allowed for this package.

Max Databases: Enter the maximum databases allowed in this package.

Max Sub Domains: Enter the maximum sub-domains allowed in this package.

Max Parked Domains: Enter the maximum domain aliases allowed in this package.

Max Addon Domains: Enter the maximum add-on domains allowed in this package.

Maximum Hourly Email by Domain Relayed: Enter the maximum number of emails that any domain on the account can send per hour. This value defaults to Unlimited.

Maximum percentage of failed or deferred messages a domain may send per hour: Type in the maximum percentage of failed or deferred messages that a domain on the account can send before your server temporarily blocks outgoing mail from that domain. When a domain exceeds the limit, it cannot send mail until the queued mail is delivered or deleted.

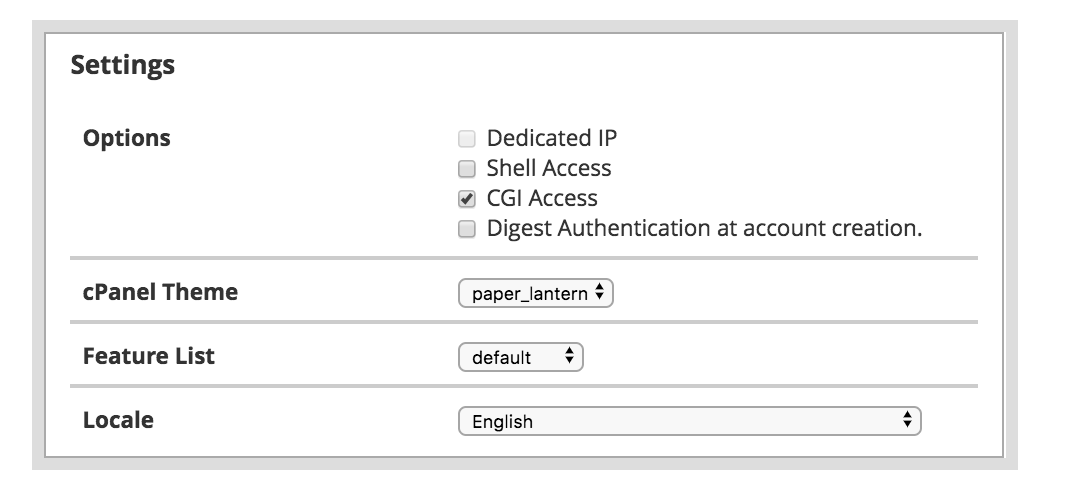
5) Under the Settings section choose the extra cPanel features that the account will have access to.

whm add plan settings

Dedicated IP: Check this box if you want to assign a static IP address that will only be used by the account.

Shell Access: Check this box if you want to allow the user to access the server using a command line interface.

CGI Access: Check this box if this package allows CGI scripts execution.

cPanel Theme: You can select from the dropdown menu the default cPanel theme displayed when the user accesses their cPanel.

Feature list: Feature lists define which cPanel features are available to cPanel users. To edit or create a feature list, use WHM’s Feature Manager interface. You can read more about feature lists by clicking here.

Locale: You can select the default cPanel language that will be used by default for this package.

6)  Click on the Add button once you are happy with the values set for the plan.

And that’s it! Now you know how to create packages/plans in your WHM.

Updated on August 6, 2020

Was this article helpful?

Related Articles

TRY CHEMICLOUD RISK-FREE
Fast, secure cloud hosting. 18 global data centers. Unhappy with your web host?
👉 Migrate for Free

Comments

  1. Hey Scott, thank you for the comments and feedback! 🙂 I’m the one who writes our KB articles and our reader feedback is very important to us!

  2. I’m not sure if anyone comments on these, but these are super helpful articles

    Thanks ChemiCloud!

Leave a Comment

This site is protected by reCAPTCHA and the Google Privacy Policy and Terms of Service apply.