If you host your domain at Cloudflare or use their subscription services, it can be very helpful to add another user or two to your Cloudflare account.
Here are some examples of why you may want or need to do this:
- You are hiring an Admin or Tech Support to help you with administering your DNS records.
- You’ve purchased a new e-mail anti-spam service and you need to make changes to your DNS records, but because you aren’t super-techy, you’ve decided to add the company that provides the new service to your Cloudflare account so they can make the changes themselves.
- You have a business and while your CTO controls “Admin” to the Cloudflare account, select staff are allowed certain permissions.
In this tutorial, we’ll cover how to delegate access, or add an additional user, to your Cloudflare account.
How to delegate access to your Cloudflare account
Quick Breakdown of User Roles
There are two user roles with Cloudflare:
- Super Administrator
- Administrator
Super Administrators have the following permissions:
- Edit all Cloudflare settings.
- Make purchases.
- Update Billing Settings, i.e. add/remove/update Credit / Debit Cards.
- Manage Memberships.
- Revoke access of other Super Administrators.
Administrators have the following permissions:
- Edit all Cloudflare settings, except for Membership Management and Billing Settings.
How to Add a Member to your Cloudflare Account
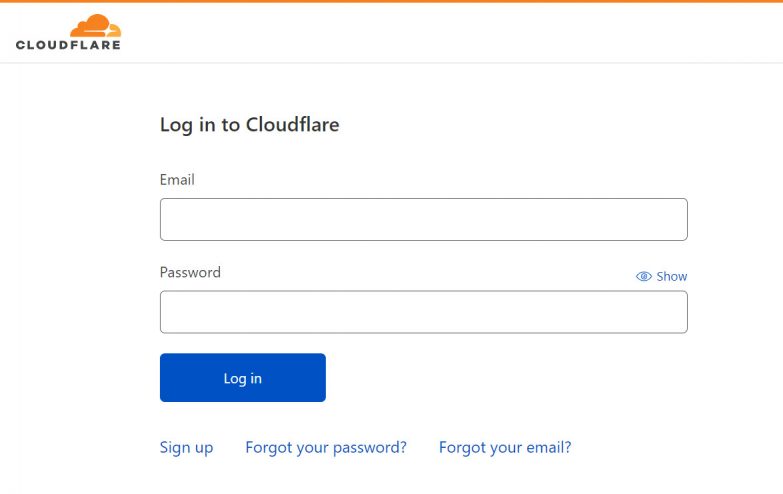
Step 1: Log in to your Cloudflare Dashboard.
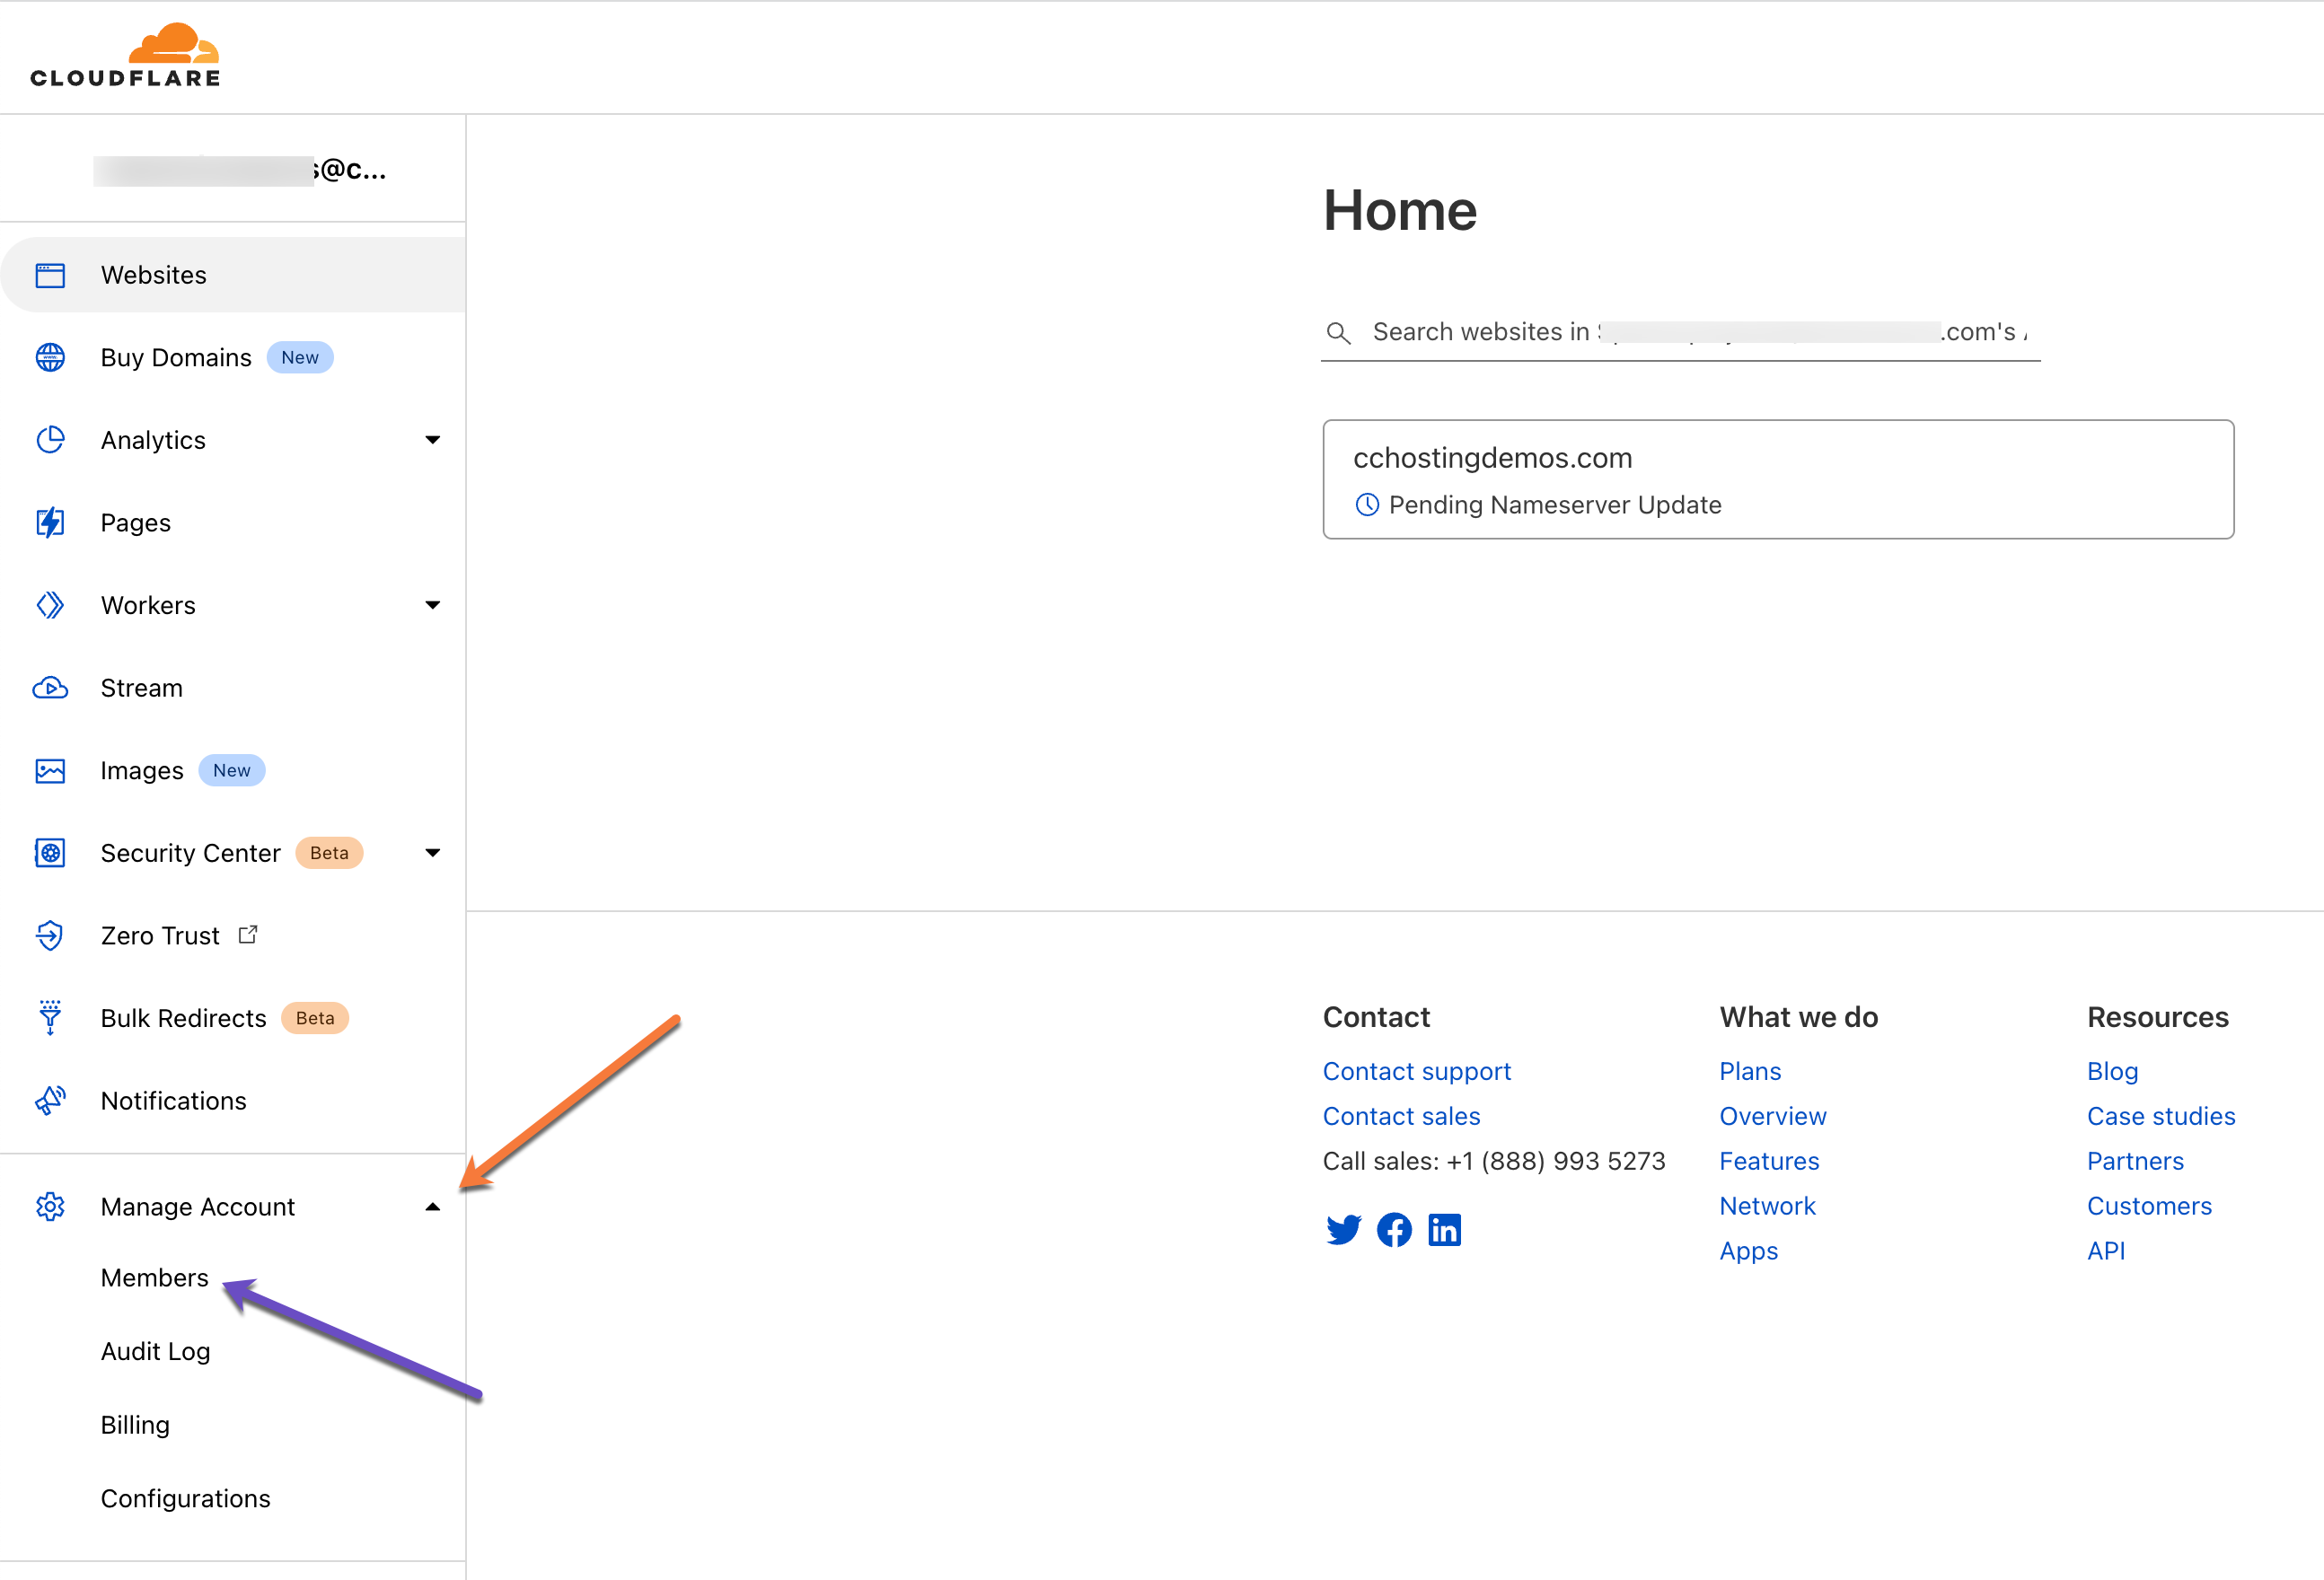
Step 2: Once you’ve logged in, click on the Manage Account drop-down menu and choose the Members option.
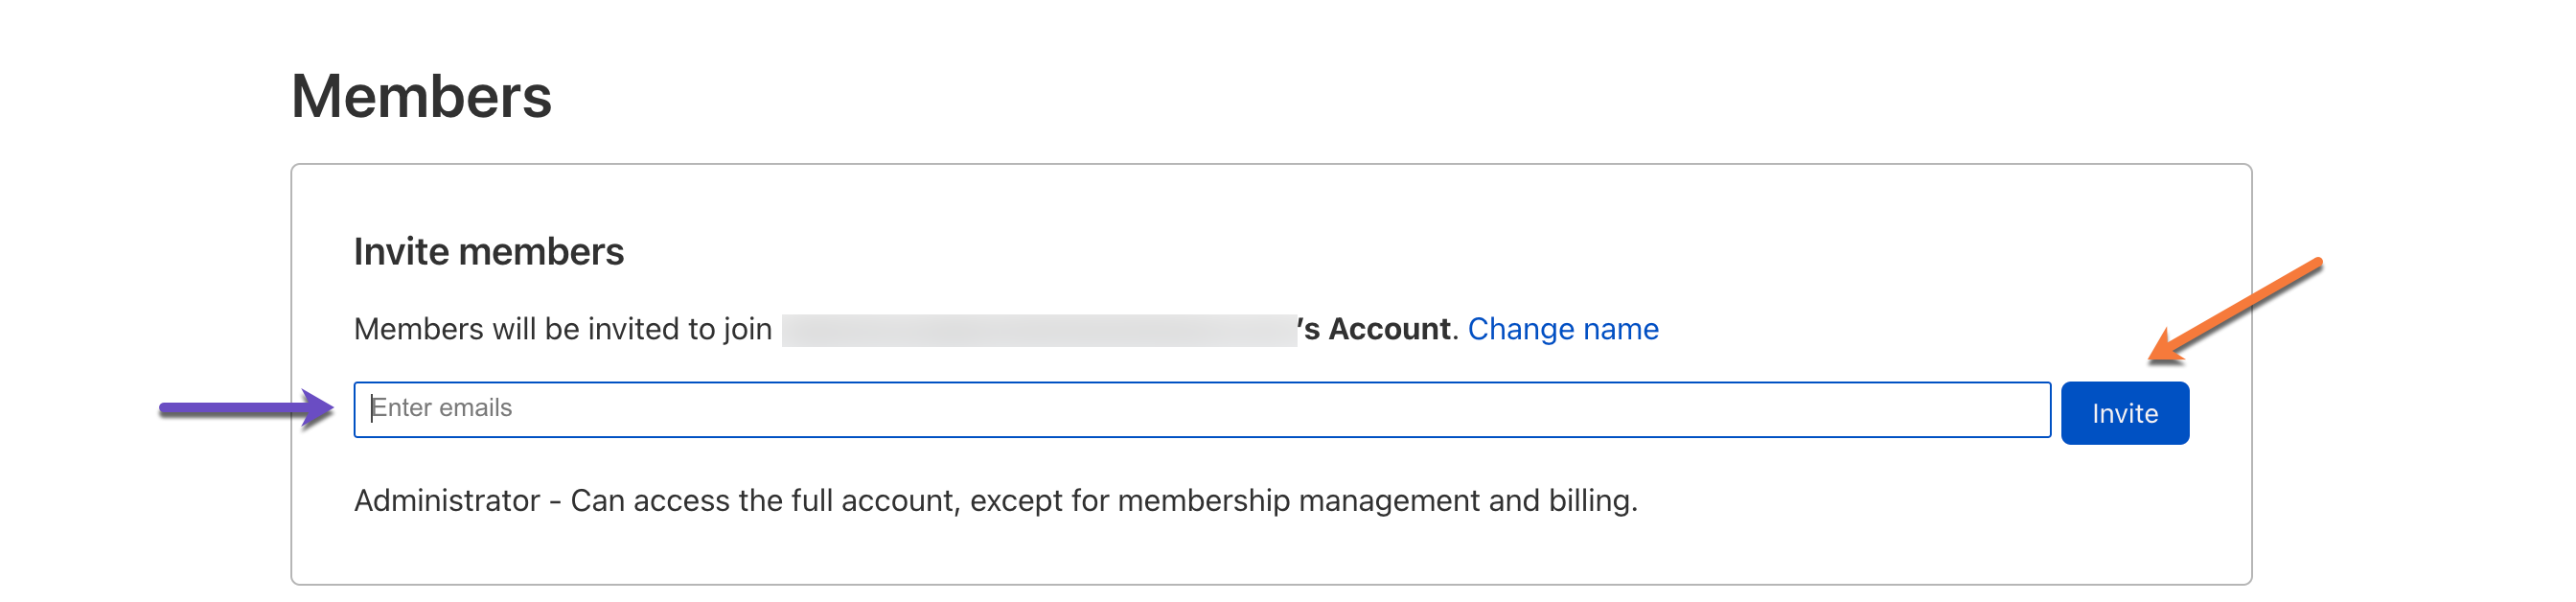
Step 3: Enter the email address of the individual you’d like to invite, then click the blue Invite button.
The user you’ve invited will receive an email that looks like the one below:
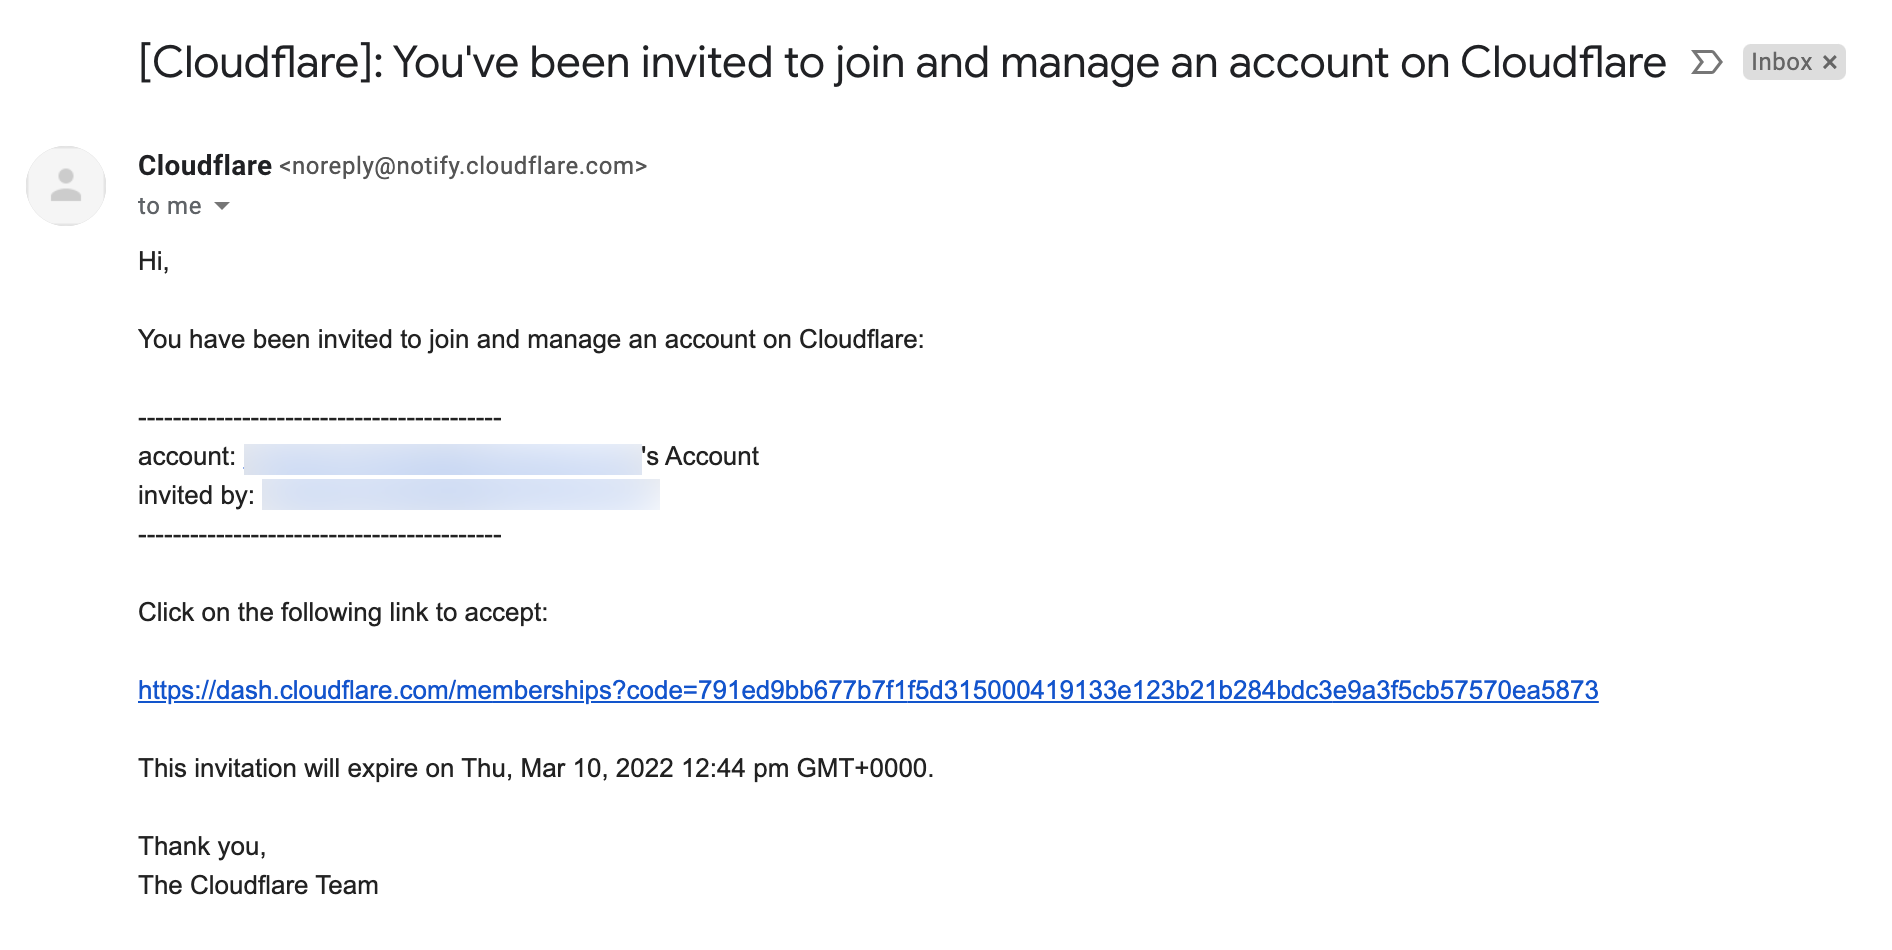
Once the user clicks the link in the email they receive, they’ll be able to access your Cloudflare account with the default permissions of an Administrator.
Are you tired of slow web hosting? We use LiteSpeed caching to deliver content to your visitors almost instantly. ⚡ Check out our web hosting plans!
How to Remove a Member from your Cloudflare Account
Just as you may find a reason to add a Member to your Cloudflare account, you may find a reason to remove them.
Step 1: Log in to your Cloudflare Dashboard.
Step 2: Step 2: Once you’ve logged in, click on the Manage Account drop-down menu and choose the Members option.
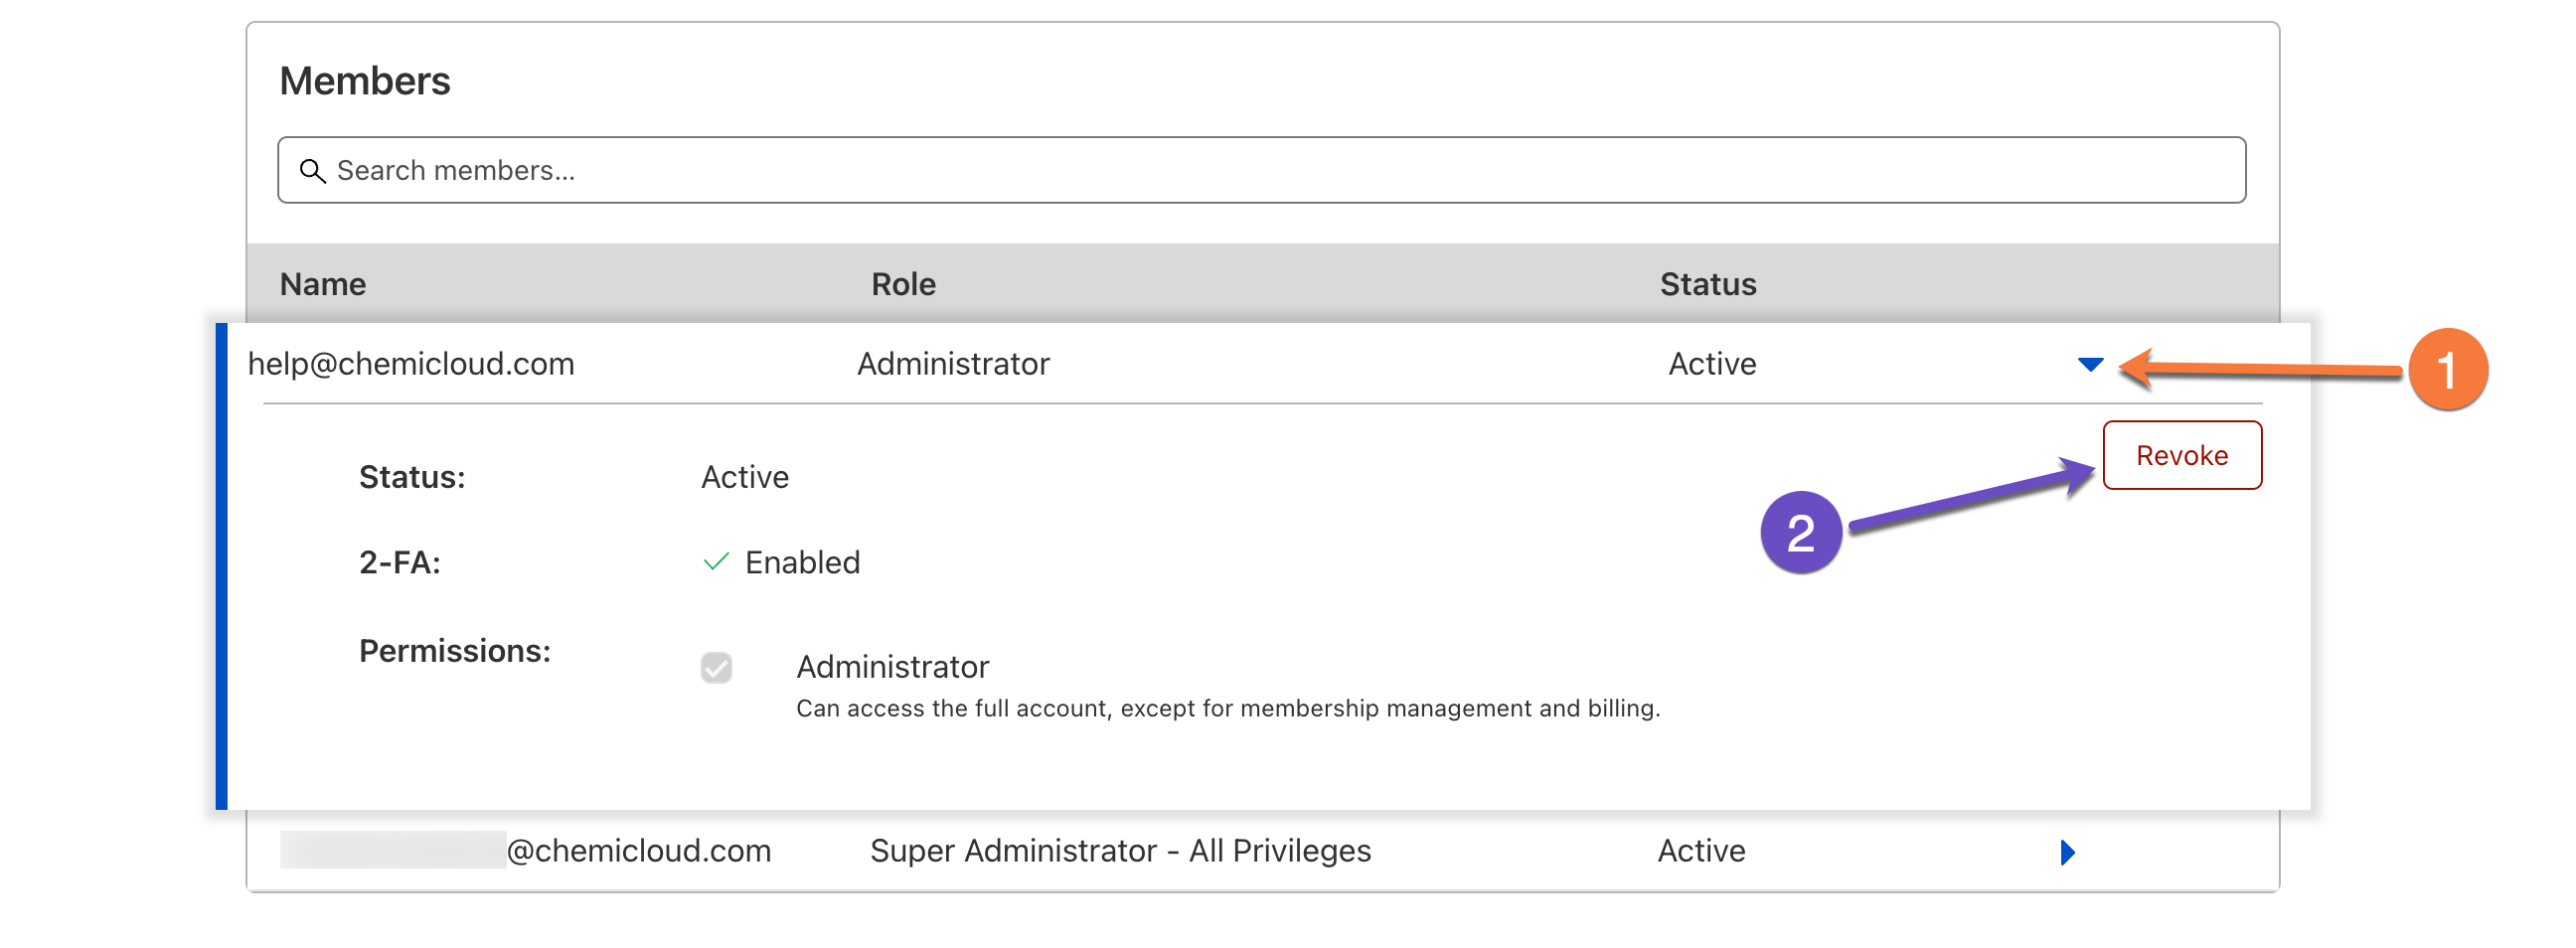
Step 3: At the bottom of the Members page, locate the member you’d like to remove and click the triangle angled to the right. When the modal expands, click the Revoke button to remove their access to your Cloudflare account.
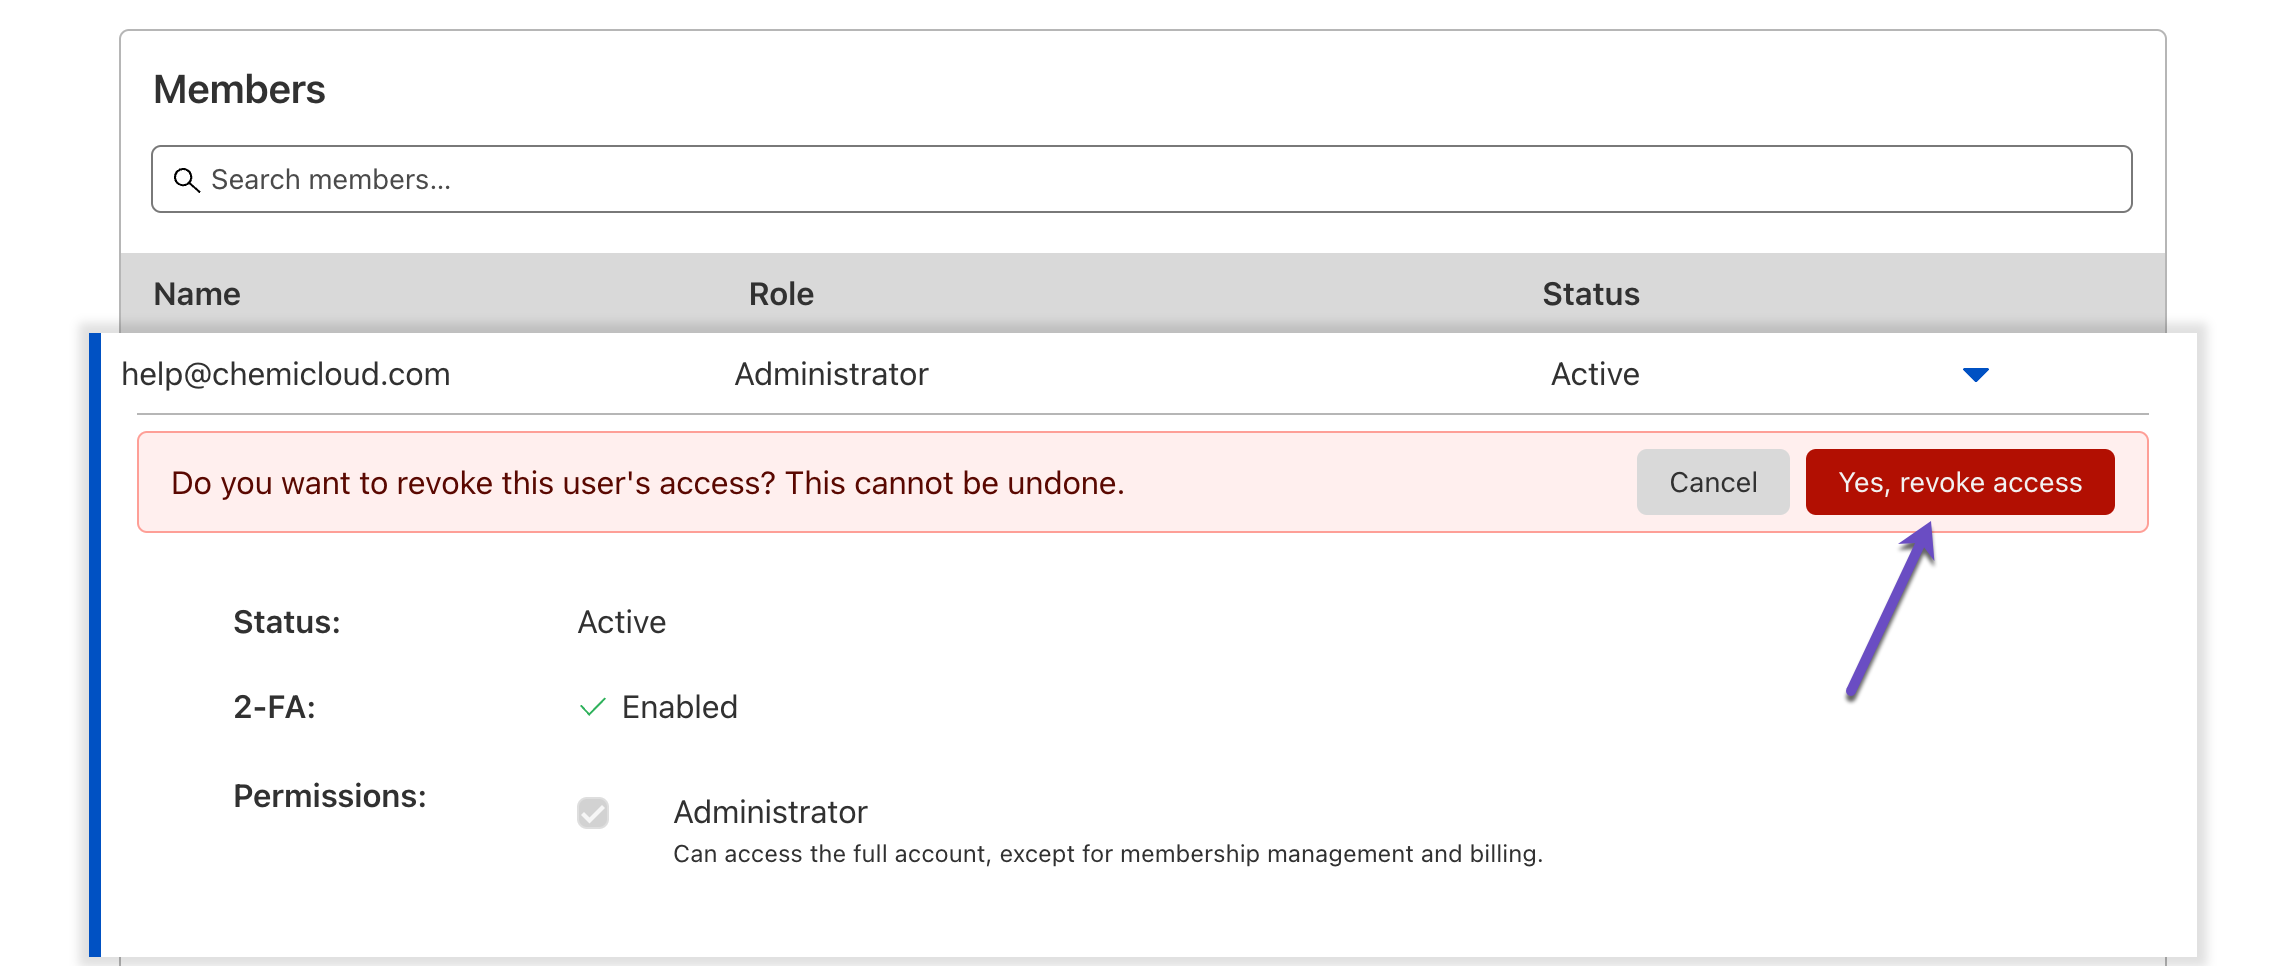
You will be asked to confirm the action. Simply click Yes, revoke access to remove this Member.
That’s it! You have now revoked access to a specific member of your Cloudflare account.
Expanded Breakdown of User Roles (Enterprise Accounts Only)
Cloudflare Enterprise Users have additional Roles they can give to Members added to their Cloudflare accounts, and they can assign additional roles to these Members.
| Role | Apps with permissions |
| Administrator (Access the full account, except for viewing payment information, adding/removing account members, or canceling subscriptions) |
|
| Super Administrator – All Privileges (Edit any Cloudflare setting, make purchases, update billing, and manage memberships, revoke access of other Super Administrators) |
|
| Administrator Read Only Can access the full account in read only mode. |
|
| Analytics (Read analytics) |
|
| DNS (Edit DNS records) |
|
| SSL/TLS, Caching, Performance, Page Rules, and Customization (Edit most Cloudflare settings except for DNS and Firewall) |
|
| Firewall (Edit WAF, IP Firewall, and Zone Lockdown settings) |
|
| Cloudflare Access (Edit Cloudflare Access policies) |
|
| Cloudflare Workers (Edit Cloudflare Workers) |
|
| Cache Purge (Purge the edge cache) |
|
| Stream (Can edit Cloudflare Stream media) |
|
| Load Balancer (Edit Load Balancers, Pools, Origins, and Health Checks) |
|
| Log Share (Edit Enterprise Log Share configuration) |
|
| Billing (Edit the account billing profile and subscriptions) |
|
| Audit Log Viewer (Can view audit logs) |
|