This article is designed to guide you through the process of generating and downloading backups within JetBackup 5. These step-by-step instructions will help you retrieve and download a backup file of your data:
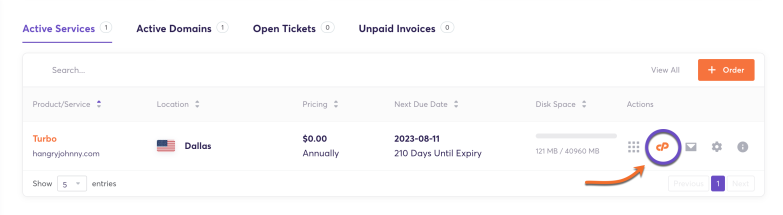
Step 1: Log in to your cPanel. There are many ways to do this, but the sure-fire easiest way is to log in to your Client Area, then open your cPanel.
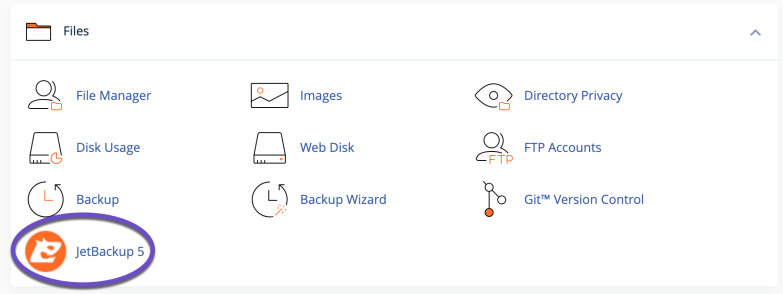
Step 2: Once you’ve logged in, scroll down through your cPanel and find the Files section, then open JetBackup 5.
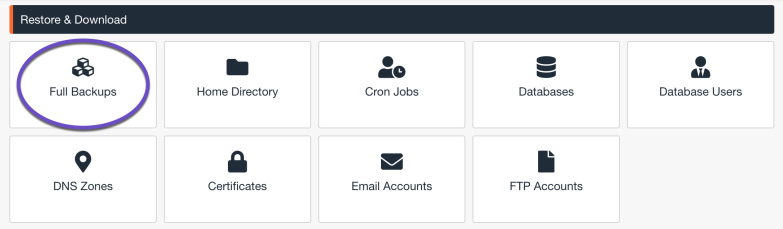
Step 3: Once Jetbackup 5 interface opens, search for the Restore & Download option and click Full Backups
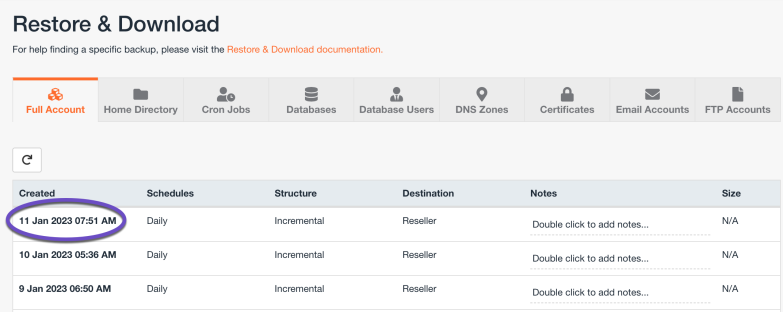
Step 4: The Full account backup restore option will open. Choose the backup date you want to restore by clicking on it, then scroll down the page and click on the Download button.
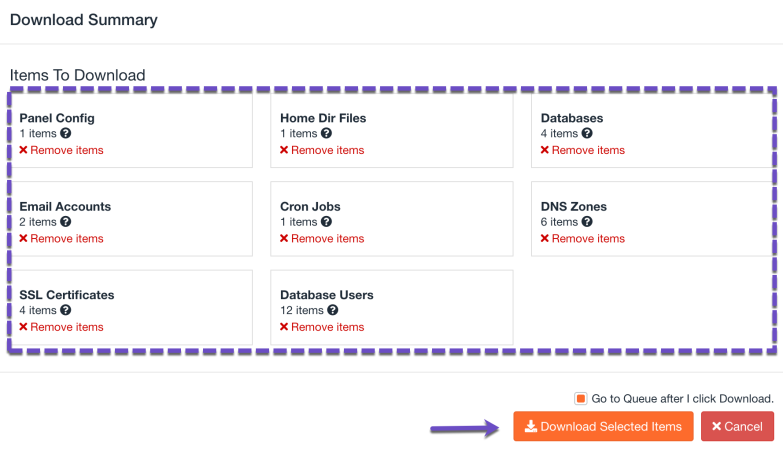
Step 5: You will be presented with a list of Items To Download. To download everything part of a cPanel Account, leave all these selected, then click Download Selected Items.
Step 6: The selected account will be queued for download. You will see a success notification in the top right corner.
Step 7: Click the Downloads button on the left menu to access your downloads.
After clicking Downloads, a page will open with your downloads available.
Just look for the download you want to save to your computer and click the Download button. The file will be saved to your computer.