If you are using JetBackup 4 interface, then this tutorial is for you and you will learn how to restore backups in cPanel.
JetApps recently released JetBackup 5 to the stable tier. If you’re using JetBackup 5 interface, please check out this tutorial.
What is JetBackup?
JetBackup is a tool available in your cPanel which provides a powerful set of backup and recovery solutions.
Our systems have been fully automated to create remote (off-site) backups for you, making this process super easy! We take daily off-site backups (around midnight) of your data and store them up to a certain number of days, based on your hosting plan.
What options are available in JetBackup?
JetBackup provides users with 6 different options for creating backups in their cPanel and can be conveniently located in it’s own section of your cPanel under “JetBackup”.
- Full Account Backups
- File Backups
- Cron Job Backups
- DNS Zone Backups
- Database Backups
- Email Backups
Below in this article, we’ll review the details and what is possible for the most popular and frequently used JetBackup Options: Full Account Backups, File Backups, and Database Backups.
Before we start, let’s break down some information that you will see along the backup restores process.
What’s an Incremental Backup?
Incremental backups are a type of backup wherein only information that has changed is backed up, versus creating a full backup each time. Let’s speculate and say your website is configured as follows:
- Your website is s WordPress site with lots of photo galleries.
- The total amount of data in your account, including all images, WordPress installations, databases, and email in your mailbox is 5 GB.
- You set a schedule to backup your website in full every night at midnight.
- Your web hosting provider gives you 20 GB of disk space.
If you have, for example, a WordPress site with a lot of photo galleries that total 5 Gigabytes (GB) and you used a full backup instead of incremental backup, your backups will have consumed 20 GB of space after 5 days, and you wouldn’t be able to upload new content to your website.
By using an incremental backup, your backup sizes only grow when you add content instead of being (essentially) cloned or duplicated in full as part of your backup schedule.
What does Location – Remote mean?
ChemiCloud has configured your automated backups to be stored on a separate group of servers in a different location than the server hosting your websites and storing your e-mails. This is done for recovery purposes. Having these remote/off-site backups keeps your information safe and sound so you can rest easy!
How to restore Full Account Backups
1) The first step would be to log into your cPanel.
2) Once logged in, go to JetBackup and click on the Full Account Backups icon.

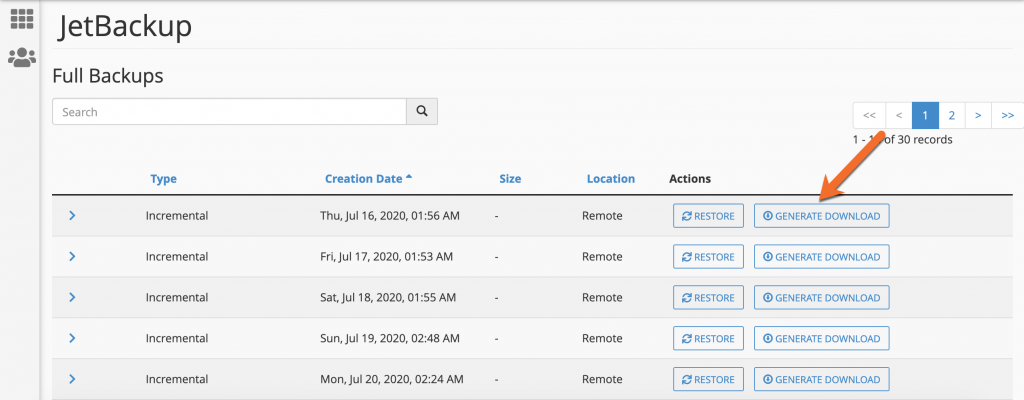
3) In the next window, you will be able to choose your desired restore point (date) and the backup to restore from.
4) To restore a full account backup, click on the Restore button.

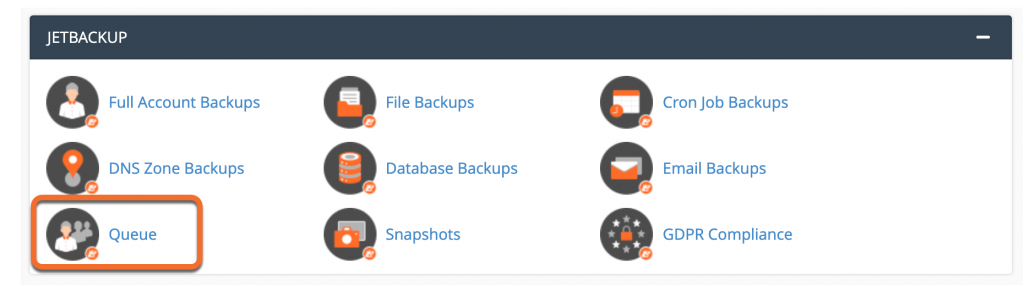
5) Once the full backup is initiated, you can view the progress from cPanel’s dashboard > JetBackup > Queue.
6) Wait the restore job to finish.
The queue status “Completed” means that the restore has been successful. If you get the queue status “Failed” you may try another date, or you may contact our Support.
Downloading a Full Backup
This feature comes in handy in case you’d like to download a full backup of your account and save it into your computer. Let’s download one of our backups!
1) First, click Generate Download from the far right column. This will instruct JetBackup to reach out to our off-site backup servers and fetch your backup files.
2) Once the full backup is initiated, you can view the progress from cPanel’s dashboard > JetBackup > Queue.
After a few moments, once the backup has been completed, you will see the option to Download the Backup button.
4) Click this to download and save your backup file to your computer.
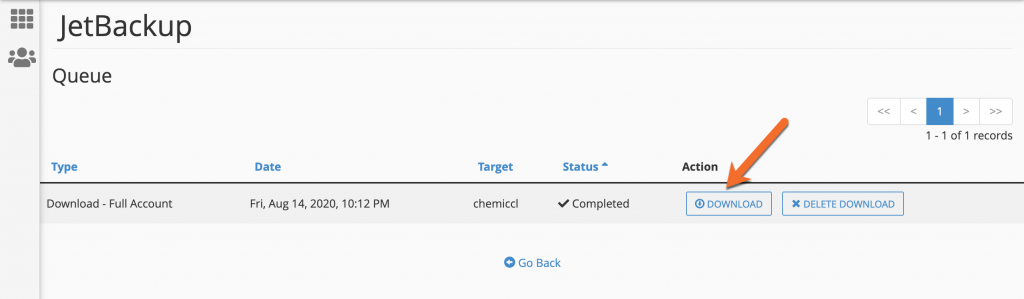
After you have successfully downloaded the backup to your computer, you can click “Delete Download“. This will remove the backup from your hosting account so it’s not consuming any space.
Below is a short animation showing the download process:
It’s that easy!
How to restore File Backups
Have you ever deleted a file and a couple of days later had a client ask you, “Can you send me this file again” and thought, “Oh no! The file is gone!”? Well, fret not! File backups make it super easy to dig in and find exactly the file you need to restore.
1) The first step would be to log into your cPanel.
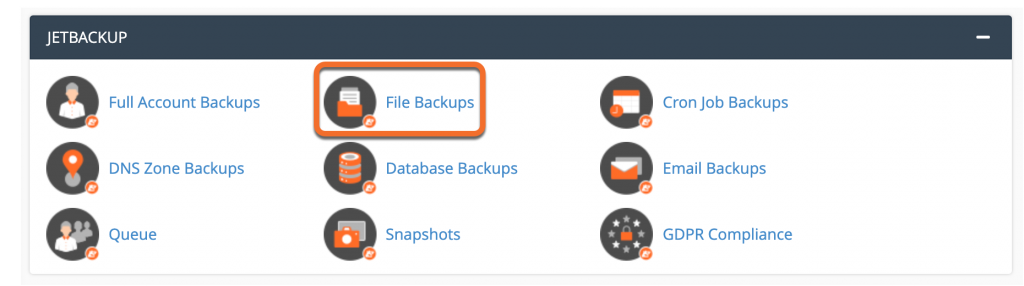
2) Once logged in to cPanel, in order to restore files or folders on your account, go to JetBackup and click on the File Backups icon.
3) In the next window, you will be able to choose your desired restore point (date) to restore from.
Once you’ve decided on the restore date, the next step is to use the File Manager which will help you to browse through your account’s file system.
4) Click on the File Manager under Actions.
In the next window, you will see all the files and folders inside your account’s home directory.
Important Options to Note while using the File Manager

- The current path will reflect the directory you are viewing in the file manager.
- Select all will check all files and folders in the directory for you.
- Download Selected will instruct JetBackup to create a compressed file for you containing the file(s) and/or folder(s) you’ve checked.
- Restore Selected will restore the file(s) and/or folder(s) you have checked to the server just as they were prior to the files being deleted.
- Show Hidden Files instructs the file manager to display system files, which are typically not needed for most backup or restore operations, for your convenience.
Alright! Now that you are familiar with the File Manager options, let’s proceed and do a file backups restore.
In my example, I’ll do a restore for the site on my cPanel’s primary domain. The document root for your primary domain; it’s always the public_html folder.
5) You will see all the files and folders inside your account’s home directory. In my case, I will select only “public_html“.
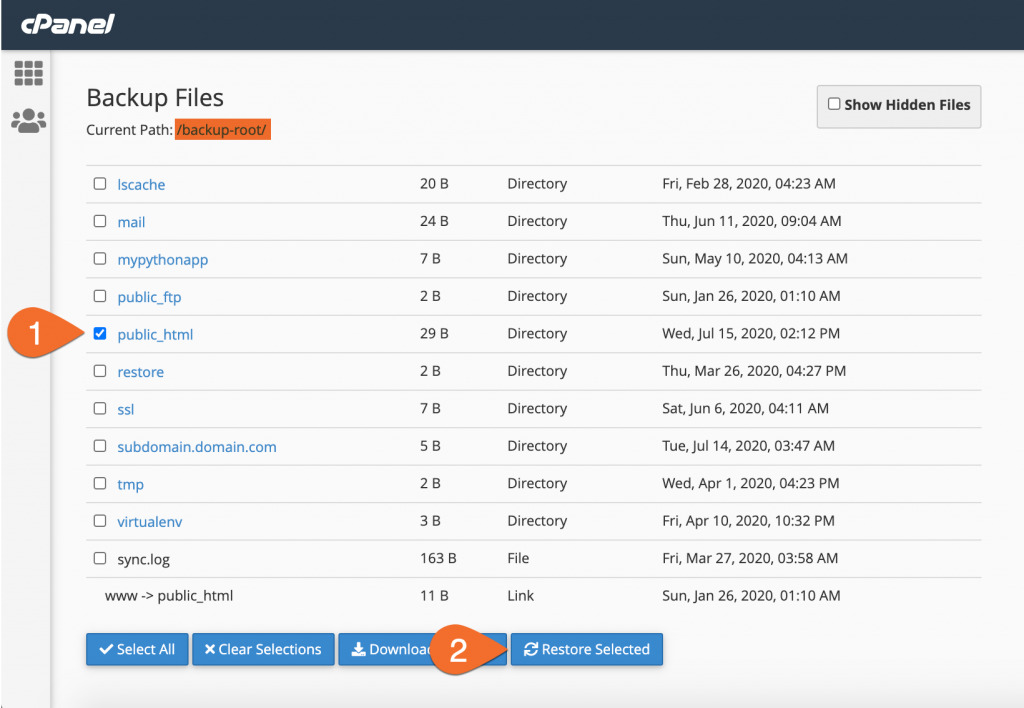
6) Once the public_html folder is selected click on the “Restore Selected” button.
If I wanted to download a backup of the selected folder, I could have checked to Download Selected instead of Restore Selected, and JetBackup would have started to create a backup of that folder. This comes in handy in case you want to do a local download and to check on some of your site’s files before doing a restore.
7) Tick the box Are you sure you want to restore this account?
8) Click on Add to Restore Queue button
9) Once the file backup is initiated, you can view the progress from cPanel’s dashboard > JetBackup > Queue.
10) Wait the restore job to finish.
The queue status “Completed” means that the restore has been successful. If you get the queue status “Failed” you may try another date, or you may contact our Support.
It’s that easy!
How to restore Database Backups
JetBackup makes downloading and restoring databases in your hosting account super simple. If a WordPress plugin has corrupted your database and you need to restore to one from the night before, or the week before, no problem!
1) The first step would be to log into your cPanel.
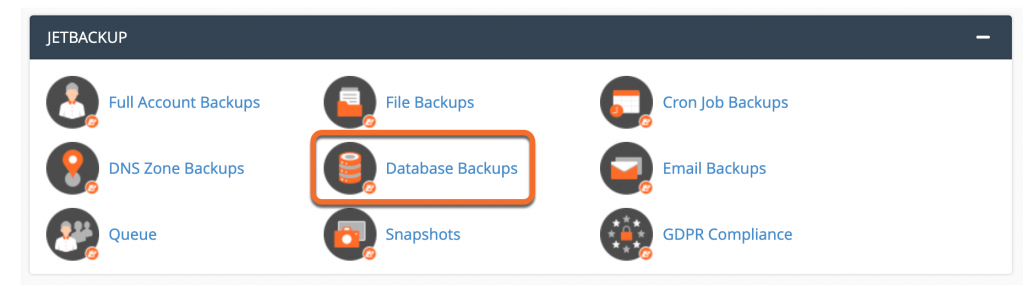
2) Once logged in to cPanel, in order to restore files or folders on your account, go to JetBackup and click on the Database Backups icon.
3) In the next window, you will be able to see all your databases and to choose your desired restore point (date) to restore from.
Once you’ve decided on the restore date, the next step is to use the Restore button.
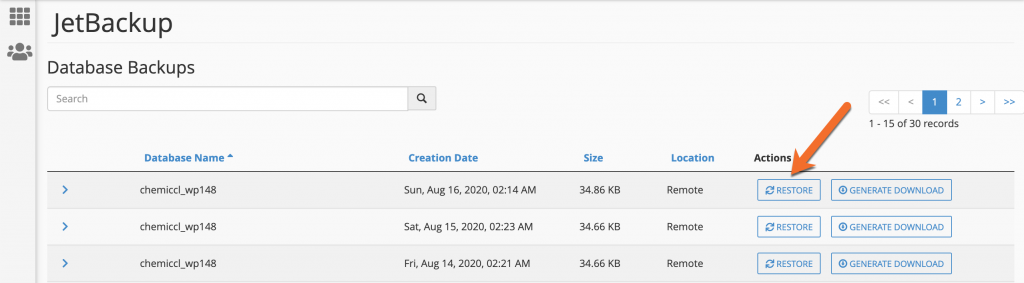
4) Tick the box Are you sure you want to restore this account?
5) Click on Add to Restore Queue button
6) Once the database backup is initiated, you can view the progress from cPanel’s dashboard > JetBackup > Queue.
7) Wait the restore job to finish.
The queue status “Completed” means that the restore has been successful. If you get the queue status “Failed” you may try another date, or you may contact our Support.
It’s that easy!
Similar to Full Account Backups, using Generate Download will instruct JetBackup to create a compressed file containing your database which will be downloaded to your computer.
How to restore Email Backups
JetBackup makes downloading copies of your mailbox very easy. This can be a very useful feature if you are investigating a user’s account for abusive emails or if you are migrating from one email server to another. Downloading mailboxes is very similar to downloading Databases.
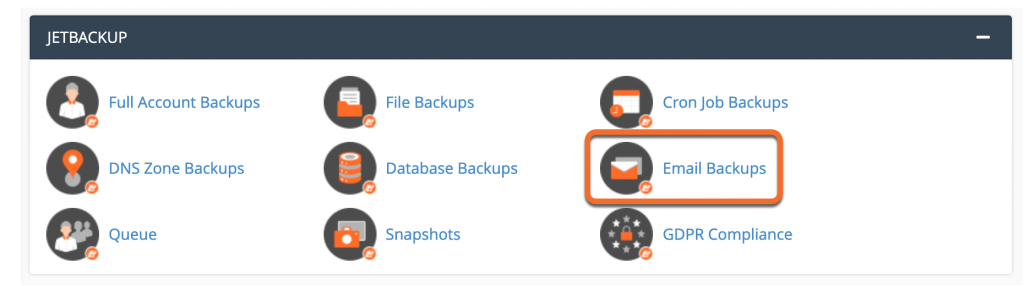
1) The first step would be to log into your cPanel.
2) Once logged in to cPanel, in order to restore emails on your account, go to JetBackup and click on the Email Backups icon.
3) In the next window, you will be able to see your email addresses and to choose your desired restore point (date) to restore from.
Once you’ve decided on the restore date, the next step is to use the Restore button.
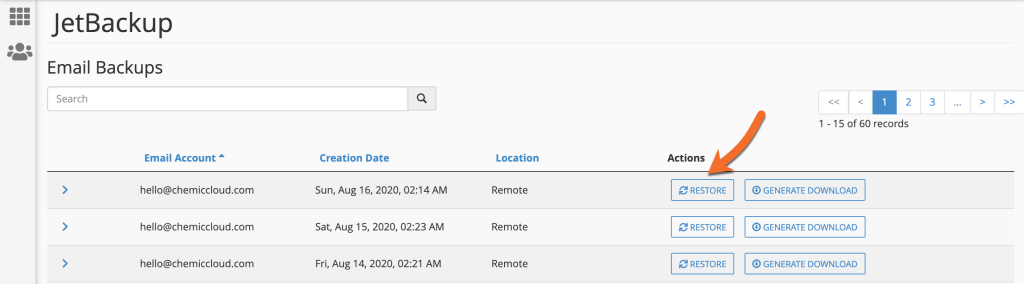
4) Tick the box Are you sure you want to restore this account?
5) Click on Add to Restore Queue button
6) Once the email backup is initiated, you can view the progress from cPanel’s dashboard > JetBackup > Queue.
7) Wait the restore job to finish.
The queue status “Completed” means that the restore has been successful. If you get the queue status “Failed” you may try another date, or you may contact our Support.
It’s that easy!
How to decompress & navigate a downloaded backup
When you download a Full Account Backup (for example), or a backup containing more than one file or folder, or Database Backup, the file will be generated and saved to your computer in the form of tar.gz file. This is a type of compressed file, similar to a .zip file.
Expanding these files is quite easy. Below, we have a short animation displaying how to decompress a full account backup file and navigate to the public_html folder using Windows 10 and the free compressed file management tool – 7zip.
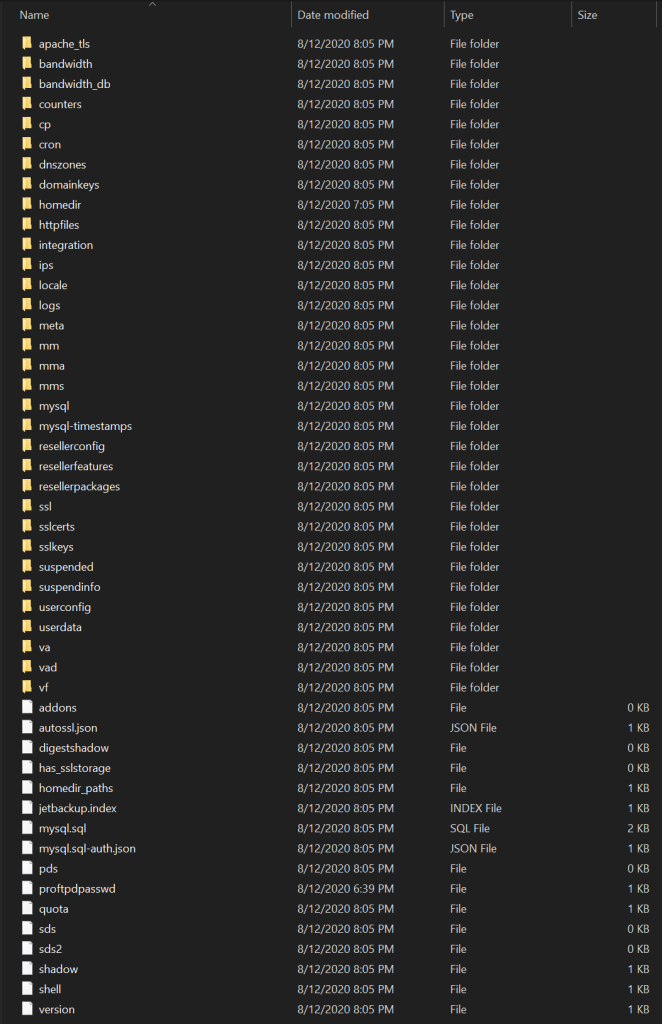
Here is a screenshot of the folder structure of a full account backup when it is decompressed:
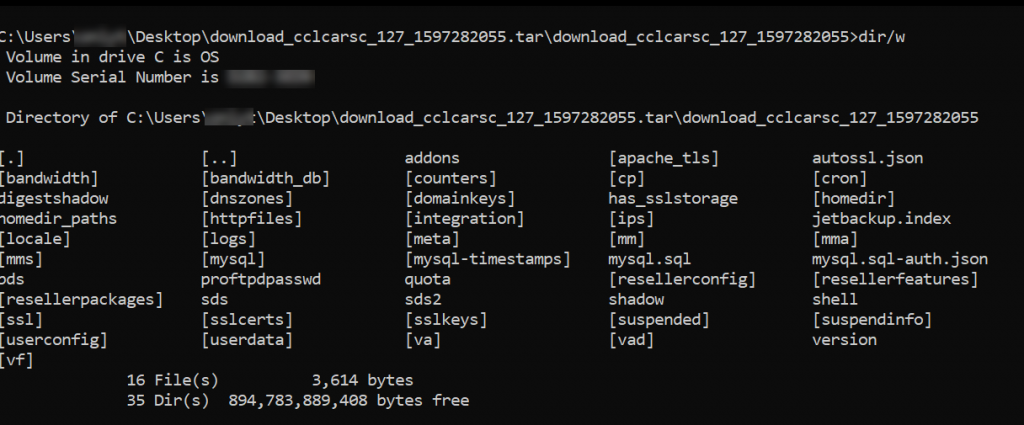
Or, for those who prefer the command line view:
Database Backups
Decompressing a downloaded Database backup is almost identical to decompressing a Full Account Backup, however, instead of a number of folders, each with individual website files, being decompressed, a single sql file will be displayed. See below:
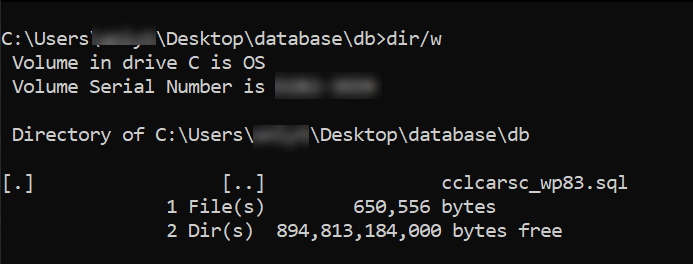
We can see the database file – cclcarssc_wp83.sql has been downloaded to our local computer.
You can save this file in your favorite online storage provider for additional backups if you would like, or you can open the file in an application such as mySQL Workbench and modify or change tables if you’d like.
Email Backups
Downloading email backups are a little different due to the way cPanel reconciles and stores mailboxes. Below is a short animation showing the folder structure of an Email Backup I’ve downloaded and decompressed:
Conclusion
JetBackup provides users with a very powerful set of tools for backing up (for offline storage) and restoring full accounts, individual files and folders, databases, email accounts, and more.
If you have any questions about using one of the options in your JetBackup section of cPanel, especially if you are considering using the restore feature, reach out to our live chat support to have your questions answered!