You’ve probably seen it before – the dreaded white screen of doom in WordPress and named as such because it’s a white screen and your WordPress site just appears dead.
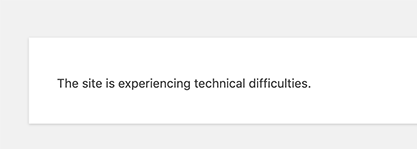
On rarer occasions, you may see a critical error message instead of the white screen of doom:

The error is still the same whether you see a white screen or a critical error message. This can happen for a few reasons, including bad themes and plugins or if there’s an issue with the webserver. Due to the variety of causes for this error, troubleshooting it can take some time.
Below, our troubleshooting tips should get you up and running quickly if you encounter this error!
#1 Is the problem happening on other WordPress Sites you have at the same host?
Suppose other WordPress sites that are hosted under the same account at your web host are also having this problem. In that case, you should reach out to our Happiness Engineers if you host with ChemiCloud, and if you don’t, you should contact your web host and ask if there are any server-related problems + let them know you’re getting the white screen of doom in WordPress.
#2 Increase Your Memory Limit
Sometimes you might be trying to do too many things at once and exhaust, or use up, all the available memory. For example, if you are trying to upload too many files to your media library at the same time, you may encounter this white screen of doom.
We have a great guide on how to increase the PHP Memory Limit in cPanel here.
#3 Deactivate All Your Plugins
If you’ve previously increased your memory limit to 512M or even 1G or 2 G, and your WordPress site still didn’t back, you need to check, you will need to do some further troubleshooting.
If you can’t get into your wp-admin because of the ‘white screen of doom’, the steps below will help you. Regrettably, WordPress doesn’t have a way to deactivate all plugins with the click of a mouse. To do this, you’ll need to use the File Manager in your cPanel.
Step 1: Login to your cPanel. There’s a lot of ways to do this, but the sure-fire easiest way is to login to your Client Area, then open your cPanel.
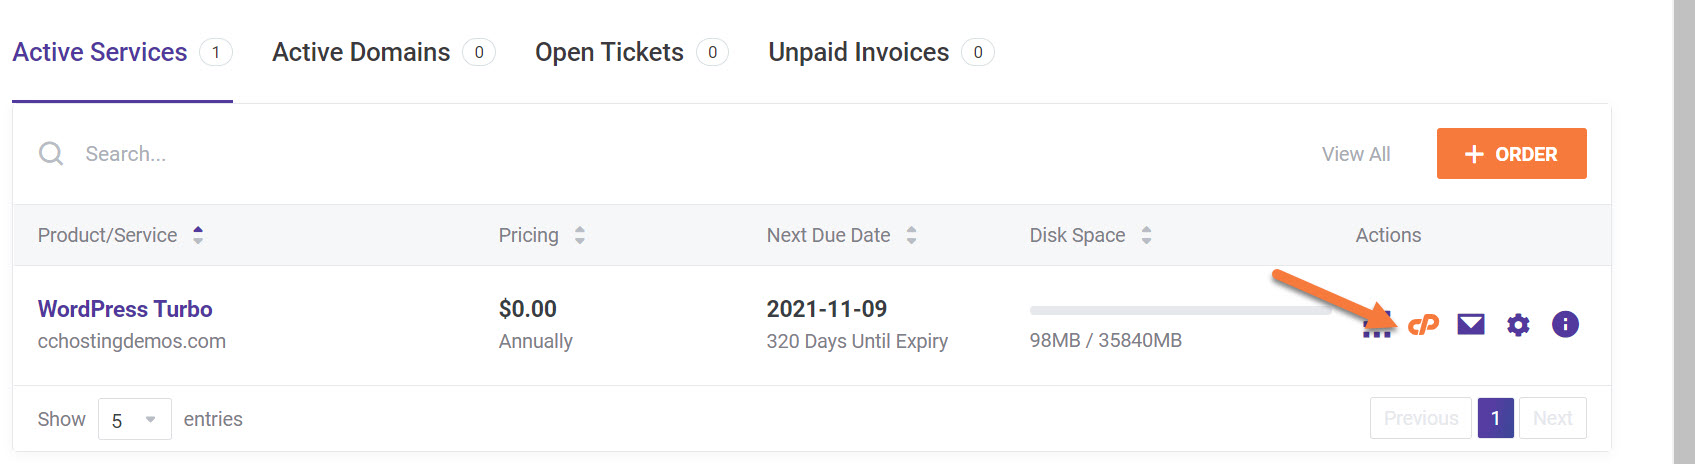
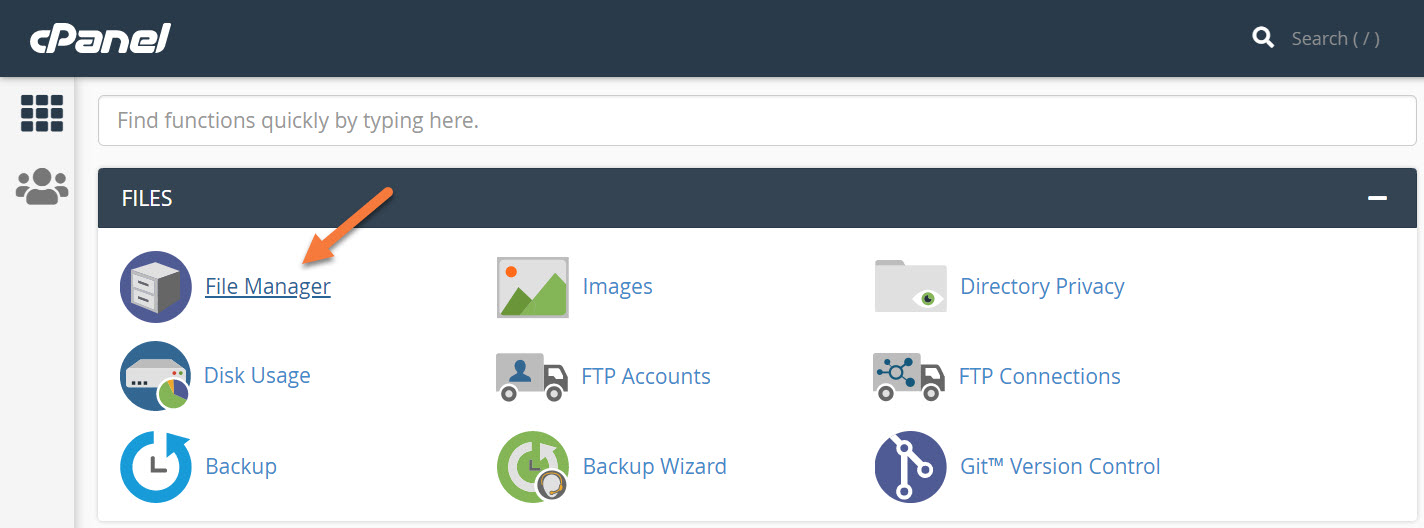
Step 2: Once your cPanel is open, look for and open the File Manager under the Files section.
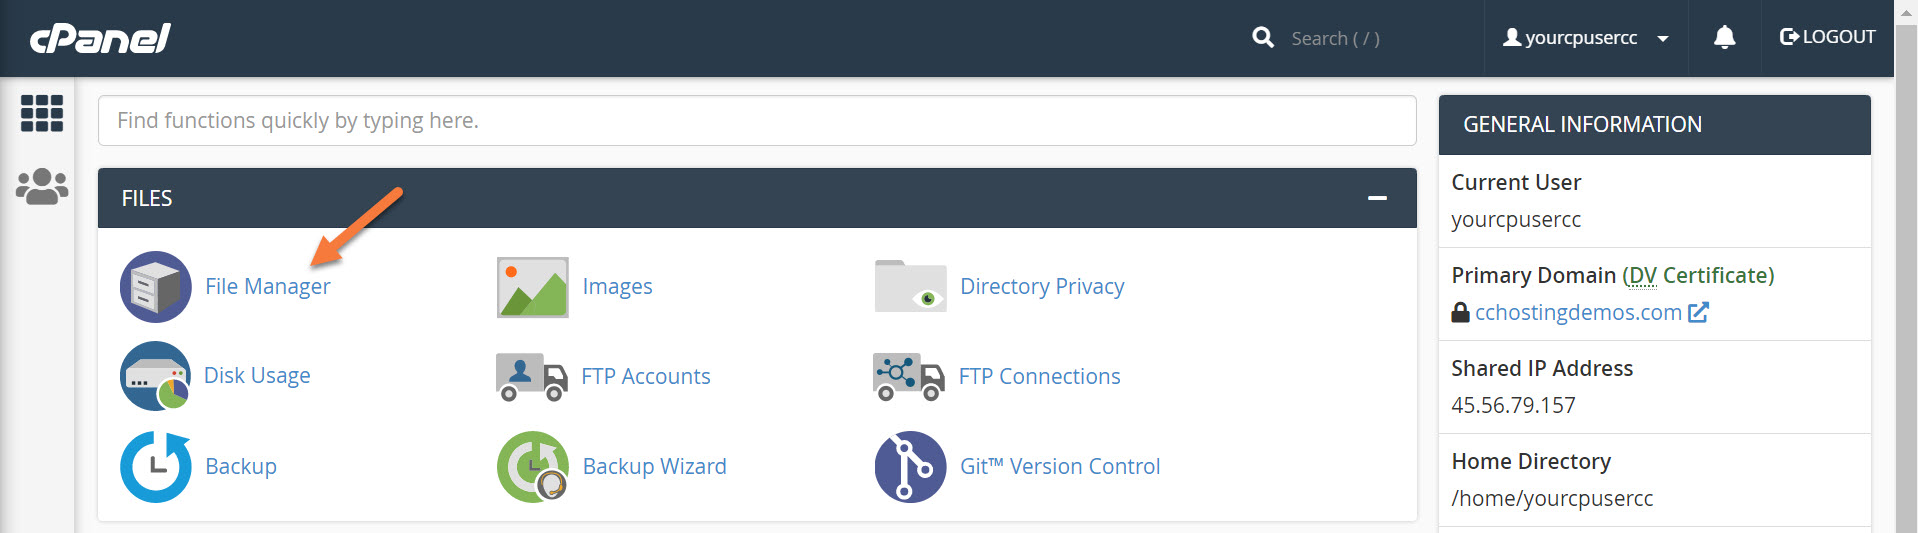
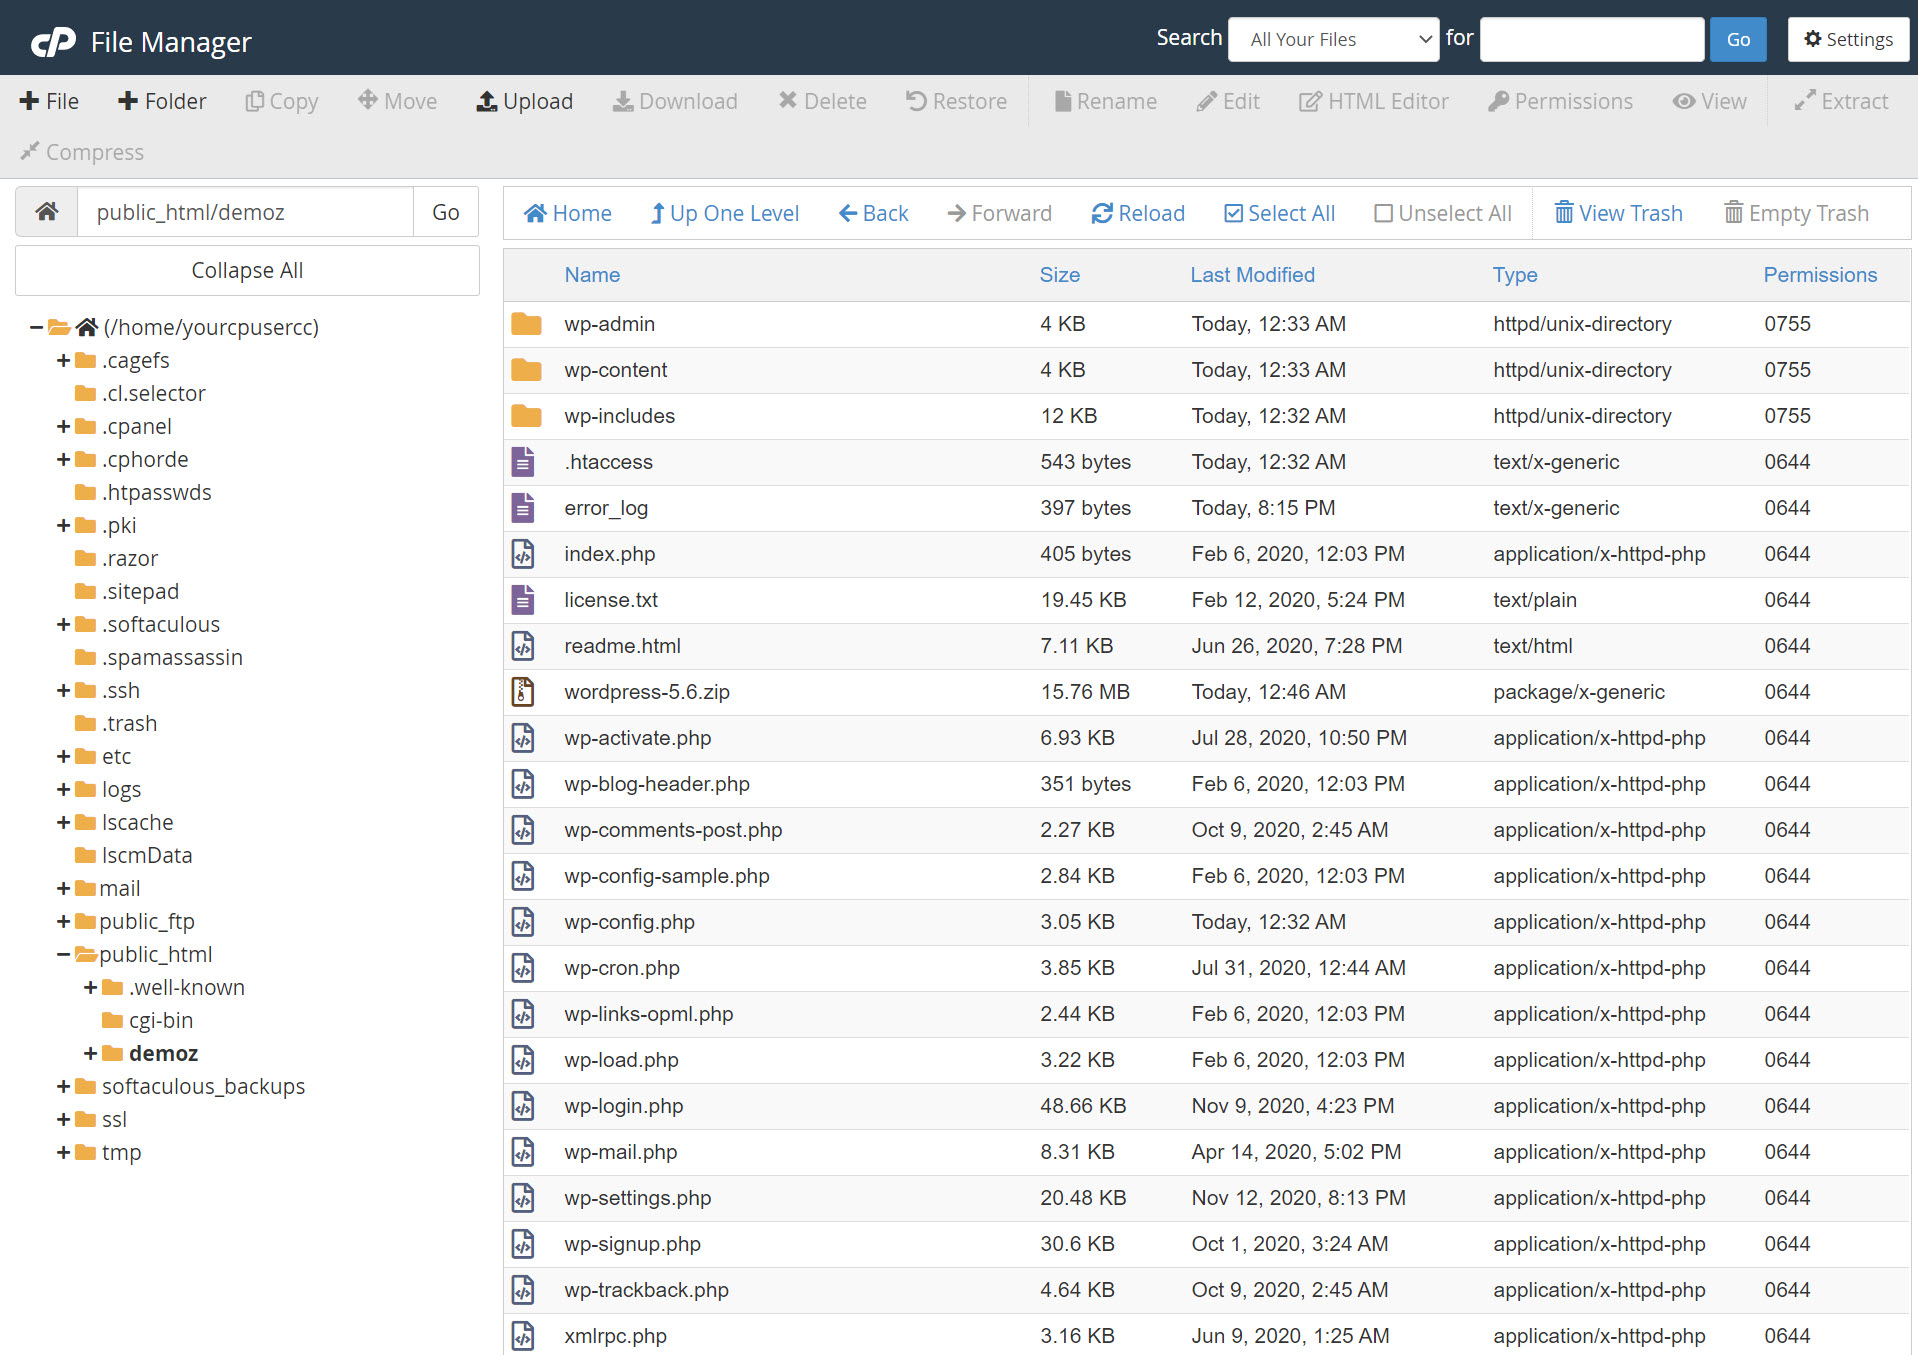
Step 3: Once the file manager opens, navigate to the directory where your WordPress configuration is installed. This is most likely in your public_html folder.
Step 4: In your File Manager, open the folder called wp-content:
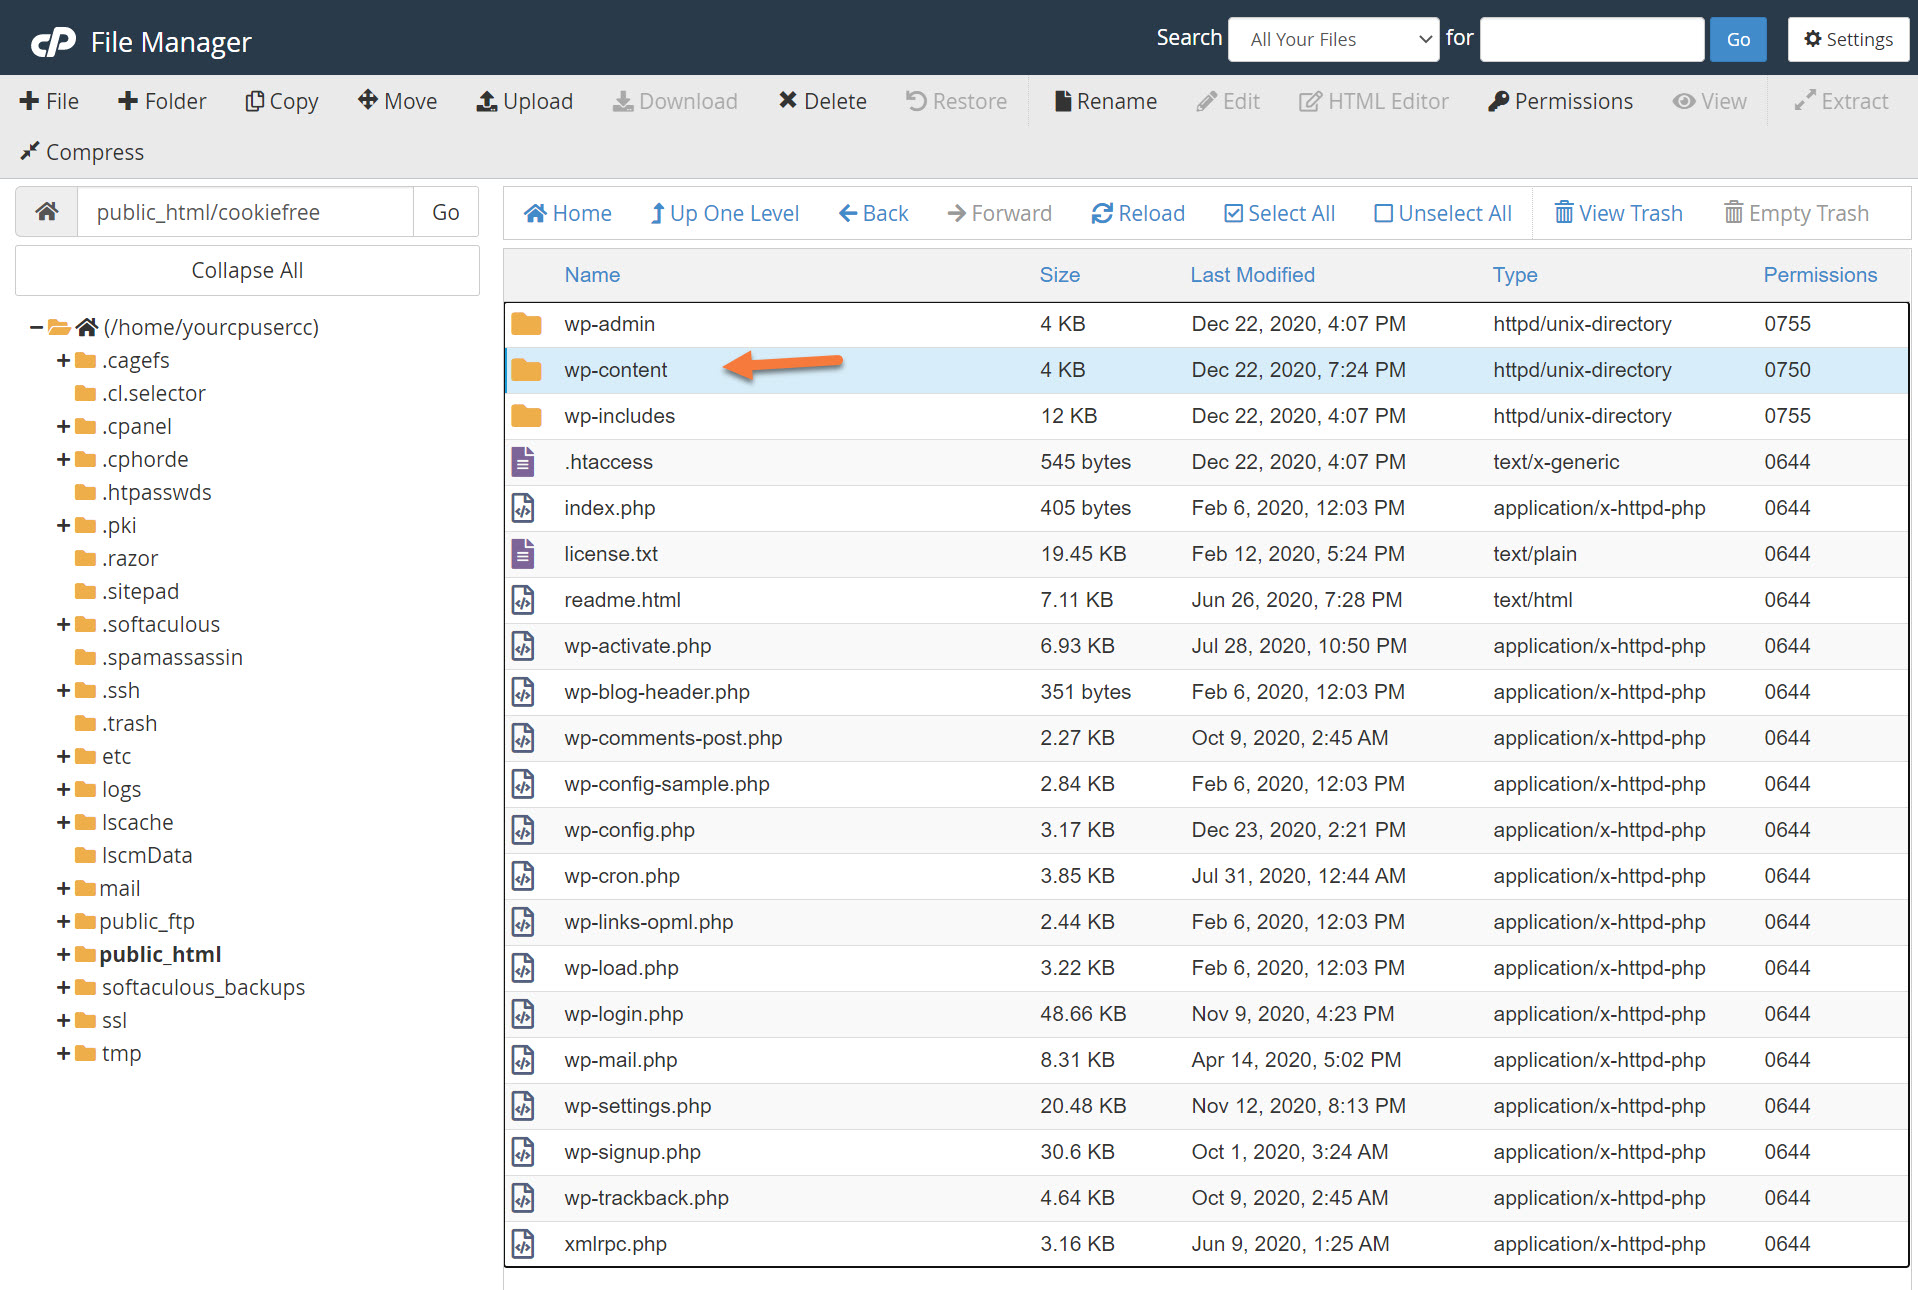
In your wp-content folder, look for another folder called Plugins.
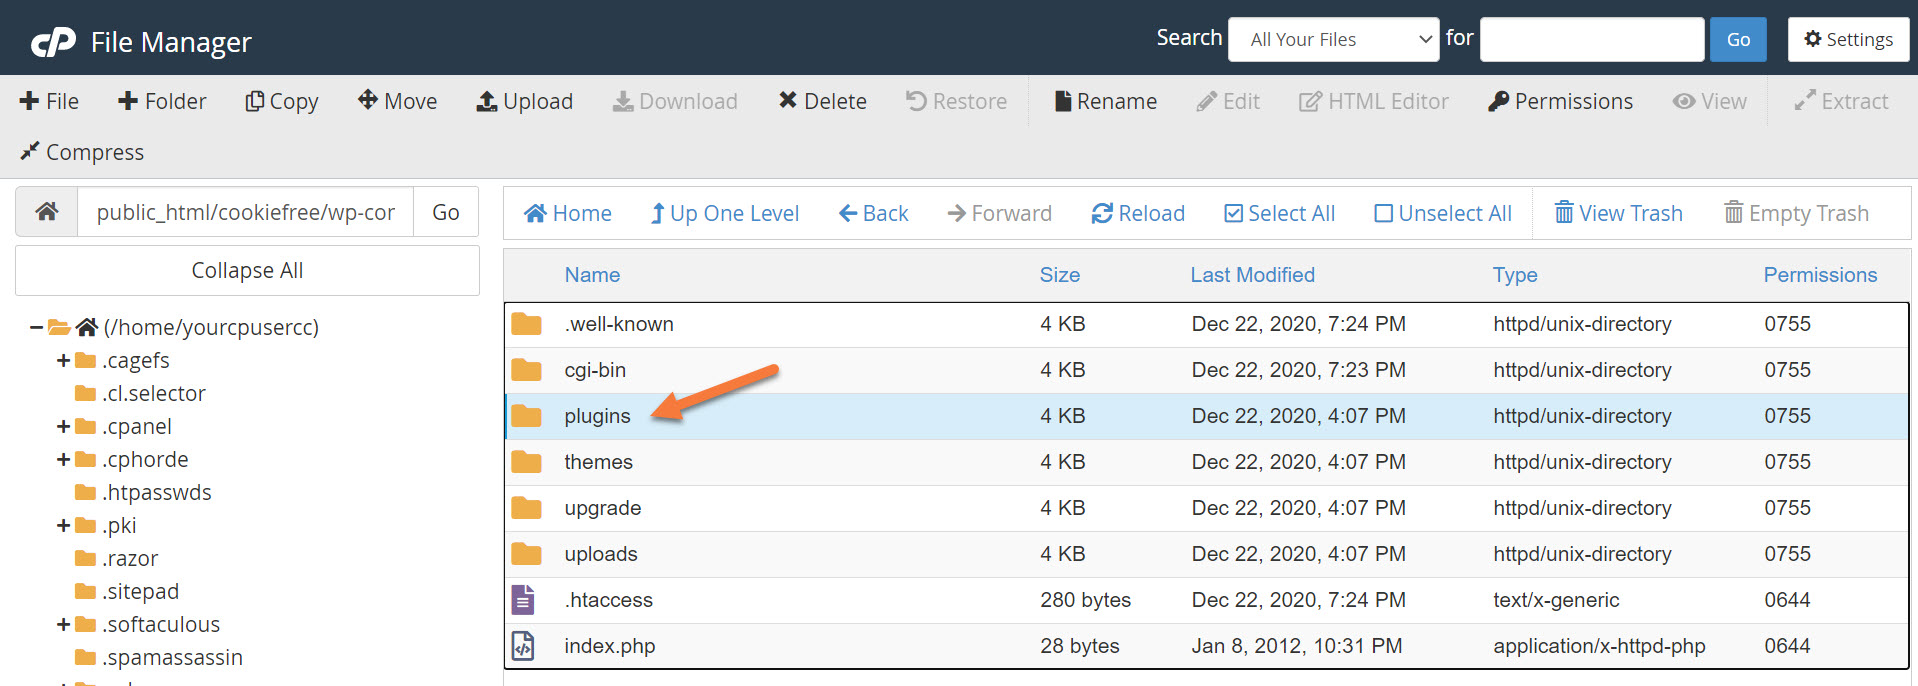
Right click the folder, then choose Rename.

Step 5: To deactivate all plugins at once, rename the plugins folder to something like “plugins.deactivated” just without the quotes.
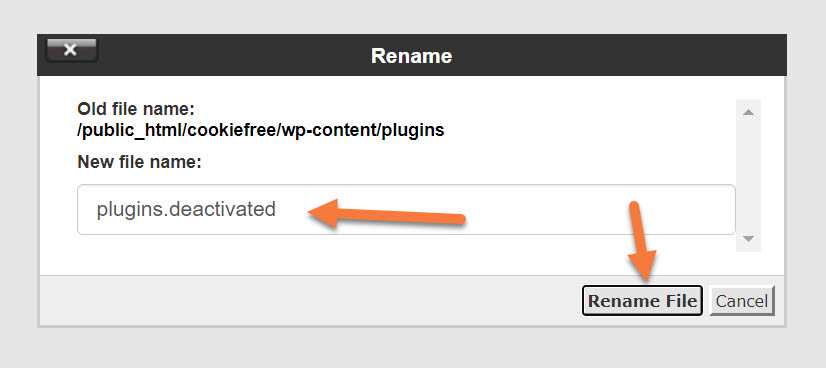
Once you select Rename File, your plugins will be deactivated. Now you can return to your WordPress site and see if you can log in to your wp-admin area without issue.
Essentially, WordPress looks for the Plugins folder to run plugins that are installed, and let’s face it, you probably have plugins. When WordPress can’t find the Plugins folder, it deactivates all plugins.
Step 6: Now, you need to return to the File Manager, open your public_html folder, then the wp-content folder, just as before, except you need to rename the Plugins folder back to Plugins.
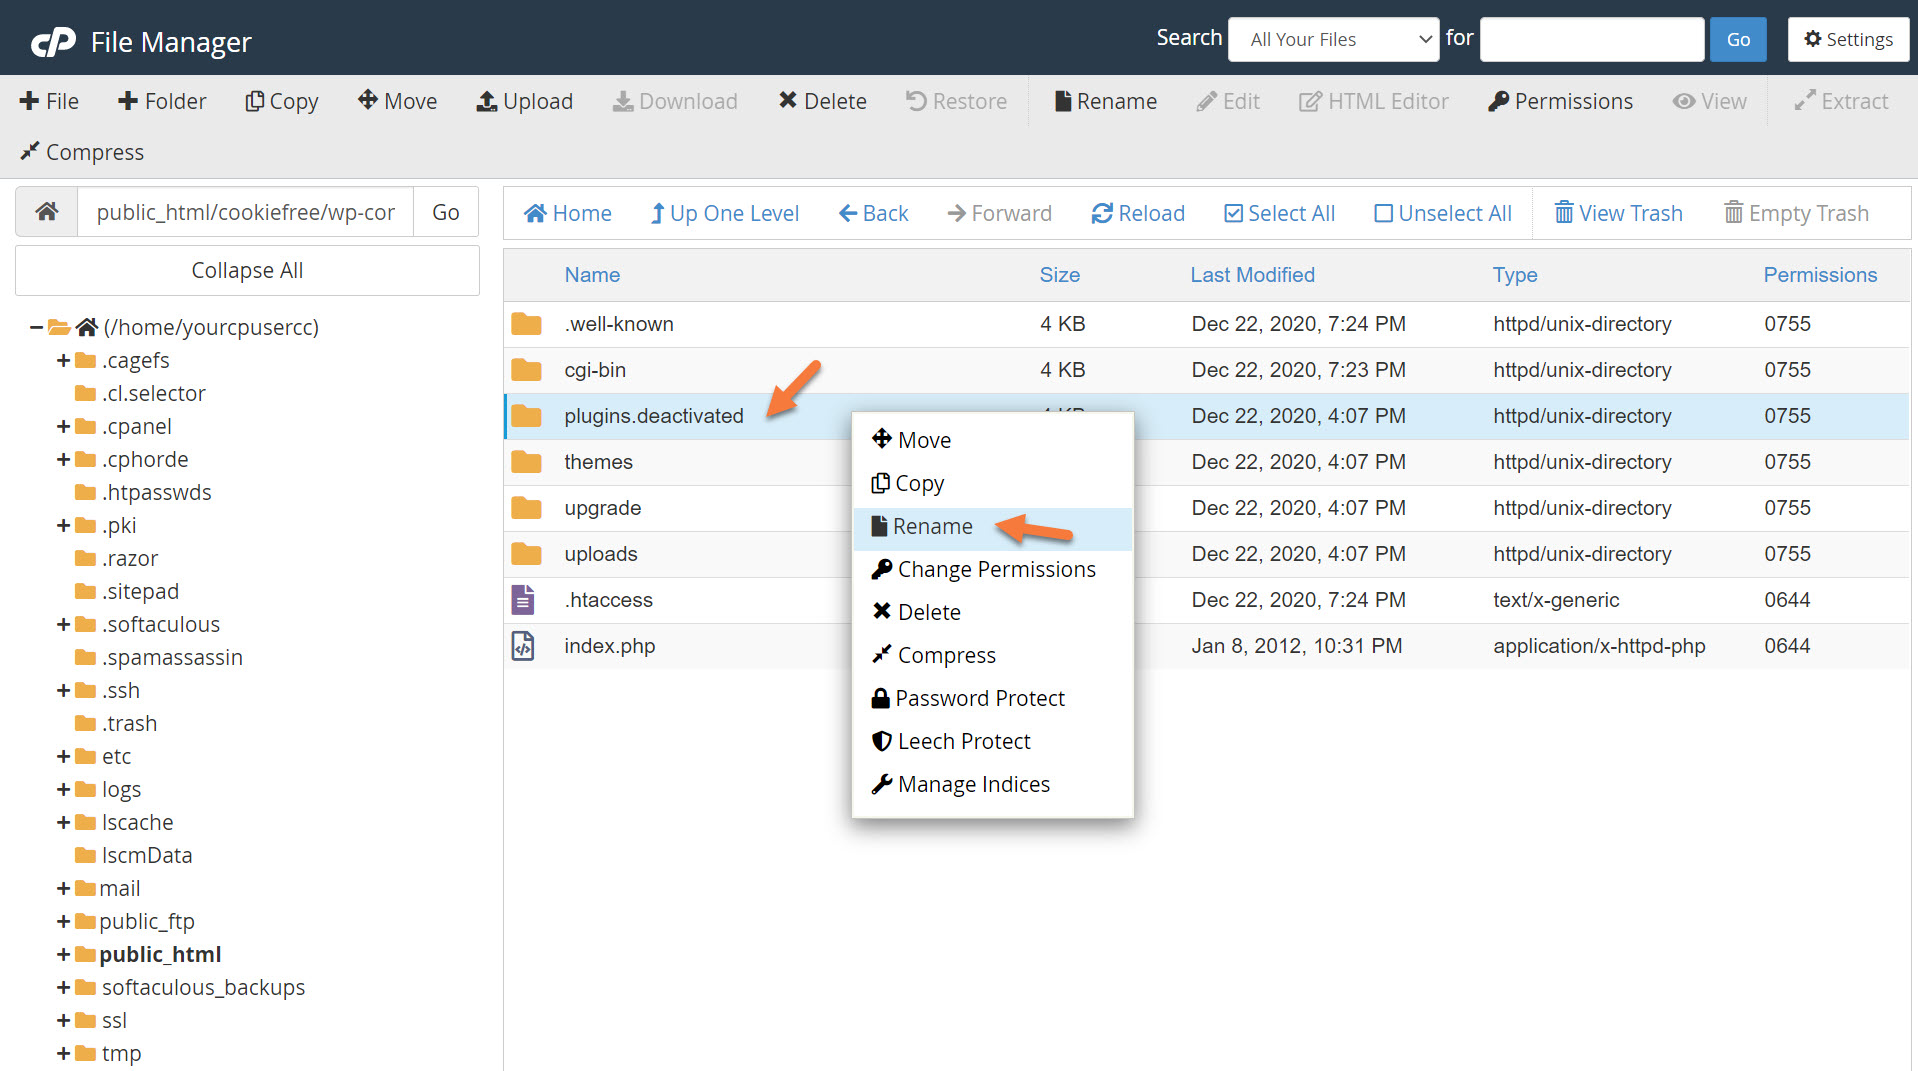
Next, rename the folder ‘plugins’, but without the quotes, and click Rename File.
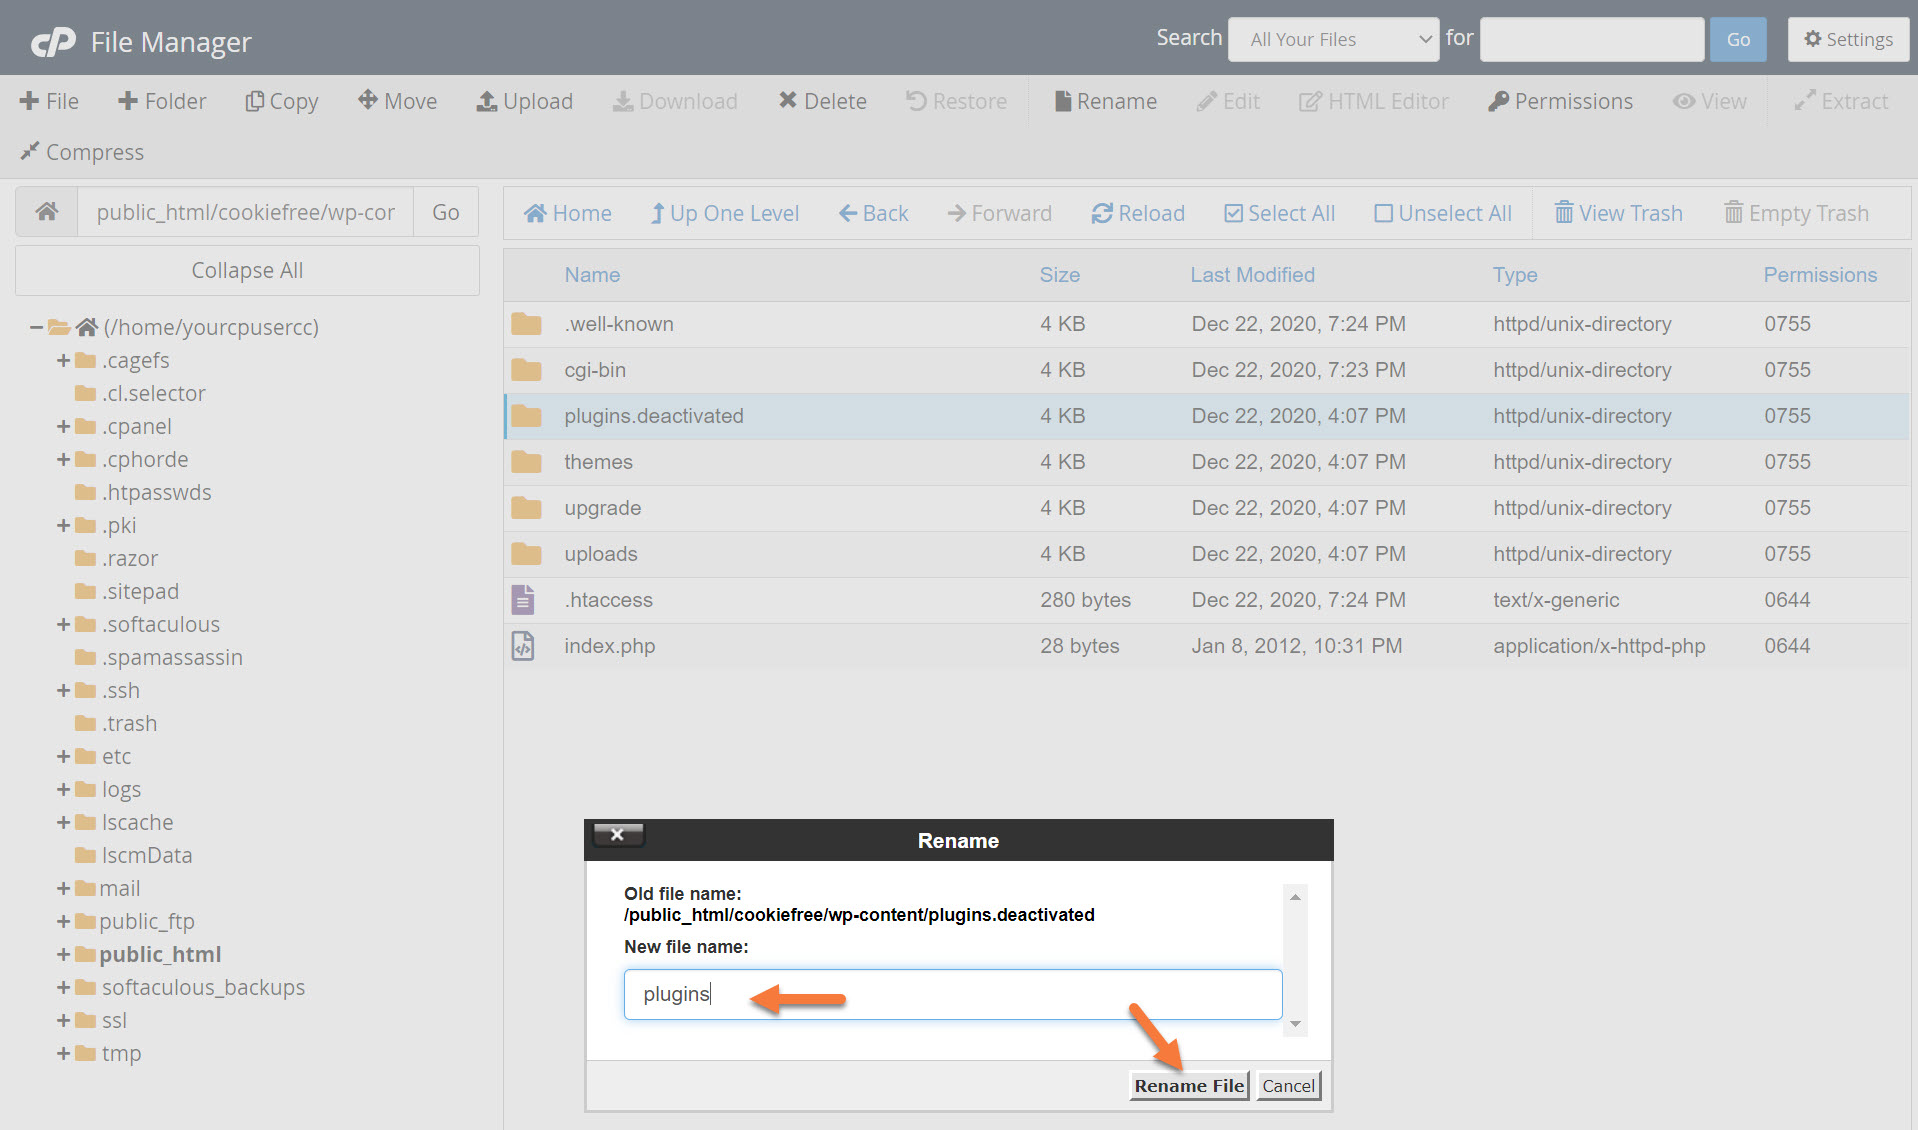
Step 7: Now, return to your wp-admin and go to Plugins. Then, one by one, enable your Plugins until your site displays the Internal Server Error.
When that happens, you know which plugin is causing the issue. Repeat the process above to deactivate all plugins, then when you are able to get back into your wp-admin, delete that plugin before re-activating it.
Struggling with WordPress troubleshooting? ChemiCloud is the hosting solution designed to save you time and money! 🤓 Try our Managed WordPress Hosting plans for just $1!
If that solved your problem, congrats! If not, keep reading!
#4 Use WordPress Recovery Mode
Back in WordPress 5.2, the developers introduced fatal error protection. Sometimes WordPress can catch an error and stop it in it’s tracks, especially if it’s with a plugin.
In the event you see an error that says:
You should receive an email to your admin email address with more details.
The email will say something to the effect of:
Howdy!
Since WordPress 5.2, there’s a built-in feature that detects when a plugin or theme causes a fatal error on your site.
In this case, WordPress caught an error with one of your plugins: <Plugin Name>
The email will also contain a special link that will allow you to get into your /wp-admin so you can disable that wonky plugin and get your site back up and running.
#5 Clear Your /wp-cache
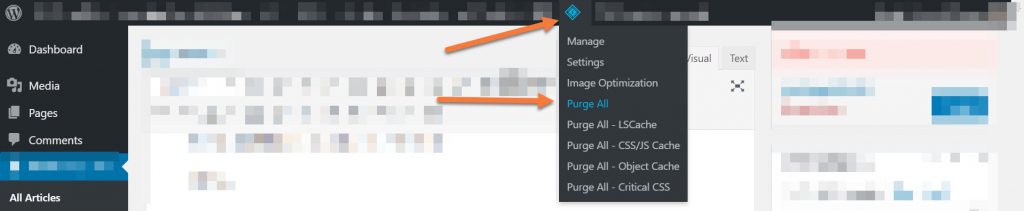
If you’re hosting with ChemiCloud, you’re running on LiteSpeed Servers and should have the LiteSpeed Cache Plugin installed in your WordPress to benefit from the speed of our servers truly.
To clear your LiteSpeed Cache, login to your /wp-admin and look for the LS logo at the top. Hover over the logo and click Purge All.
Now, please return to your website and try to open it. If it works, congrats! If not, keep trying with the next step below.
#6 Enable Debug Mode
If the steps above haven’t helped, the next step would be to enable debug mode and read through it’s output to locate the exact cause of the issue. Use the steps below to edit your wp-config file and enable debug mode.
Step 1: Login to your cPanel. There’s a lot of ways to do this, but the sure-fire easiest way is to login to your Client Area, then open your cPanel.
Once your cPanel is open, look for the Files section and open the File Manager.
Step 2: Once the file manager opens, navigate to the directory where your WordPress configuration is installed. This is most likely in your public_html folder.
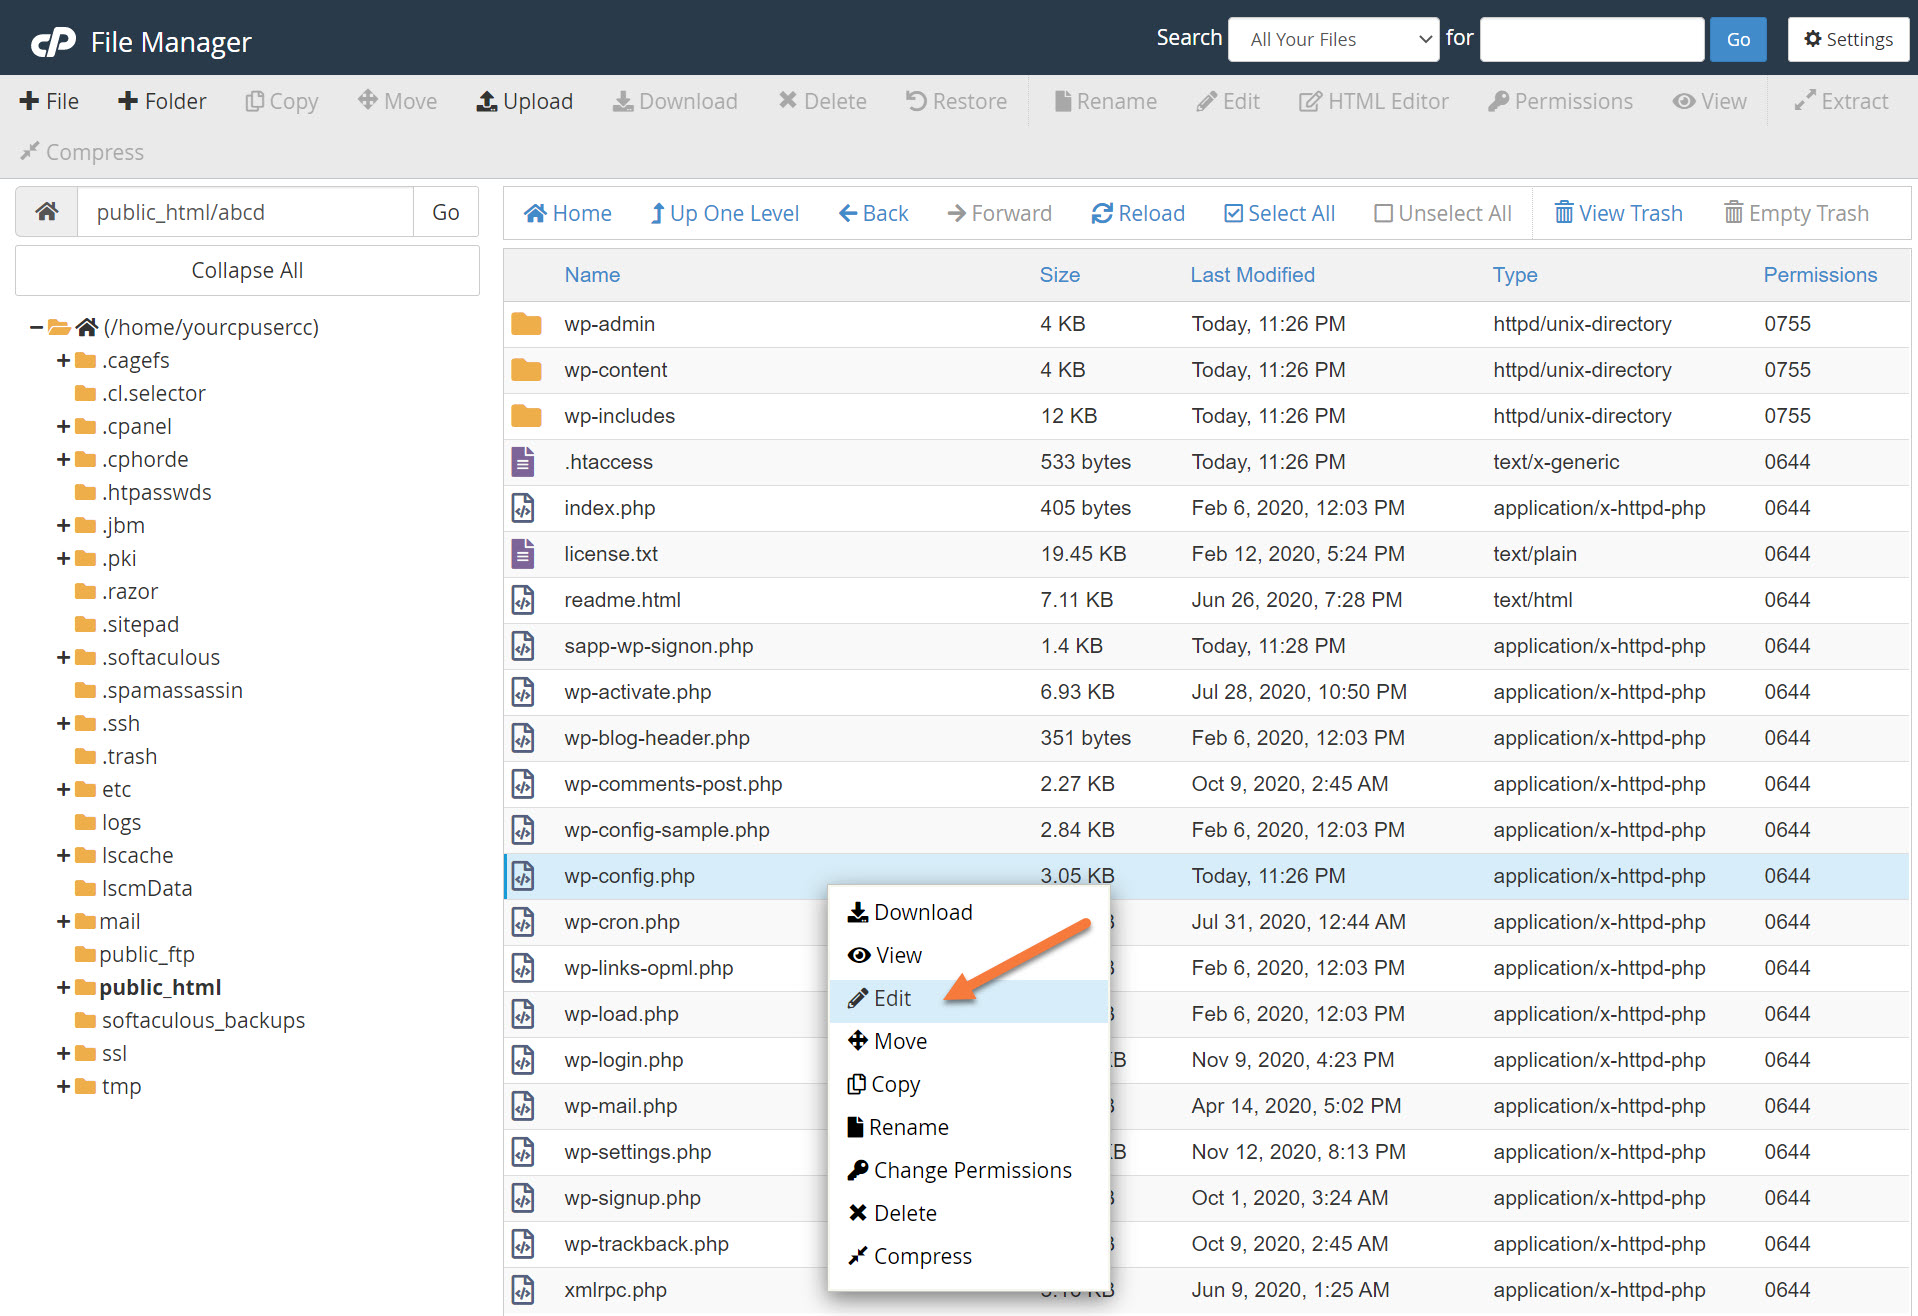
Step 3: Look for the wp-config file in the listing of files. Single-click the icon to the left of the file to select it.
Next, using your mouse, right-click on the file, then choose Edit from the menu.
You will see a warning like the one below:
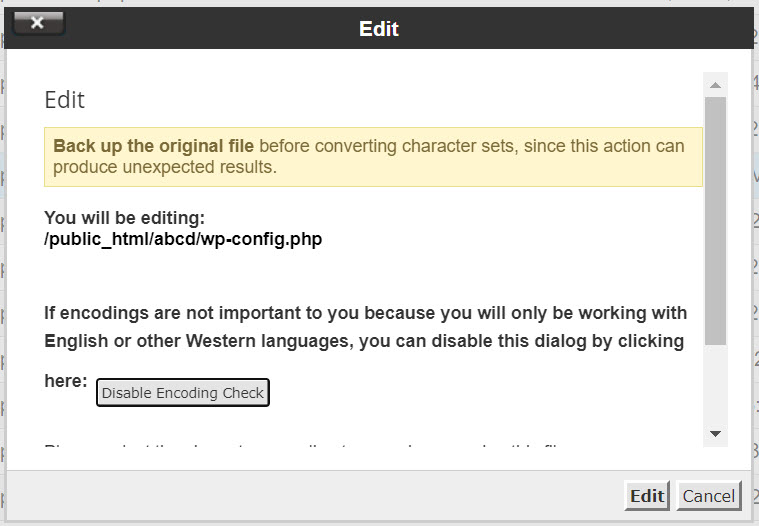
95% of users can proceed and click Edit.
A new tab in your browser will spawn and you will see the codebase that outlines the structure of this themes wp-config.php file. If it feels overwhelming, don’t worry, we’re only looking for the section below:
 * For developers: WordPress debugging mode.
*
* Change this to true to enable the display of notices during development.
* It is strongly recommended that plugin and theme developers use WP_DEBUG
* in their development environments.
*
* For information on other constants that can be used for debugging,
* visit the documentation.
*
* @link https://wordpress.org/support/article/debugging-in-wordpress/
*/
define( 'WP_DEBUG', false );
To enable debug mode, change the false on the last line to true. Be sure to leave the space at the end.
We can find the information we need to correctly complete this section of our wp-config.php file from our cPanel.
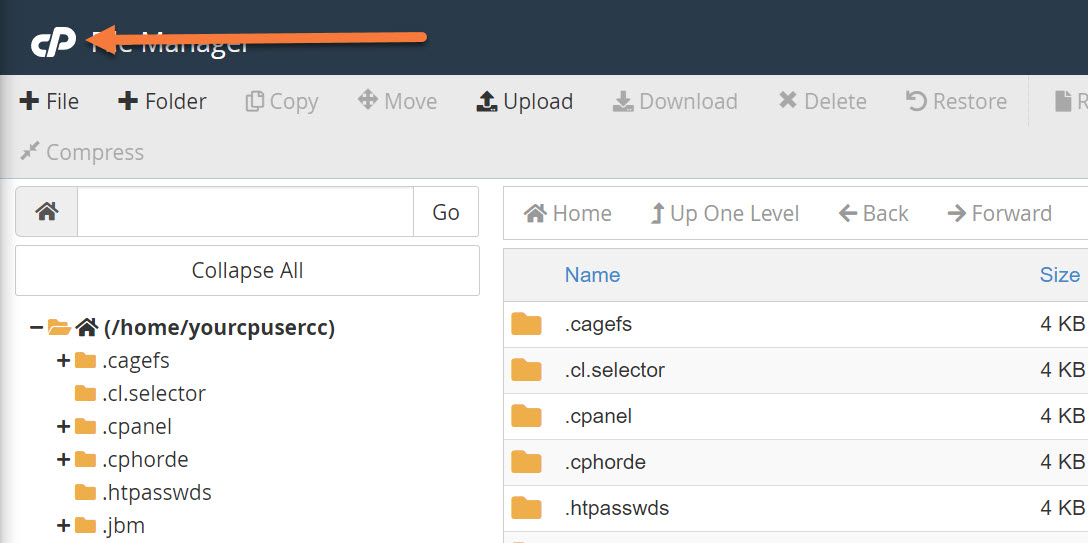
Step 4: Keeping the tab with the wp-config.php code open, go to the other tab where your cPanel File Manager is open, and click the CP logo in the top left to return to the main cPanel screen.
Once you’re on the main cPanel screen, look in the Database section (3rd from the top) and click MySQL Databases to open this section.
Click the Save button in the top right corner to save your changes, otherwise, you’ll need to reenter this information.

Now, open a new tab in your browser and try to load your website. If it works, great! You solved your issue! Congrats! ✋🎉
If this didn’t resolve your issue, we suggest you open a ticket with our Happiness Engineers so they can investigate further.
If the steps above didn’t solve your issue, you might need to restore the database and site files from a backup if you have one available.
If you’re a ChemiCloud customer, you can rest easy! All our WordPress hosting plans come with 30 day daily offsite backups allowing them to be quickly restored.