Mozilla’s Thunderbird e-mail client has long been a favorite open-source alternative to Microsoft Outlook.
This article will help you setup a IMAP email account in Mozilla Thunderbird version 78 on Windows 10.

Adding your first email account to Thunderbird
If you just installed Thunderbird and need to add your first email account, you’re in the right spot!
Step 1: Open Thunderbird. This can be done by clicking the![]() logo in the bottom left corner of your taskbar on your keyboard type mail, then select Thunderbird from the search results.
logo in the bottom left corner of your taskbar on your keyboard type mail, then select Thunderbird from the search results.
Step 2: When Thunderbird opens for the first time, you’ll see a screen that looks like this:
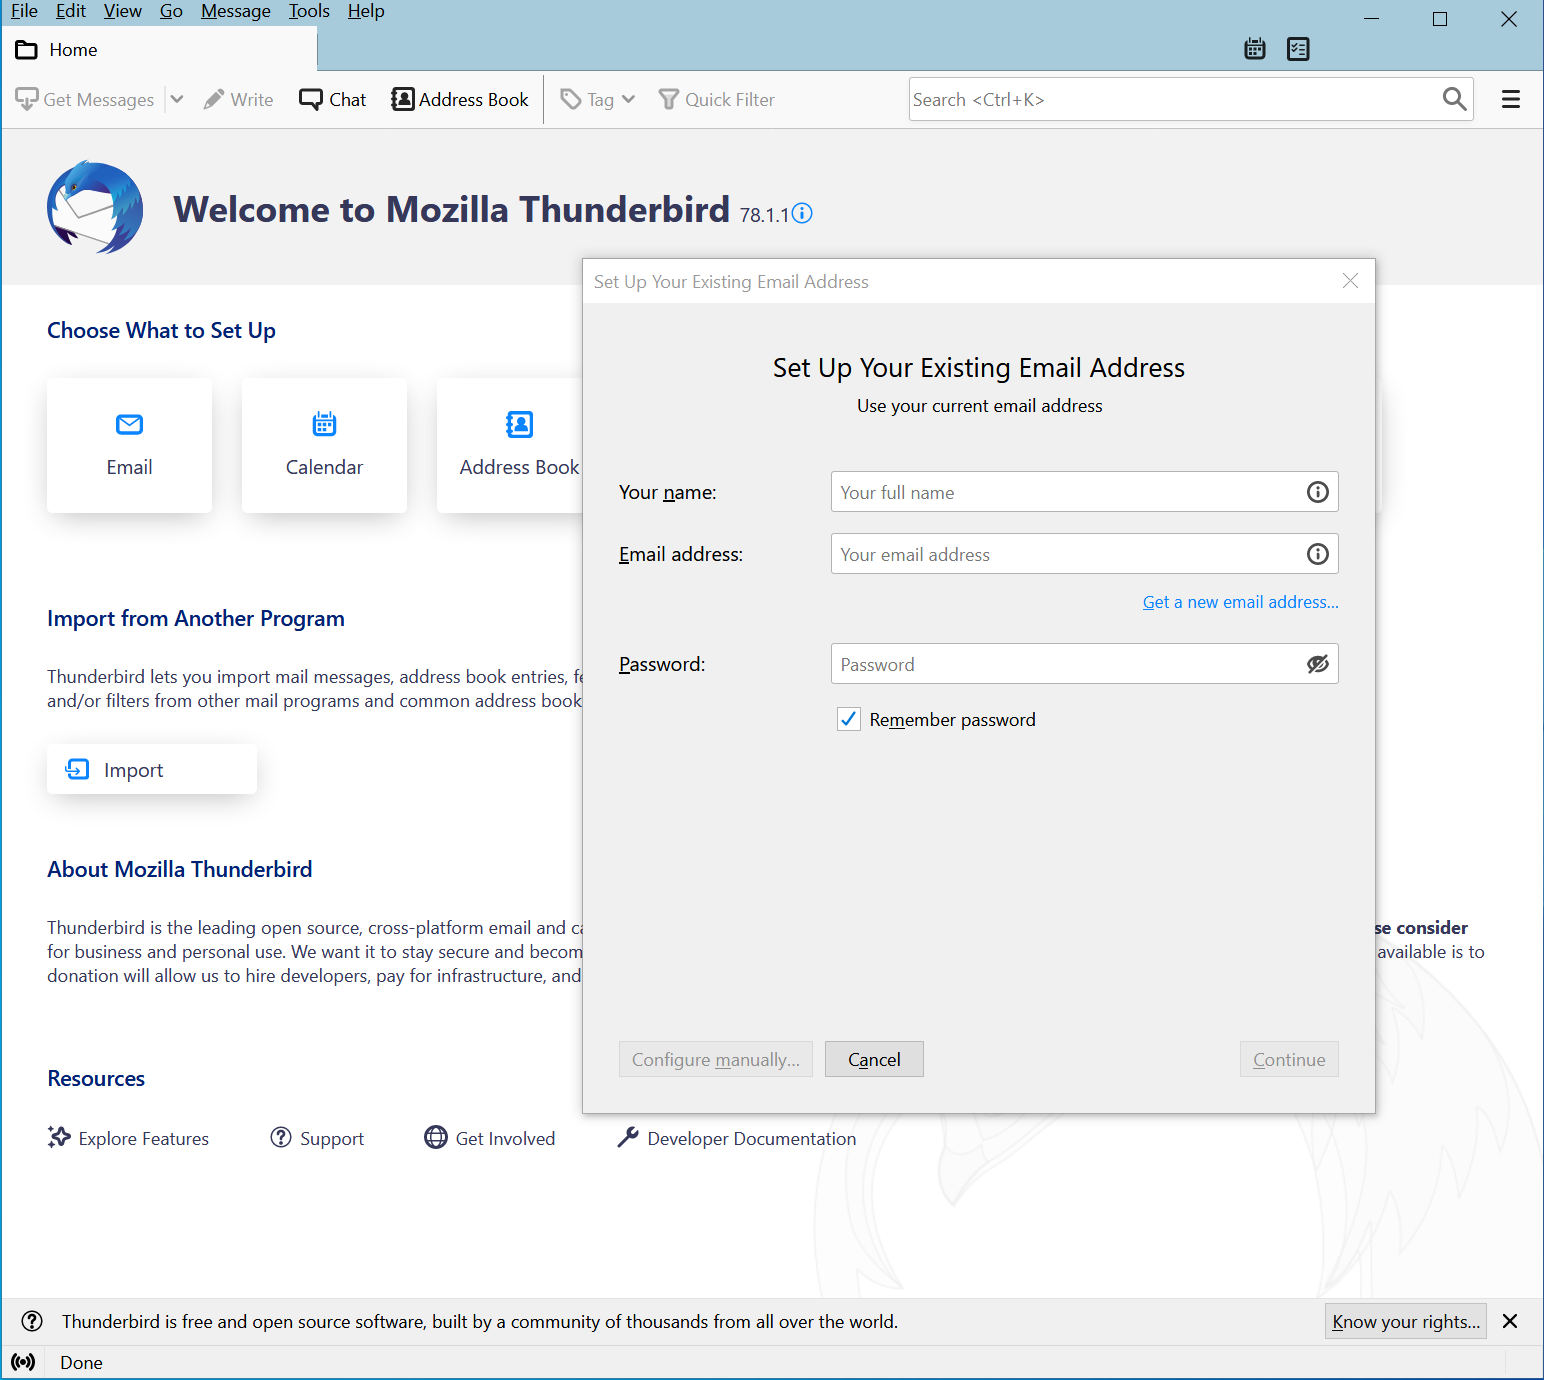
Step 3: Enter your Name, as you wish others to see it when you send e-mail via Thunderbird, as well as the e-mail address and password for the account you’re adding.
In the bottom left, click Configure manually. The window will expand so you can enter server and protocol information.
Step 4: Since we’re configuring this account manually, you will need to enter your incoming and outgoing server information, as well as other information. Let’s review the information at the bottom of this window:

Under the Incoming column:
The Protocol we are using is IMAP.
The server should be mail.yourdomain.tld
The port should be 993
In the drop down next to SSL, select SSL/TLS
In the drop down next to Authentication, select Normal password
In the box next to Username enter the full [email protected] username for the account you’re adding.
Under the Outgoing column:
The server should be mail.yourdomain.tld
The port should be 465
In the drop down next to SSL, select SSL/TLS
In the drop down next to Authentication, select Normal password
In the box next to Username enter the full [email protected] username for the account you’re adding.
When you’ve finished, click Done. Thunderbird will perform a connection test to validate the server information + username and password you have provided in the configuration are correct.
Step 5: That’s it! If you see a window prompting you whether you want to make Thunderbird the default client for Mail, Calendars, and Contacts and not an error message, then congrats! You’ve added your first IMAP account to Thunderbird! 🎉
Adding additional IMAP email accounts to Thunderbird
Adding additional IMAP accounts in Thunderbird is pretty easy. This section of the knowledgebase article will walk you through this process.
Step 1: Open Thunderbird. This can be done by clicking the![]() logo in the bottom left corner of your taskbar on your keyboard type mail, then select Thunderbird from the search results.
logo in the bottom left corner of your taskbar on your keyboard type mail, then select Thunderbird from the search results.
Step 2: When Thunderbird opens, you’ll see a screen that looks like this:

Looking at this image, we can see in the top left where I have already added an e-mail account.
Struggling with the Thunderbird mail client setup? ChemiCloud is the hosting solution designed to save you money and time! 🤓 Check out our email hosting plans!
To add a new account, click the ≡ icon (hamburger menu) in the top right corner of Thunderbird below the X to close the application.
Step 3: In the menu that drops down, click Account Settings.

Step 4: The Account Settings window will open. In this window, you have the option to edit the settings for accounts you have already added to Thunderbird, as well as add new ones.
To add a new email account, click Account Actions in the bottom left corner, then click Add Mail Account.

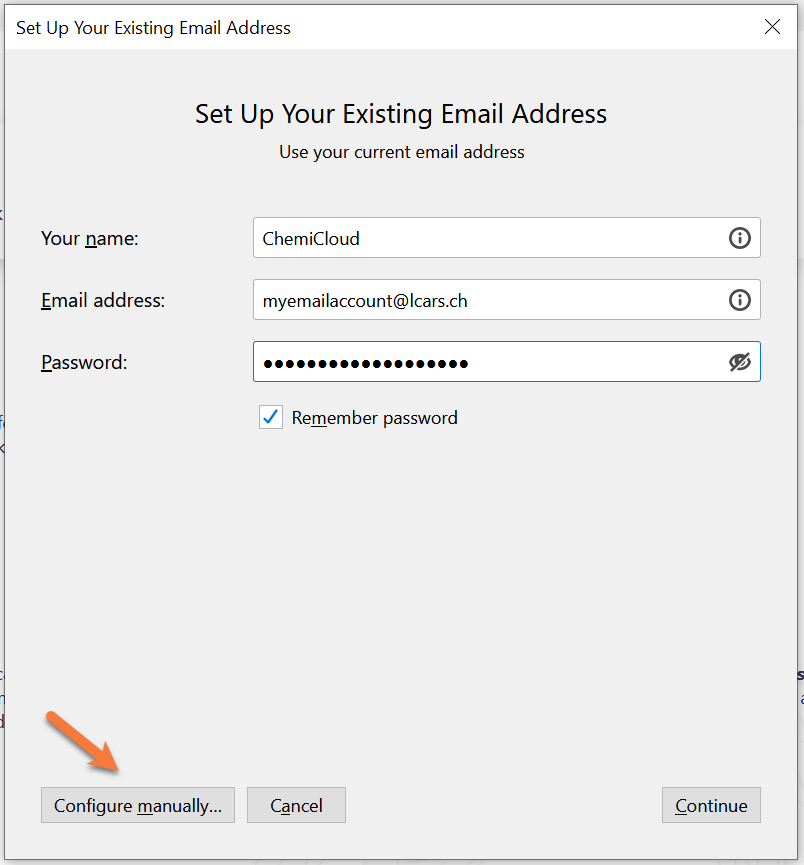
Step 5: A familiar window will open. Yep, it’s the same one we saw when we added our first email account to Thunderbird.
Enter Your name (as you wish others to see it when you send mail via Thunderbird), Email address, and Password for the account you’re adding.
Then click Configure manually.

Step 6: As before, the Setup window will expand and you will have the option to enter the server configuration information for the email account which you are adding.

Under the Incoming column:
The Protocol we are using is IMAP.
The server should be mail.yourdomain.tld
The port should be 993
In the drop down next to SSL, select SSL/TLS
In the drop down next to Authentication, select Normal password
In the box next to Username enter the full [email protected] username for the account you’re adding.
Under the Outgoing column:
The server should be mail.yourdomain.tld
The port should be 465
In the drop down next to SSL, select SSL/TLS
In the drop down next to Authentication, select Normal password
In the box next to Username enter the full [email protected] username for the account you’re adding.
When you’ve finished, click Done. Thunderbird will perform a connection test to validate the server information + username and password you have provided in the configuration are correct.
Step 5: That’s it! After adding the new account, you’ll be taken back to Thunderbirds Account Settings area where you can add additional accounts if you wish, or make changes to existing ones.

That’s it! Now you know how to add additional accounts to Mozilla Thunderbird.
We hope this was helpful! If you have any questions, feel free to leave a comment, open a ticket from your Client Area, or hit us up on Live Chat 24×7.