Edison is another fantastic email app with some really innovative features, like package tracking and it’s price drop alerts for your recent purchases.
By the end of this knowledgebase article, you’ll know how to add your first IMAP Email Account to Edison on Android, as well as additional IMAP Email Accounts.

Adding Your First IMAP Email Account
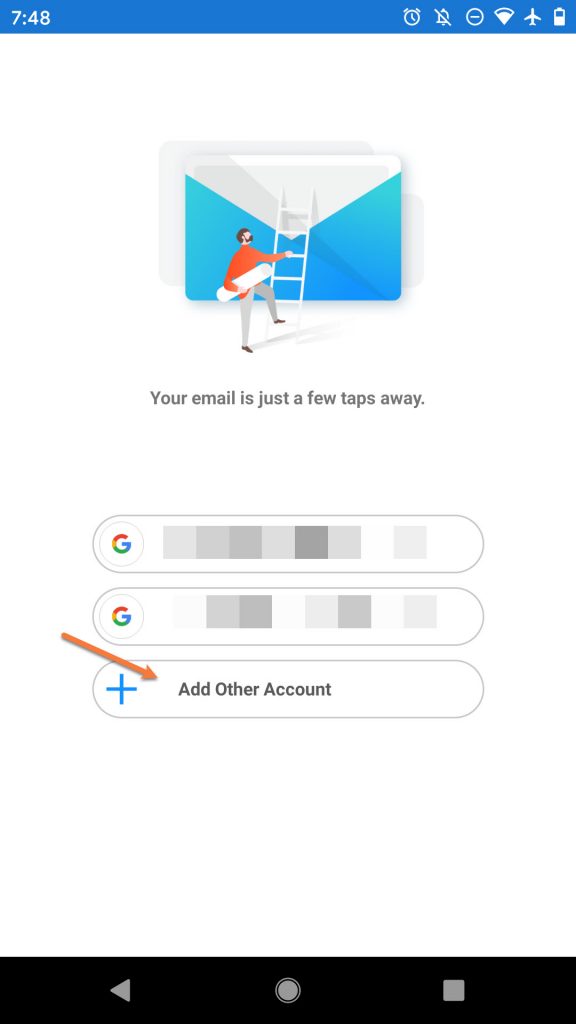
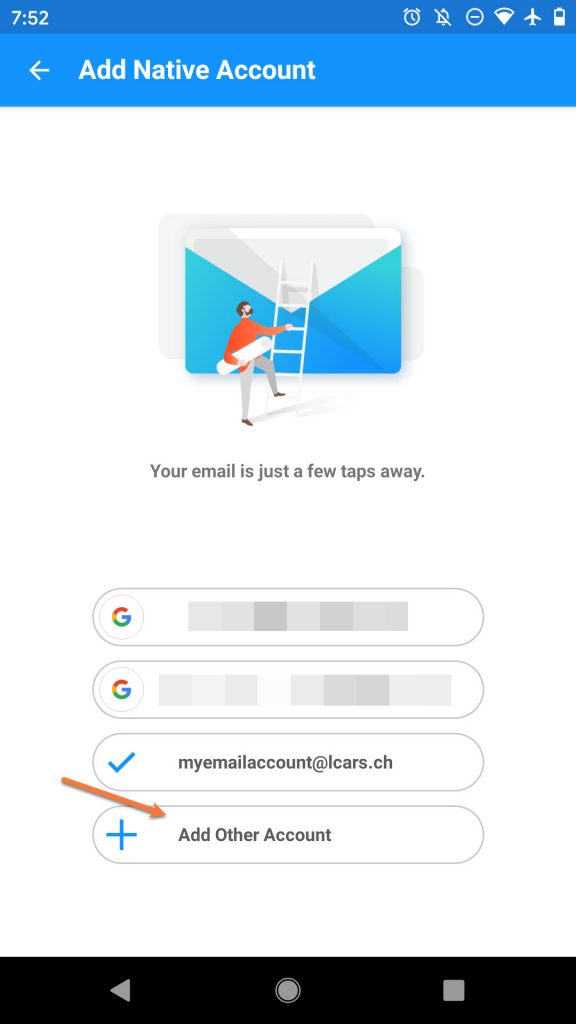
Step 1: If you haven’t downloaded & installed Edison Mail yet, you can click here to open the Play Store and do so. After opening Edison for the first time, you’ll see a screen that looks similar to the one below.
Tap Add Other Account to proceed.
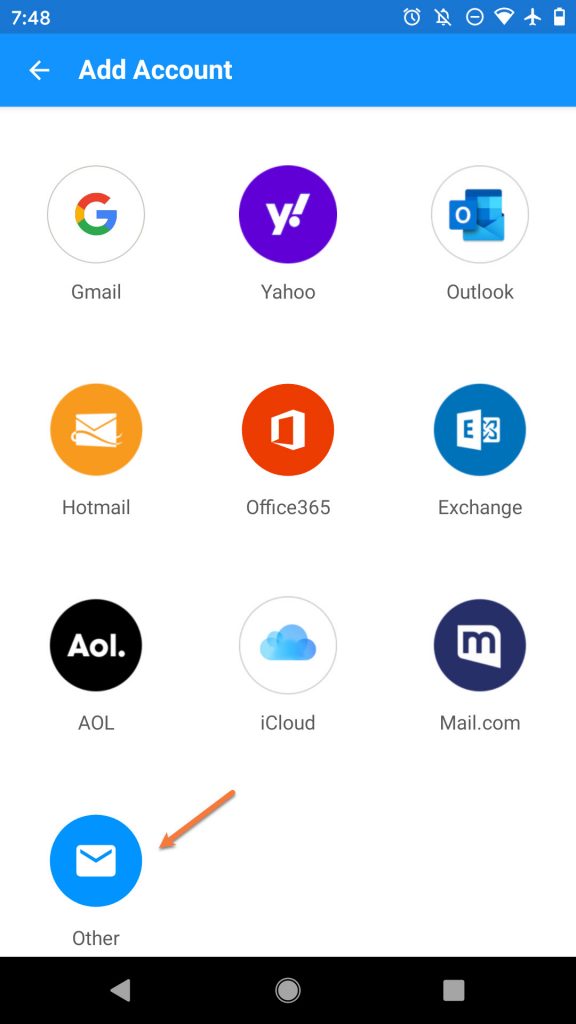
Step 2: Edison is able to connect to a wide variety of email accounts. Since we’re setting up an IMAP Account, tap Other to proceed.
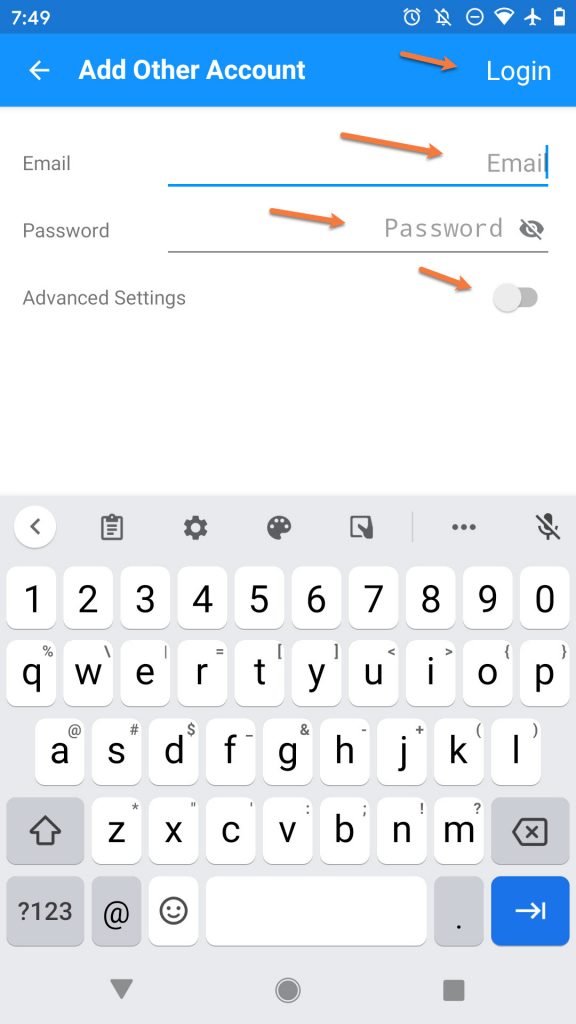
Step 3: Enter the Email Address and Password for the account you are adding. Also, slide the Advanced Settings toggle to on.
Then tap Login in the top right corner.
Step 4: There’s a lot of fields on this screen. Let’s imagine there’s a line dividing the screen into two.
For the top half:
In the Email field, ensure the email address you’re adding is entered.
In the Hostname field, enter mail.yourdomain.tld
You can leave the Username field blank
Enter the password for the account you’re adding
Ensure the Port is set to 993
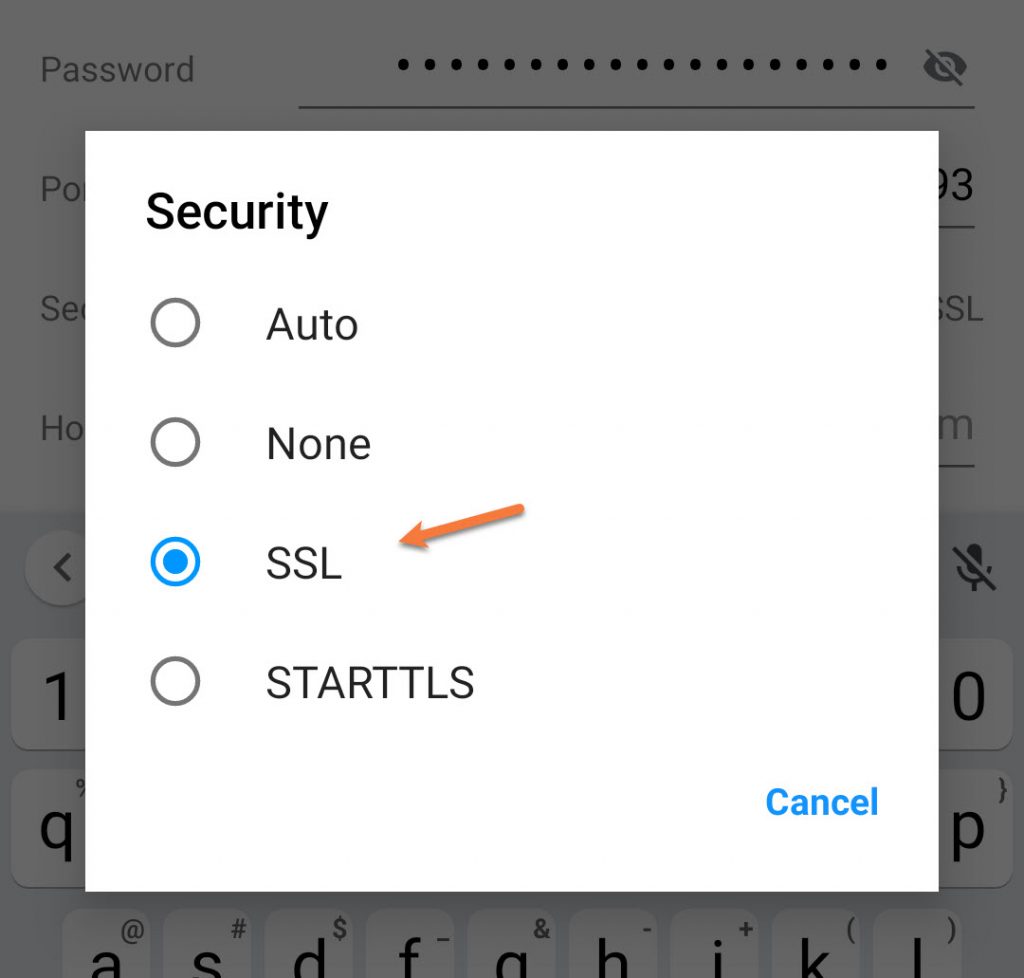
Ensure SSL is set next to Security.
Important Note! When you tap the field next to Security, a pop up like the one below will appear. Choose SSL from this popup, if it is not already chosen for you.
Moving on to the bottom half of this setup screen:
Again, enter the Hostname as mail.yourdomain.tld
You can leave the Username and Password fields blank on this section.
Ensure the Port is set to 465
And lastly, ensure SSL is selected next to Security.
Just like with the Security – SSL setting on the top half. when you tap the section next to Security, a popup will appear with various Security Options. Tap SSL if it is not already chosen for you.
Your configuration should look similar to the one below:
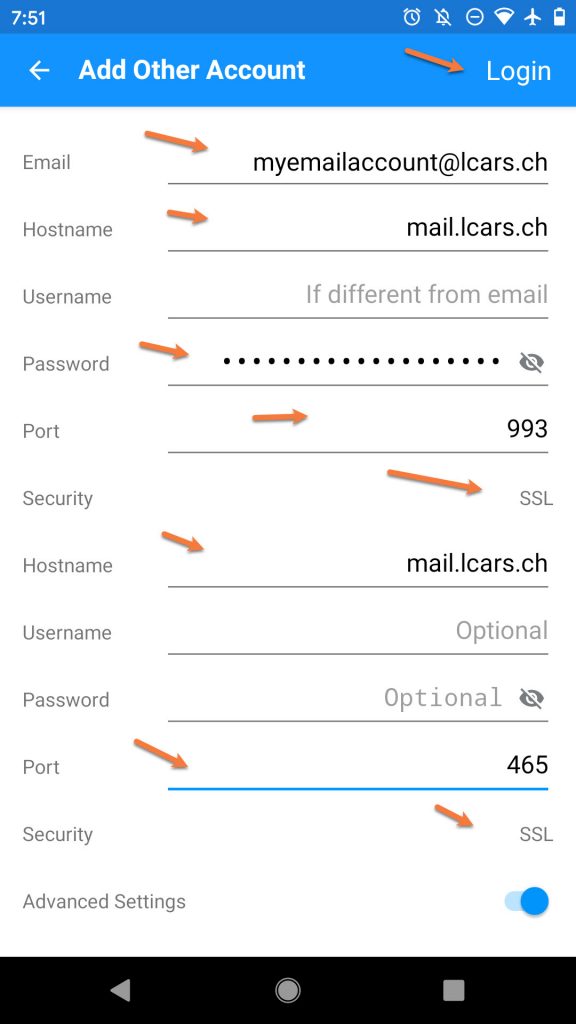
After you’ve entered your account information into each of the necessary fields, tap Login in the top right to proceed.
Struggling with the Edison mail client setup? ChemiCloud is the hosting solution designed to save you money and time! 🤓 Check out our email hosting plans!
Step 5: Edison will check the account and server settings you have entered and if they are correct, you will see a screen much like the one below confirming the successful addition of the email account.
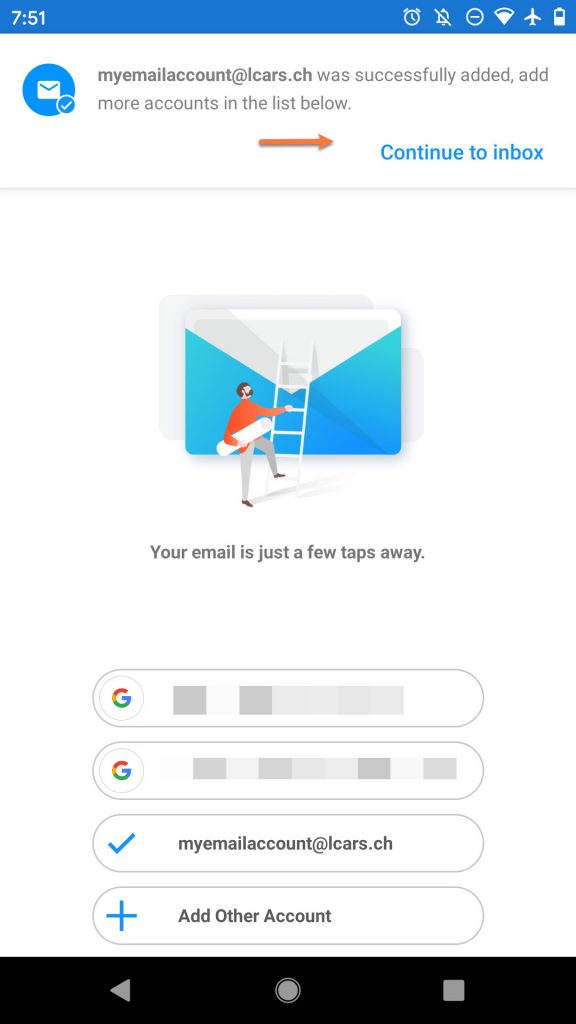
Tap Continue to inbox to proceed.
That’s it! Now you know how to add your first Email Account to Edison on Android!
Adding Additional IMAP Email Accounts
Adding additional email accounts to Edison is super easy!
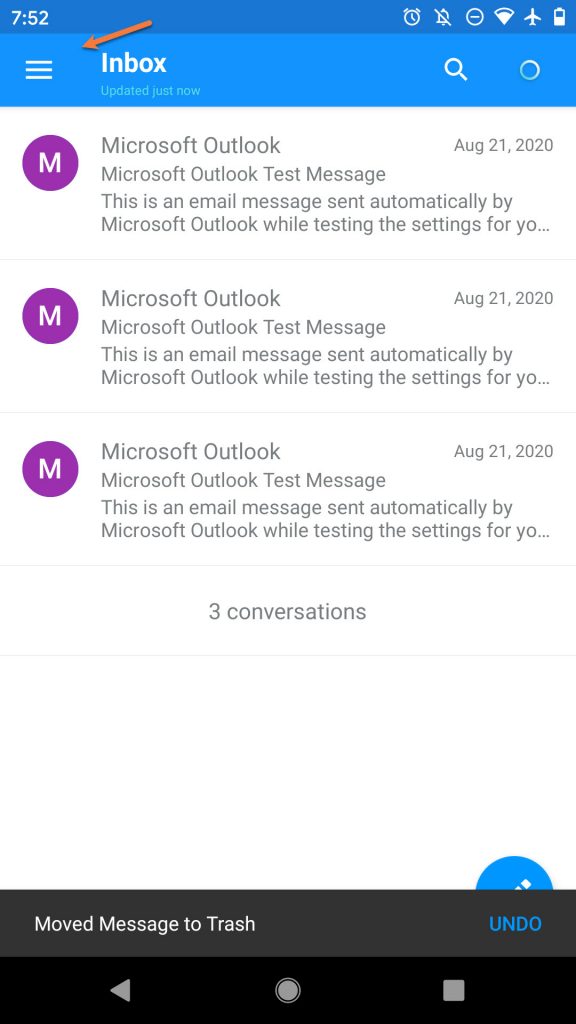
Step 1: Open Edison and in the top left corner tap the ≡ icon (hamburger menu).
 Step 2: Tap the + icon in the top right corner of the slide out that appears.
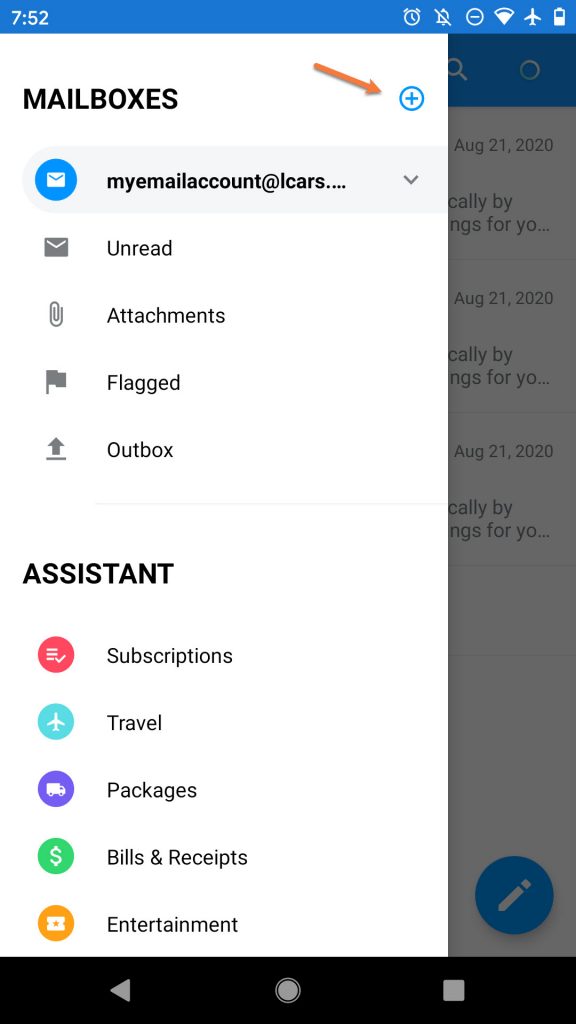 Step 3: Edison will list the accounts already added and give you the option to add another. Tap Add Other Account to continue.
Step 4: Since we’re setting up an IMAP Account, tap Other to proceed.
Step 5: Enter the Email Address and Password for the account you are adding. Also, slide the Advanced Settings toggle to on.
Then tap Login in the top right corner.
Step 6: There’s a lot of fields on this screen. Let’s imagine there’s a line dividing the screen into two.
For the top half:
In the Email field, ensure the email address you’re adding is entered.
In the Hostname field, enter mail.yourdomain.tld
You can leave the Username field blank
Enter the password for the account you’re adding
Ensure the Port is set to 993
Ensure SSL is set next to Security.
Important Note! When you tap the field next to Security, a pop up like the one below will appear. Choose SSL from this popup, if it is not already chosen for you.
Moving on to the bottom half of this setup screen:
Again, enter the Hostname as mail.yourdomain.tld
You can leave the Username and Password fields blank on this section.
Ensure the Port is set to 465
And lastly, ensure SSL is selected next to Security.
Just like with the Security – SSL setting on the top half. when you tap the section next to Security, a popup will appear with various Security Options. Tap SSL if it is not already chosen for you.
Your configuration should look similar to the one below:
After you’ve entered your account information into each of the necessary fields, tap Login in the top right to proceed.
Step 7: Edison will check the account and server settings you have entered and if they are correct, you will see a screen much like the one below confirming the successful addition of the email account.
Tap Continue to inbox to proceed.
And that’s it! Now you know how to add additional IMAP Email Accounts on Edison!
We hope this was helpful! If you have any questions, feel free to leave a comment, open a ticket from your Client Area, or hit us up on Live Chat 24×7.
How can I stop that the emails are removed from the server?
I just set up the Edison Email app on my Android. However I don’t see any way to access my folders. I see how to move mail from my inbox to my folder but I see no method to just go directly to my folders.
My email account is pop. How do i change it from IMAP. Works on my computer but not on my phone.