Microsoft has really stepped up and made sweeping improvements to it’s iconic email application – Outlook – on the Android Mobile Operating System. However, adding an IMAP Email Account to the app still isn’t as intuitive as some would like ,which is why we created this Knowledgebase Article for you!
After reading this KB Article, you’ll be able to add your first IMAP Email Account to the app and also additional accounts.
How to add your first IMAP Email Account to Outlook on Android
Step 1: If you haven’t already downloaded & installed Outlook, you can click here to open the Play Store.
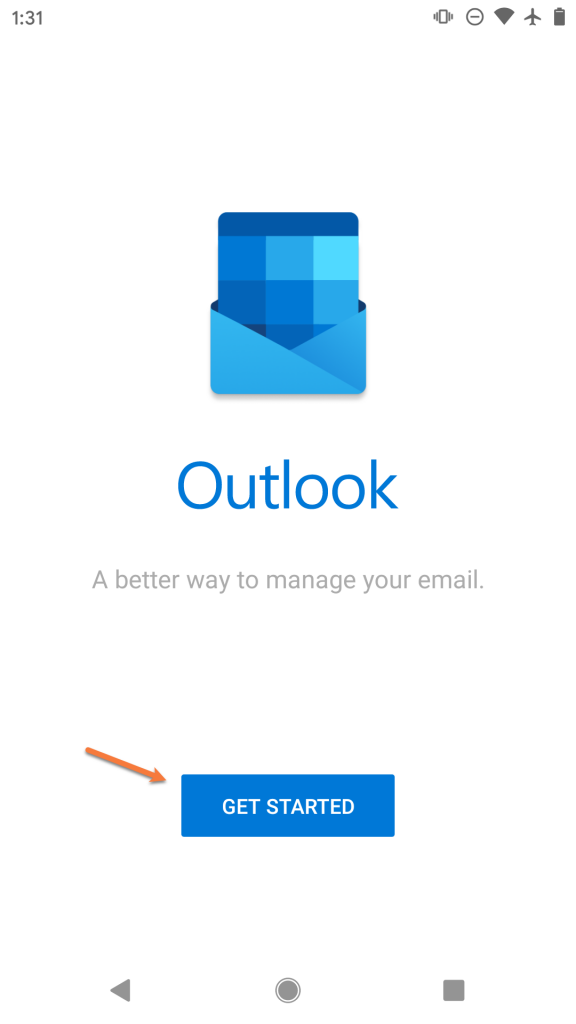
Step 2: The first time you open Outlook, you’ll see a screen like the one below.
Tap Get Started
Step 3: Enter the email address you are adding as [email protected]
Then tap Continue

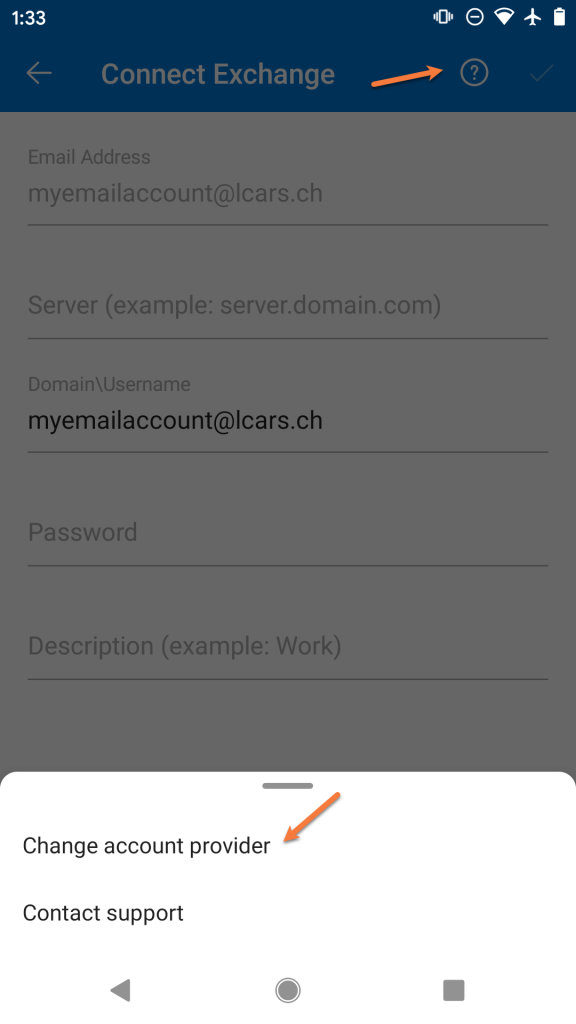
Step 4: Outlook will attempt to help you setup your email account as though you are connecting to a Microsoft Exchange mail server. We’ll need to switch the account type to continue setup.
To do this, tap the? mark in the circle located in the top right corner of the screen. Then tap Change account provider
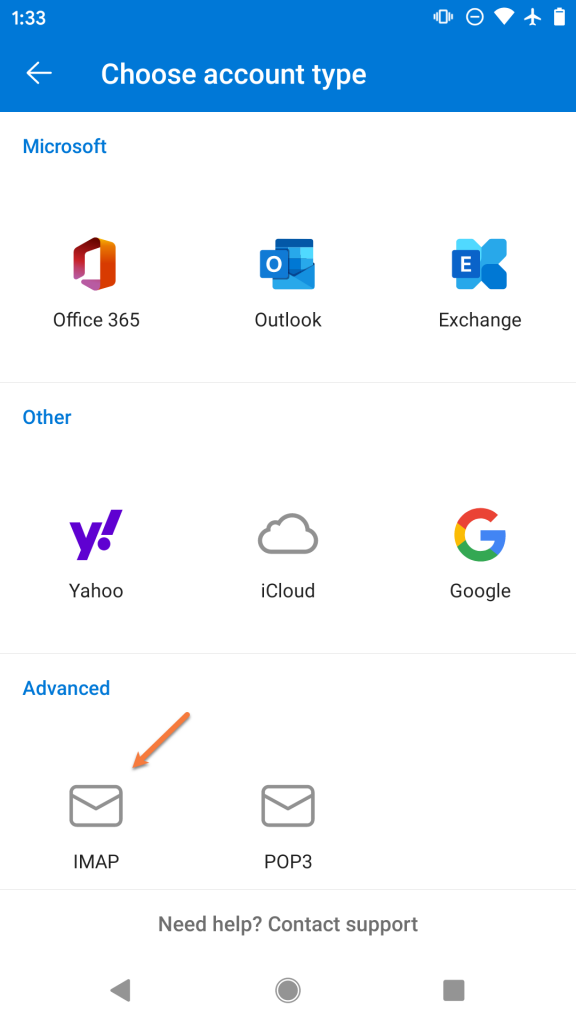
Step 5: Outlook will provide you with a list of common account types. In the 3rd section, tap IMAP to continue.
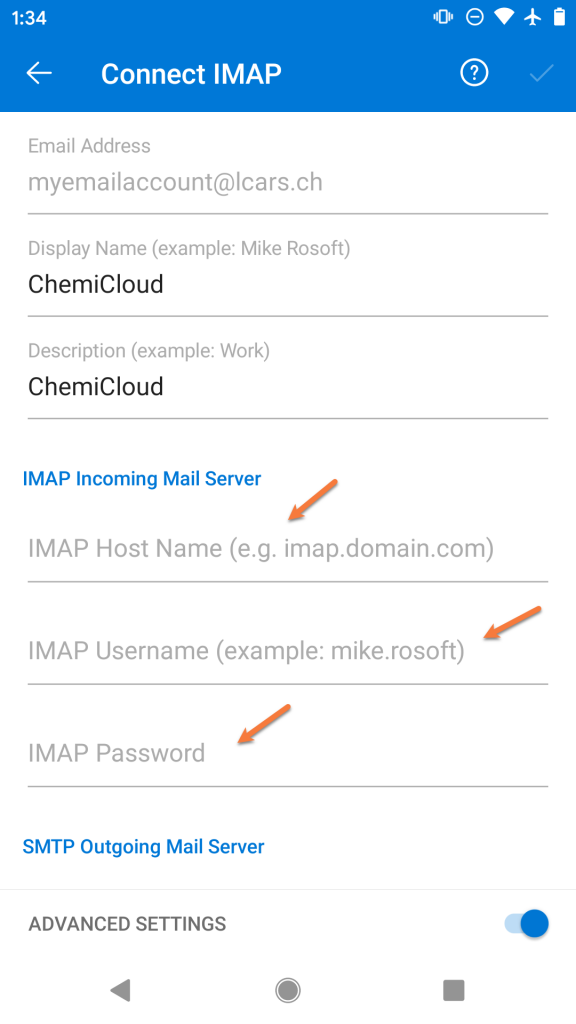
Step 6: On the next screen, you will be prompted to enter the account credentials for this new account.
Enter the password for the email account you are adding.
Next, enter the name you want other people to see when you use Outlook to send mail.
Then, give the account a name so you can easily identify it in Outlook. This is useful if you have multiple accounts setup in Outlook.
Next, tap the toggle in the bottom right to enable the advanced settings.

Step 7: We will examine the next screen in 2 parts.
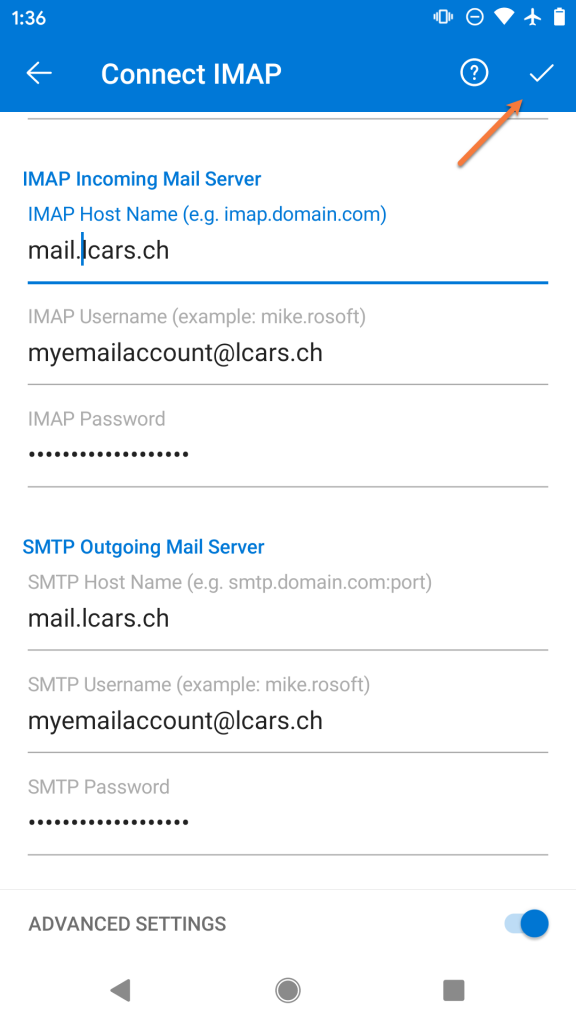
Firstly, we’ll need to enter the incoming IMAP server information. Enter this as mail.yourdomain.tld
Then enter the username for the account you’re adding as [email protected]
And finally, enter the password for the account you are adding.
Next, you’ll need to scroll down so you can enter the SMTP Outgoing Mail Server settings.
Enter mail.yourdomain.tld as the SMTP Host Name
Enter your [email protected] as the SMTP Username
And enter the password for the account you’re adding
To proceed, tap the ✔ mark in the top right corner.
Step 8: That’s it! If the settings you typed are correct, you’ll see a screen like the one below!
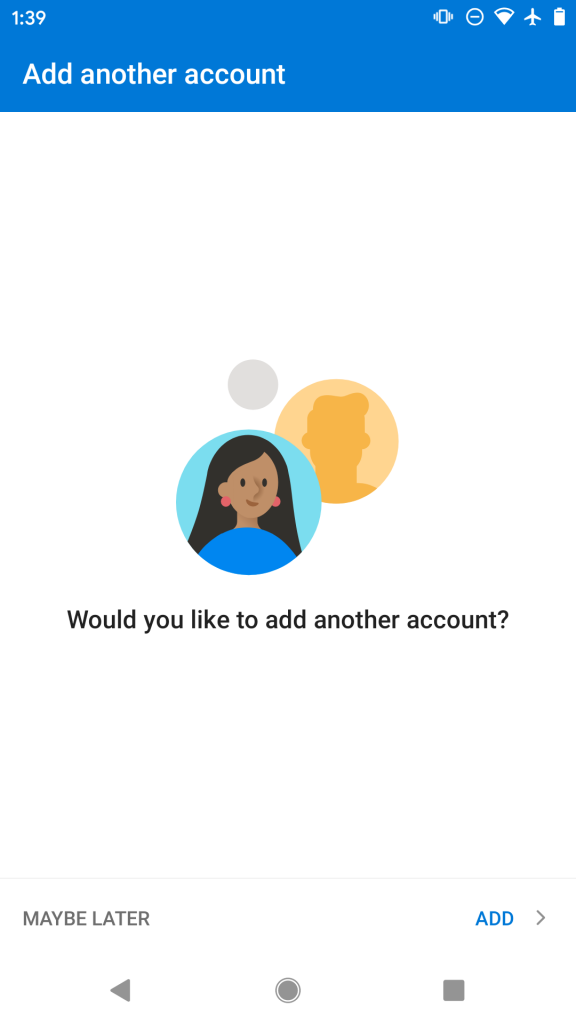
If you want to add another account, you can tap Add or to continue to your inbox, tap maybe later.
Struggling with the Outlook mail client setup? ChemiCloud is the hosting solution designed to save you money and time! 🤓 Check out our email hosting plans!
How to add additional IMAP Email Accounts to Outlook on Android
Let’s say it’s been a few weeks since you started using Outlook on Android and you need to add a second email account to the App. This section of the guide will get you sorted!
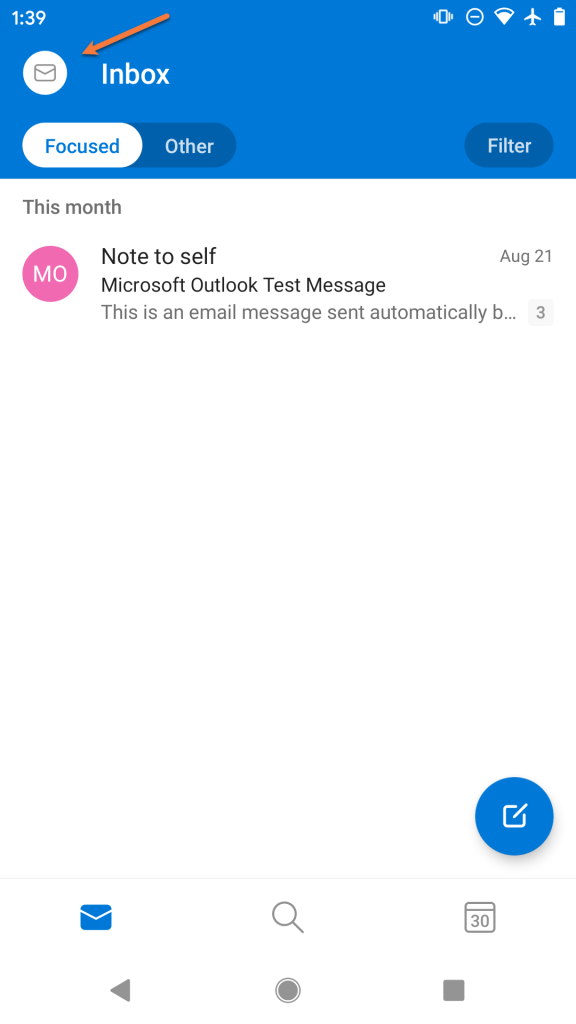
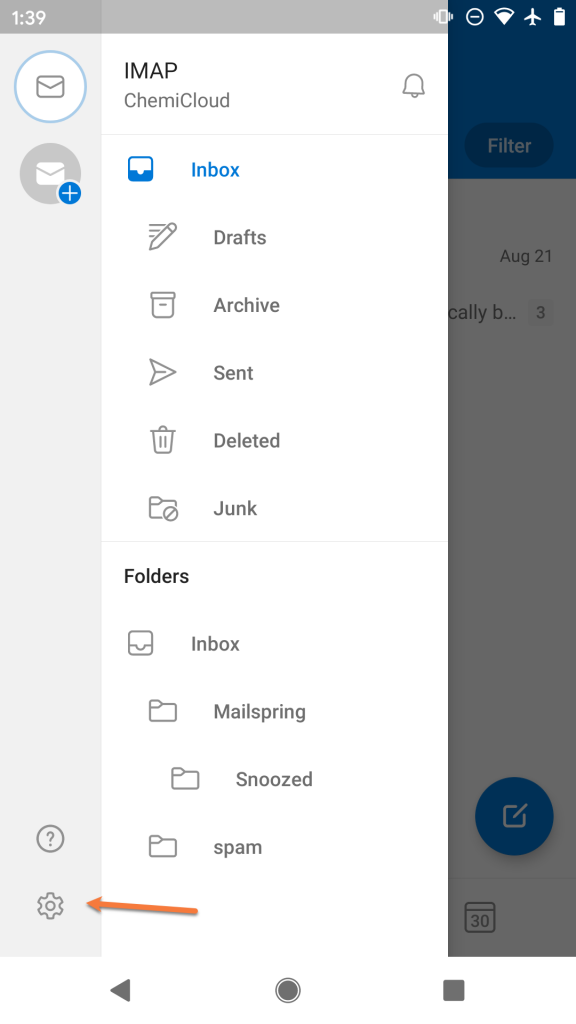
Step 1: Open the Outlook app and tap the ✉ icon in the circle located in the top left of the app.
Step 2: Tap the ⚙ icon in the bottom left to open the Settings area in Outlook.
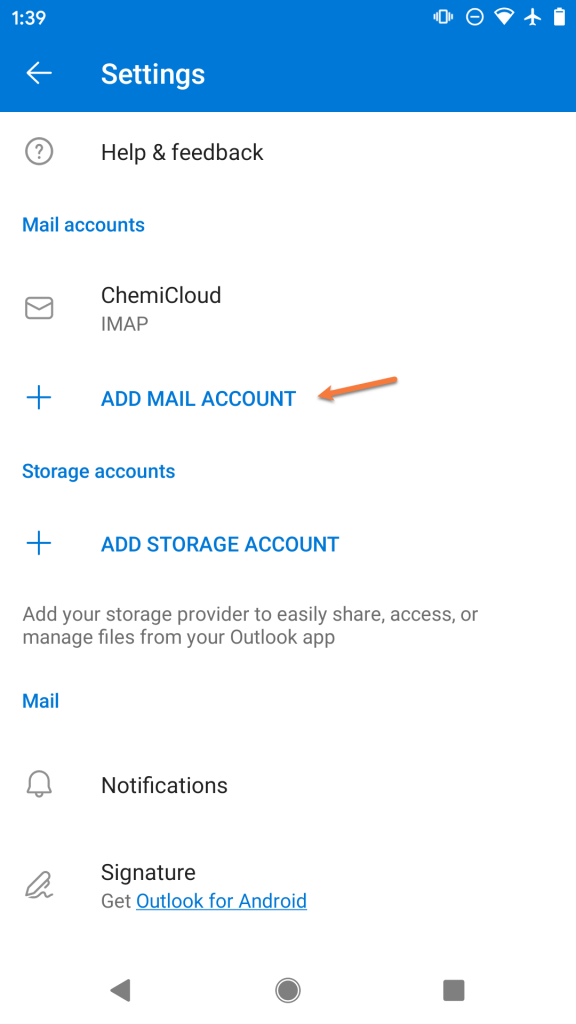
Step 3: Tap Add Mail Account to proceed.
Step 4: Enter the email address you are adding as [email protected]
Then tap Continue
Step 5: Outlook will attempt to help you setup your email account as though you are connecting to a Microsoft Exchange mail server. We’ll need to switch the account type to continue setup.
To do this, tap the ? mark in the circle located in the top right corner of the screen. Then tap Change account provider
Step 6: Outlook will provide you with a list of common account types. In the 3rd section, tap IMAP to continue.
Step 7: On the next screen, you will be prompted to enter the account credentials for this new account.
Enter the password for the email account you are adding.
Next, enter the name you want other people to see when you use Outlook to send mail.
Then, give the account a name so you can easily identify it in Outlook. This is useful if you have multiple accounts setup in Outlook.
Following this, tap the toggle in the bottom right to enable the advanced settings.
Step 8: We will examine the next screen in 2 parts.
Firstly, we’ll need to enter the incoming IMAP server information. Enter this as mail.yourdomain.tld
Then enter the username for the account you’re adding as [email protected]
And finally, enter the password for the account you are adding.
Next, you’ll need to scroll down so you can enter the SMTP Outgoing Mail Server settings.
Enter mail.yourdomain.tld as the SMTP Host Name
Enter your [email protected] as the SMTP Username
And enter the password for the account you’re adding
To proceed, tap the ✔ mark in the top right corner.
Step 9: That’s it! If the settings you typed are correct, you’ll see a screen that looks just like the one below!
If you want to add another account, you can tap Add or to continue to your inbox, tap maybe later.
We hope this was helpful! If you have any questions, feel free to leave a comment, open a ticket from your Client Area, or hit us up on Live Chat 24×7.
Thanks for publishing, really useful 👍