At ChemiCloud, we’re always working to provide our customers with the latest in Web Hosting Technology; whether it helps their site be faster or more secure, we want our customers to have the best.
That’s why we have introduced a new Malware Scanner & Removal tool that will save our customers time and money when it comes to fighting the ever-growing malware threat.
Imunify360 powers the malware scanner & removal tool.
Essential Pre-requisites Before Using The Malware Scanner
- The Malware Scanner & Removal Tool is free on Turbo and all Reseller Hosting Plans. If you’d like to upgrade your web hosting plan to a Turbo or Reseller plan, please open a ticket from your Client Area, and our team will be happy to make that happen for you! If you’re a VPS Hosting customer, you can get this helpful tool as an add-on.
- Scheduling scans is currently not supported. Scans must be manually initiated from your cPanel > Imunify360 App.
- You don’t have to keep your cPanel open during the scan.
- The scan results will also be emailed to the cPanel Administrative Contact. Please ensure your email address in cPanel is up-to-date. If you are unsure or unfamiliar with how to update that email address, you can review our Knowledge Base article on the subject here.
What is the Malware Scanner & Removal Tool?
The Malware Scanner & Removal Tool is an application that we have added to your cPanel, which allows you to scan your web hosting account for files that may be infected with Malware. These infections commonly infect PHP files or scripts vital to a CMS’s normal functioning, such as Drupal, Joomla, or WordPress.
Overall, the tool is a comprehensive security application and utilizes highly tailored and integrated components for web server security.
How Does The Malware Scanner & Removal Tool Work?
The Malware Scanner & Removal Tool references an off-site database of known and highly probable malware infections and compares the files on your web hosting account to those known to be infected using machine learning and Cloud-based heuristics. The tool can detect the most sophisticated attacks, including the infamous zero-day and distributed brute-force attacks, and delivers robust and comprehensive protection for your web hosting account.
Using machine learning, it can compare the PHP files of a “clean version” of that file and extract precisely the malware, leaving your original files intact and undamaged.
How can the Malware Scanner & Removal Tool Help?
The Malware Scanner & Removal Tool can help you by saving you time, as it can quickly scan your website(s) and clean them of any infection. This tool can also save you money, potentially, as you may have had otherwise to hire a developer or 3rd party security service to clean your website and make it safe again.
Why Does a Website Get Infected With Malware?
Below are some possible reasons your website may have been infected with the malware:
- Vulnerable Website Code: Just like good products and designs attract visitors to your website, lousy code attracts hackers like moths to a flame. Your website may often contain deprecated functions known to be vulnerable to some attacks. Hackers often search for these functions and exploit websites with these vulnerabilities for their gain.
- Lack of Input Sanitization: A website has multiple input forms, such as the search bar, login area, comments boxes, registration areas, and more. If the inputs captured by the website aren’t sanitized, they often allow a hacker to add lousy code. This is an easy way to enter the website without much effort. Attacks like this include XSS (Cross-Site Scripting) and SQL Injection.
- Outdated Plugins: If your site runs on WordPress, you’re probably running plugins to help with forms, SEO, insert and manage Media, and more. The developers of these plugins spend copious amounts of time on them, and a good developer pushes regular updates. It’s up to you to keep your plugins up to date, as it’s possible an update was pushed because an exploit was found in the version of the plugin you’re running, and you got infected because you didn’t update that plugin.
- Not using CAPTCHAs: No one likes CAPTCHA, but its impact on spam from forms cannot be denied. It’s essential to use CAPTCHA because it adds a layer of protection to the form it’s being used on, such as comments and login forms. This layer of protection acts as an additional barrier for your site, and not using them is possibly asking for trouble.
How to Run a Malware Scan in cPanel Using Imunify360
Step 1: Log in to your cPanel. There are many ways to do this, but the sure-fire easiest way is to log in to your Client Area, then open your cPanel.
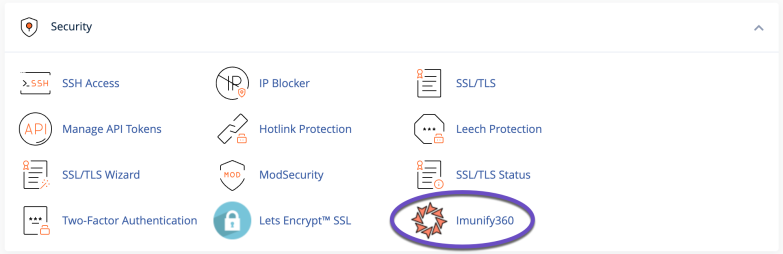
Step 2: Scroll down to the Security section of your cPanel and open the Imunify360 application.
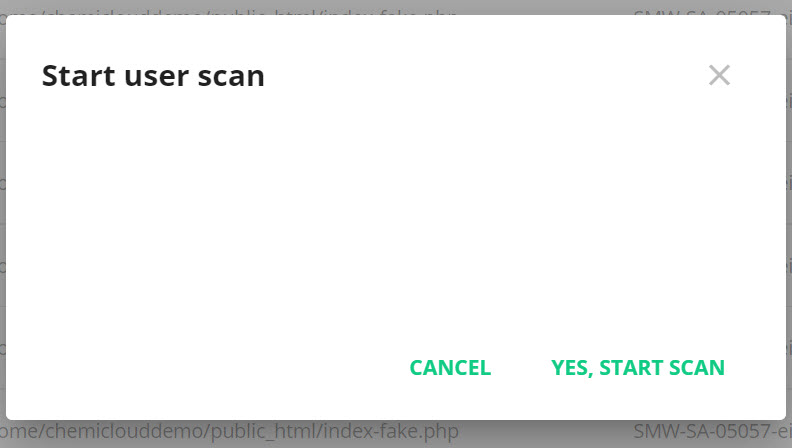
Step 3: The Imunify360 application will load. To run a new scan, click the “Start Scanning” button.

A modal window will appear asking you to confirm you want to start the scan. Click “Yes, Start Scan” to proceed.
The scan will be added to the queue:

When the scan is finished, you will receive an email message to the Administrative Contact email set for the cPanel account under which you ran the Malware Scan.
- Please ensure your email address in cPanel is up-to-date. If you are not sure or are not familiar with how to update that email address, you can review our Knowledge Base article on the subject here.
How to Cleanup Files Infected with Malware in cPanel
Step 1: Log in to your cPanel. There’s a lot of ways to do this, but the sure-fire easiest way is to log in to your Client Area, then open your cPanel.
Step 2: Scroll down to the Security section of your cPanel and open the Imunify360 application.
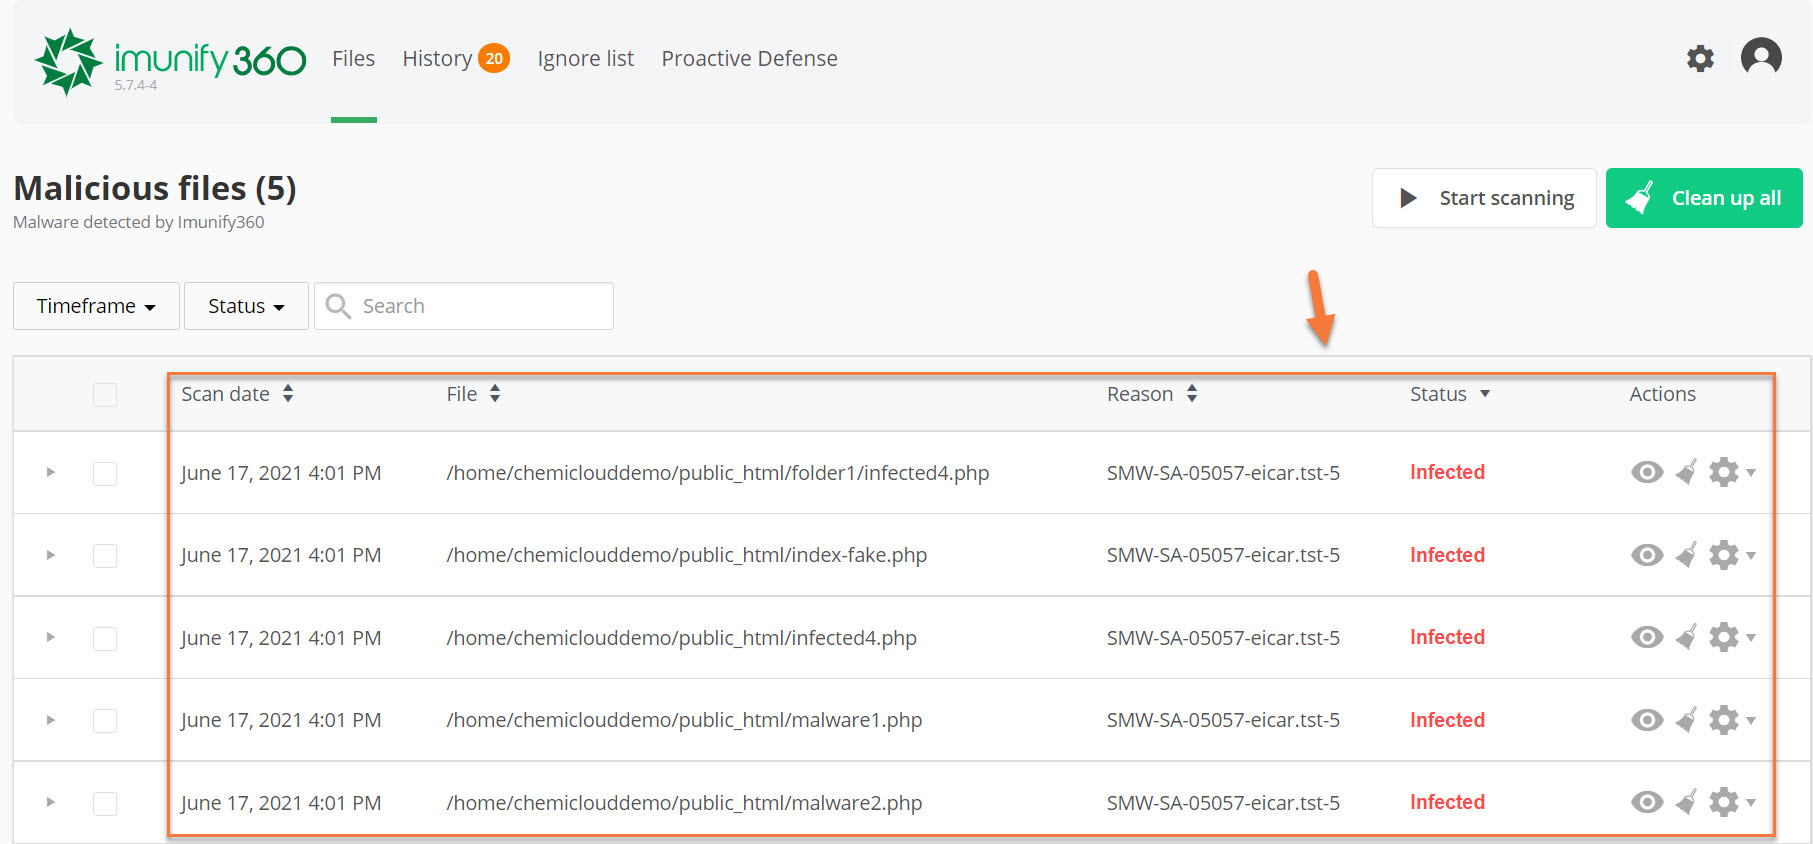
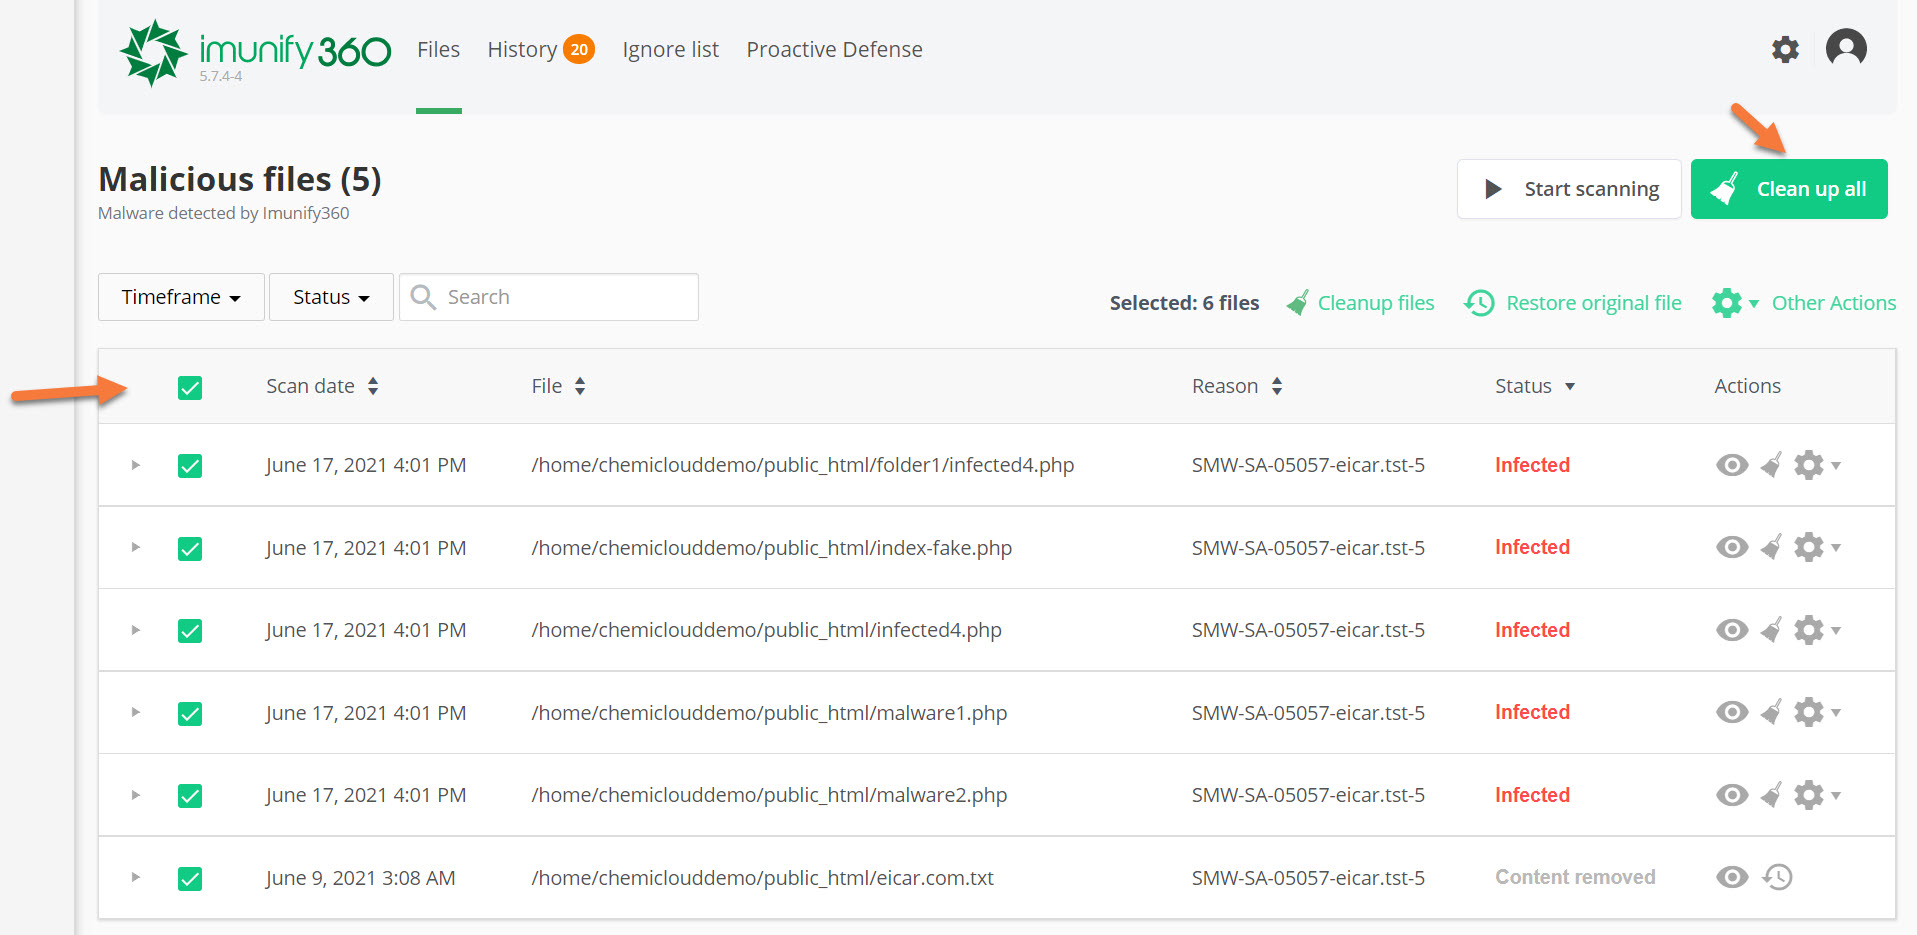
Step 3: The Imunify360 application will load and the Malicious Files discovered in the scan will be listed. See below:
Step 4: Let’s take a look at our available actions for these files. Under the actions column, we have 3 icons.
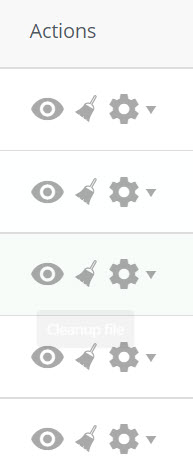
- The eye icon (view file) allows you to view the file that is infected and examine it’s code/content.
- The broom icon (cleanup file) will clean the selected file and rid it of the malware infection.
- The cog will give you the option to add the infected file to the ignore list. This can be helpful if the file is listed and you know it to be a false-positive.
In this case, I have 5 files that are infected, as indicated in the image above. I want to go ahead and clean all of these files. To do that, I’m going to select all of them using the checkbox in the top left of the list of files, then click the green Clean up all button.
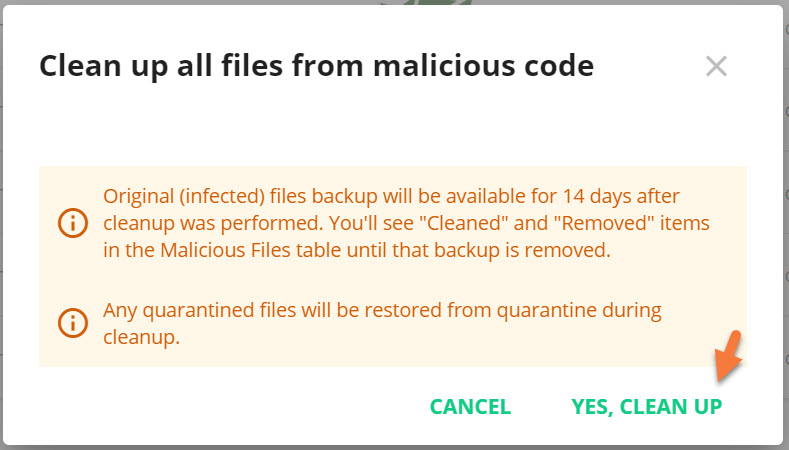
After clicking Clean up all, a modal window will appear with a warning and notice with the following information:
- Original (infected) files backup will be available for 14 days after the cleanup was performed. You’ll see “Cleaned” and “Removed” items in the Malicious Files table until that backup is removed.
- Any quarantined files will be restored from quarantine during cleanup.
A message will appear stating the cleanup has started.

Step 5: After the cleanup finishes, you will see a list of the files that were infected and the Status of them will have changed to Content Removed.
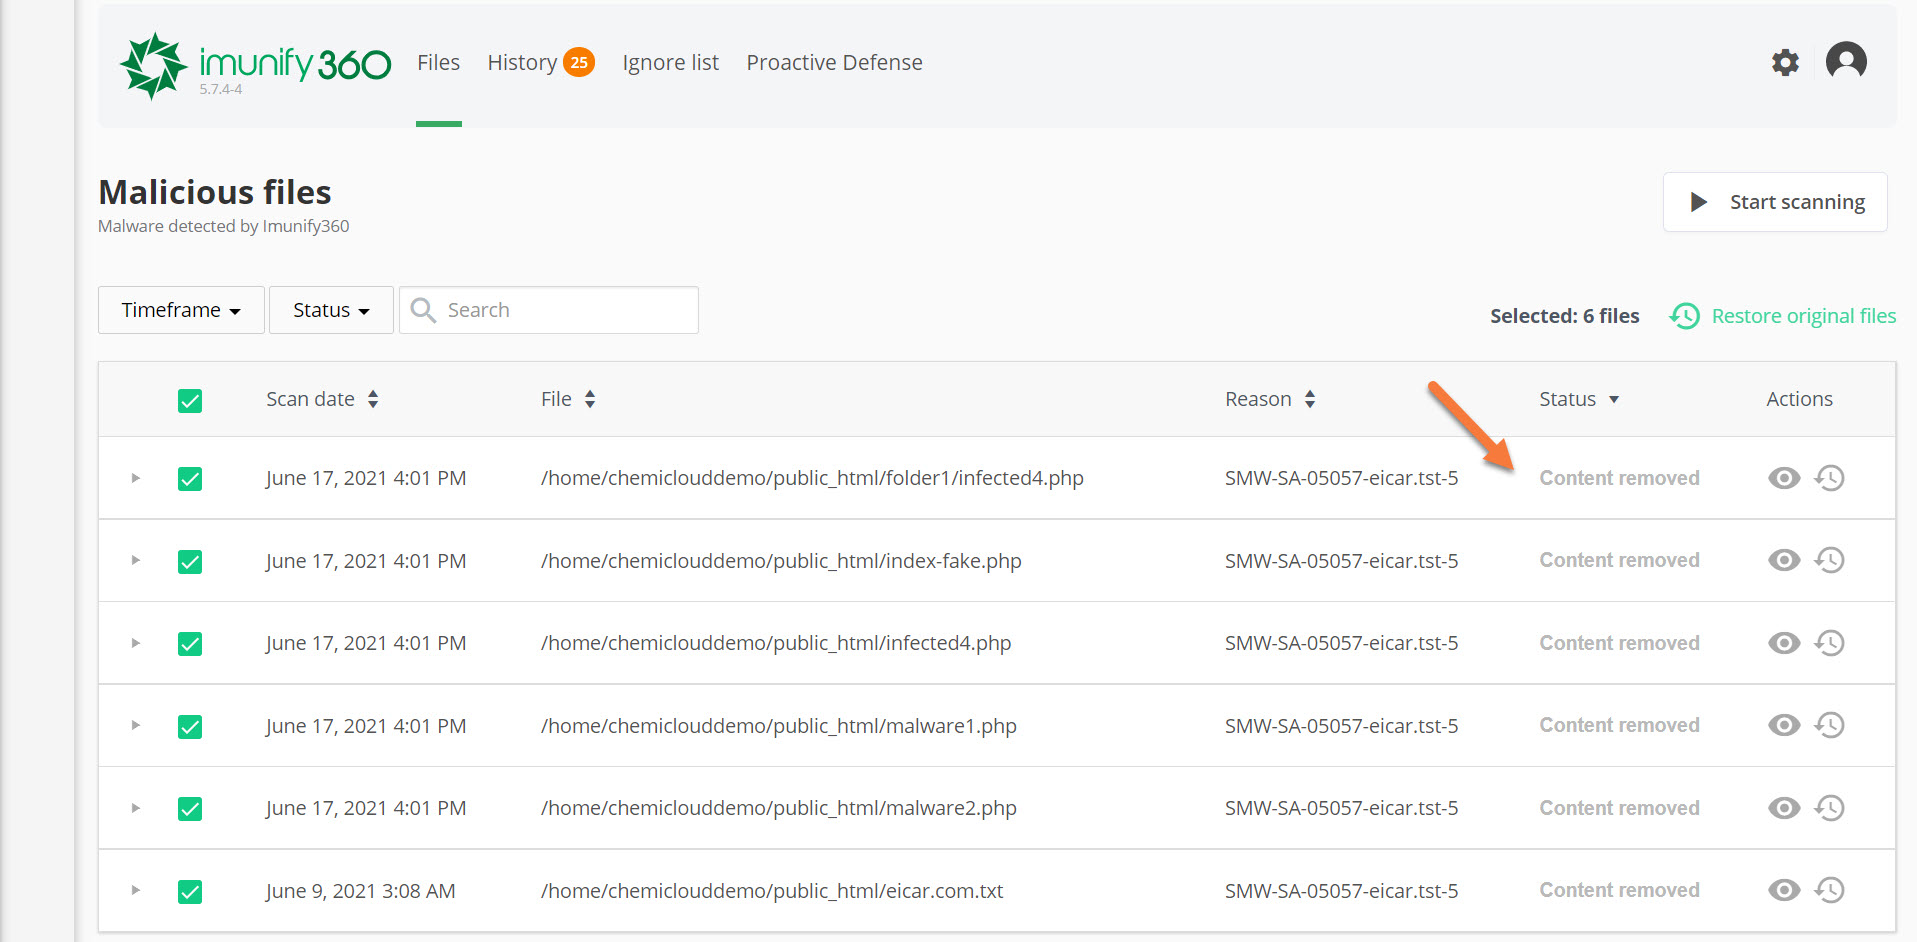
And just like that, Immunify360 has removed the malware from the account.
How to Use the Proactive Defense Mode in the Malware Scanner & Removal Tool
The website Malware Scanner & Removal Tool features an advanced tool called Proactive Defense that can help make PHP-based websites more secure by terminating PHP scripts with malicious activity occurring in them, including insecure WordPress plugins and any other outdated and unpatched applications which can be easily compromised.
You can access the Proactive Defense mode by clicking “Proactive Defense” from the row of options at the top of Immunify360.
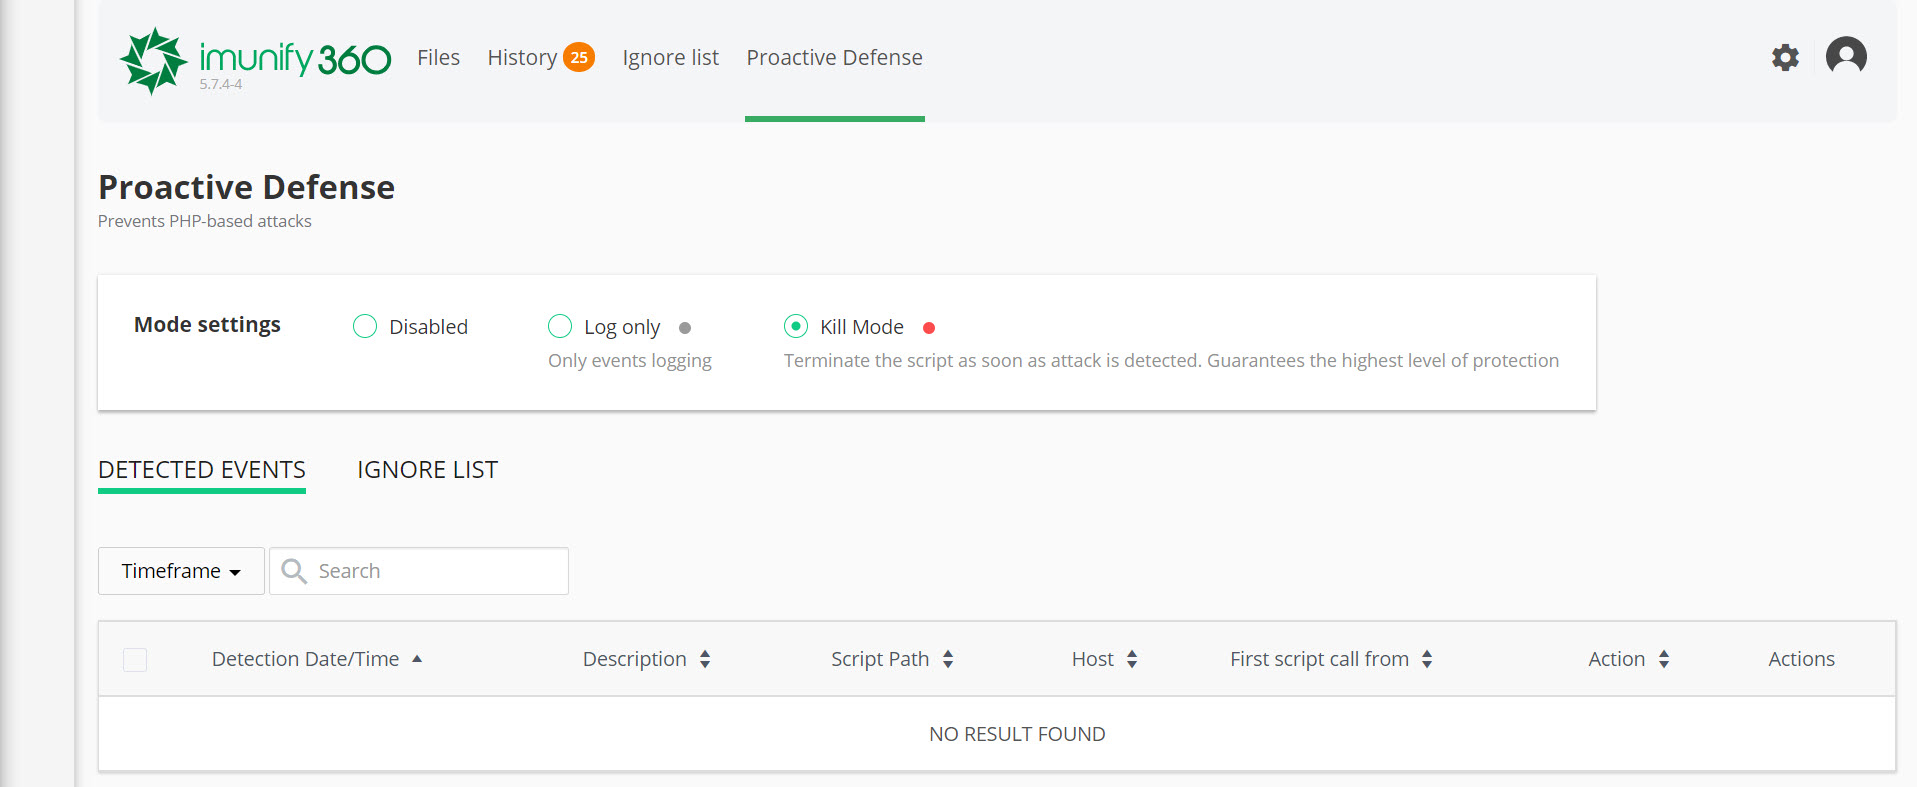
The default mode of operation for Proactive Defense is disabled. However, if you choose to enable it, please note the following:
When enabled, you have the choice of the following 2 mode settings:

- Log only – this will only log suspicious events.
- KILL Mode – this will terminate the script as soon as an attack is detected and guarantees the highest level of protection.
The table beneath the Mode settings will list the detected events and the ignore list if you have placed any events on ignoring.

Frequently Asked Questions about the Proactive Defense Option
Q: Can Proactive Defense prevent the malicious activity of cron jobs? Can the cron job execute in a way so the Proactive Defense module is not loaded?
A: Proactive Defense is a PHP module that should execute any time PHP script is executed including running PHP using a cron job. Note that hackers can create a cron job with PHP script started from custom php.ini to skip loading Proactive Defense. To prevent this from happening, we recommend using exclusively HardenedPHP where the Proactive Defense component cannot be skipped by using custom php.ini.
Q: Are there any restrictions for use with different PHP handlers?
A: Proactive Defense can work with any PHP handler provided the PHP version 5.4 or higher.
Q: Can I benefit from Proactive Defense if I have Cloudflare WAF enabled for my website?
A: Cloudflare WAF and other WAF check only HTTP requests and not the actual PHP execution. As a result, Proactive Defense adds another layer of protection to your site.
Q: What is the difference between Proactive Defense and other services like Wordfence?
A: Most security tools like Wordfence are tailored for a single CMS (e.g. WordPress) and work only for hosting accounts they are installed for. In addition, they are signature-based, so they cannot block PHP script execution proactively.
Q: Will Proactive Defense affect my website’s performance?
A: It slows down PHP script execution by approximately 3-5%. This means that if the script was loading 0.2 seconds before, it will now take around 0.206 seconds.