Are you bored of Roundcube and Horde? Not to worry! RainLoop is available in your Softaculous Web Apps Installer for a fresh, modern take on webmail. RainLoop also has modern features such as reCAPTCHA and 2-Factor Authentication plugins which bolster security to your webmail.
In this tutorial, we will cover how to install & configure RainLoop Webmail.
How To Install RainLoop in cPanel
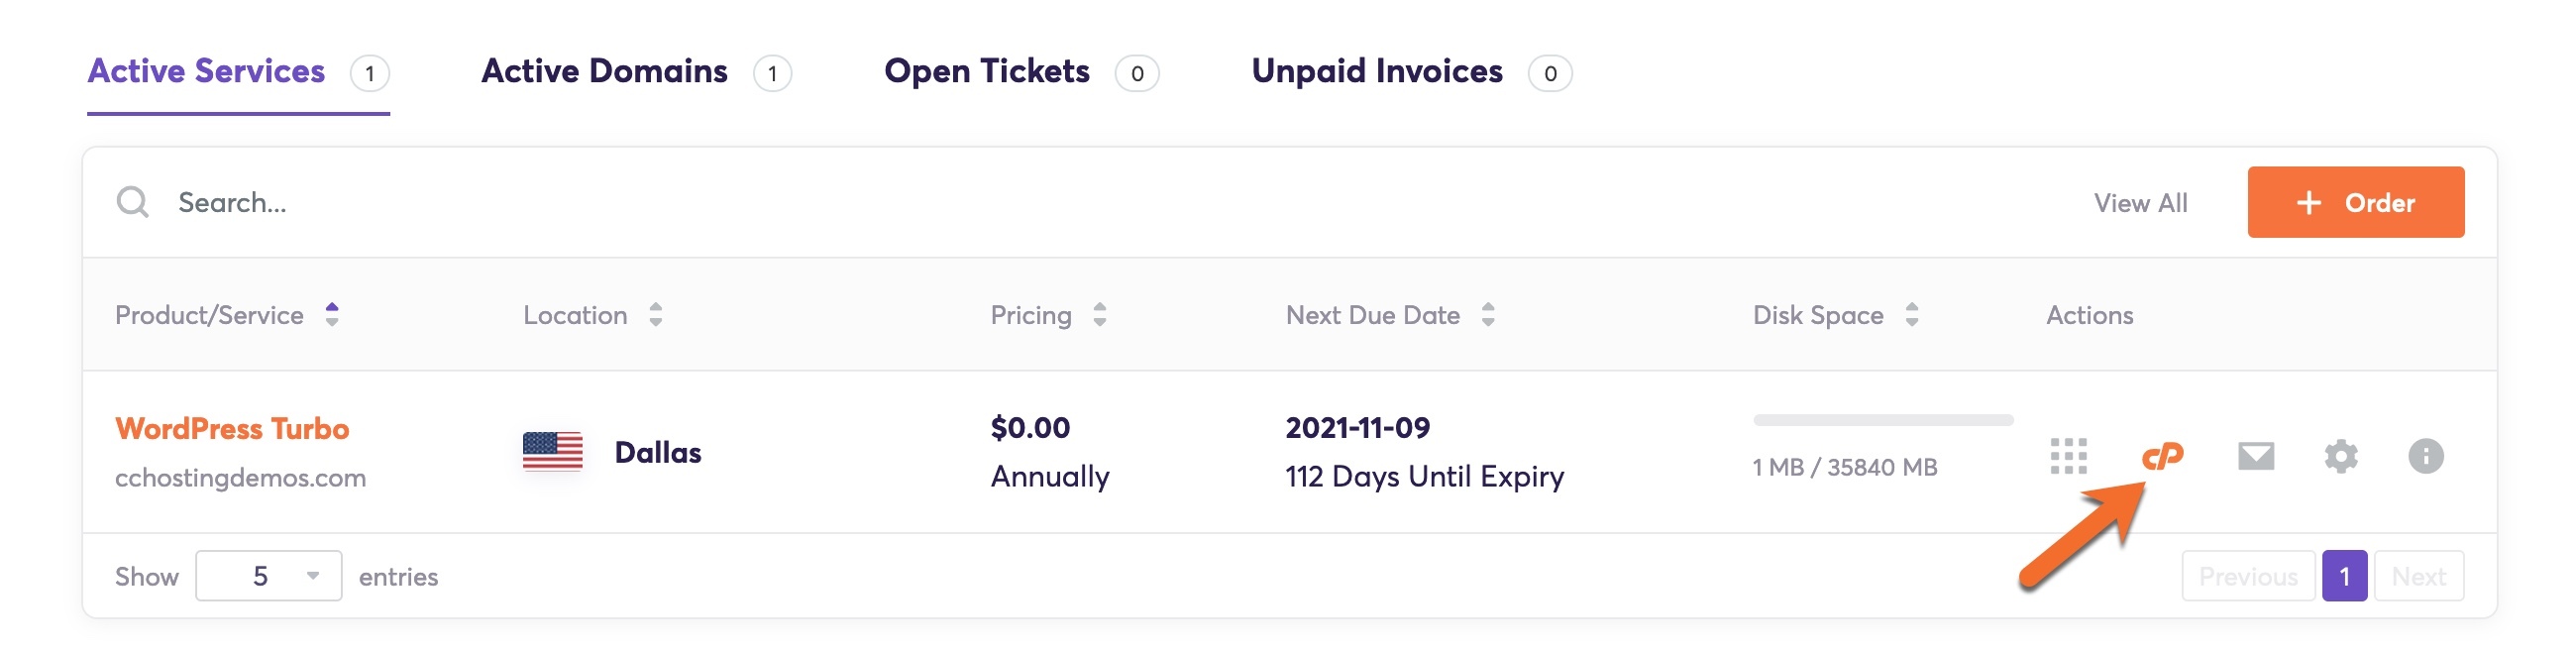
Step 1: Login to your cPanel. If you’re a ChemiCloud customer, there’s a lot of ways to do this, but the sure fire easiest way is to login to your Client Area, then open your cPanel.
Step 2: In cPanel, scroll down to the Software section and click Softaculous Apps Installer to open Softaculous.

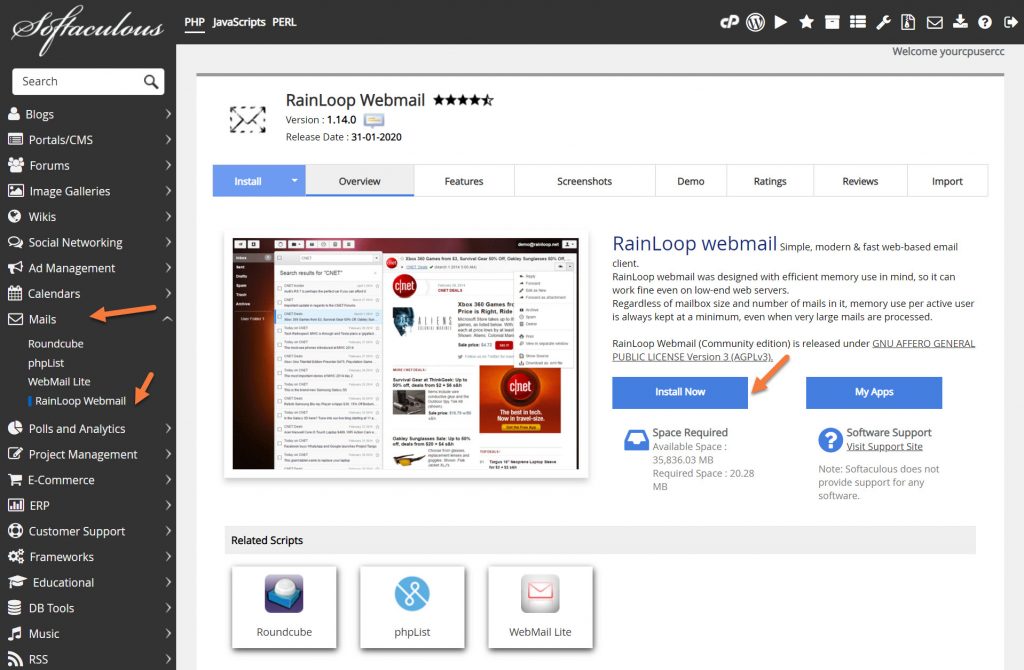
Step 3: Once Softaculous is open, click Mails on the left side and when it expands, click RainLoop Webmail. When the RainLoop page opens, click Install Now.
Step 4: On the Software Setup Screen, you’ll have several options. Let’s review them.
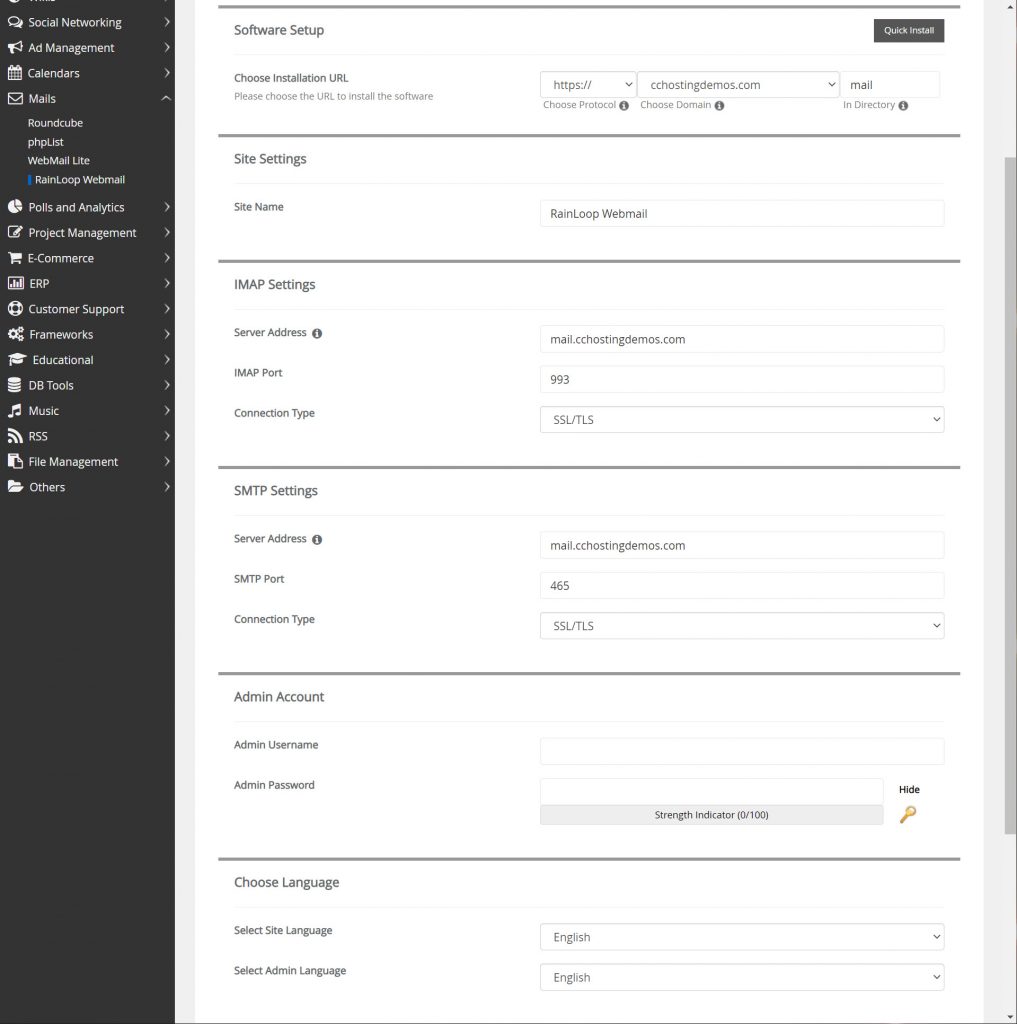
Under Choose Installation URL, you have the option to choose a URL in which to install RainLoop.
Due to limitations with cPanel, you will not be able to install RainLoop in a directory named Webmail successfully. Accessing your domain.tld/webmail with a cPanel Host will always result in your webmail choice of Horde or Roundcube opening, not RainLoop.
Because of this limitation, we recommend installing RainLoop in another directory with a name such as mail, or rainloop, or webmail2, for example. In this example, we’re going to use mail as the directory.

Under Site Settings, you can name your RainLoop site title. This will appear in the browser tab as the Site Title when you open RainLoop. You can name this anything you choose.

Next, we have our IMAP and SMTP Settings. Think of RainLoop as another email client, like Apple Mail or Outlook. Like those apps, it needs to know how to communicate with the mail server to send and receive email.
Looking for a web hosting alternative? 👀 Join the growing club of happy customers who made the switch to better, faster web hosting!
The IMAP and SMTP Settings are the same settings you would use in one of the same email apps.
Ensure your settings are as follows:
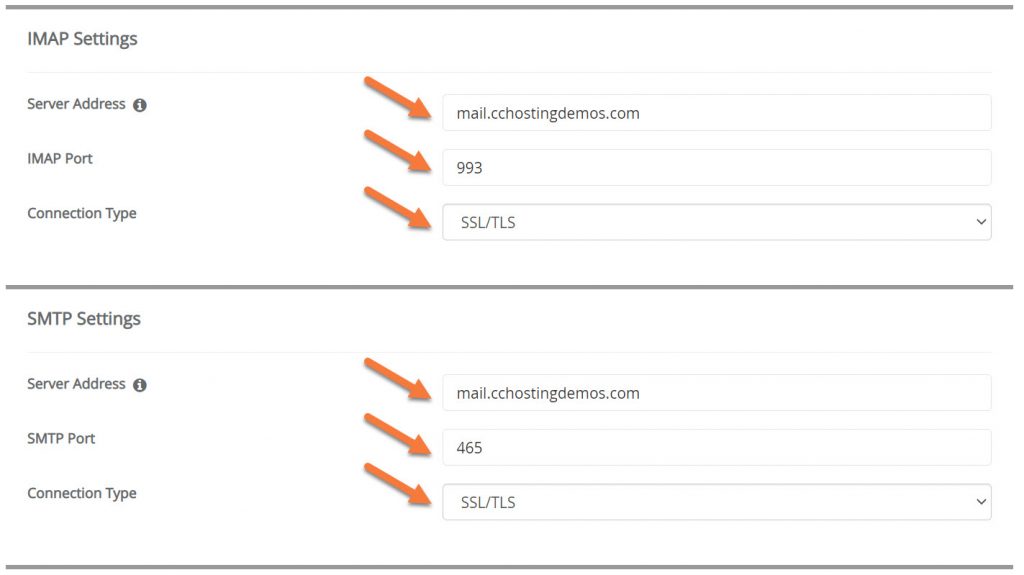
IMAP Settings:
Server Address: mail.yourdomain.tld
IMAP Port: 993
Connection Type: SSL/TLS
SMTP Settings:
Server Address: mail.yourdomain.tld
SMTP Port: 465
Connection Type: SSL/TLS
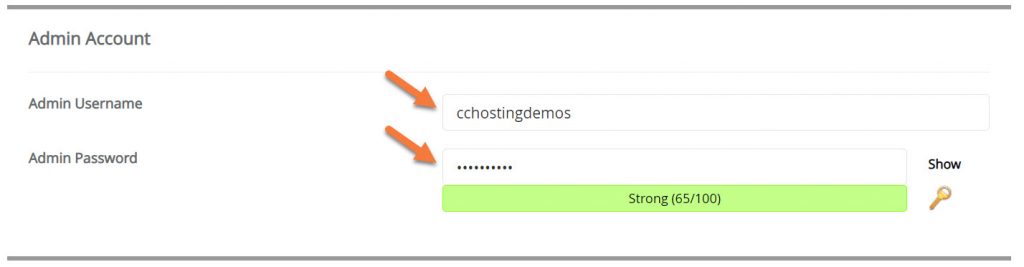
Next, is the Admin Account. This is the login to administer functions of RainLoop. It’s important to create a secure login for this account.
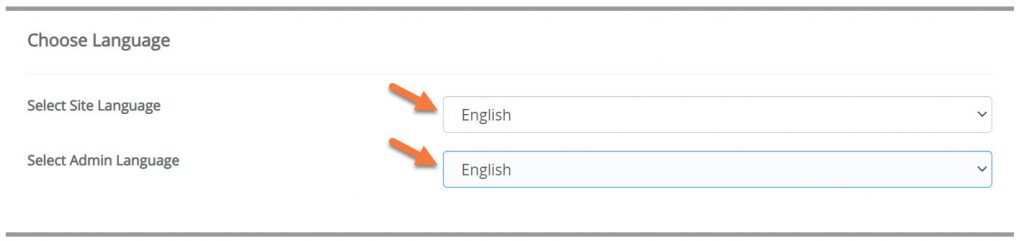
Lastly, you have the option to choose the language for the RainLoop site itself and also the language for the Admin area.
To complete the installation, click the blue Install button at the bottom.
Step 5: After the installation is completed, you’ll see a screen like the one below:
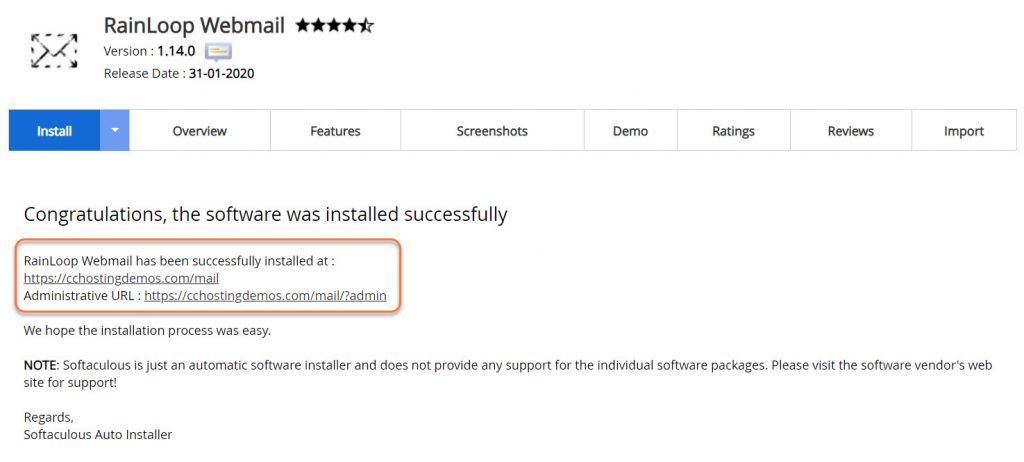
Take note of the two URLs you have, particularly the Admin URL. You’ll need the Admin URL for the next section.
How to Configure RainLoop for Use
Next, you will need to make some modifications to RainLoop’s Configuration before you can use it. Don’t worry, this won’t take but a minute!
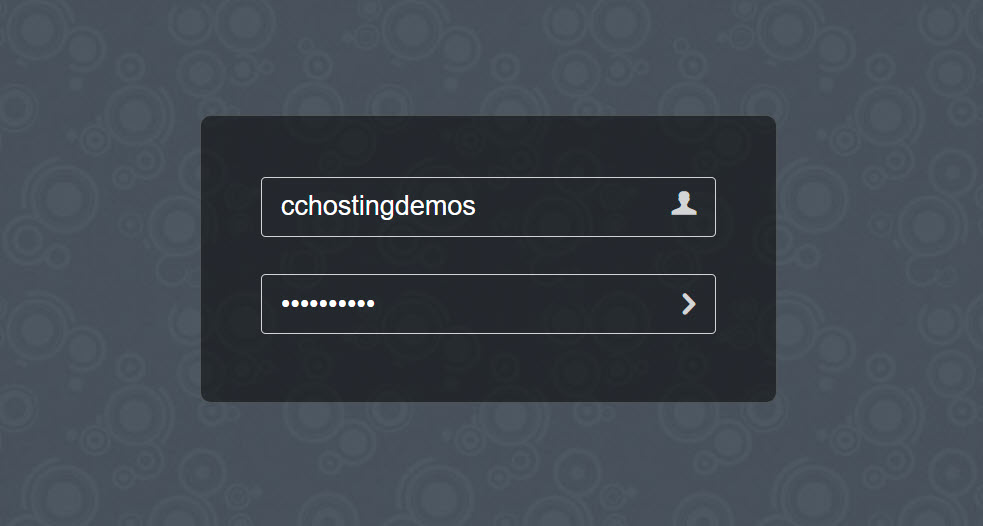
Step 1: Click the Admin URL to open the Administrative Login for RainLoop and enter the Admin Credentials you setup when you installed RainLoop in the last step.
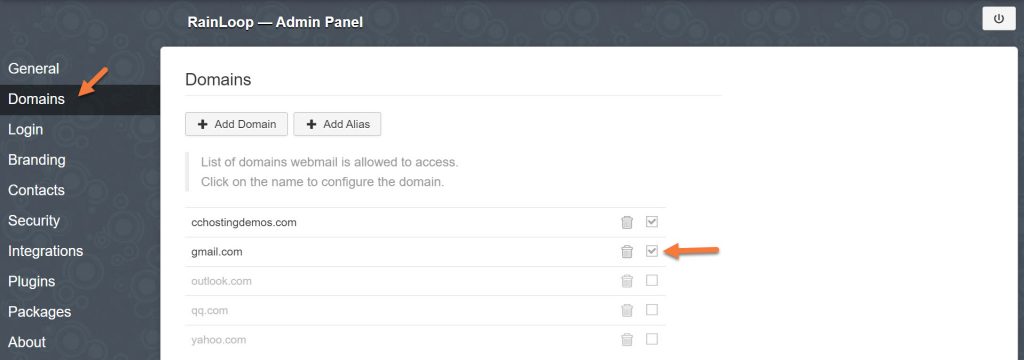
Step 2: Once you are logged in, click Domains on the left. Then uncheck the option next to Gmail.
That’s it!
Now, open a new tab in your browser and visit https://www.yourdomain.tld/<your-rainloop-directory> and you should be able to login as any of the email accounts you have created in your cPanel > Email Accounts area.
Dear Author,
After following the above steps, all is working fine.
Further to this, I created email account in bluehost cpanel and when i try to login for accessing email, I get a error message that “Account is not allowed”.
Tried all possible troubleshooting, Have added domain in default domain list, updated white list. Am able to access admin panel but still unable to access webmail.
Kindly help.