LiteSpeed Cache has introduced LSCache standard Presets for WordPress, which now lets you use a set of pre-tuned options to optimize any WordPress site using LiteSpeed Cache.
This Knowledge Base article will cover how to use this new feature.
Frequently Asked Questions
I am new to Litespeed Cache, which preset should I apply to?
We recommend using the Advanced Preset as it takes a balanced approach to Optimization and Speed, and you shouldn’t need to manually tweak any settings. That said, if you experience difficulty, you can always revert to your previous settings, or try the Basic Preset.
Can I modify Litespeed Cache settings after setting up this preset?
Yes, it is absolutely possible to edit any options after applying this preset. Standard presets are just an easy way to give you a good base optimization to start with. Most complex websites will need more fine-tuning to achieve their best possible score.
If my website breaks after applying a preset, can I change back to the setting I was before?
Yes, but only if you have previously saved a backup of your settings as instructed. A backup will provide you with a config file of your own website, which you can restore later if needed. Alternatively, you can always use the Basic Preset, which has the default settings.
How should I get more fine-tuning specifically for my website?
You can start with the Advanced Preset, and then go through the options in the Page Optimization section to see what more you’d need. Then try to enable them one by one to get the best for your website.
Are there any known bugs?
Yes. The Domain Key removes itself when you apply a new preset, and requires you to manually refresh your domain key from the General settings. LiteSpeed plans to patch this issue in an upcoming version.
Let’s begin!
Overview of the LiteSpeed Cache Presets
The new presets from LiteSpeed come in 4 stages:
- Essentials
- Basic
- Advanced
- Aggressive
- Extreme
Let’s review what is included and pre-configured in each Stage, below.
Essentials
For those who are just starting out, or have a simple website, the no-risk preset is an ideal choice. It can be used on any website without requiring a Domain Key. However, it should be noted that only basic caching features are enabled with the preset.
This preset sets the following:
- Default Cache
- Higher TTL
- Browser Cache
Basic
This preset is a great starting point for those beginning their journey in website optimization. It provides basic optimizations that will help to improve the speed and user experience of your site, without taking any unnecessary risks.
This preset sets the following:
- Everything in Essentials, Plus
- Image Optimization
- Mobile Cache
To make use of this preset, you’ll need to have a Domain Key. If you are not familiar with requesting a Domain Key, we recommend the following steps:
Step 1: Login to your /wp-admin and click the LiteSpeed Cache Plugin, then access General Settings. To request your domain key, click the button called “Request Domain Key”.
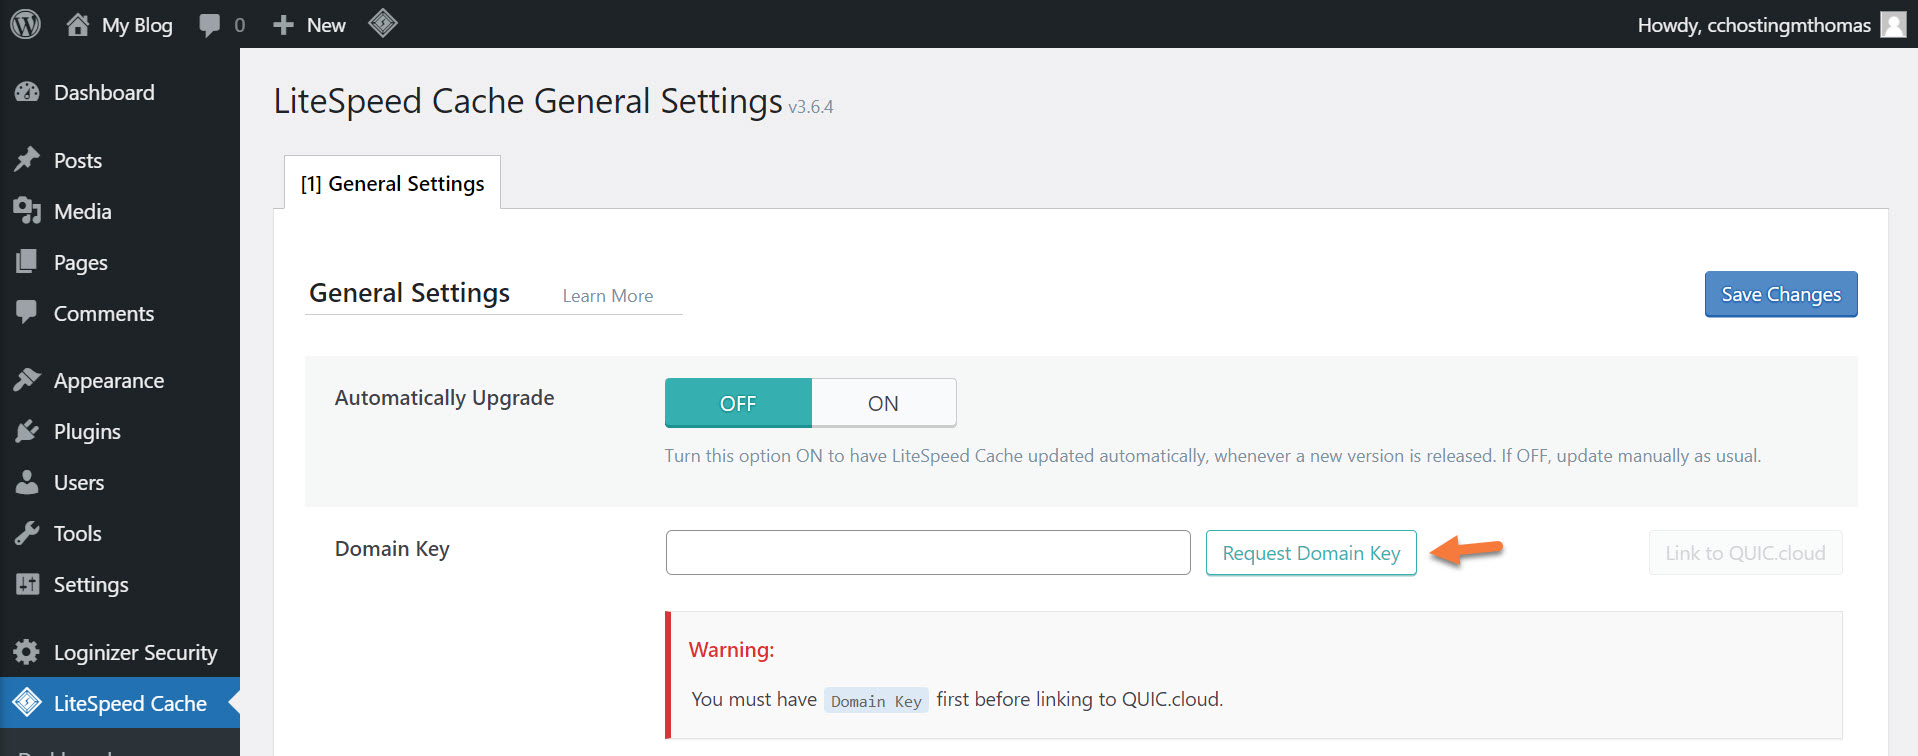
After clicking the Request Domain Key button, you will see this notice:

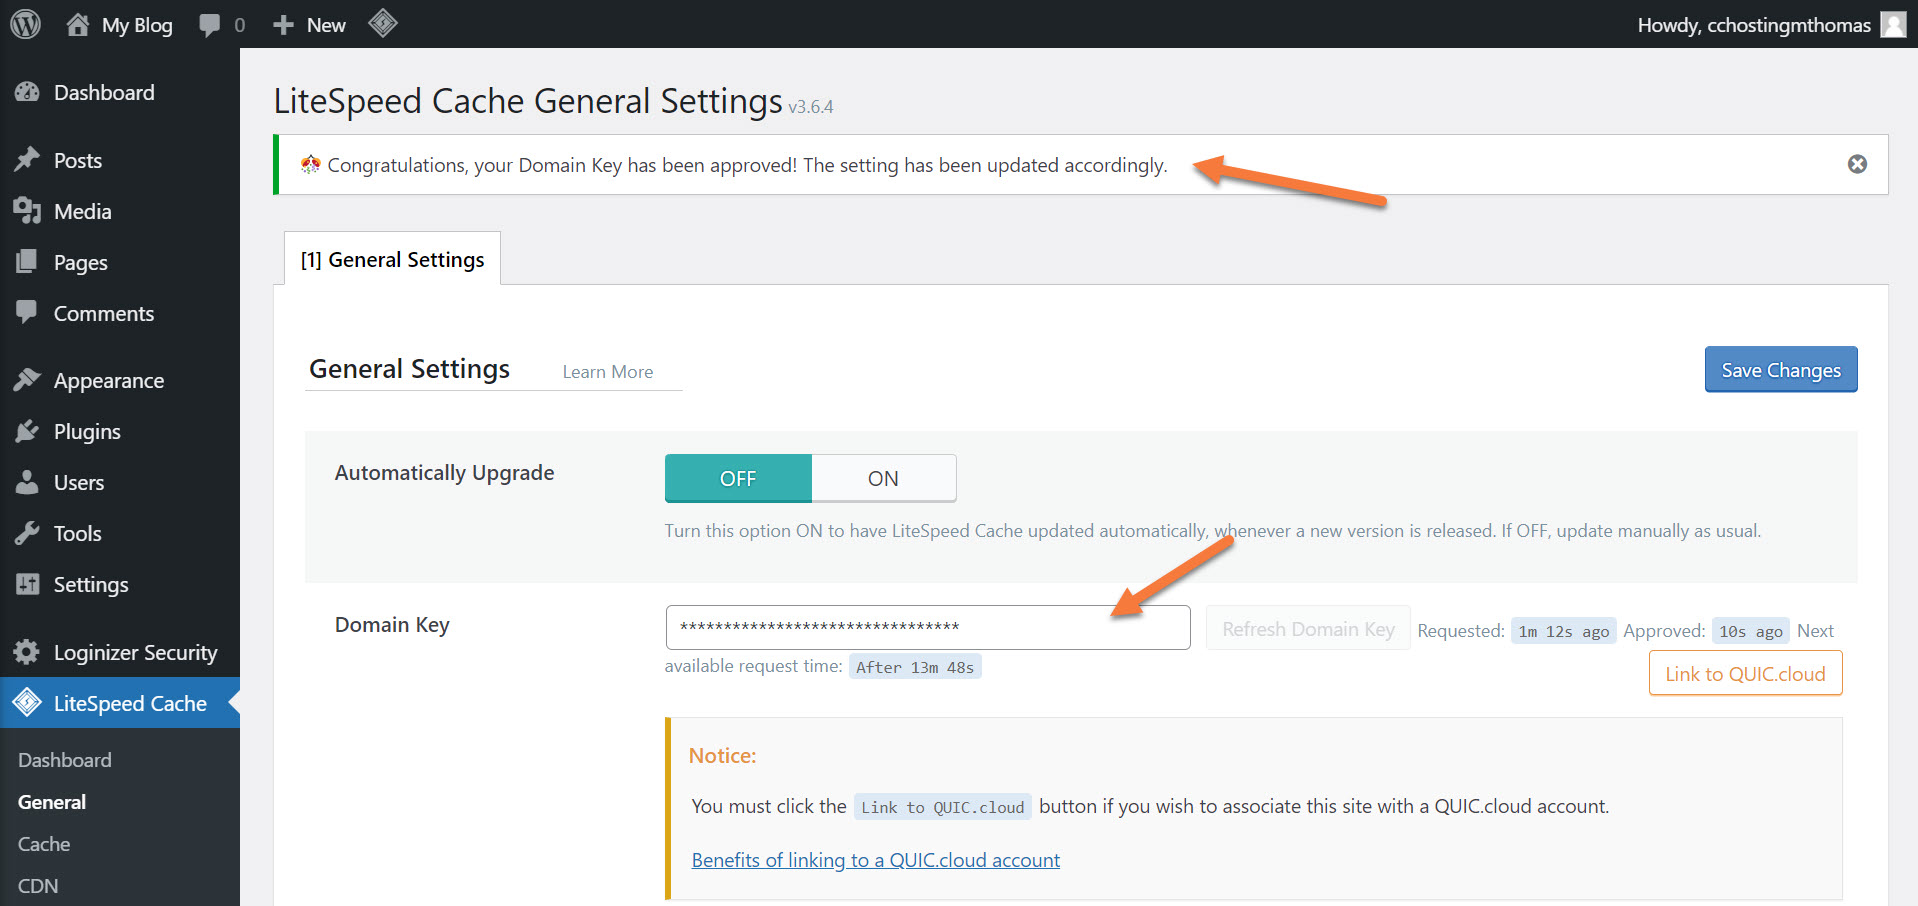
You’ll need to wait a minute or two, then refresh the page. After the key is issued, you will see a congratulatory notice at the top of the page and you’ll see a bunch of *** in the key field.
Advanced
For the majority of websites, employing the preset is a wise decision and it is very unlikely to cause any issues. In the event that there are CSS or JS conflicts, Page Optimization > Tuning tools can be used to rectify them.
This preset sets the following:
- Everything in Basic, Plus
- Guest Mode and Guest Optimization
- CSS, JS and HTML Minification
- Font Display Optimization
- JS Defer for both external and inline JS
- DNS Prefetch for static files
- Gravatar Cache
- Remove Query Strings from Static Files
- Remove WordPress Emoji
- Remove Noscript Tags
You must request a Domain Key to use this. If you are not familiar with requesting a Domain Key, we recommend the following steps:
Step 1: Login to your /wp-admin and click the LiteSpeed Cache Plugin, then access General Settings. To request your domain key, click the button called “Request Domain Key”.
After clicking the Request Domain Key button, you will see this notice:
You’ll need to wait a minute or two, then refresh the page. After the key is issued, you will see a congratulatory notice at the top of the page and you’ll see a bunch of *** in the key field.
Tired of slow WordPress hosting? We use LiteSpeed + QUIC.cloud Enterprise CDN to deliver content almost instantly. ⚡ Try our Managed WordPress Hosting plans for just $1!
Aggressive
This pre-set is for fairly experienced WordPress Administrators and we highly recommend testing it with your WordPress site before using this pre-set in Production.
Because of its aggressive nature, you might be required to exclude a few resources from CSS/JS combine, and you may need some advanced configuration for Critical CSS and Localization.
This preset sets the following:
- Everything in Advanced, Plus
- CSS & JS Combine
- Asynchronous CSS Loading with Critical CSS
- Removed Unused CSS for Users
- Lazy Load for Iframes
You must request a Domain Key to use this. If you are not familiar with requesting a Domain Key, we recommend the following steps:
Step 1: Login to your /wp-admin and click the LiteSpeed Cache Plugin, then access General Settings. To request your domain key, click the button called “Request Domain Key”.
After clicking the Request Domain Key button, you will see this notice:
You’ll need to wait a minute or two, then refresh the page. After the key is issued, you will see a congratulatory notice at the top of the page and you’ll see a bunch of *** in the key field.
Extreme
This profile stage includes ESI which can supercharge your WooCommerce Store. It might require some help from a developer to integrate ESI properly, as well. In addition to this, some images like logos and slider images might require exclusions from Lazy Load.
This preset sets the following:
- Everything in Aggressive, Plus
- Lazy Load for Images
- Viewport Image Generation
- JS Delayed
- Inline JS added to Combine
- Inline CSS added to Combine
You must request a Domain Key to use this. If you are not familiar with requesting a Domain Key, we recommend the following steps:
Step 1: Login to your /wp-admin and click the LiteSpeed Cache Plugin, then access General Settings. To request your domain key, click the button called “Request Domain Key”.
After clicking the Request Domain Key button, you will see this notice:
You’ll need to wait a minute or two, then refresh the page. After the key is issued, you will see a congratulatory notice at the top of the page and you’ll see a bunch of *** in the key field.
How to Apply a Standard LiteSpeed Cache Preset
Before proceeding, be sure you have installed the LiteSpeed Cache plugin from the WordPress Plugins repository. (Tutorial: How to Install LiteSpeed Cache on WordPress)
Step 1: Login to your /wp-admin and hover over the LiteSpeed Cache option in the menu on the left and click Presets.

Step 2: Click on the Import/Export tab. Take a backup of your current LiteSpeed configuration by clicking Export.

Step 3: After backing up your current configuration, click the “Standard Presets” tab and choose the desired preset:
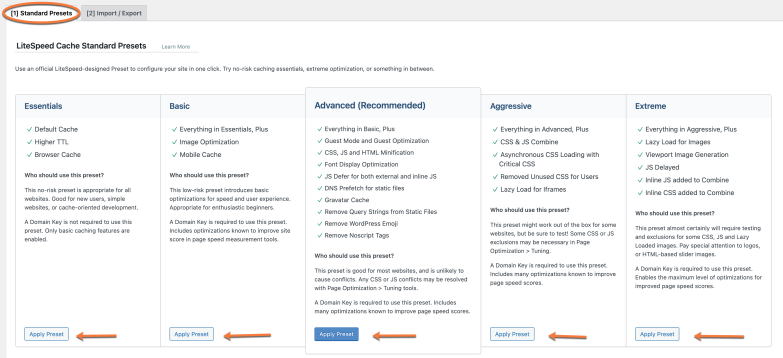
Step 4) Click Apply Preset
Be sure you thoroughly test your site before going live with the new configuration! If something isn’t going as expected, you can easily import the old settings from the backup you’ve taken earlier.
That’s a wrap! Now you know how to use predefined LiteSpeed Cache Presets.