When it comes to Page Caching, the LiteSpeed Cache plugin for WordPress has you covered! There are dozens of options you can tinker with to get your site up and running at the best performance possible with the plugin.
But why tinker when you could just follow our knowledge base article where we’ll cover the best settings to enable to get the best out of the plugin?
Follow along below to do just that. Let’s dive in!
How to Configure the LiteSpeed Cache Page Optimization Settings in WordPress
Step 1: Login to your /wp-admin and hover over the LiteSpeed Cache plugin in the menu on the left…. when the little menu pops out, click Page Optimization.
 Step 2: When the Page Optimization settings load, you’ll see a few tabs at the top + a lot of different options for each tab.
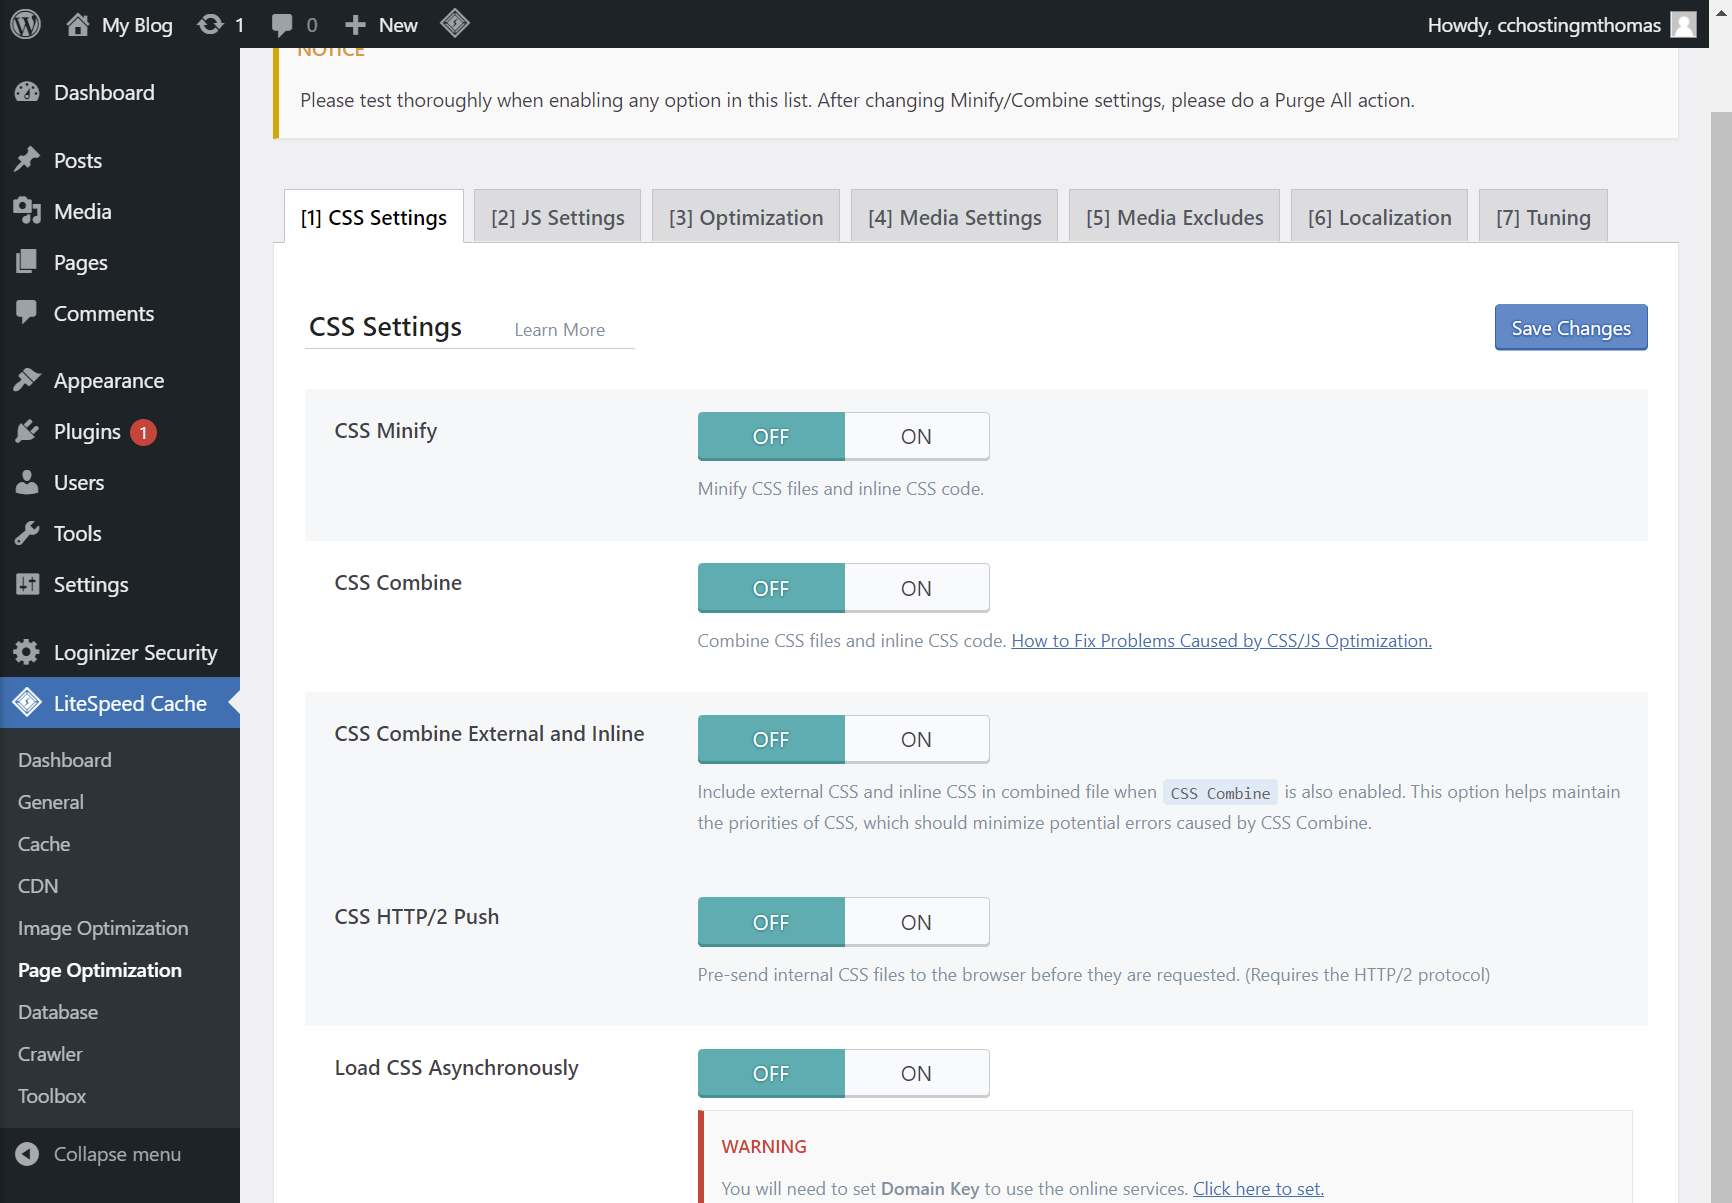
Let’s review these options so you can enable the right ones to maximize your optimization and get the best out of the LSCache for the WordPress plugin.
First up are the CSS Settings.
- With CSS Minify, as mentioned in the Pro-Tip above, you should leave this off.
- For CSS Combine, also as mentioned above, you should leave this off.
- You can leave the CSS HTTP/2 Push setting off as well.
- Leave the Load CSS Asynchronously setting off or you can see some displeasing font issues on your website. Yes, having this on can help your website test scores, but it hurts your UX. Don’t make your visitors suffer from ugly FOUC/FOUT issues!
- For Generate Critical CSS, leave this setting off. We don’t recommend using Critical CSS unless absolutely needed.
- Leave the Generate Critical CSS in Background option alone, as it’s dependent on the Generate Critical CSS option.
- With the Separate CCSS Cache Post Types option, if you are using Critical CSS, you should list here every post type that has it’s own page and CSS. Otherwise, leave this alone.
- An example of this would be WooCommerce category and product pages, along with pricing tables, etc.
- For Separate CCSS Cache URIs, this is similar to the above, Separate CCSS Cache Post Types and you should enter single URLs with CSS that is vastly different from other pages. Otherwise, leave this section alone.
- Leave the Inline CSS Async Lib off, or you will get weird font issues.
- And lastly, for Font Display Optimization, you should only use Default or Block. Don’t use Swap or Fallback as they can cause font issues, as well.
Once you’ve configured your settings, be sure to click Save Changes at the bottom of the page.
Next, click JS Settings.
- As we mentioned for CSS Settings, leave the JS Minify option off. If you’re going to use minification, do it from your CDN.
- Do the same for JS Combine, leave it off.
- For JS HTTP/2 Push, you can leave this off.
- With Load JS Deferred, the off setting is the safest setting.
- The Default setting for Load Inline JS is your best option. Deferred or delaying until after DOM load may improve page scores or help other JavaScript optimizations, but it also contributes to altered site design or function on page loads.
- Finally, set Exclude JQuery to the On Setting.
Once you’ve configured your settings, be sure to click Save Changes at the bottom of the page.
Next, at the top of the page click the Optimization tab.
- The default setting for CSS/JS Cache TTL is safe. You can use a lower TTL when you’re making a lot of development changes, if you want. Or you can use a higher TTL, if you aren’t changing site design as frequently.
- With HMTL Minify, leave this setting to off, as you have with the other Minify options.
- For Inline CSS Minify, you should also leave this setting off.
- Also, leave Inline JS Minify off.
- The DNS Prefetch field is useful if you want to preload the DNS queries for external assets on your website. You should list the URLs of each of those in the space provided.
- If you aren’t sure what your external content URLs may be, you can find them by opening your website in a Chrome Incognito tab, then right-click on the page and choose Inspect from the context menu. Following that, the Developer Tools will open, and you should click the Sources tab. This will list all the external calls your website is making and their URLs.
- For DNS Prefetch Control, you can set this to on if you aren’t using the option above where you’ve listed URLs manually.
- The Remove Query Strings option doesn’t typically offer a speed improvement since most caching can now handle query strings. We recommend leaving this set to Off.
- For Load Google Fonts Asynchronously, you can enable this if you want, but keep in mind most Google Fonts are already cached in the browser from other websites using them.
- You can enable the Remove WordPress Emoji setting. Most browsers can now natively render emojis and this only removes a small JavaScript call.
Once you’ve configured your settings, be sure to click Save Changes at the bottom of the page.
Exciting News: Introducing Our fastest WordPress Hosting stack 🚀 Ready for speed? Try it for just $1!
Next, at the top of the page click the Media Settings tab.
- A lot of people like lazy load, I’m not really a fan and recommend leaving Lazy Load Images set to off. Having it enabled can improve page load times a teeny bit, but it’s bad for UX to use the feature under certain conditions.
- For Basic Image Placeholder, you can specify the base64 of an image to be used as a placeholder until your actual images load.
- If you aren’t sure how to encode an existing image you want to use into base64, there’s a great web encoder tool you can use by clicking here.
- If you are lazy loading images, we recommend setting Responsive Placeholder to on. Otherwise, you can leave this off. This option reserves the space on the page for images so that the layout doesn’t jump around when users scroll down.
- The prefilled text in Responsive Placeholder SVG should be fine for most sites, but you can customize the color using the {color} variable.
- For Responsive Placeholder Color, the default color is fine for most people, but if you select something, keep it grey-ish to be with the web standards.
- If you choose to enable LQIP Cloud Generator, you will need to register and setup your site with QUIC.Cloud. We have a Knowledge Base article on how to do that which you can read by clicking here.
- With this option, a very low-quality version of the image will appear during page load and will soon be replaced by a full-quality image. This is an excellent option for image-heavy websites as it gives them the appearance of loading quickly.
- A setting of 4 for LQIP Quality should suffice for most users, but you can test other settings and use what you feel works for you!
- The Lazy Load Iframes option is helpful if you have iframes or video embeds on your page that aren’t used. Otherwise, you can leave this setting in the off position.
- Lastly, for Inline lazyLoad Images Library, you can leave this to off for better performance. If you turn it on, it will remove another HTTP Request which can improve page scores, if your site is super lean, however, most users will be okay with the setting to off.
Once you’ve configured your settings, be sure to click Save Changes at the bottom of the page.
Next, at the top of the page click the Media Excludes tab.
Each of the options in this section are blank by default. In these boxes you will enter URI or UIRLs, depending.
- For Lazy Load Images Excludes, enter the URL of any images you want to exclude from lazy-load. This is a good idea for ATF-images or ones on pages that are constantly skimmed by users.
- For Lazy Load Image Class Name Excludes, enter the CSS Class of any image you want to exclude.
- On Lazy Load Image Parent Class Name Excludes, you can enter the parent class of any images you want to exclude.
- For Lazy Load Iframe Class Name Excludes, this is a handy way of excluding certain videos from lazy load, such as the ones that are nearer to the top of your web pages, or those which take a while to load.
- With Lazy Load Iframe Parent Class Name Excludes, you can enter the parent class name to exclude any iframes that don’t have a CSS class assigned.
- Finally, for Lazy Load URI Excludes, you can list URIs in the box to disable lazy load functions on certain pages, such as a landing page where you want videos and images to load instantly.
Once you’ve configured your settings, be sure to click Save Changes at the bottom of the page.
Next, at the top of the page click the Localization tab.
- The Gravatar Cache option is a great feature if your site is busy with tons of comments, but not necessary if your site doesn’t have any comments or use comments at alll.
- If you have set the Gravatar Cache option to On, you should have the Gravatar Cache Cron enabled, as well.
- Lastly, with the Gravatar Cache TTL, the default setting is fine, but you can probably go a lot higher, nearer to 3-6 months. How often does one really update their Gravatar?
Once you’ve configured your settings, be sure to click Save Changes at the bottom of the page.
Lastly, at the top of the page click Tuning Settings.
- In the CSS Excludes box you should list all CSS files you don’t want to be minified or combined. You can enter their full string name, like elementor-builder.css, or a partial string, like elementor.
- For JS Excludes, list all the JavaScript files to be excluded from minification and combination.
- In Critical CSS, specifiy critical CSS rules for above the fold content. Use this only if you have Load CSS Asynchronously enabled.
- In JS Deferred Excludes, list JavaScript files or inline JavaScript code that will not be deferred on load.
- In the URI Excludes field, you can enter the URL of any pages where you won’t want the optimizations to apply.
- Finally, select Role Excludes if any roles should be excluded from optimizations.
Once you’ve configured your settings, be sure to click Save Changes at the bottom of the page.
The settings we’ve detailed above should be enough to get you going in no time with the LiteSpeed Cache Plugin for WordPress!
▶️ Please join us in the next tutorial, where we will walk you through the setup of QUIC.Cloud CDN in order to speed up your WordPress website.
This is a fantastic post that contains a lot of useful information. I appreciate you writing on LiteSpeed Cache for WordPress since it’s really useful to us.