In this tutorial, we’ll show you how to retrieve the Cloudflare nameserver records for your WordPress site so you can point your domain to your Managed WordPress Hosting service.
We include Cloudflare’s integrated Anycast DNS service with your Managed WordPress hosting plan.
What is Anycast DNS?
Anycast DNS is a system where multiple DNS servers share the same IP address. When someone tries to visit a website, their request is routed to the nearest available server in the network. This reduces the time it takes to connect (latency), improves website availability, and helps protect against DDoS attacks.
How does Anycast work?
Normally, each device connected to the Internet has a unique IP address, like a street address directing traffic to a single location. In contrast, Anycast allows multiple servers to use the same IP address. When a request is made, it is automatically sent to the closest or most available server, making communication more efficient.
Imagine sending a letter to a friend who has multiple homes across the country. The letter would automatically be delivered to the closest house instead of a specific, fixed location. That’s similar to how Anycast routes traffic.
How does Anycast DNS work?
DNS (Domain Name System) translates website names into IP addresses that devices understand. Typically, when you enter a website, your device queries a DNS resolver to get the IP address. With Anycast DNS, this query can be handled by any server in the network, and it will be routed to the closest or most efficient server. This speeds up the process, reduces latency, and keeps services running smoothly even if some servers go offline.
For example, Cloudflare uses Anycast DNS across its network of data centers in over 330 cities. This means DNS queries can be resolved quickly from any of these locations, improving speed and reliability.
Without Anycast: Unicast DNS
In a traditional Unicast setup, each DNS server has its own unique IP address, and queries are sent to a specific server. If that server is down, the query has to try other servers, which can slow things down.
What’s the Key Benefit of Anycast DNS?
Anycast DNS ensures faster, more reliable website connections by routing requests to the nearest and best-performing server, reducing latency and improving uptime.
How to Retrieve the CloudFlare Nameservers Records for your WordPress Site
This tutorial assumes that you’ve already installed a WordPress instance on your domain using the WordPress Manager. If you didn’t do so, this tutorial will help you.
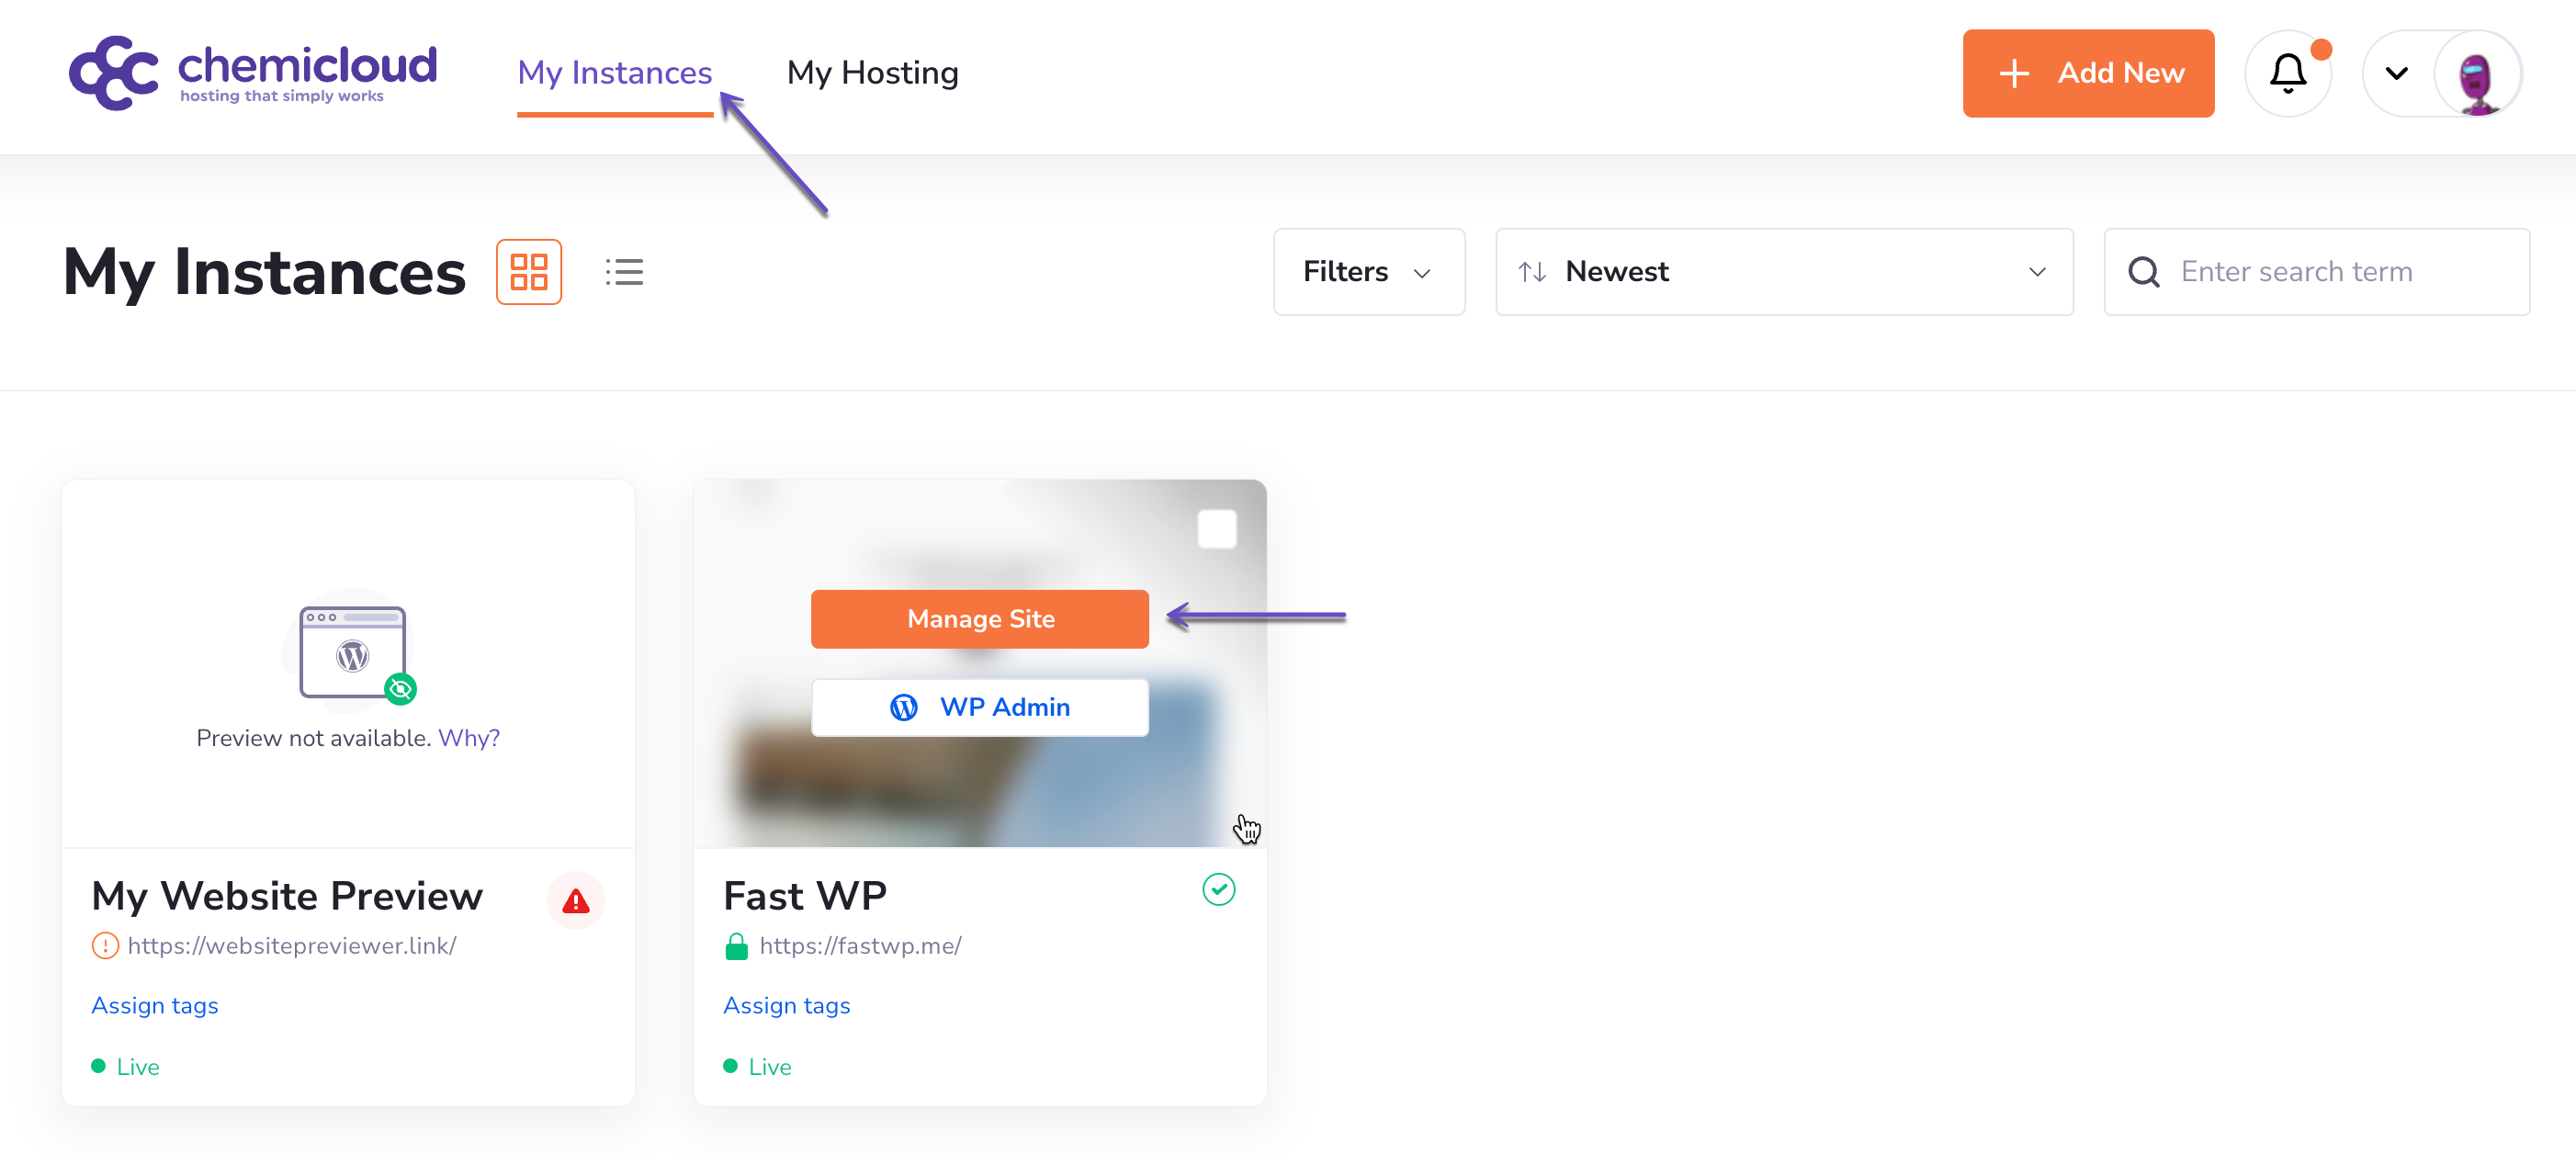
Step 1) Log in to the WordPress Manager.
Step 2) Click on the “Manage site” button corresponding to the WordPress instance you wish to retrieve the Nameservers records.
If your domain is not pointing at the Cloudflare nameservers, you should see a “DNS propagation is in progress” message in the top section.
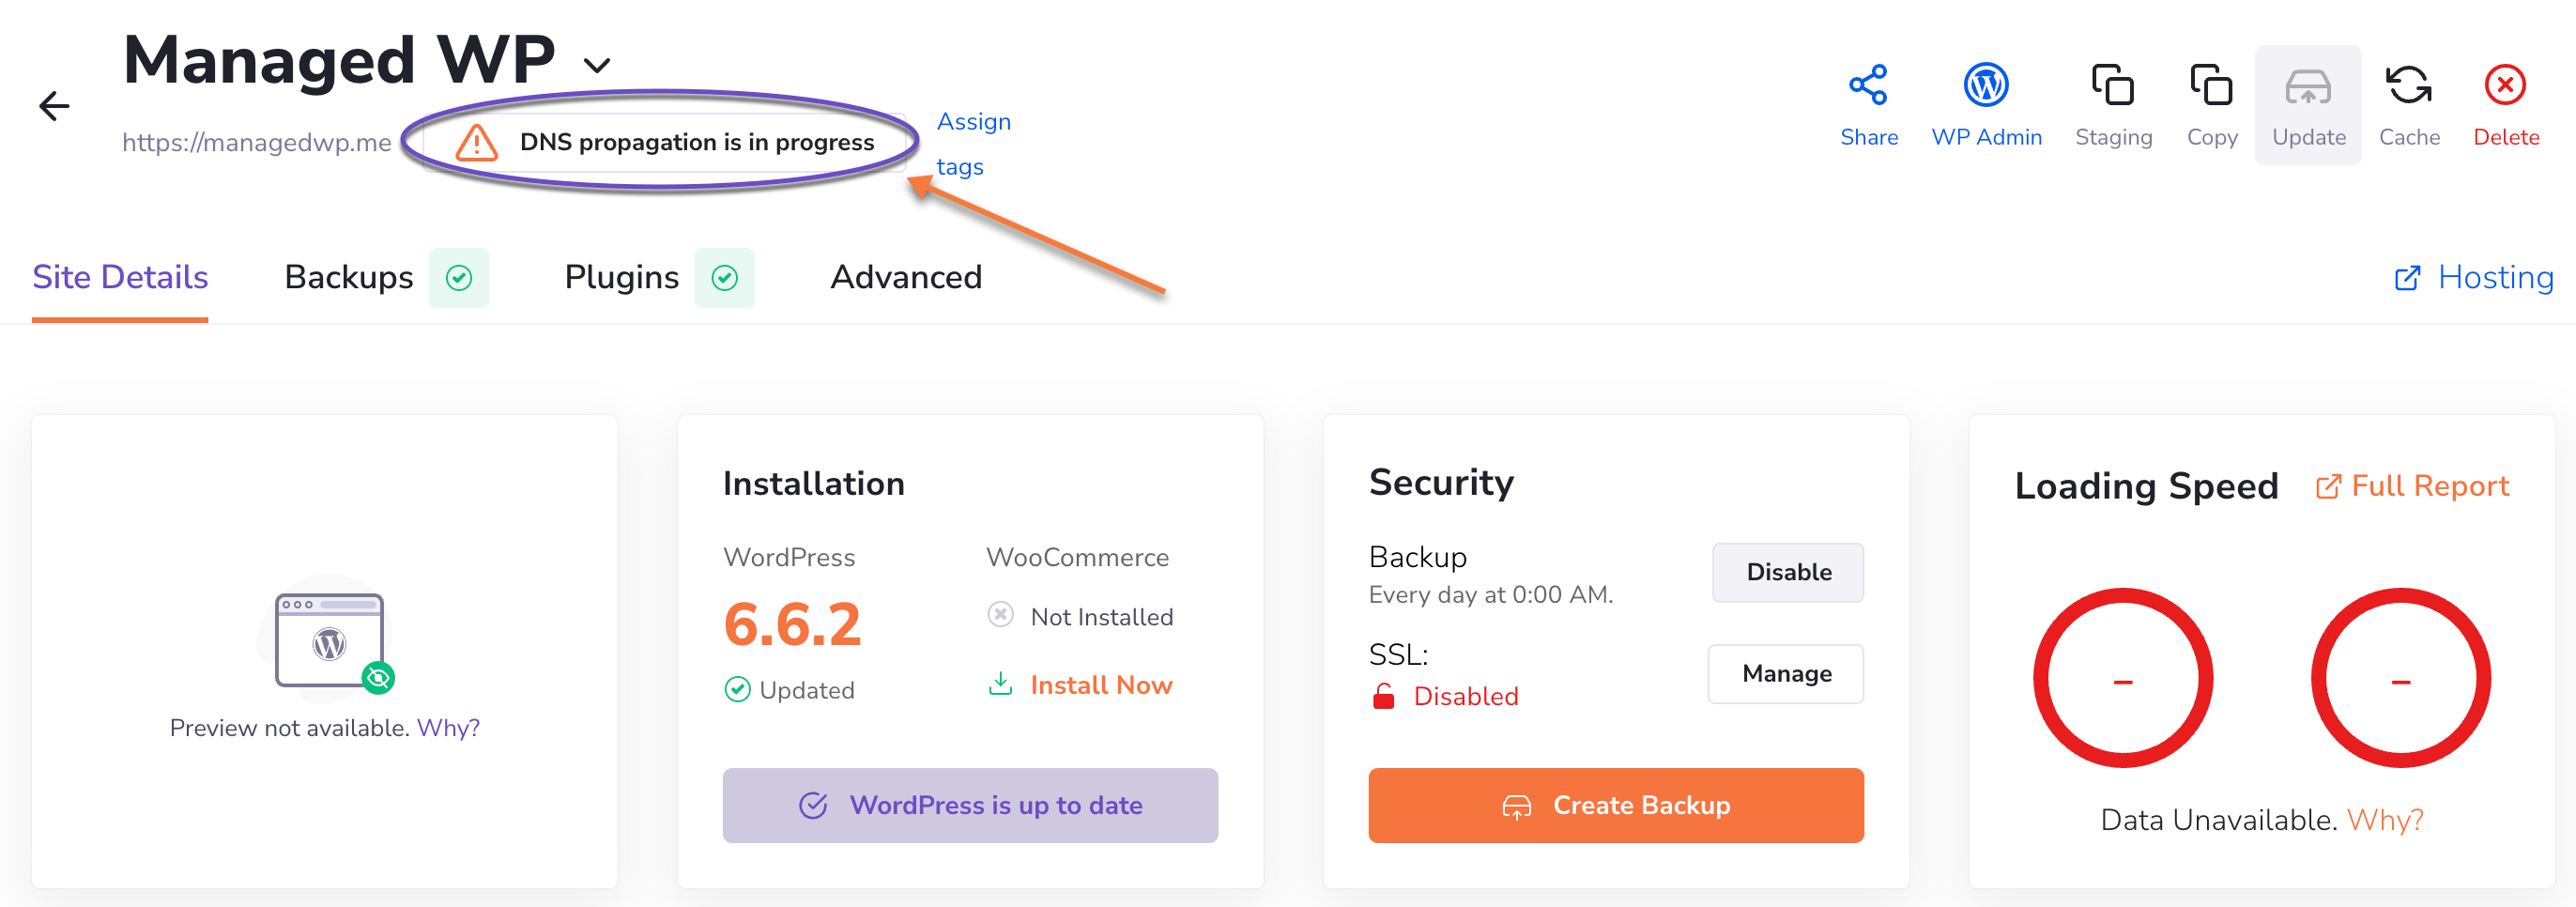
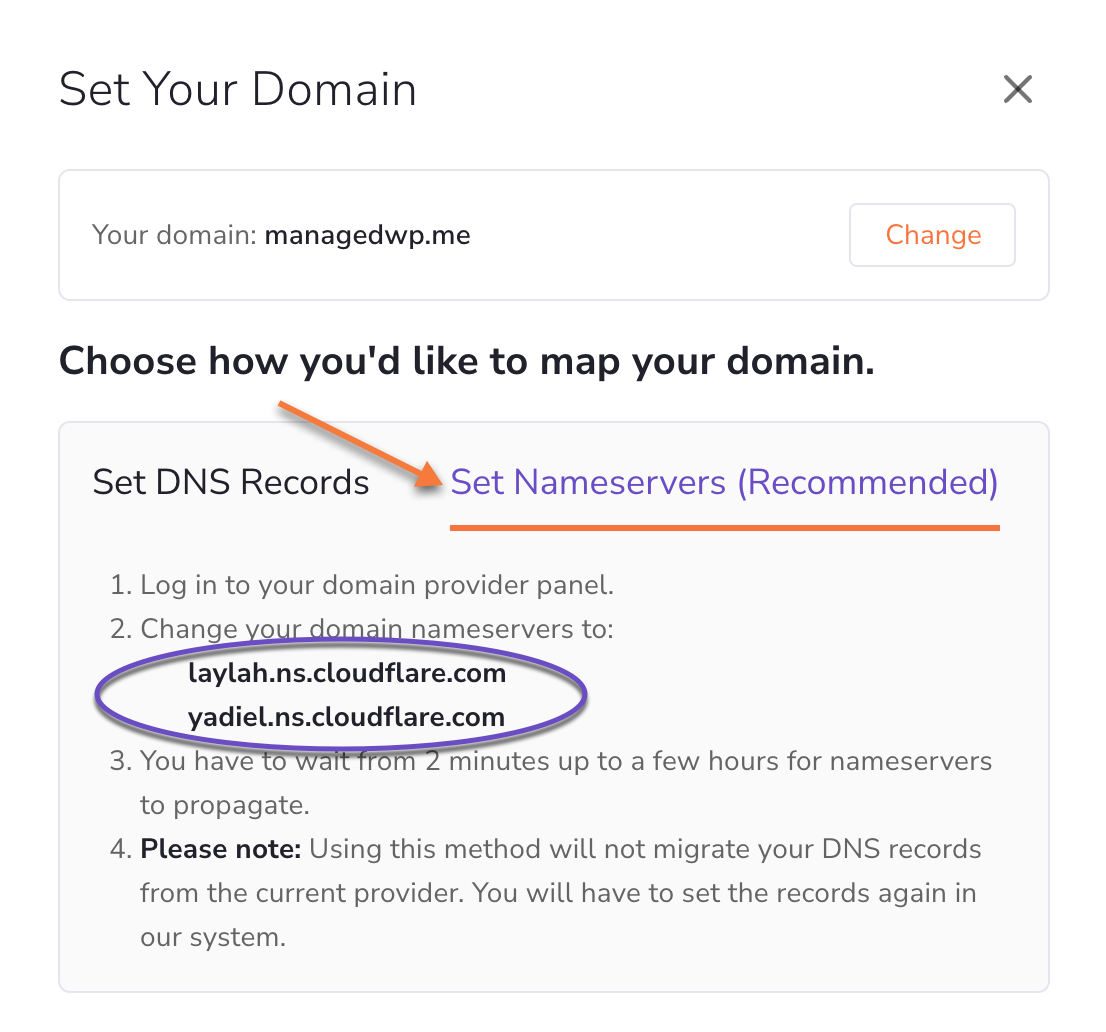
Step 3) Click on it and select the Nameservers tab to retrieve the Cloudflare name servers records to which you should point your domain.
That’s it! Now you know how to retrieve the Cloudflare nameserver records for your WordPress site so you can point your domain to your Managed WordPress Hosting service.
Next, we’ll show you how to point your domain to the specified nameservers from your domain registrar.
How to Change the Nameservers for Your Domain with ChemiCloud
Step 1: Go to chemicloud.com/login and log in to your ChemiCloud customer account.
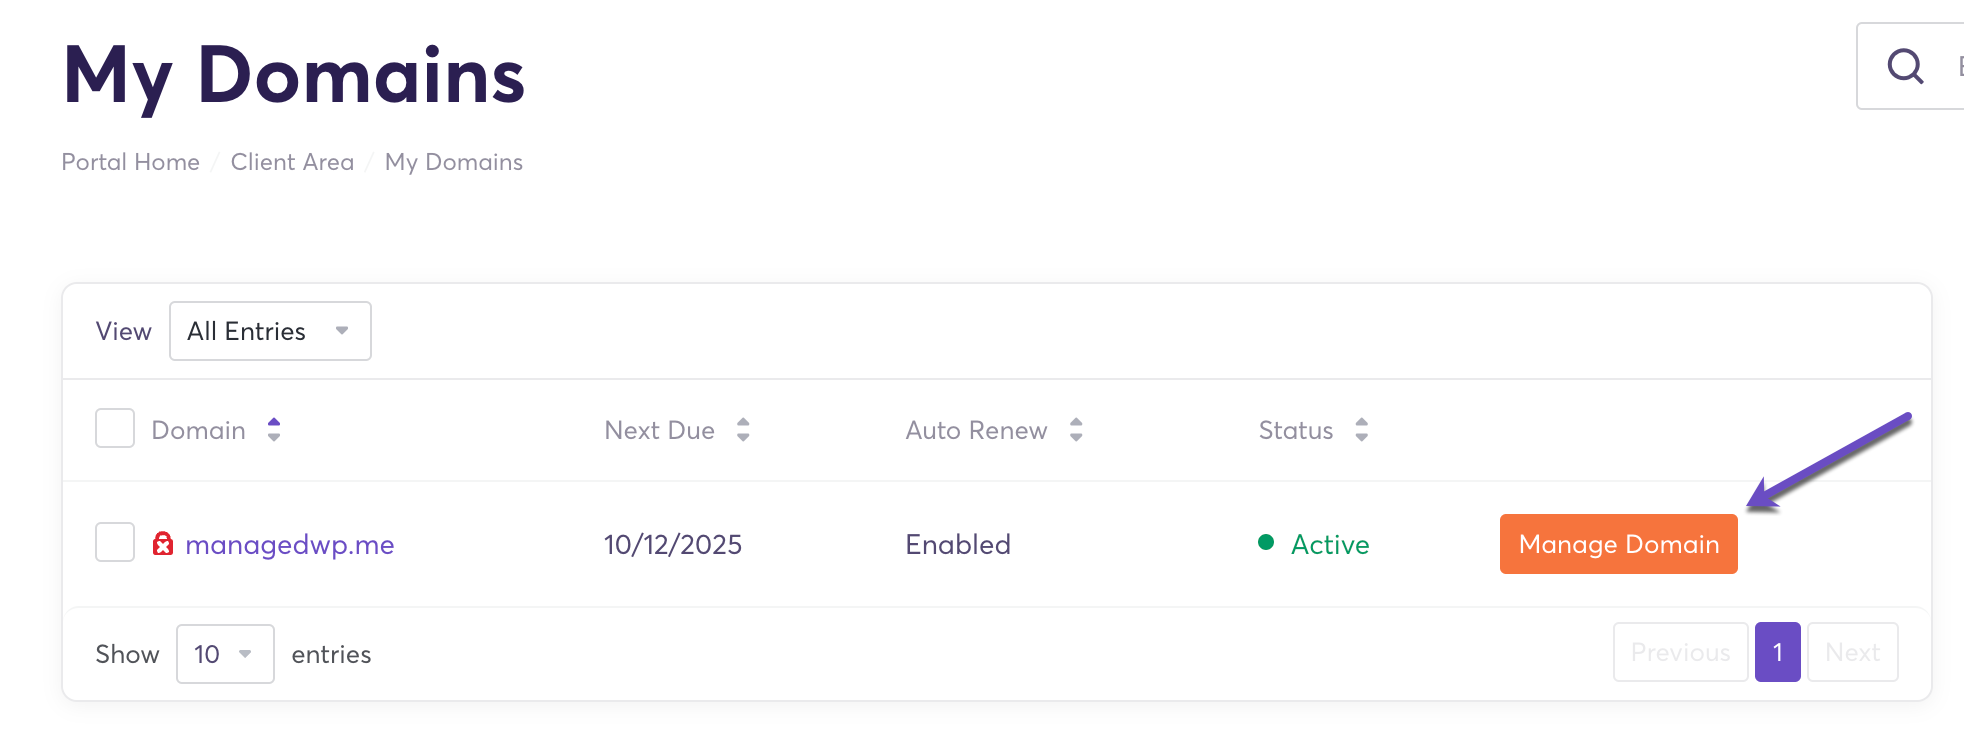
Step 2: In your Client Area Dashboard, click the “Domains” icon located on the left-hand side menu.
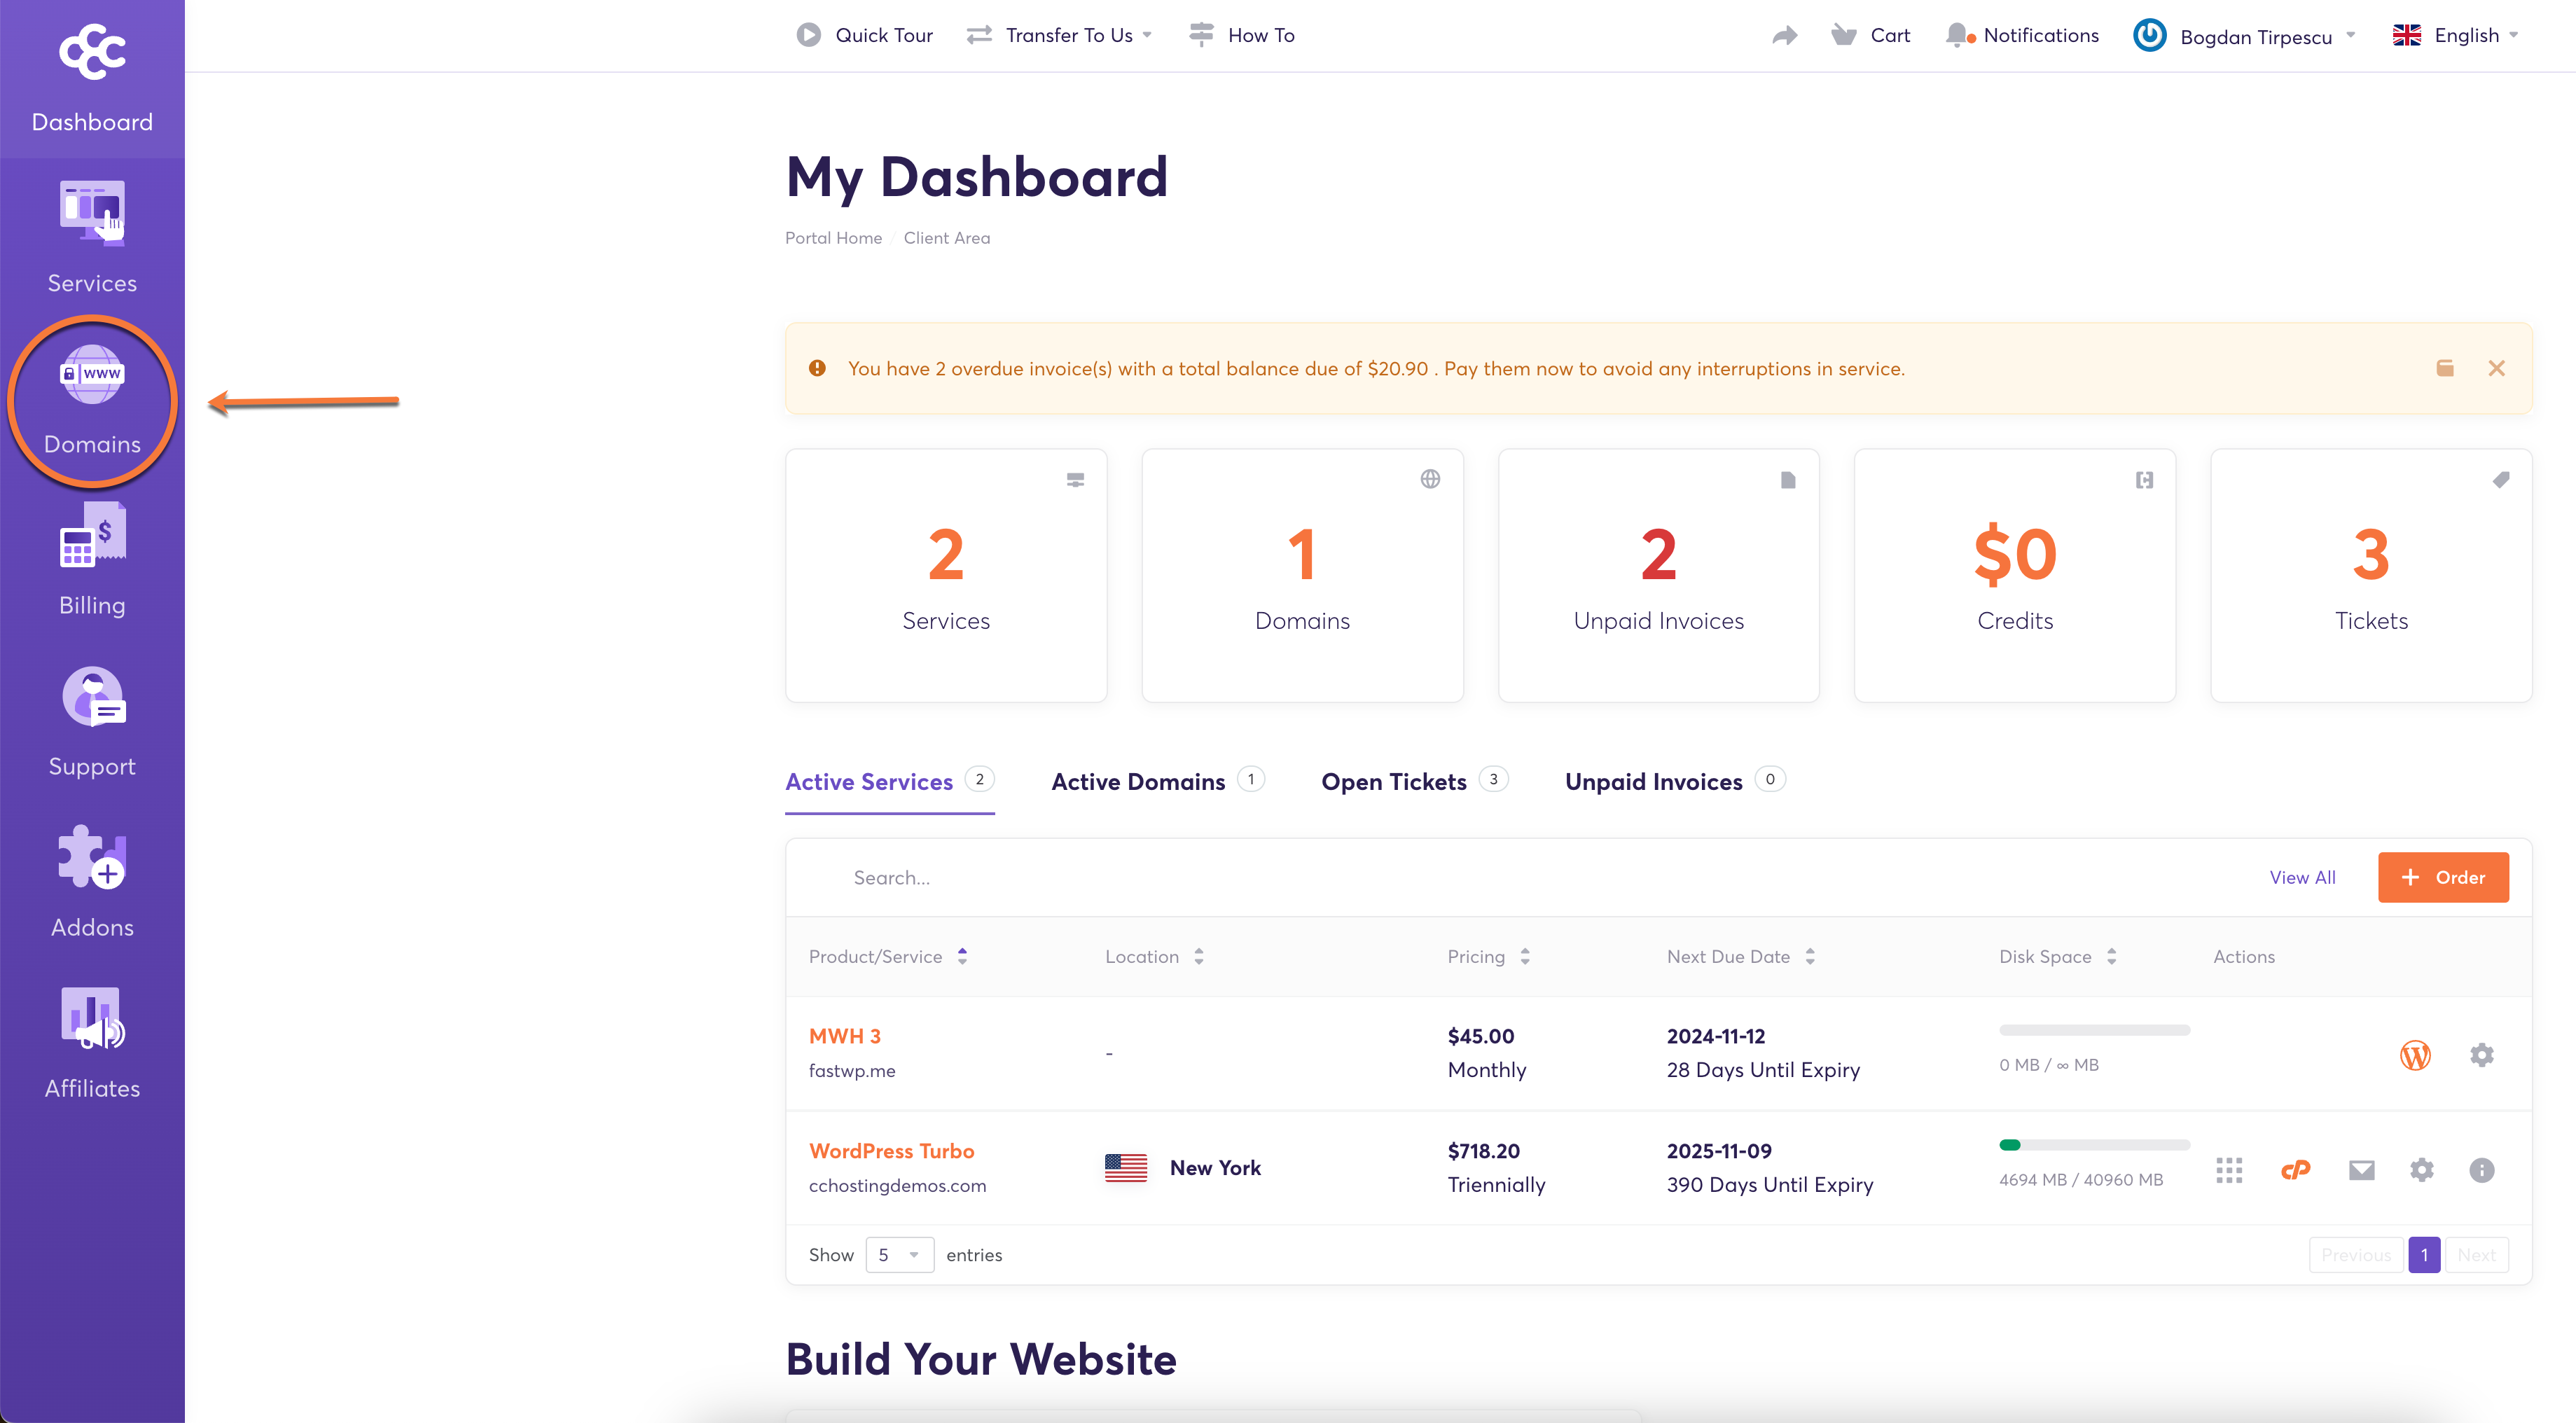
Step 3: From the list, locate the domain you want to manage and click the “Manage Domain” button.
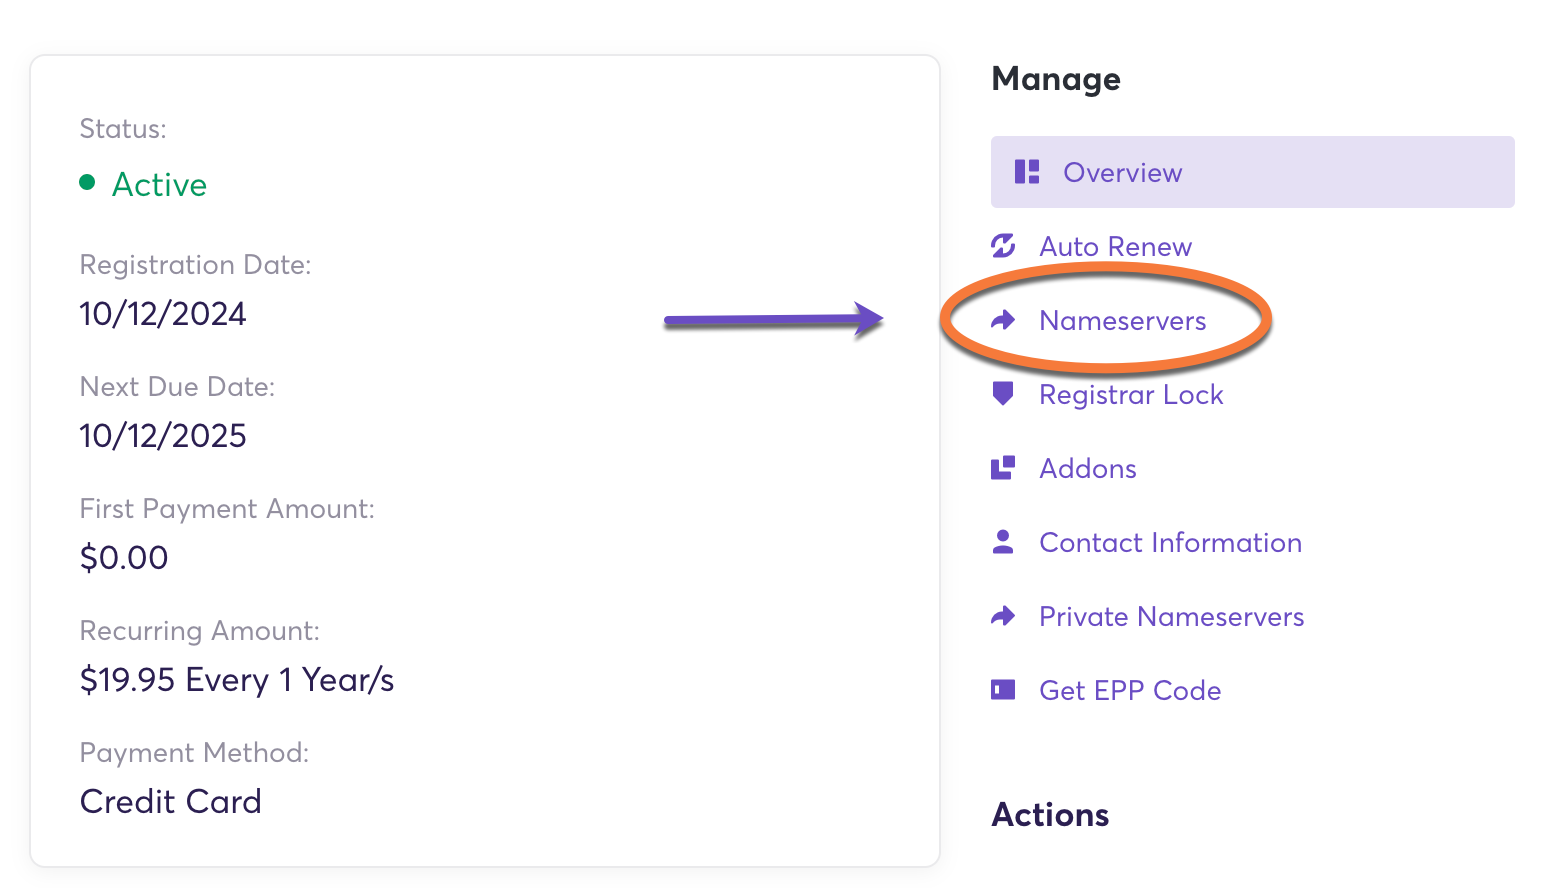
Step 4: In the “Manage” action menu on the right-hand side, click on the Nameservers option.
Step 5: Select the “Use custom nameservers” option and enter the nameservers you wish to use for your domain.
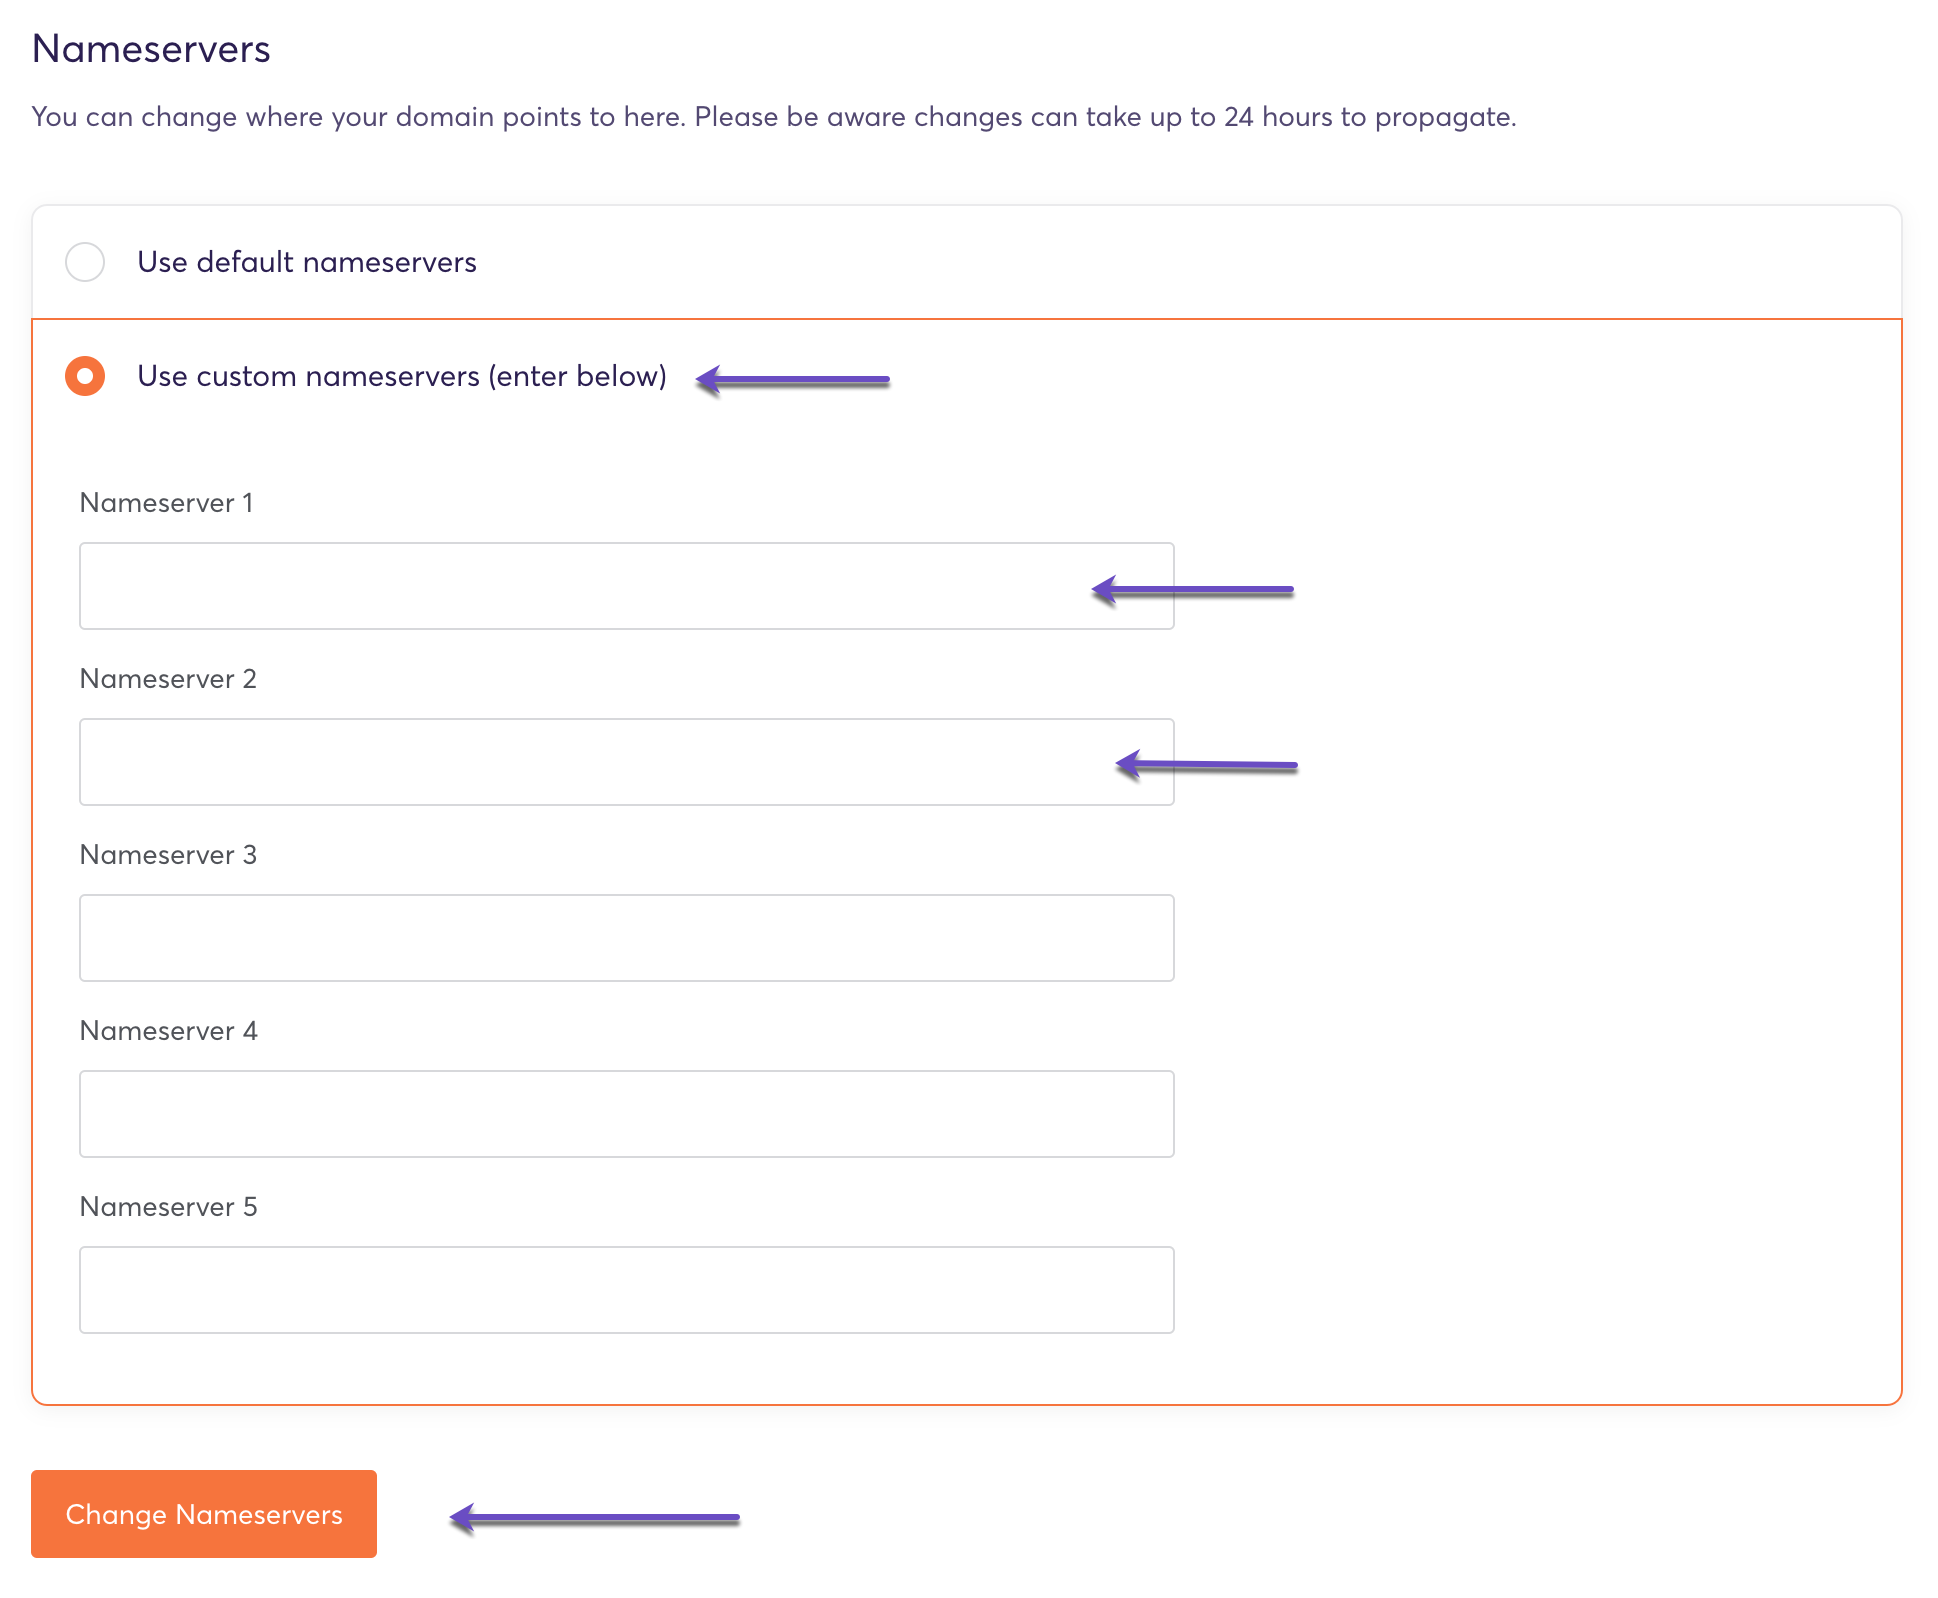
Step 6: Click the “Change Nameservers” button to apply the new nameservers.
Please note that it can take up to a few hours for the nameserver changes to fully propagate worldwide. While it often takes just a few hours, it’s good to be aware of this timing. You can use a DNS propagation checker to monitor the global propagation status.
That’s all! You now know how to change the nameservers for your domain registered with ChemiCloud.
How to Change the Nameservers for Your Domain Registered Elsewhere
In this tutorial, you’ll learn how to change the nameservers for your domain registered with a different provider.
- How to change your domain’s name servers at Namecheap
- How to change your domain’s name servers at PorkBun
- How to change your domain’s name servers at HostGator
- How to change your domain’s name servers at GoDaddy
- How to change your domain’s name servers at Bluehost
- How to change your domain’s name servers at IONOS
- How to change your domain’s name servers at 123-reg
- How to change your domain’s name servers at Hostinger
- How to change your domain’s name servers at SiteGround
- How to change your domain’s name servers at WordPress.com
That’s it! Now you know how to change your domain’s nameservers with different registrars and set the Cloudflare nameservers for your WordPress site, allowing you to point your domain to your Managed WordPress Hosting service.