If you have ever used a site like GTMetrix to analyze the performance and optimizations on your website, you’ve probably seen a suggestion that you Use cookie-free domains. When you click a link in Chrome, it sends a request to a URL for that data along with some response headers. Inside of those response headers may be instructions for your browser to set a cookie. These can be used for various things, like tracking, sessions (like in a shopping cart), comments, and more.
What Are a Cookie-Free Domains?
A cookie free domain, on the other hand, is a domain that doesn’t send a command to your browser to store cookies. Think about the content on your website. Of everything on the site, how much of it needs to interact with a user in a way that your browser would need to remember them? Probably not a lot of it. This means you can shift your static assets, like CSS files, images, and video to a different sub-domain to reduce the load time on the main website. It makes your website a little bit faster. Pretty neat trick, right?
How To Setup Cookie-Free Domains in WordPress
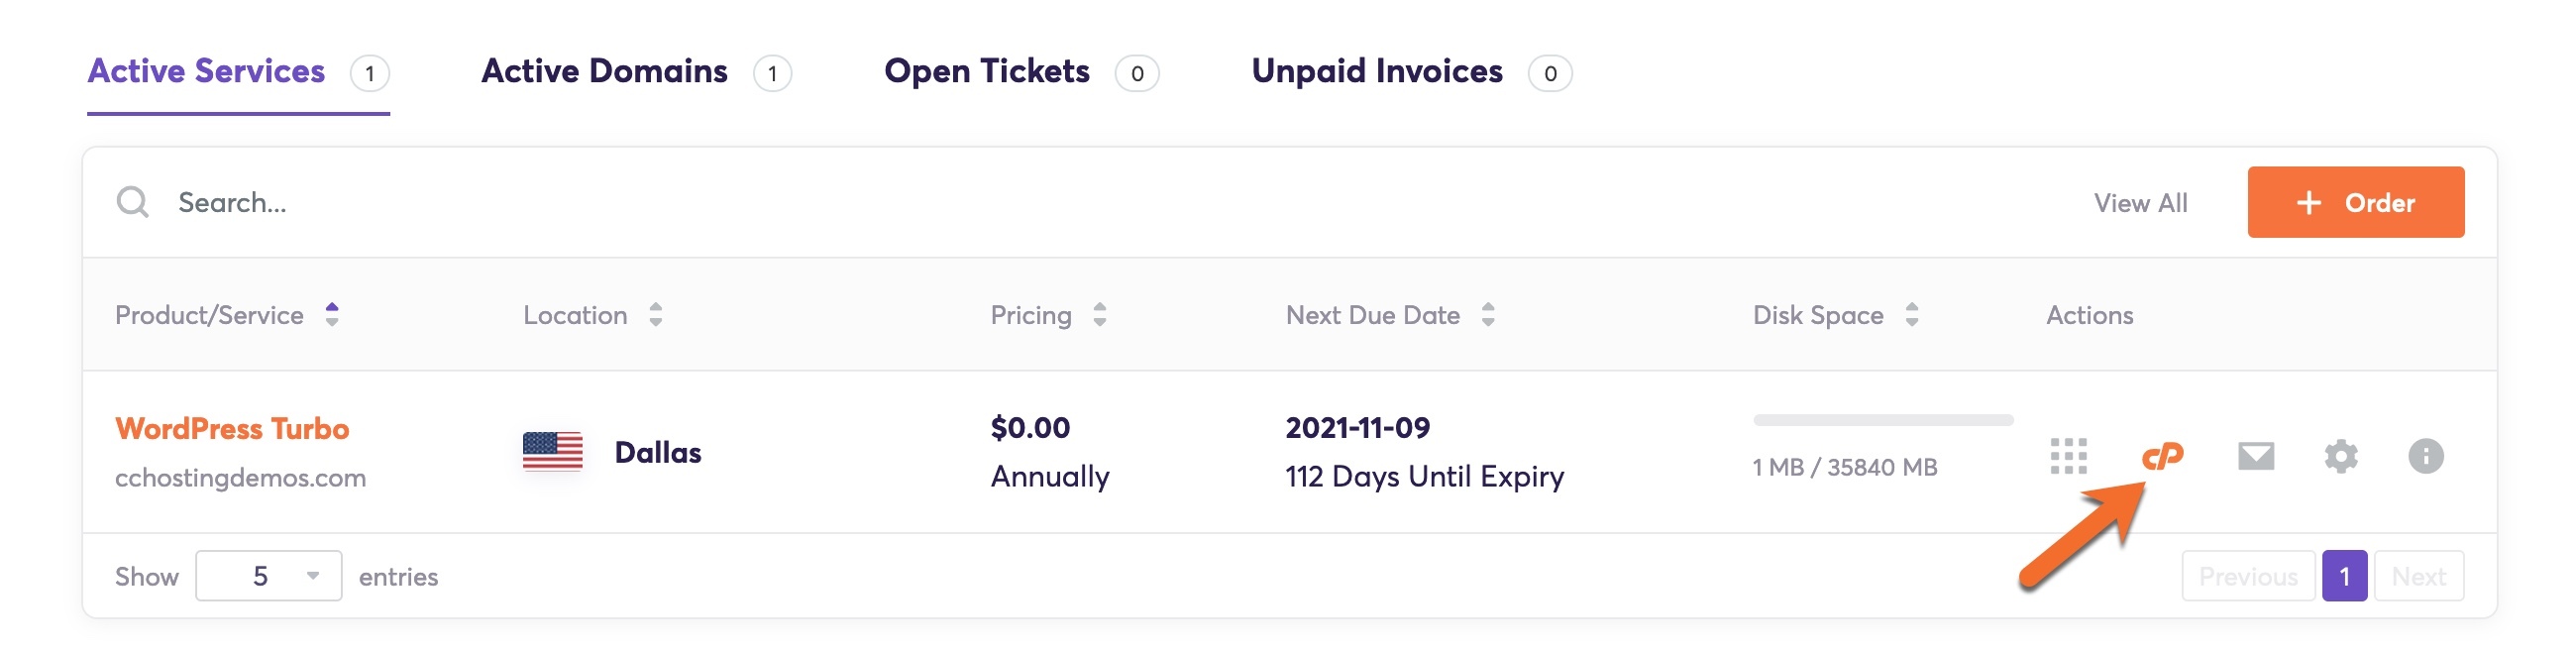
Step 1: Login to your cPanel. There’s a lot of ways to do this, but the sure fire easiest way is to login to your Client Area, then open your cPanel.
Step 2: Navigate to the Domains area and click Subdomains.

Step 3: To have your static content, such as CSS Stylesheets, Images, and Videos served on a subdomain, you’ll need to create the subdomain first. In this case, we’re going to call our subdomain ‘static’, without the quotes around it.
You also need to point it to the directory where your WordPress content is stored. You can do this while creating the subdomain.
First, give the subdomain your name.
Second, ensure the domain for which you are creating the subdomain matches.
Third, in the directory path where your WordPress installation is installed.
For example, my WordPress installation is in my public_html, then inside of a folder called cookiefree. And by default, the wp-content folder is where WordPress stores content. This means the directory path is /public_html/cookiefree/wp-content. As shown below:

If you installed your WordPress into the root of your public_html folder, then your directory path (for example) would be:
/public_html/wp-content
Step 4: Now you need to update your wp-config file and tell it where to look for the files inside the wp-content folder. To do this, return to your cPanel and in the Files area, open the File Manager.

Once the file manager opens, navigate to the directory where your WordPress configuration is installed.
Once you have reached the folder in which your WordPress installation resides, look for the wp-config.php file and click it once to highlight/select the file.

Next, click the Edit icon at the top of the cPanel File Manager.

You will see a warning like the one below:

95% of users can proceed and click Edit.
A new tab in your browser will spawn, and you will see the codebase that outlines the structure of your wp-config file. Don’t worry if this seems overwhelming; we’re only adding two lines to this file, not editing anything else.
Scroll down to the bottom of the file and paste these two lines of code in:
define(“WP_CONTENT_URL”, “static.yourwebsite.com”);
define(“COOKIE_DOMAIN”, “www.yourwebsite.com”);
Be sure to replace ‘static’ with the name of your subdomain and ‘yourwebsite.com’ with your domain name and corresponding TLD.
Your entry should look similar to the one below:

Now you need to save your changes. To do this, click the blue Save Changes button in the top right corner of the Editor window.

Step 5: This step is semi-optional.
If you have just installed WordPress and your site doesn’t have any content in it, i.e. Posts or Pages, you can skip this step. You can close your cPanel and the File Manager and continue on your way to creating your website in WordPress! Huzzah!
Tired of slow WordPress hosting? We use LiteSpeed + QUIC.cloud Enterprise CDN to deliver content almost instantly. ⚡ Try our Managed WordPress Hosting plans for just $1!
If your site does have content in it, please follow the steps below.
Next, return to the browser tab in which the File Editor is open with the wp-config file still open. Look midway (approximately) through the file for a section called * WordPress Database Table prefix” and note the table prefix that is listed in the line below. In my example, the table prefix is as follows:

Please make a note of this prefix because you’ll need it for Step 6!
Step 6: Because you already have content in your WordPress site but are now using a subdomain to serve your static content, you’ll need to update the database table to instruct WordPress of this change.
Now, the change you need to make is to use a tool called phpMyAdmin, which is located in your cPanel. phpMyAdmin is a great tool but can be dangerous if misused. It’s essential you follow the instructions below carefully so you don’t damage your WordPress Site by mistake.
First, take a backup of your website. It’s always essential to make a backup of your site before making changes to the database in WordPress. You can use your preferred method for this, such as using Softaculous or JetBackups.
After you’ve made your backup, return to the browser with the File Manager Editor open. If you’ve taken note of your Database Table Prefix, as mentioned above, you can close the editor by clicking the Close button in the top right corner. This will return you to the File Manager. You can also close this tab in your browser.
Now, you should have your cPanel open. Navigate to the Databases area and click the phpMyAdmin option to open the application.

Your phpMyAdmin should look something like this when opened:

Let’s examine the layout of this real quick. On the left side, we have a list of your databases. If you expand the database by clicking the + next to it, you can see a list of all the tables in the database.

Since you have content in your database, as you have existing posts and pages, we will be modifying the posts table, which is prefixed for my installation by wpbn_.
The prefix of your database will 100% be different than mine. Mine was randomly named as part of the Softaculous installation process. It was essential to notate your database prefix earlier while you had your wp-config file opened. However, you can also get the prefix by opening phpMyAdmin, as you see.
Next, we need to run a command inside of phpMyAdmin. However, we need to select the table in which we want to run this command first. To do that, click the _posts table with your mouse.
Your phpMyAdmin will open the _posts table. You can tell you have your posts table open because at the top of phpMyAdmin, it will indicate to you the Database and Table you’re presently using:

Also, on the left, you will see a grey selection covering the table you’re editing!
Next, click the SQL tab at the top of the page.

When the page opens, you may see some text in the text box, just like in the image above. Simply click into this text box, and using the backspace key on your keyboard, delete the text until there’s nothing there except the 1 to the left of the text box.
We need to paste a command instructing WordPress that you’ve decided to use a subdomain for all of your static content. This command is below:
UPDATE wp_posts SET post_content = REPLACE(post_content,'www.yourwebsite.com/wp-content/','static.yourwebsite.com/')
Since you’ll need to customize this command a bit, let’s break down what this command does.
UPDATE wp_posts tells phpMyAdmin we are executing an UPDATE command on the table called wp_posts
SET post_content = REPLACE (post_content,’www.yourwebsite.com/wp-content’,’static.yourwebsite.com/’) tells phpMyAdmin we are making changes to the row post_content and the change we are making is changing the URL.
It is VERY important you update the command with the corresponding table prefix from your phpMyAdmin. For example, to run this command on my WordPress installation, the command would look like this:
UPDATE wpbn_posts SET post_content = REPLACE(post_content,'www.cchostingdemos.com/wp-content/','static.cchostingdemos.com/')
When pasted into phpMyAdmin, it looks like this:

After pasting your query into the box (modified with your table prefix and domain name) you can simulate the query by clicking the Simulate Query button in the bottom right. This will present to you simulated results to ensure the query runs without issue. Or, if you’re ready to execute the command, just click Go.
Your phpMyAdmin page will look similar to the one below:

Once the command has run successfully, that’s all you need to do! Your database will be updated to serve static content from your new static subdomain and your site should appear to be noticeably faster!
We hope you enjoyed this KB article. If you did, you’d enjoy our hosting even more!
Check out our Managed WordPress hosting plans and have your website migrated today!
Thank you, I made things correctly. I hope this help a lot on soarpass.com, its been days having trouble with website speed test. I really appreciate these tutorial.
Thanks, we have updated the KB!
Awesome post. Thanks a lot.
Bug Found:
define(“WP_CONTENT_URL”, “http://static.yourwebsite.com”);
define(“COOKIE_DOMAIN”, “www.yourwebsite.com”);
This results in error with the “http://static.yourwebsite.com
Resolution: works well without the “http” prefix
define(“WP_CONTENT_URL”, “static.yourwebsite.com”);
define(“COOKIE_DOMAIN”, “www.yourwebsite.com”);
Ngl I legit had zero clue how to setup the cookie free domain myself but this was definitely helpful. Thanks a ton 👌