What Is a Staging Environment?
A staging environment is a copy of your website in a production state where you can preview any changes, test upgrades, plugins, or themes before you apply them on your live website. This prevents any downtime or unexpected errors on your live website.
If you are a ChemiCloud customer, we’ve got you covered. Our new Staging feature will help you create and manage staging copies with one just click.
Creating a Staging Environment
We will be taking an example of a WordPress installation. We will create a staging on a subdomain.
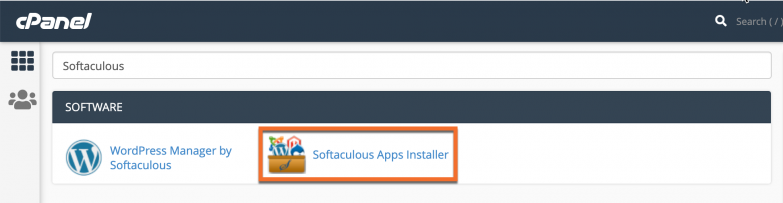
Step 1) Log in to cPanel
Step 2) Scroll down to Software and choose Softaculous Apps Installer
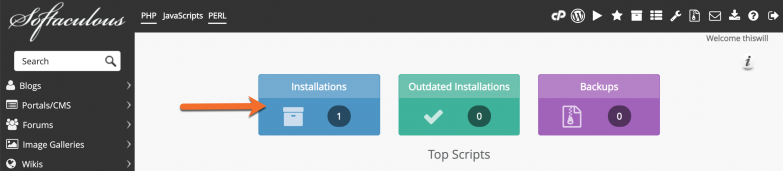
Step 3) Once you’ll see the Softaculous dashboard, click on the Installations box.
Step 4) Choose the installation you want to create staging then click on the Create Staging button.
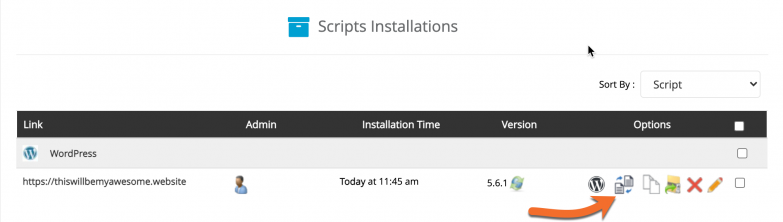
In case you do not see any installations listed, it means that you have manually installed your application and you need to import it in Softaculous. Please follow the instructions in this guide.
Step 5) Choose the installation URL on which the staging will be created. In our case, we’ve selected the staging.thiswillbemyawesome.website subdomain from the dropdown menu. The protocol should be https://
Under the Site Settings, you should disable the search engine visibility. If checked then this shall discourage search engines from indexing the staging site in order to avoid duplicate content.
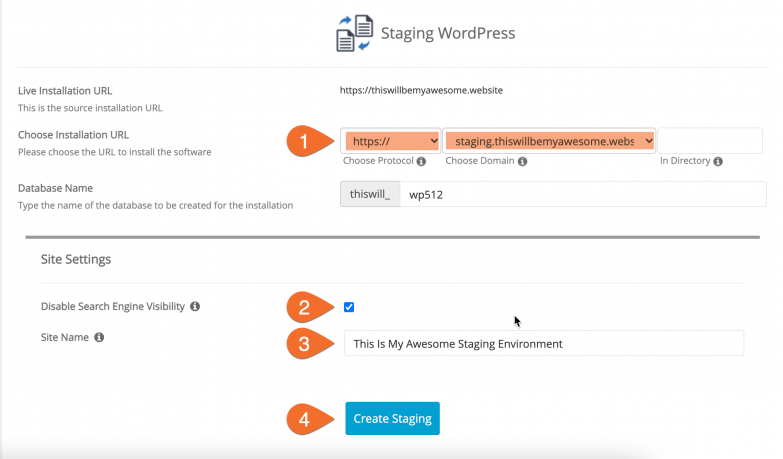
Step 6) Finally, click on the Create Staging button.
The time taken may vary in accordance with the size of your website, so please be patient.
Once the staging has been created, you’ll see a successful message like the one in this screenshot:
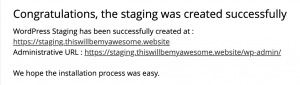
That’s a wrap !! You can now use the staging environment you’ve just set up.
Push to Live
Now that you’ve worked on your website in the staging environment, it has come the time to push any changes in production, which means to push any changes to the live website. In order to do so, please follow the steps below:
- Log into cPanel
- Scroll down to Software and choose Softaculous Apps Installer
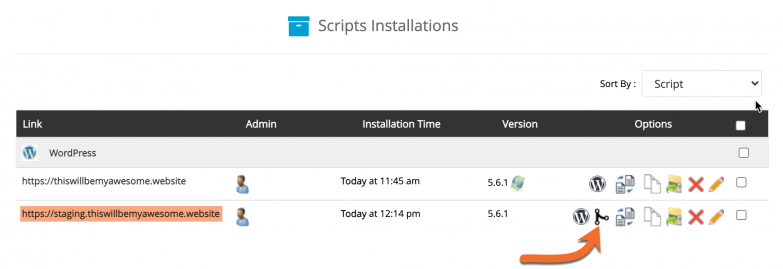
cPanel > Software > Softaculous - Once you’ll see the Softaculous dashboard, click on the Installations box.
Softaculous > Installations - Choose the Staging installation you want to push to live and click on the Push To Live button corresponding to it.
5. On the next page, you will see two options to push the installation to live.
- Default options: this will replace all the files of your live installation with the ones in Staging installation and will erase the live database and import the database from your staging installation.
- Customize: with this option you will be able to choose files, full database, and tables structures, and tables data you want to push.
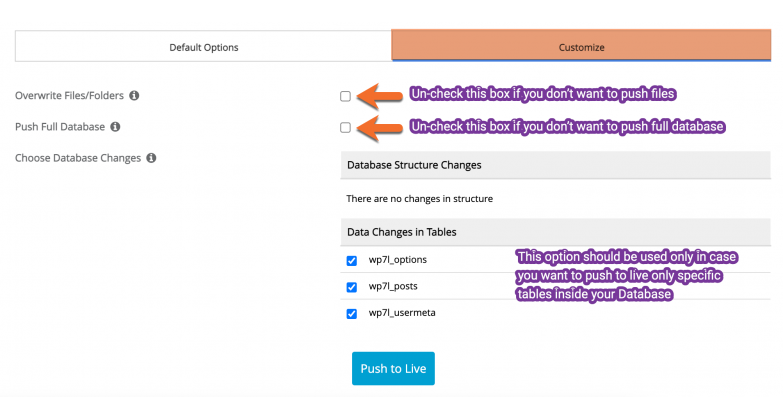
6. Click on the Push To Live button.
That’s it !! Your staging changes have been pushed to your live website. You will receive the pushed installation details via email (if the emails are enabled).
It was such a great article which was on the environment for wordpress. To set up a staging environment for WordPress, you can follow these general steps:
1.Choose a Hosting Solution
2.Duplicate Your WordPress Site
3.Update Site URLs
4.Secure the Staging Environment
5.Test and Modify
6.Sync Changes
7.Regular Maintenance
These are some points which I wanted to include in your article. Readers, If you want to develop your wordpress website, you can visit an IT company like Alakmalak technologies. They have 17+ years of experience in this field.