In this tutorial, we will show you the steps on how to easily register private nameservers for a domain name registered with Google Domains.
What are Private Nameservers?
Private nameservers allow you to set up nameservers for your own domain of choice. Let’s say you are operating a web hosting business and don’t want people to Google our nameservers and find out you really resell hosting thru us. Using private nameservers, you can avoid just this problem.
Having your own nameservers also gives you a more professional appearance than just plain nameservers, for example. ns1.bobshostingshack.com is pretty professional compared to our default nameservers. 😏
How to Setup Private Nameservers at Google Domains
Step 1: Click here to open the Google Domains page. In the top right corner of the webpage, click the Sign In button.

You will be prompted to login to your Google Account:
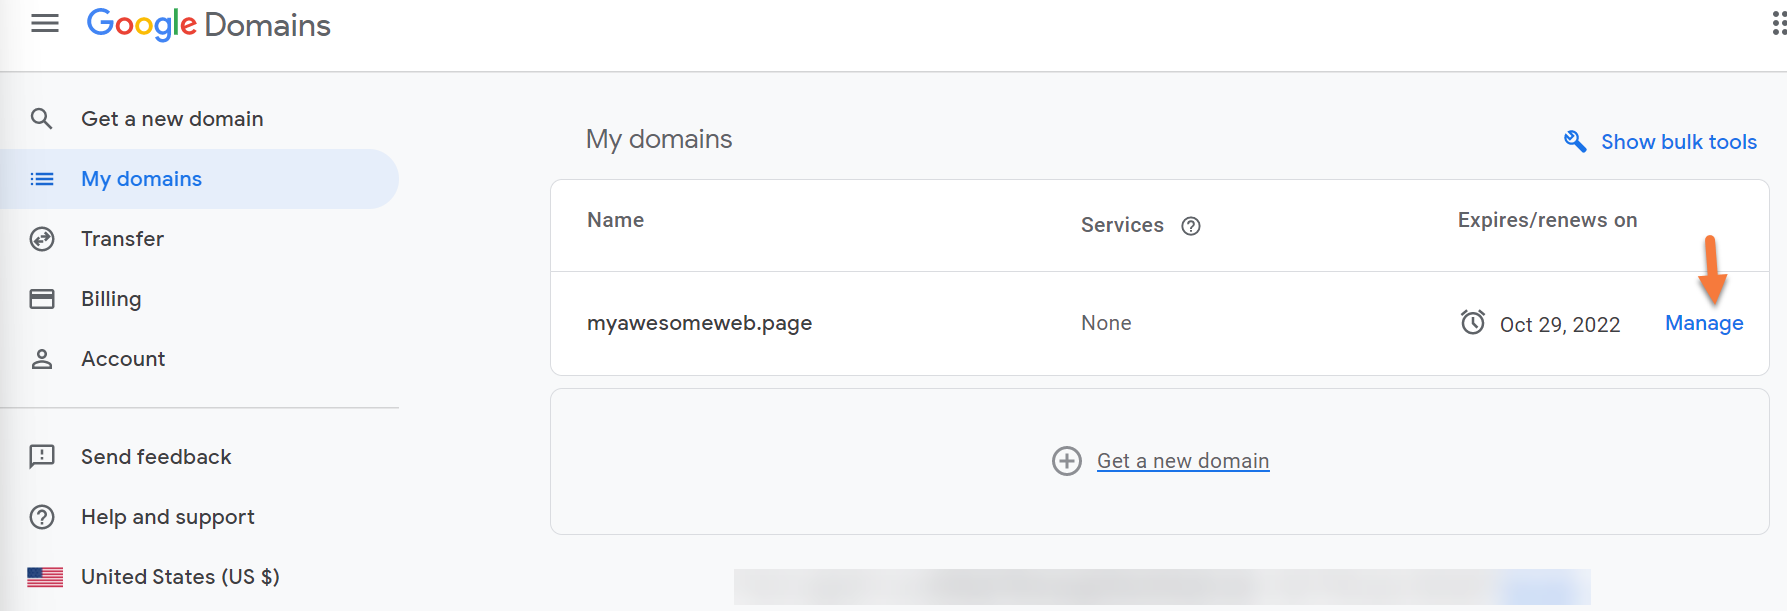
Step 2: After signing into your Google Account, your Google Domains page will load and you will see a list of all domains registered in your Google Domains account.
Find the domain for which you wish to manage the Nameservers and click Manage to the right of the domain listing.
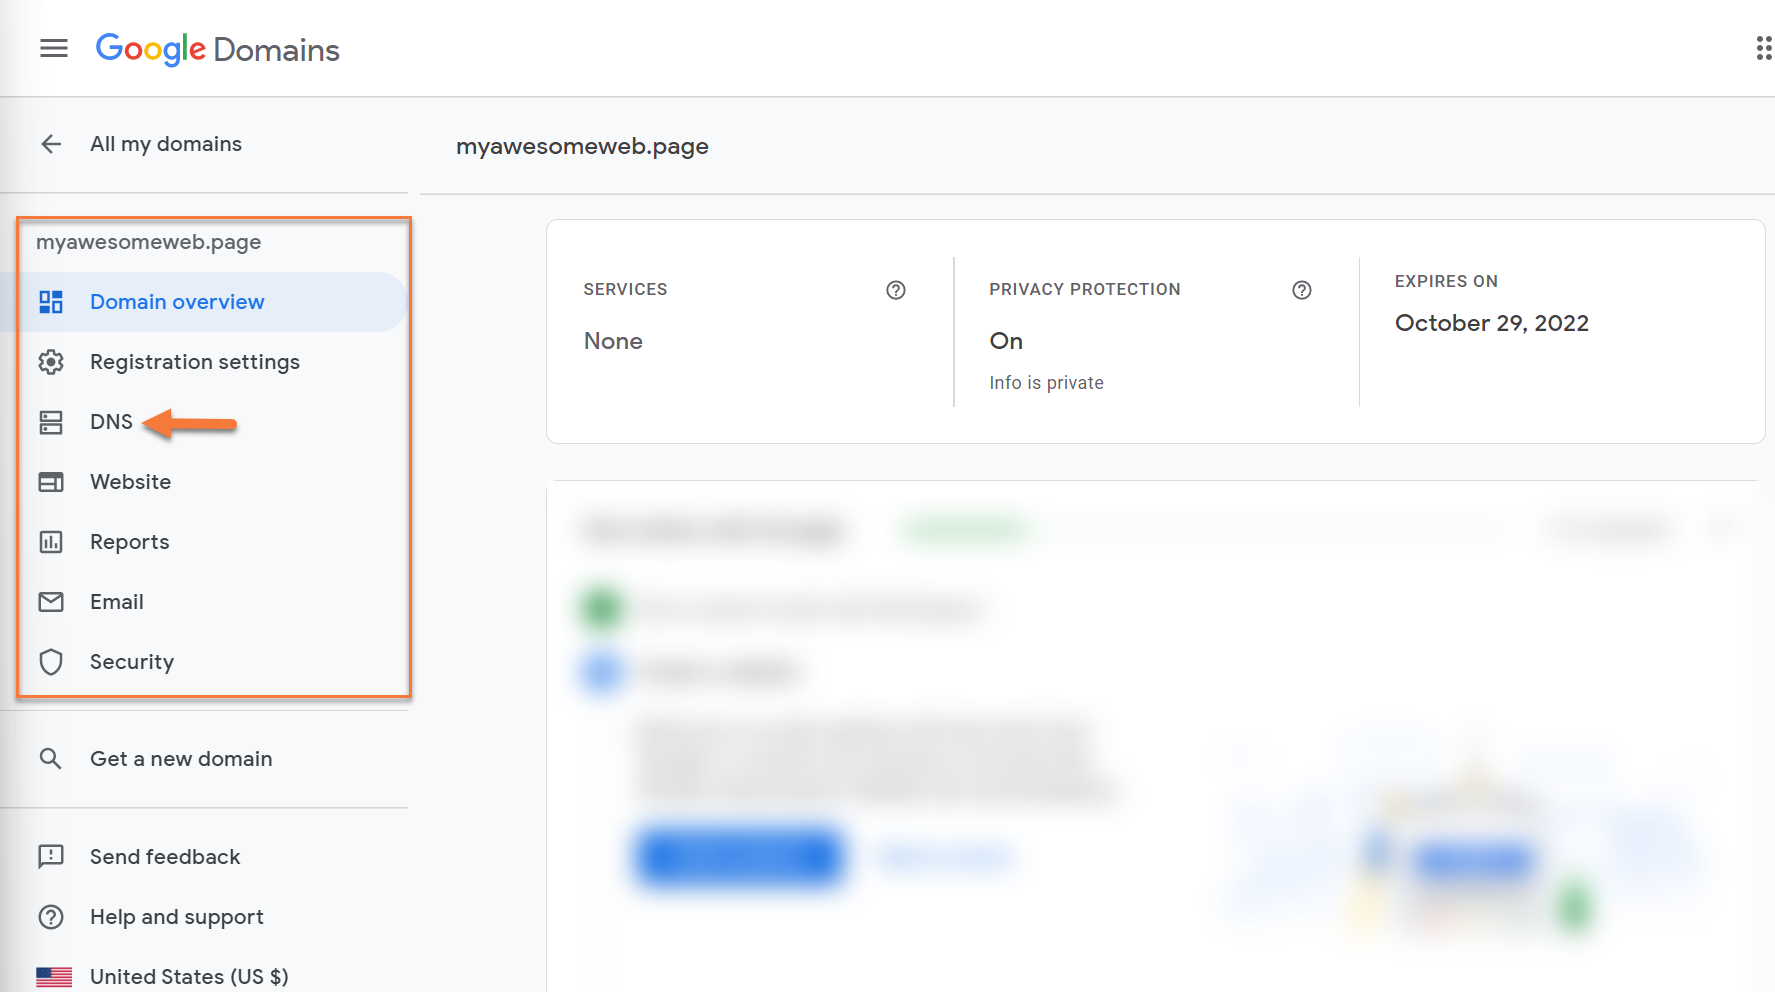
Step 3: The Domain Management page will load. Look on the left side of the page and you will see a list of options.
Click DNS.
Step 4: Once the DNS Management page has loaded, look in the top right corner for the Global DNS settings button. Click this to open the configuration area.

Step 5: In order to use custom name servers, you must first setup the Glue Records for the domain. Glue records are used to associate a name server with an IP address. To do this, click Manage Glue Records:

Step 6: Once the Glue records page opens, you will have the option to enter your custom name servers.

First, you need to create 3 blank records. To do this, click the create new record button 3 times. Your blank glue records area should look like the image below:

Second, you’ll need to enter the record name for your custom name servers in the Host Name Field. For example, if your nameservers are going to be ns1.yourdomain.tld, ns2.yourdomain.tld, and so forth, your glue record host names will look like the image below:

Third, you need to give each name server an IP address. The corresponding IP address for each name server can be found in your Welcome Email.
On the Glue records page, click the Add IPv4 address button for each name server. Your screen should look like the one below:

In the IPv4 Address field, enter the IP address for each name server and click the save button.
You will be returned to the Glue records page and the records for your domain should look like the image below:

Now your Glue Records are established. Congrats! We’re almost done.
Step 5: Next, you need to change the name servers for the domain. To do this, return to the Global DNS Settings by clicking the back button in the top left. .
Note, this is not the back button in your browser, but the back button in the settings.
See below:

Once the DNS settings page loads, click “Custom name servers” at the top of the page:

Step 6: The custom name servers area will open. Here you will enter the name servers you created in the earlier step.
Note: You will need to click the “Add another name server” button to add a field for the 3rd name server.
Your name server fields should look similar to the ones below after you’ve entered your name servers.
Thanks a lot, its work..
Last step is missing: “Set Custom name servers to ACTIVE” as last image shows Default name servers active.