DomainKeys Identified Mail (DKIM) is an email authentication method designed to detect email spoofing, using cryptographic techniques to verify that an email was sent and authorized by the domain owner.
Table of Contents
More About DKIM Records
Functioning: Involves attaching a digital signature to email headers.
Purpose: Helps in preventing email phishing and spam.
Implementation: Requires setting up DKIM records in DNS.
Complementary Technologies: Often used alongside SPF and DMARC for enhanced email security.
A Step-by-Step Guide to Adding a DKIM Record in cPanel
To enable DKIM in cPanel, follow these steps:
- Log in to your cPanel account
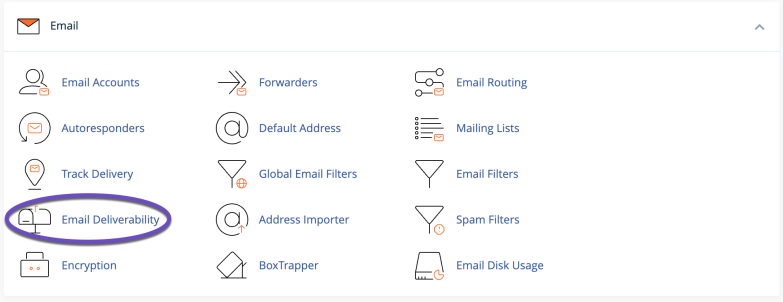
- Click on the “Email Deliverability” icon under the “Mail” section
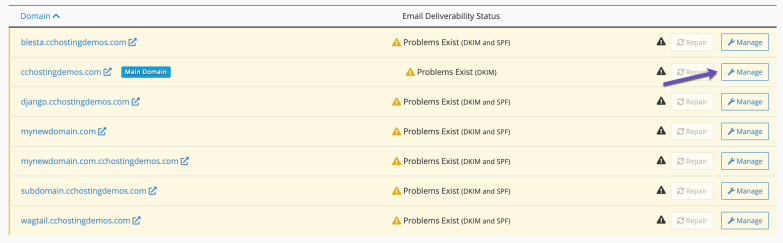
- Click on the “Manage” button next to the email domain for which you want to enable SPF
- Scroll down to the “DomainKeys Identified Mail (DKIM)” section
- Click on the “Install The Suggested Record” button to generate a new DKIM key
- Wait for the DNS changes to propagate, which may take up to 24 hours
Once DKIM is enabled, outgoing emails from your domain will include a DKIM signature that the recipient’s email server can use to verify the email’s authenticity.
Verify DKIM Configuration:
- After adding the DKIM record, it may take some time for DNS changes to propagate across the internet. You can use online DKIM validation tools to verify that your DKIM configuration is correct.
- Test DKIM Signing:
- Send an email from an email address associated with your domain and check the email headers to confirm that DKIM signing is working correctly
That’s it! You’ve successfully added a DKIM record in cPanel to enhance the security and authentication of your domain’s outgoing email messages.
A Step-by-Step Guide to Adding a DKIM Record in Cloudflare
- Log In to Your Cloudflare Account:
- Open your web browser and go to the Cloudflare website (https://www.cloudflare.com/). Log in to your Cloudflare account using your credentials.
- Select the Domain:
- After logging in, you’ll see a list of domains associated with your Cloudflare account. Click on the domain for which you want to add a DKIM record to access its dashboard.
- Go to the DNS Settings:
- In the domain’s dashboard, navigate to the “DNS” tab or section. This is where you can manage your domain’s DNS records.
- Add a DKIM Record:
- To add a DKIM record, scroll down to the DNS records section. Click on the “Add Record” button or a similar option, depending on Cloudflare’s interface.
- Choose Record Type:
- Select “TXT” as the record type. DKIM records are typically TXT records.
- Configure the DKIM Record:
- You will need to provide the following information for the DKIM record:
- Name: Enter the selector for your DKIM record. The selector is usually in the format of
s1._domainkeyor similar. You may need to refer to your email service provider or server documentation for the correct selector. - TTL (Time to Live): Set a TTL value for the record. The default value should work fine for most cases.
- TXT Data: Paste the DKIM public key (DKIM record) provided by your email service provider or server. This key is a long string of characters that starts with “v=DKIM1; k=rsa; p=”.
- Name: Enter the selector for your DKIM record. The selector is usually in the format of
- You will need to provide the following information for the DKIM record:
- Save the DKIM Record:
- After entering the required information, click on the “Save” or “Add” button to create the DKIM TXT record.
That’s it! You’ve successfully added a DKIM record in Cloudflare.