WHMCS is your ultimate companion for reselling web hosting. This guide will help you configure Domain Registrars in WHMCS, which is an important step you should take after installing WHMCS so customers can purchase and register domains from you.
Let’s begin!
You can follow the step-by-step instructions in this article or watch out our video tutorial.
How to Configure Domain Registrars in WHMCS
Step 1: First, log in to your WHMCS Admin. Once logged in, click the wrench in the top right corner, then click System Settings.
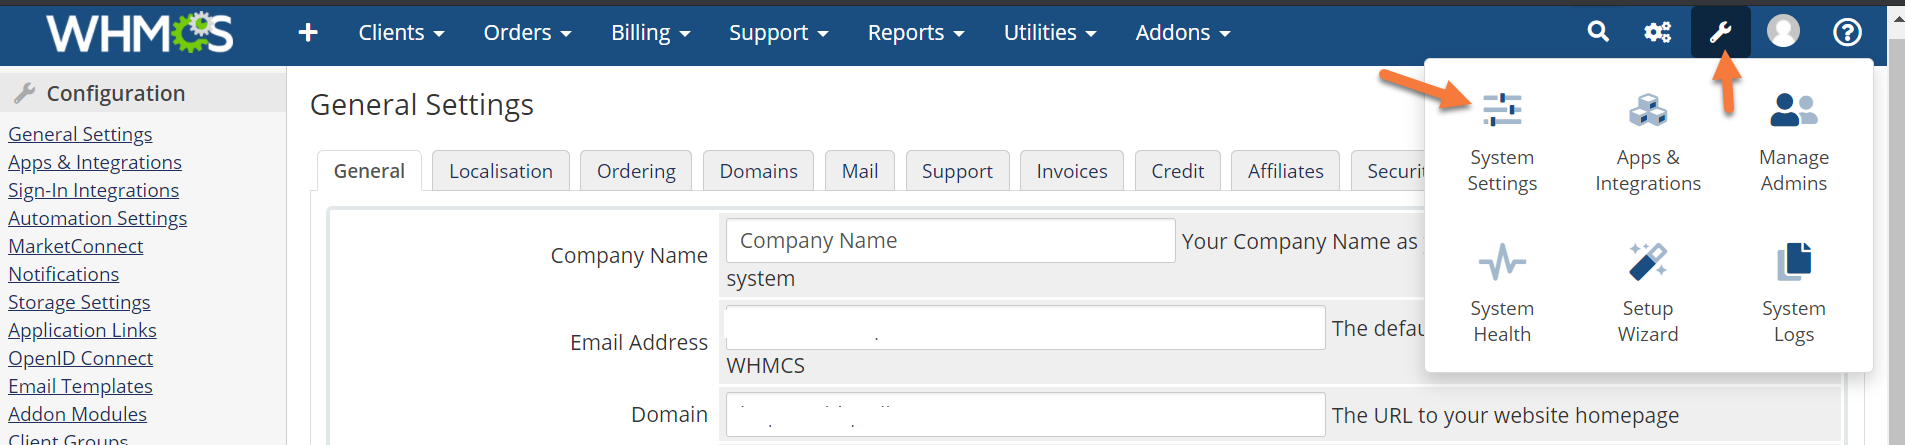
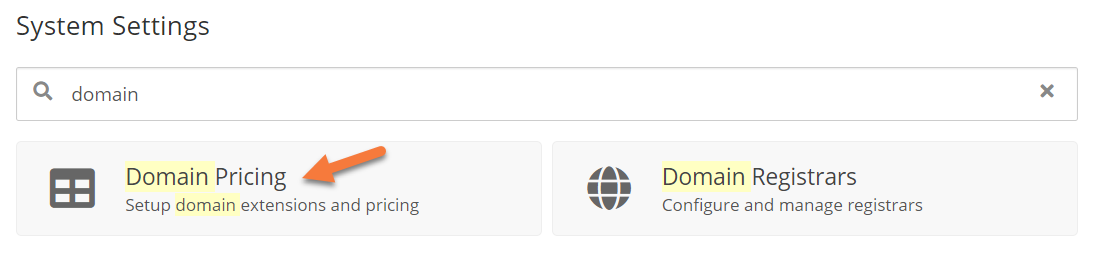
Step 2: Once the System Settings panel loads, use the search feature at the top of the page to search for domain, then when the results load, click Domain Registrars.

Step 3: A list of Domain Registrars who can integrate with WHMCS will load. If you are not a ChemiCloud customer, there are quite a few domain reseller companies from which you can choose.
How to Add the ChemiCloud Domain Reseller Module to your WHMCS and/or Blesta
If you are a ChemiCloud customer with a Reseller Web Hosting account, you received a set of Login Credentials that go with your ChemiCloud Domain Reseller account in the Welcome Email that was sent when you opened your account at ChemiCloud.
Make note of the username and password that goes with your Domain Reseller account as you’ll need it for the steps below.
To add the ChemiCloud Registrar to this list of resellers, you’ll need to install a custom module inside your WHMCS. Don’t worry, this is very straightforward! Just follow the steps below.
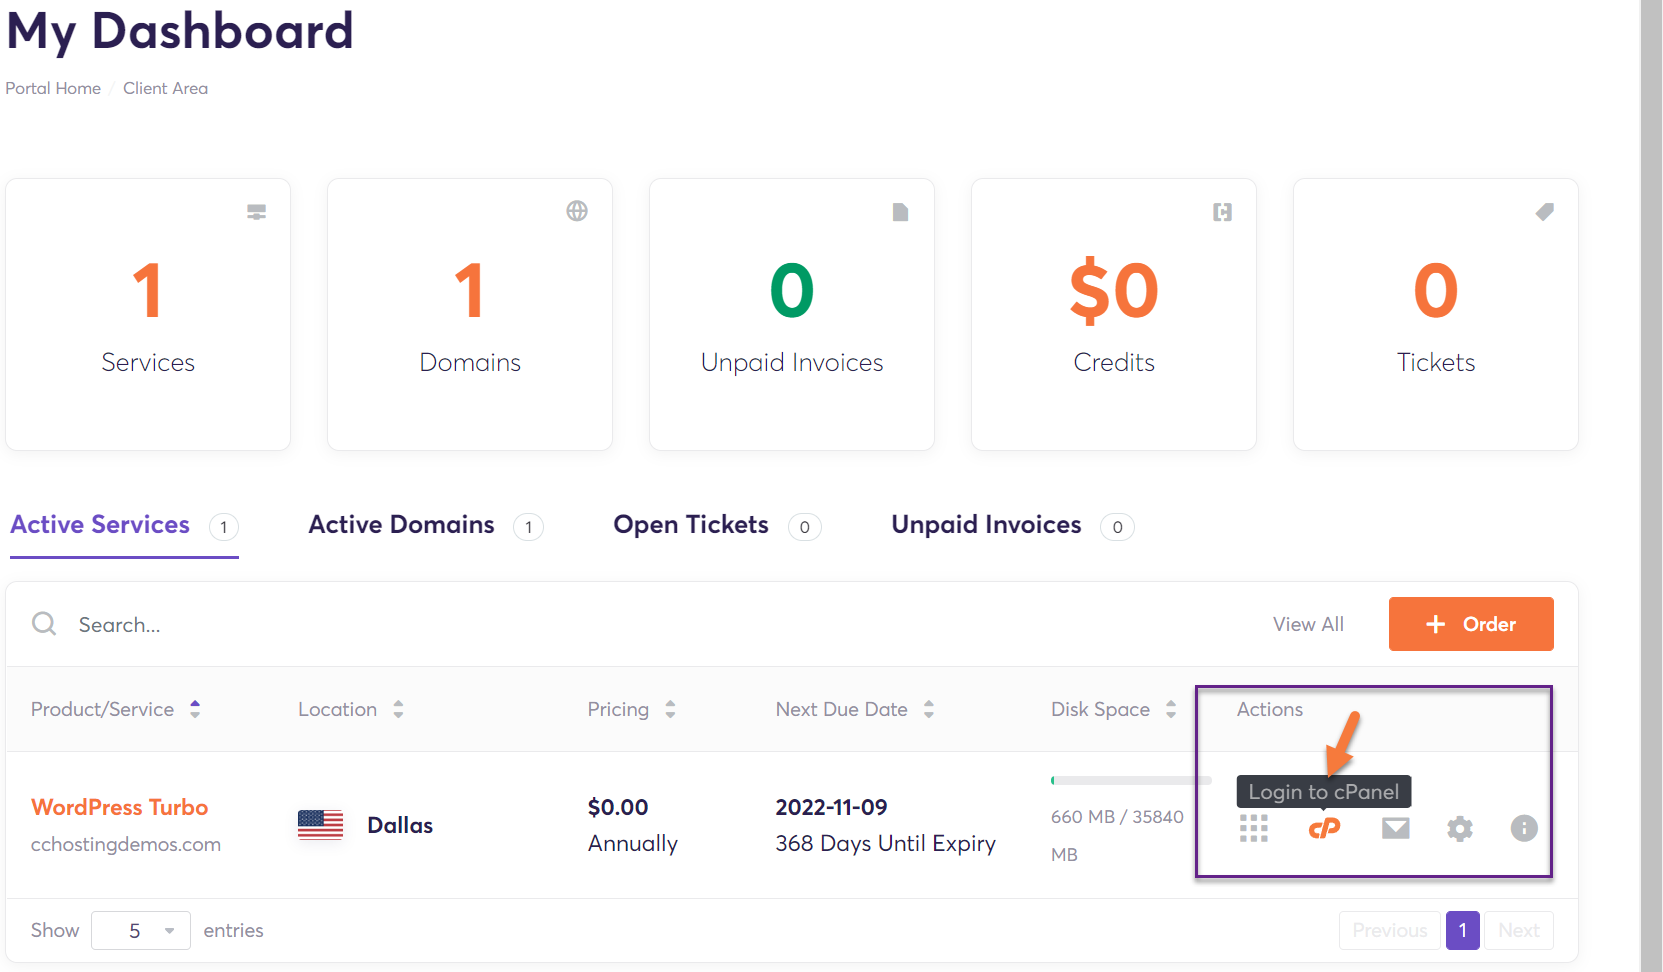
Step 1: First, login to your ChemiCloud account. Click here to open the ChemiCloud Account Login page in a new tab.
Once you have logged in, click the cPanel icon next to the domain which corresponds with the domain used for your WHMCS installation.
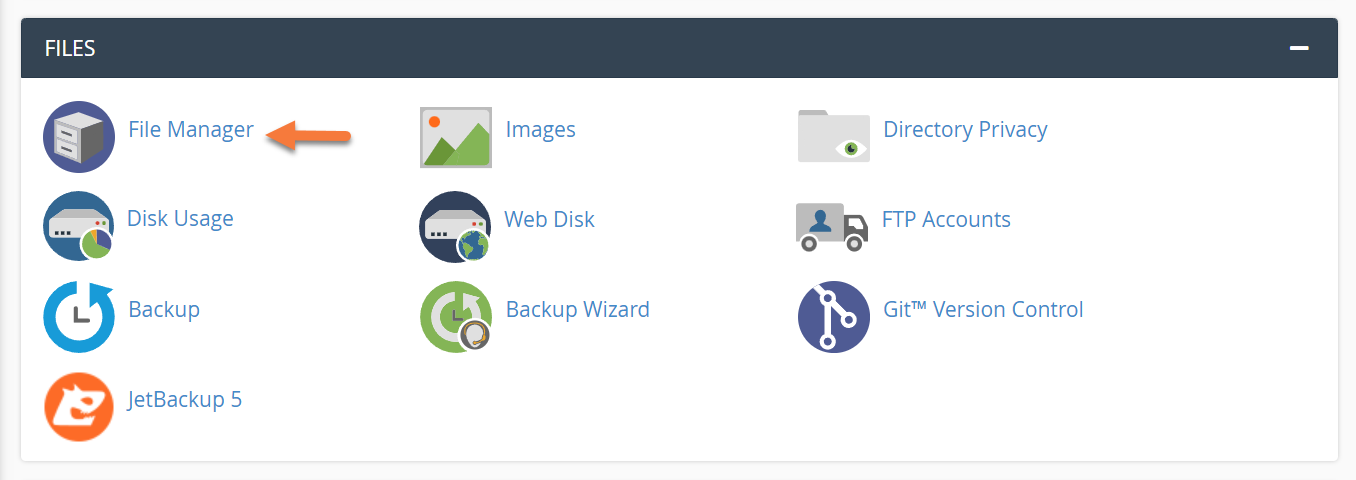
Once your cPanel has opened, look for the Files section and click File Manager.
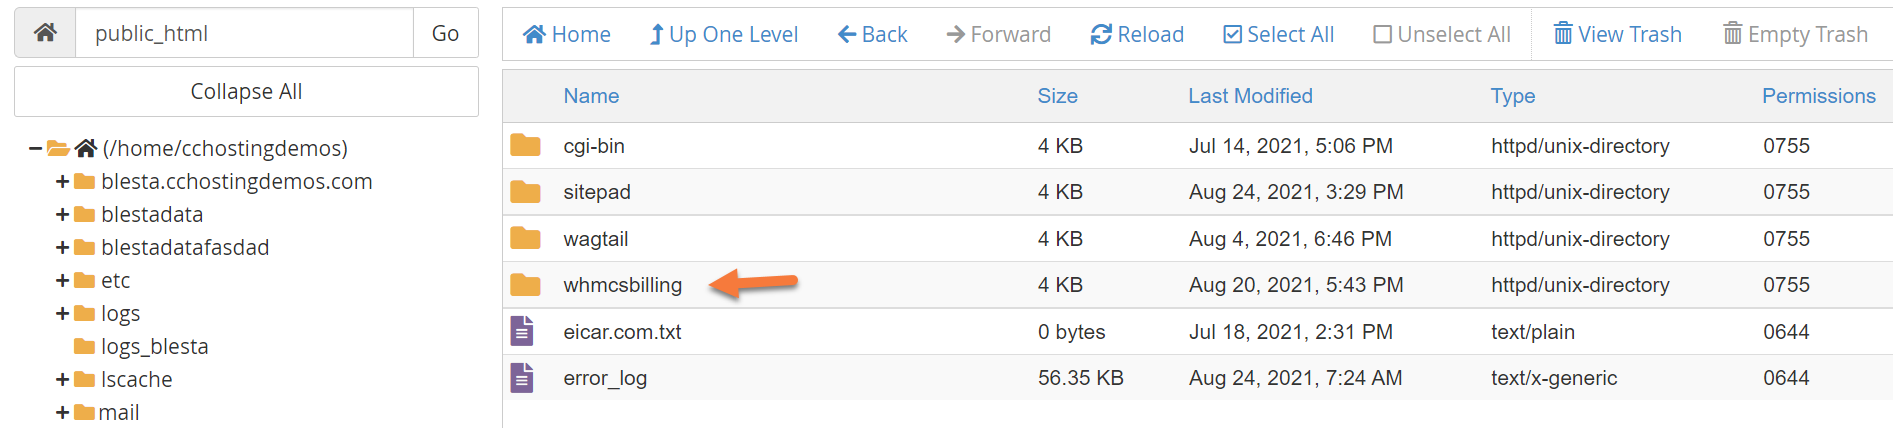
Using your File Manager, navigate to the directory where your WHMCS is installed. This is typically within your public_html folder. In my example, it’s public_html/whmcsbilling/
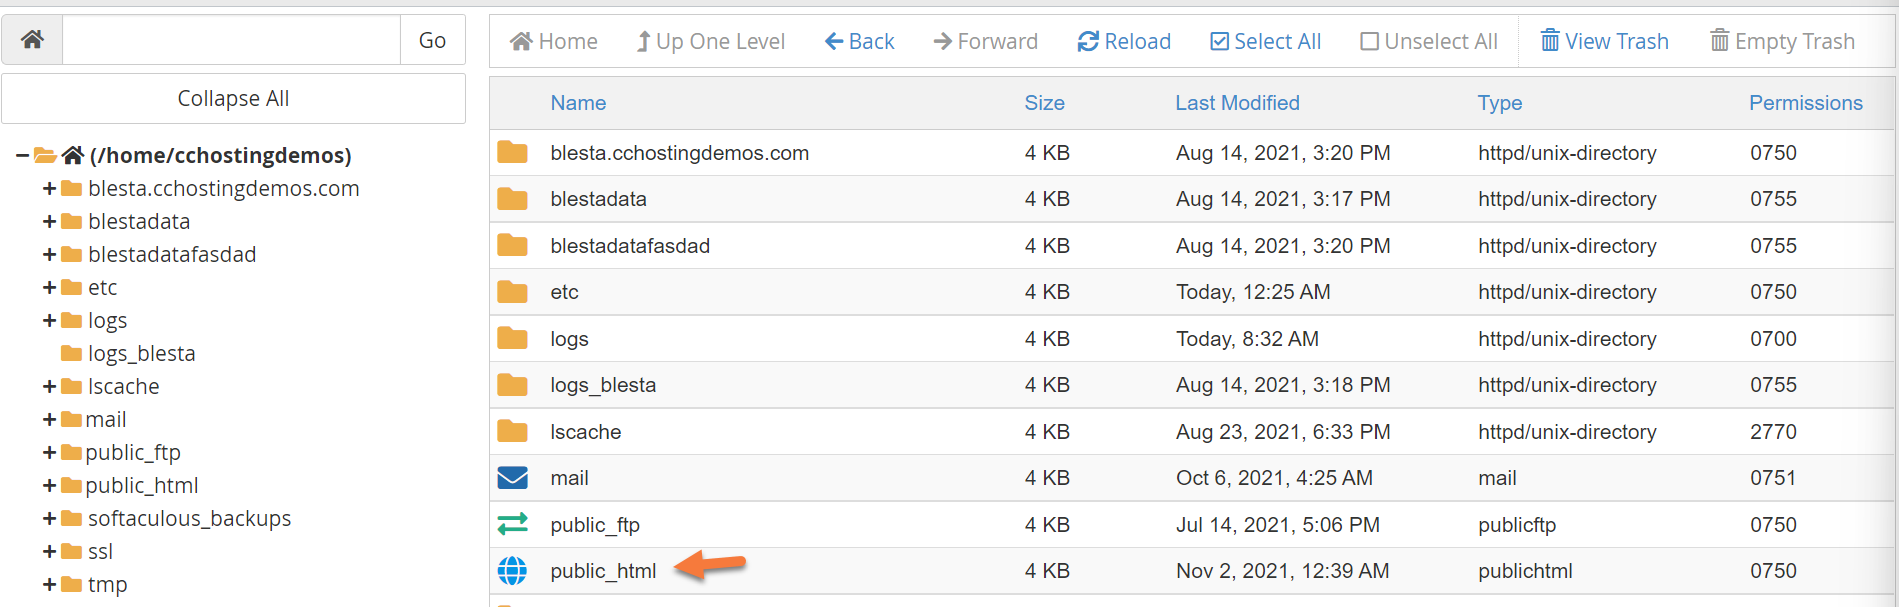
After opening the public_html directory, find and open the directory where WHMCS is installed:
Once the directory where WHMCS is installed is opened, look in the menu at the top of the File Manager for the Upload option. Click the menu option to open the Upload tool.
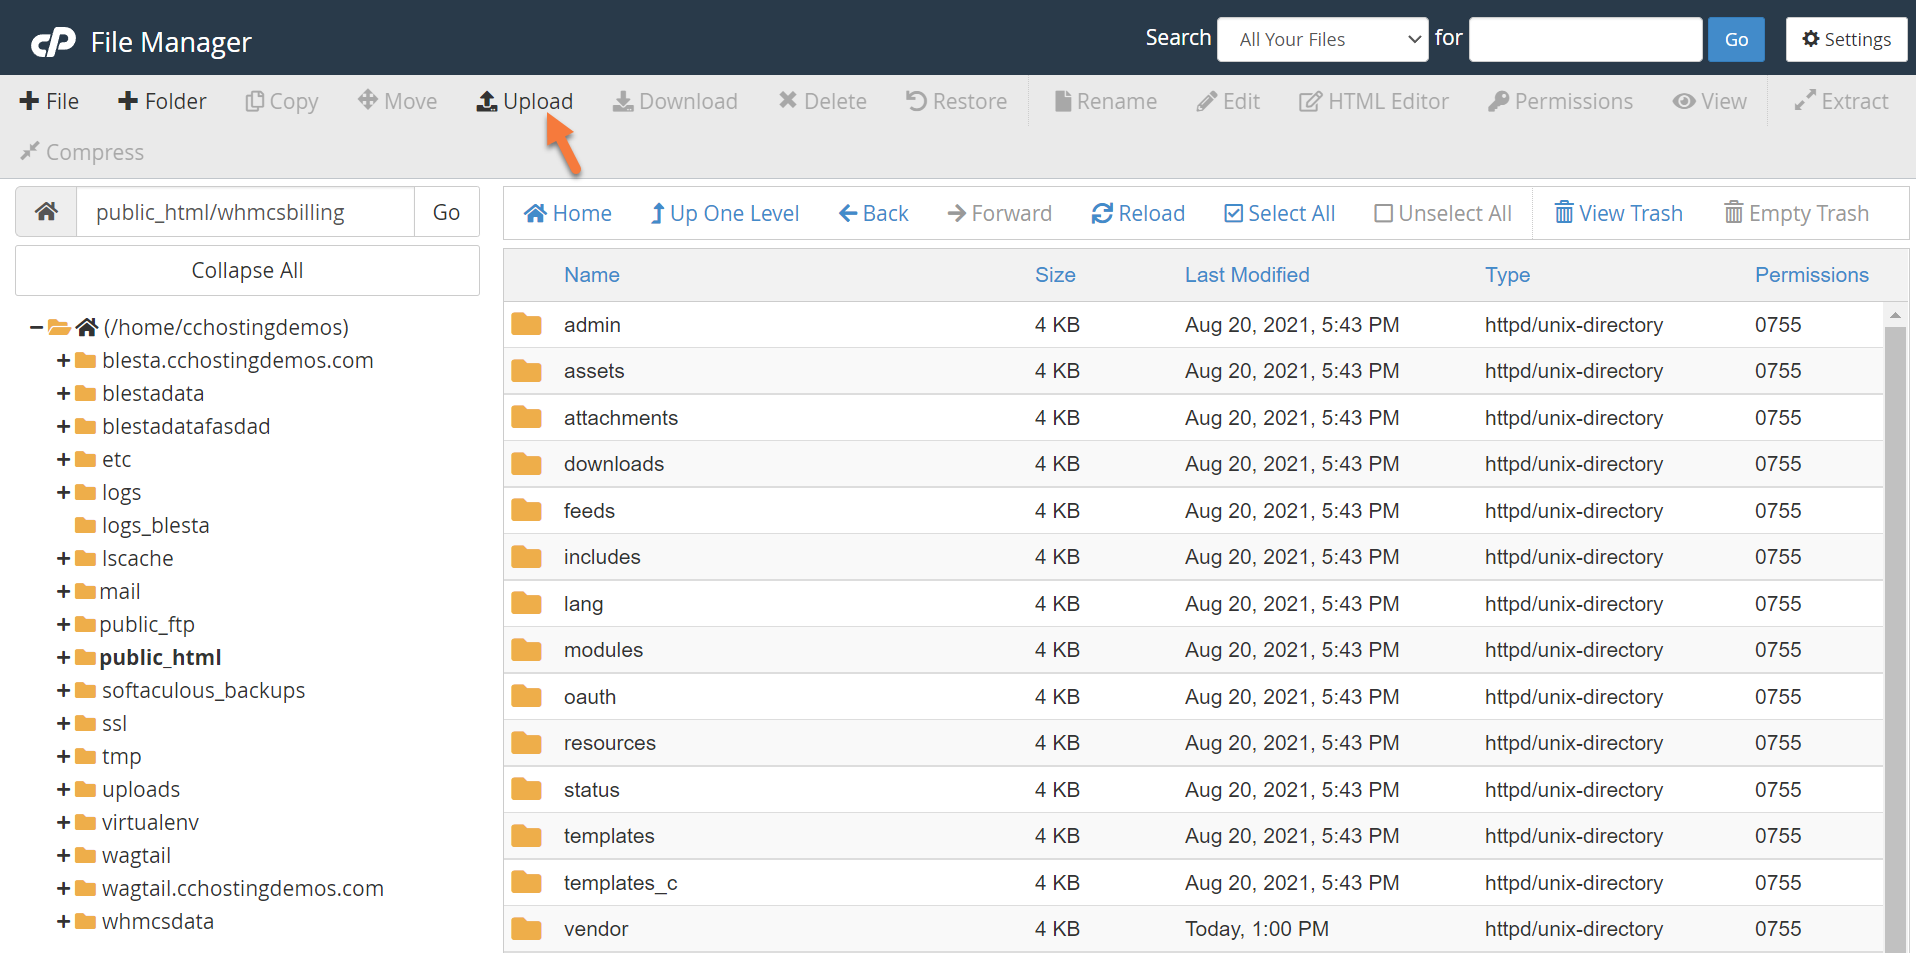
Once the Upload tool has opened, click the blue “Select File” button to open the finder on your computer.

Using the dialog window which has opened, navigate to the directory on your computer where the ZIP file you downloaded earlier was stored. In my example, it’s my Downloads folder.
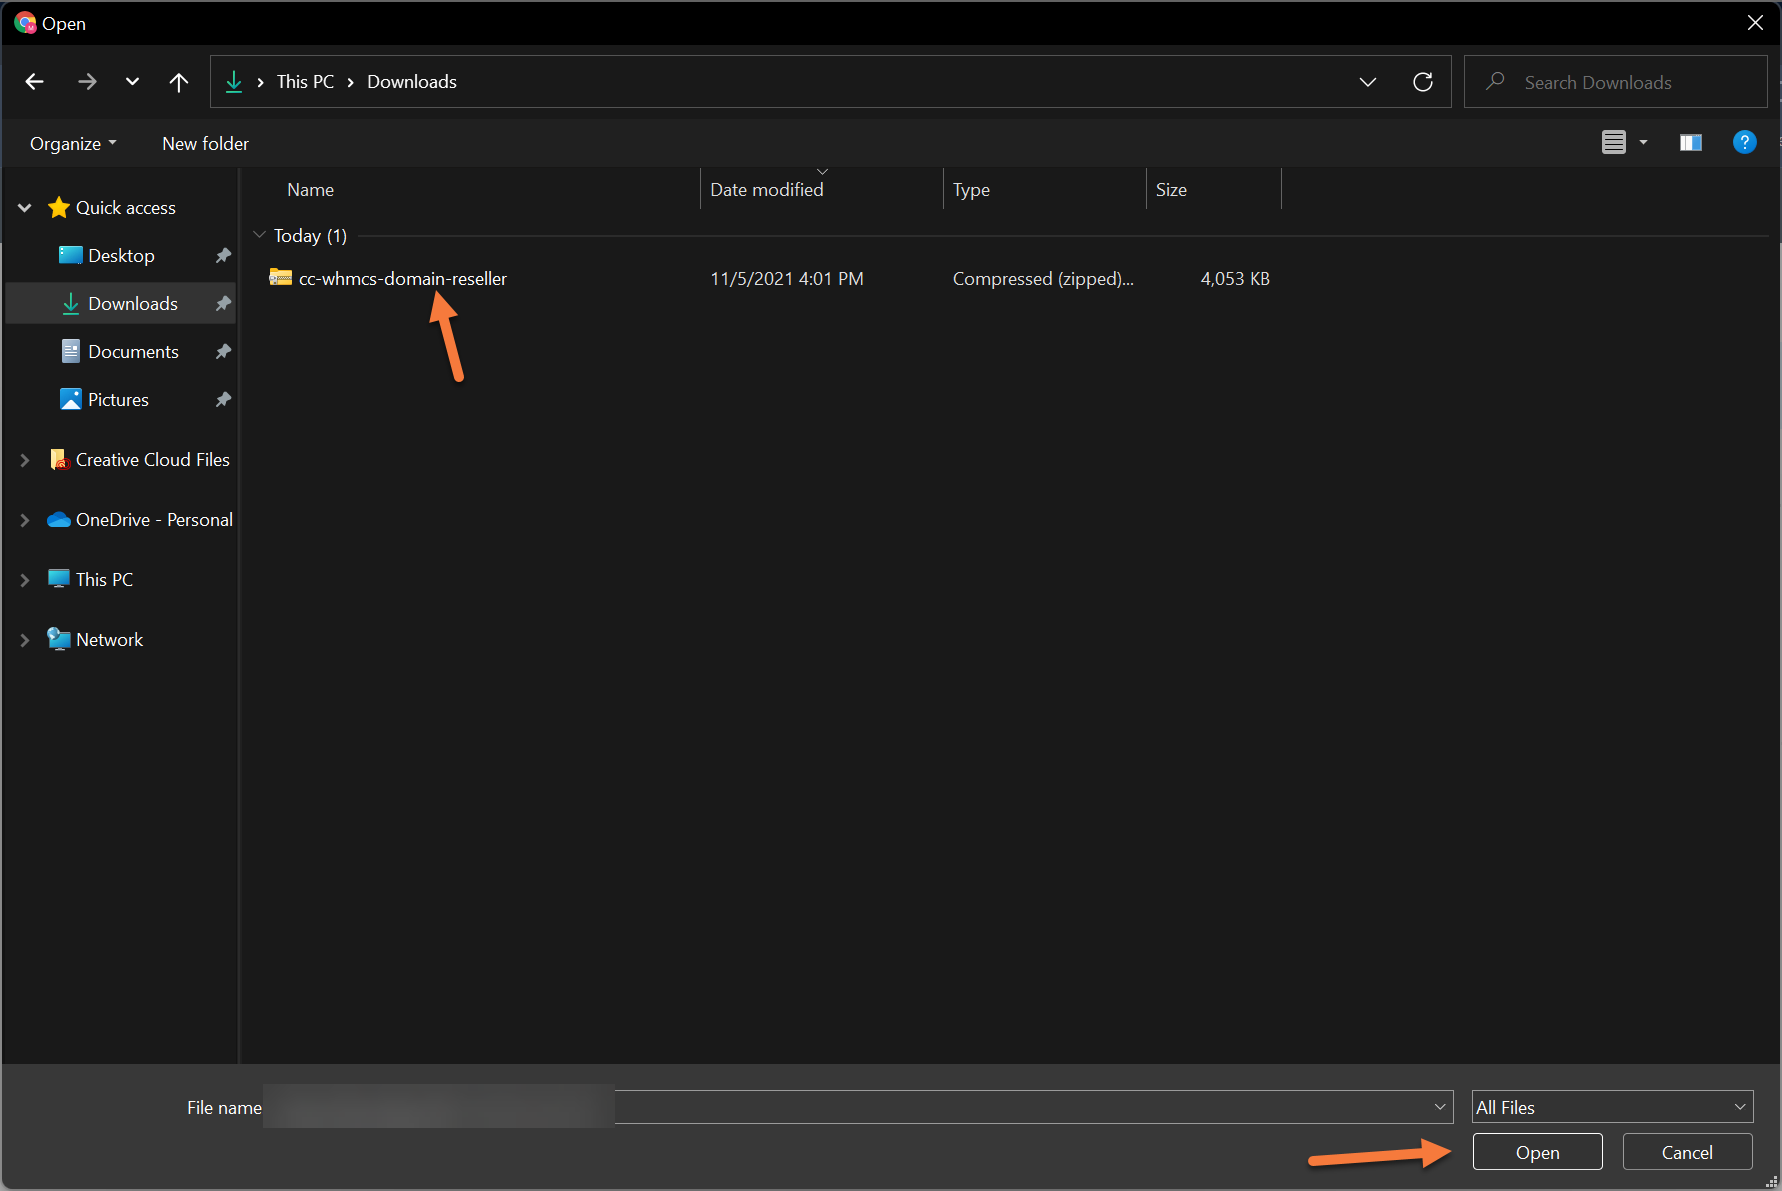
Select the file, then click Open. This will begin the process of uploading the file to your WHMCS directory on the web server.
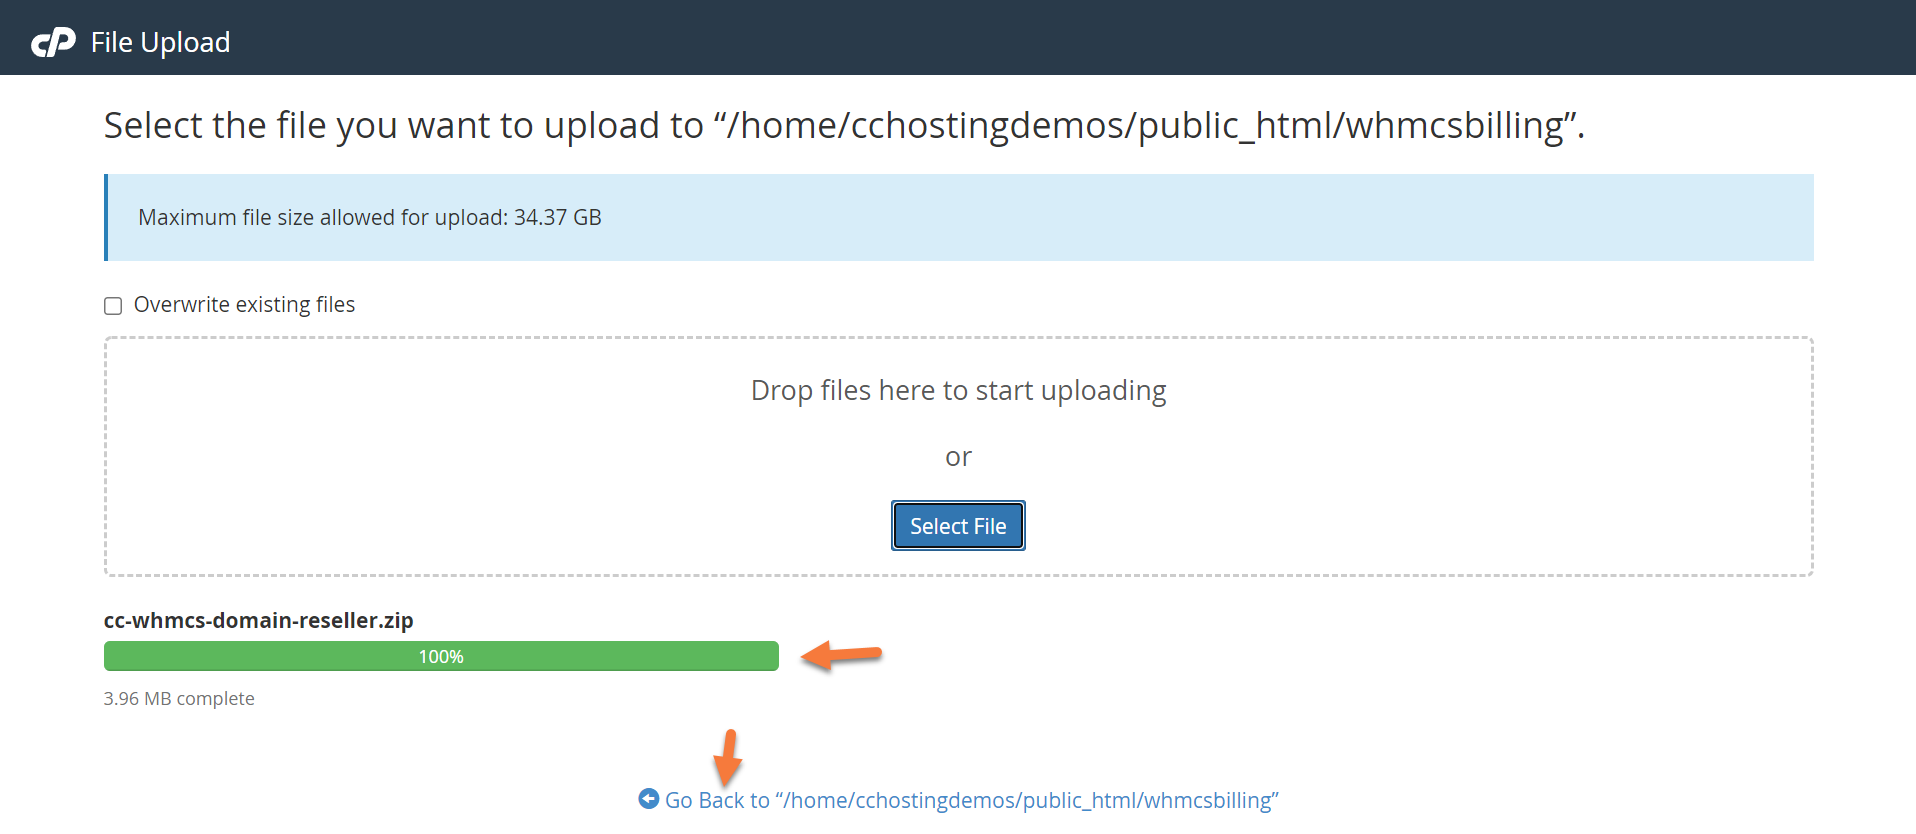
Once the Upload Progress indicator has turned green and says 100%, click the link at the bottom to Go Back to /home/youruser/public_html/your_whmcs_directory.
You will be returned to the file manager.
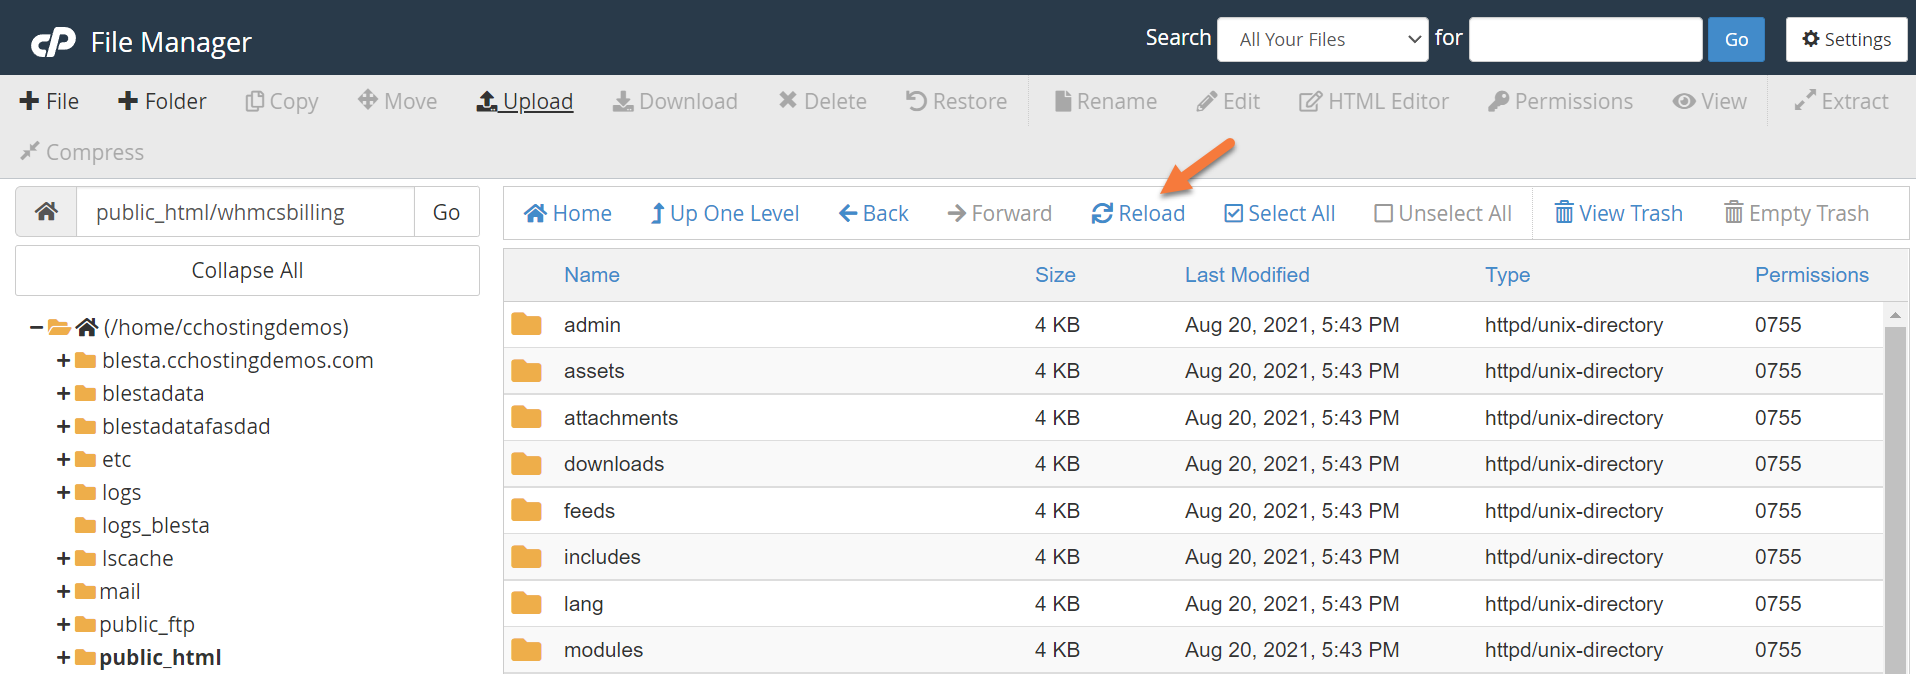
At first, you will not see the newly uploaded ZIP file. You’ll need to reload the file manager. To do this efficiently, look in the menu at the top of File Manager and click the Reload button.
Upon reload, you will see the ZIP file. Click it one time to select the file. The file will turn blue when it is selected. See below:
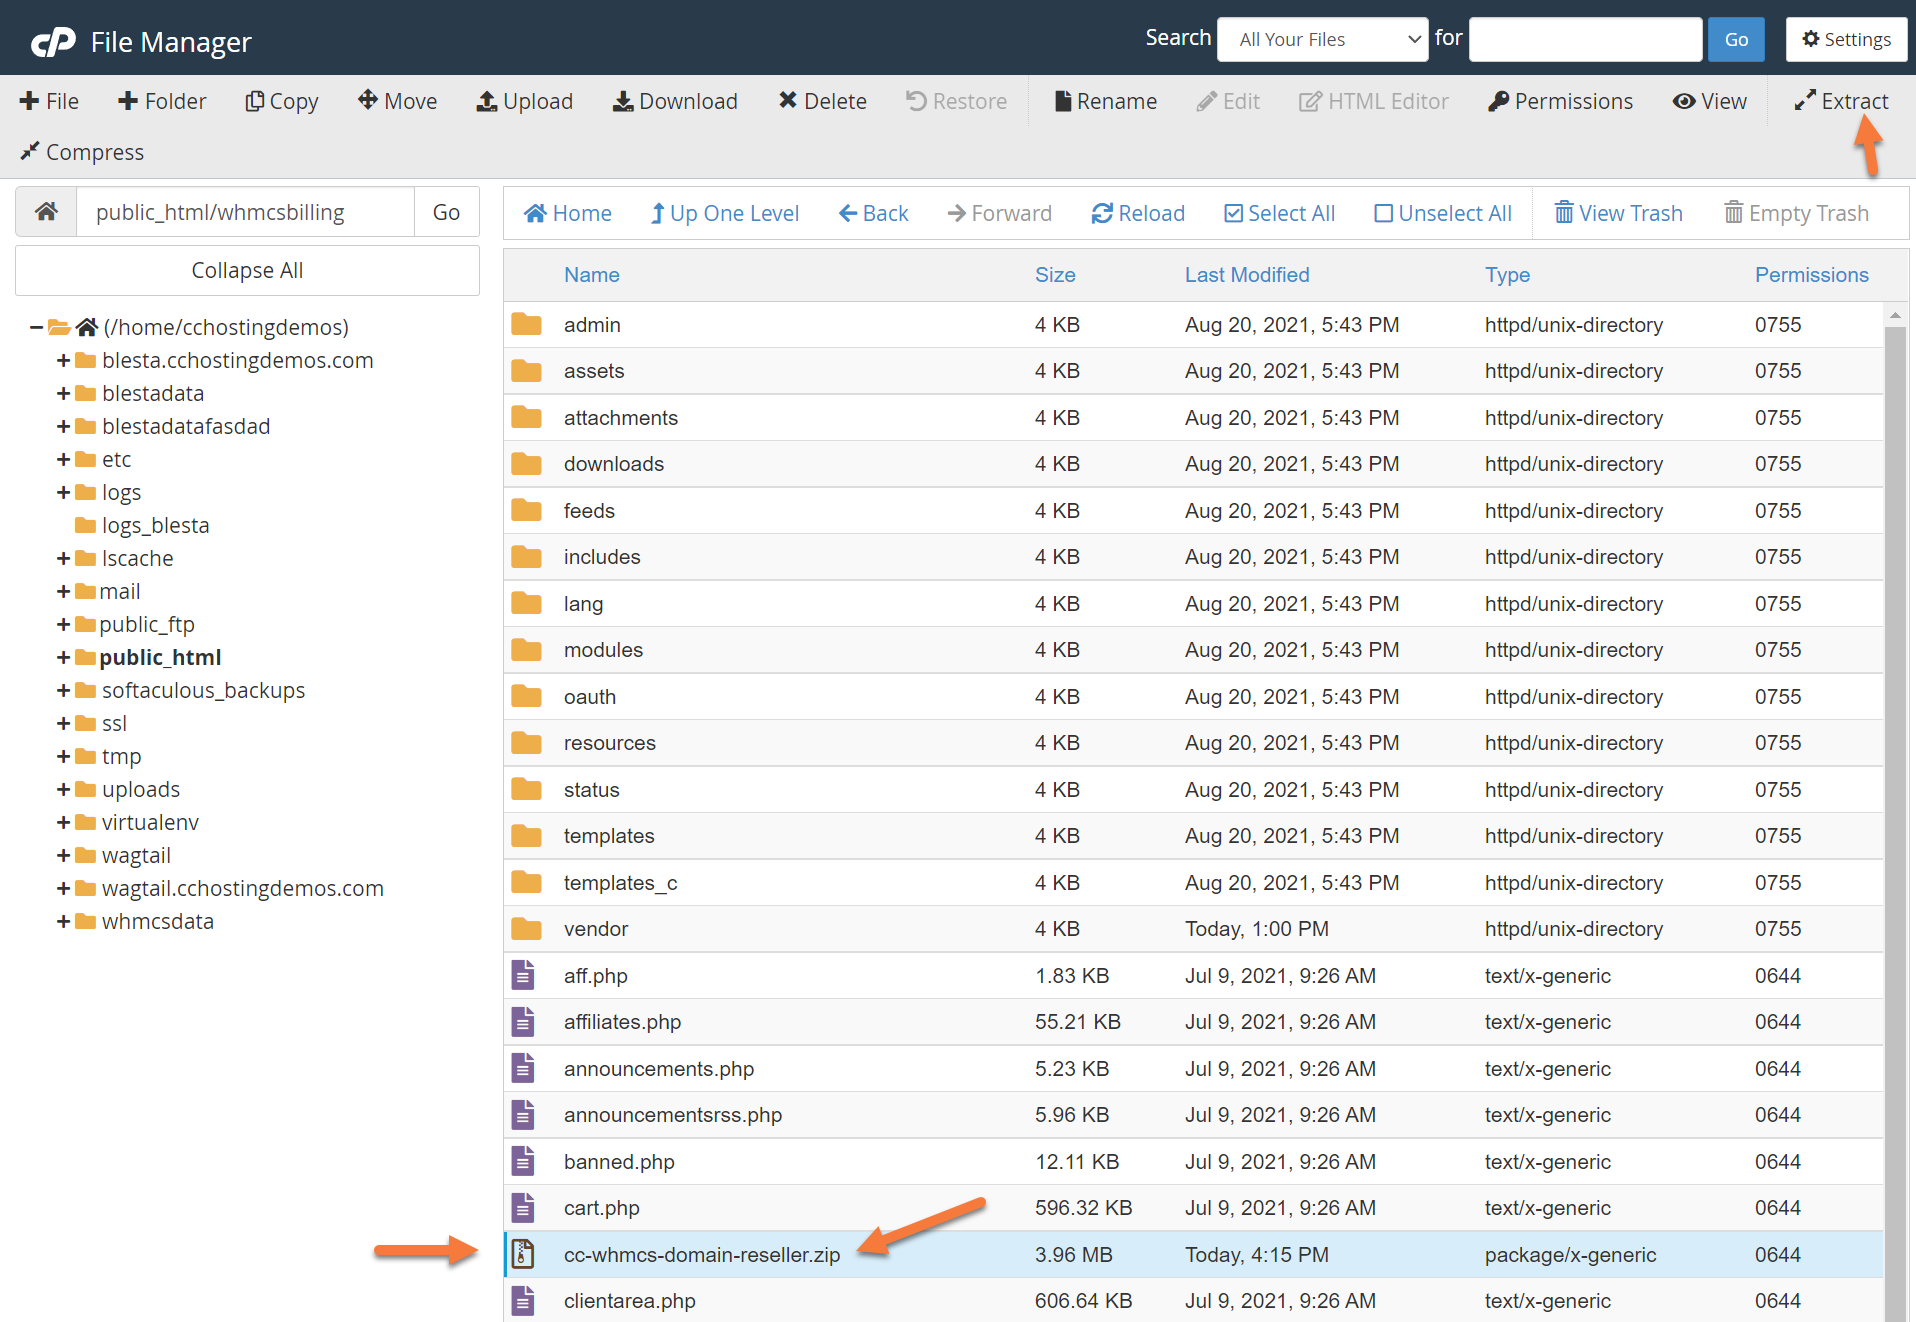
Once the file is selected, look at the top of the File Manager and in the row of options, click Extract.
After doing this, the extract modal window will open:
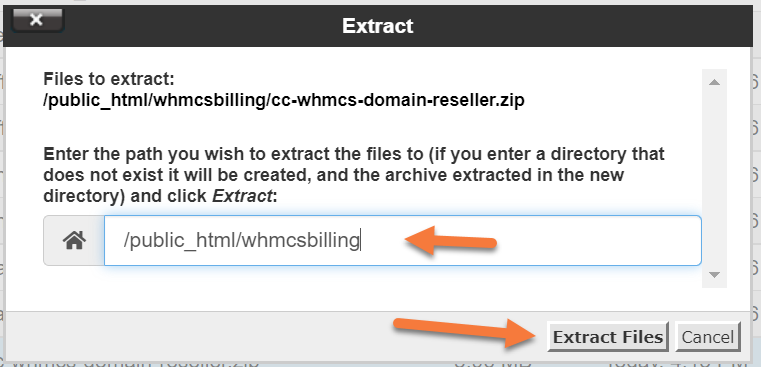
Click the Extract Files button. This will unzip the ZIP file and put the files within the ZIP into the directory where your WHMCS is installed.
Once the unzip is done, you will see a modal that looks like the one below:
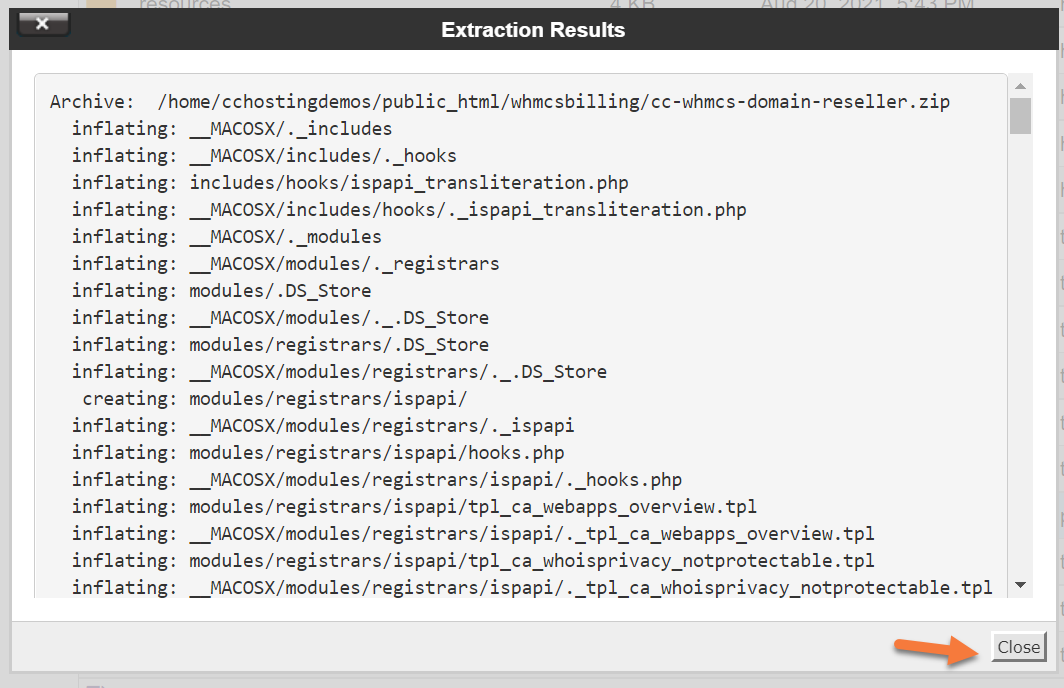
Click Close to close the modal.
Congrats, that’s all you need to do with your File Manager and cPanel. You can close the tabs where they are open and return to your WHMCS Admin > Domain Registrars page.
Step 2: Now that you have the Domain Registrars page open, refresh the page using the refresh feature in your browser. This is typically done with Control + R on a PC and ⌘ + R on MacOS.
After the page reloads, you will see ChemiCloud.com has appeared in the list of Domain Registrars.
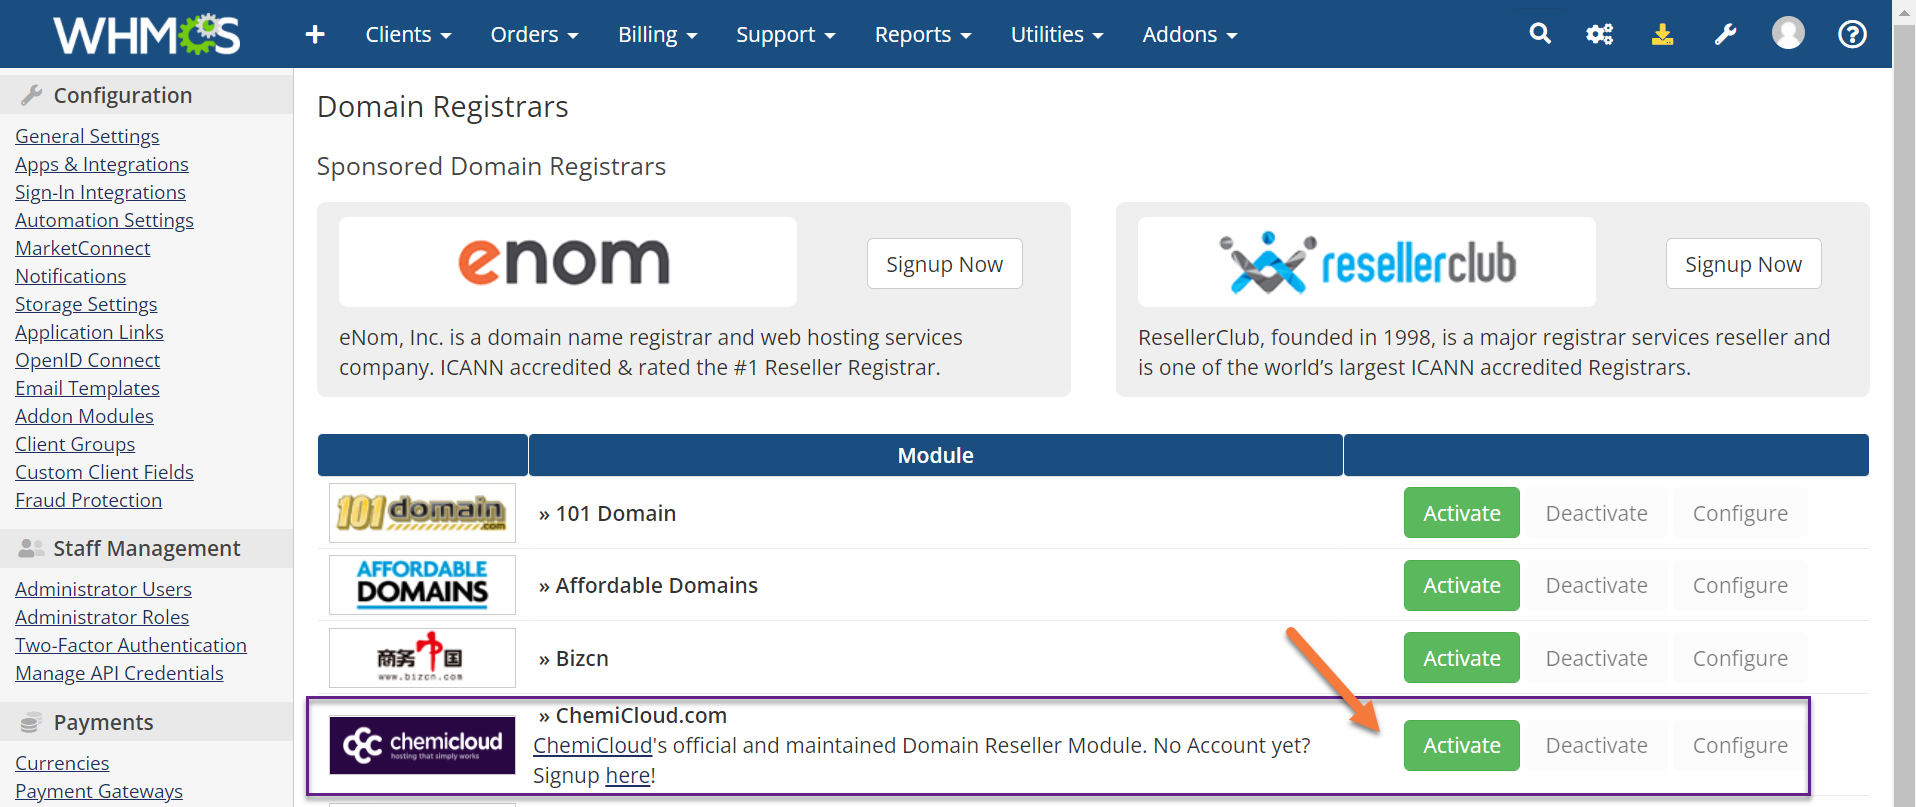
Click the green activate button to continue.
Step 3: The ChemiCloud.com Domain Reseller module will activate and expand. You will see a green message that says Registrar Module Activated and a number of new options have opened up beneath the Registrar Activation line.
Do not worry about the big red message at the bottom of the module.
See below:

Along with your ZIP file, when you requested access to a ChemiCloud Domain Reseller account, you received a username and password which goes with the account. You’ll need to enter the username and password in the respective fields.
The other options in the above-drawn purple box are entirely optional and up to you if you wish to enable them. There are a few useful options here, including:
- Automatic Transfer Lock – This will automatically enable the lock feature on a customer’s newly registered domain. This is helpful because it’s an additional layer of safety that keeps the domain from being transferred away, potentially unxpectedly.
- WHOIS Output and ERRP Settings – When enabled the customer will have the option to edit the WHOIS fields for each of the contact types, not just the registrant contact. Some companies like this because their Tech Contact is the IT Department while the Registrant Contact might be their legal department.
After entering your Username and Password + selecting the option you wish to use, click the blue Save Changes button at the bottom of the page.
The page will reload and if the credentials you provided are correct, you’ll see a green message at the top of the module which says “Changes Saved Successfully” and at the bottom, you’ll see a message which says “Connection to the LIVE Environment established.”
Congrats! When it comes to linking your new Domain Reseller Account with your WHMCS installation, you’re done! This means you can visit your store in your browser to search for and register new domains!
How to Configure Domain Pricing in WHMCS
Step 1: After linking your Domain Reseller Account to WHMCS, you’ll need to enable Automatic Domain Registration so you can automate the submission of registration and transfer requests with the built-in registrar(s).
When you enable this, WHMCS will automatically submit the request to the registrar as soon as your customer pays for the domain or transfer. WHMCS never submits domain registrations before you receive payment.
To do this, return to your System settings area by clicking the wrench in the top right corner, then click System Settings.
Next, use the search feature at the top of the page to search for domain. Once the result load, click Domain Pricing.
Step 2: When the Domain Pricing screen opens, you will be presented with a list of all the TLD’s you can sell, assuming you have linked your WHMCS installation with your Domain Reseller account of your choosing.
In our example, we have only added one TLD – .com. You should have many others.
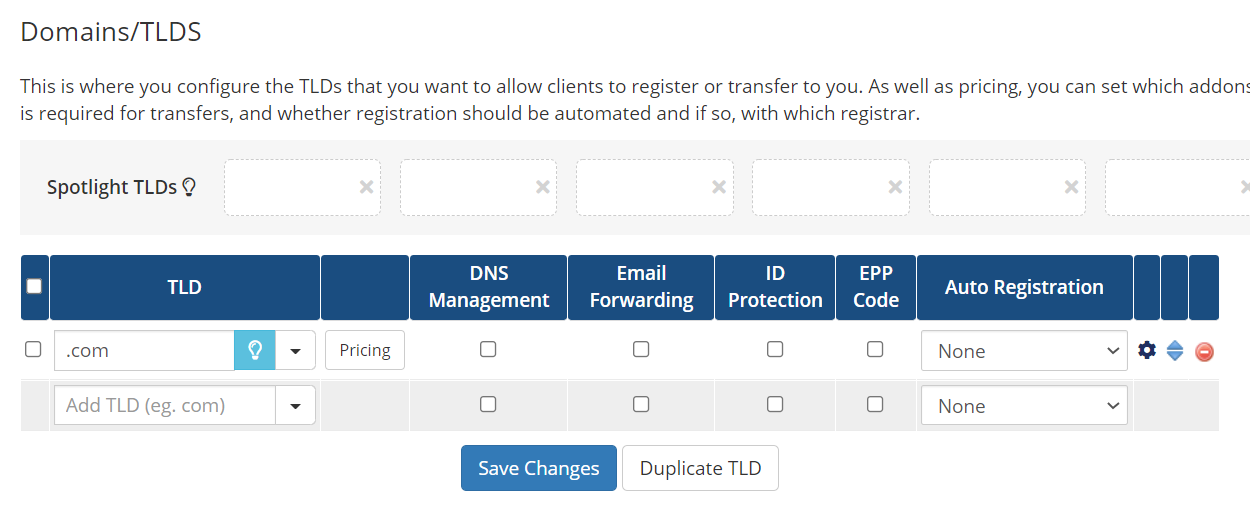
To set the pricing for the TLD, click the Pricing button just to the right of the TLD in the TLD column.
A new window will open where you can set the domain registration price for 1, 2, and even up to 10 years.
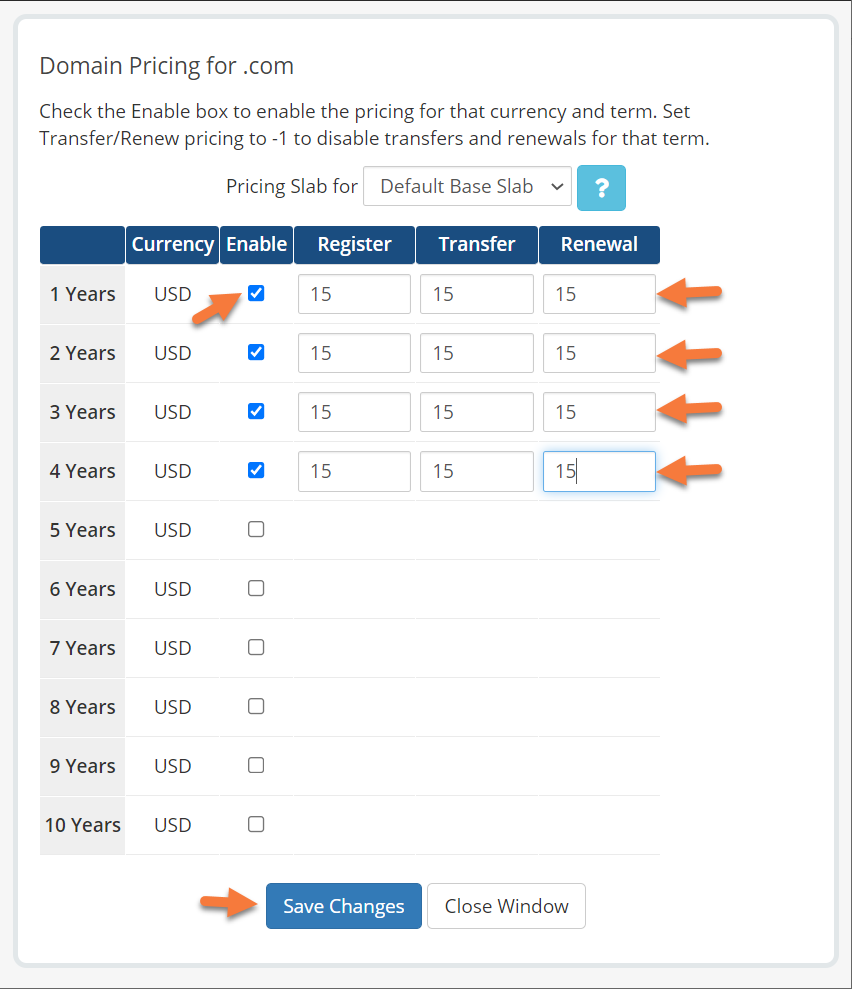 First, tick the check box beneath the Enable column in order to allow customers to register a domain for that period of time.
Next, enter the Register, Transfer, and Renewal Prices for each period of registration.
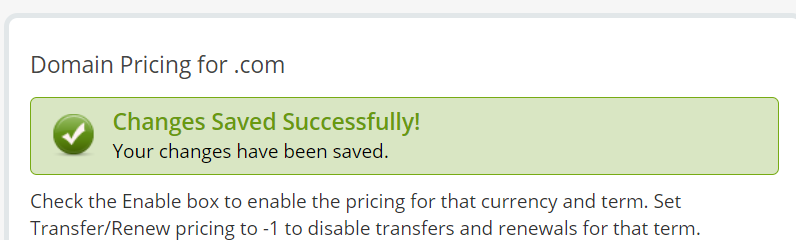
When you’ve finished, click Save Changes. You will see a message stating your changes have been saved successfully.
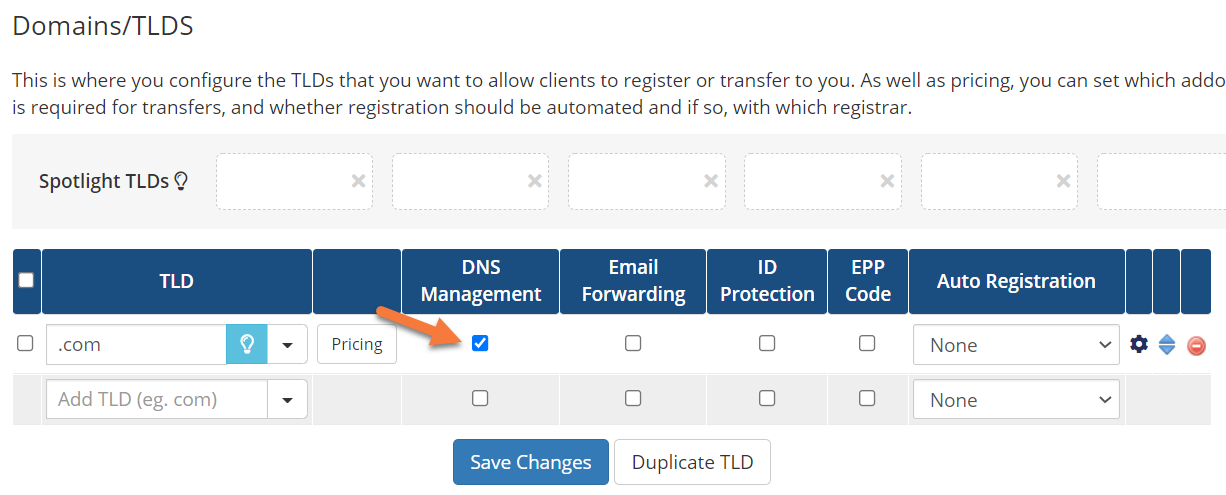
Step 3: If you want your customers to be able to control things like their DNS, Email Forwarding, ID Protection/WHOIS Protection, and request their EPP Code, you’ll need to tick the checkboxes for those options in the table for each TLD listed.
Step 4: Finally, to enable automatic registration with your domain reseller account when a customer purchases a new domain with this TLD, choose your Domain Reseller account from the drop-down menu under the Auto-Registration column.
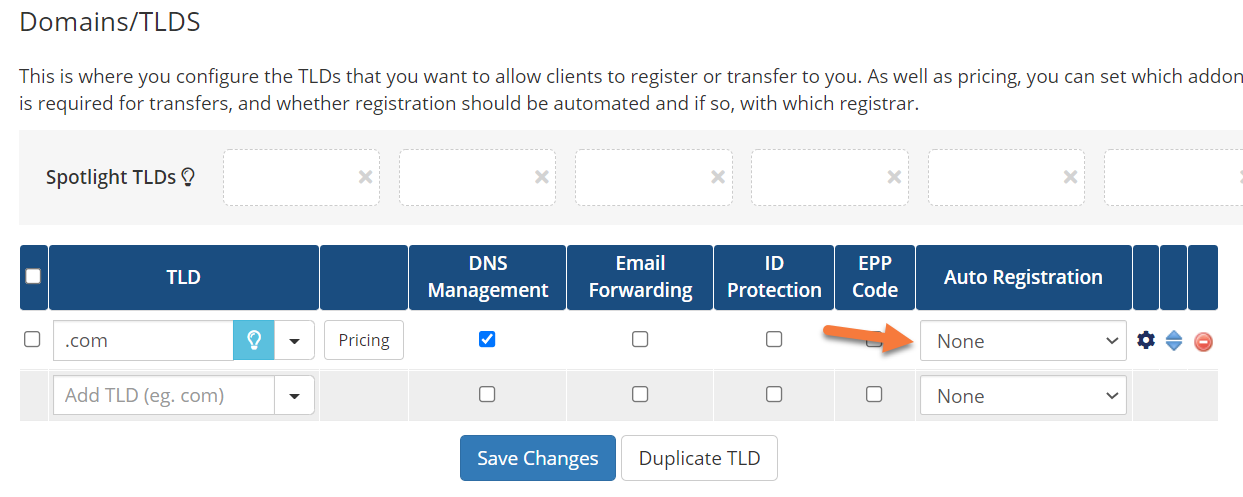 When you’ve finished making changes, click the blue Save Changes to save said changes.
Bulk Domain Management
If you have a lot of TLDs available for registration, you probably don’t want to set their pricing one at a time, as that can be rather tedious. To make things easy for you, WHMCS does offer Bulk Management for this feature
Located on the same page as your Domains/TLDs, but on the lower right side:
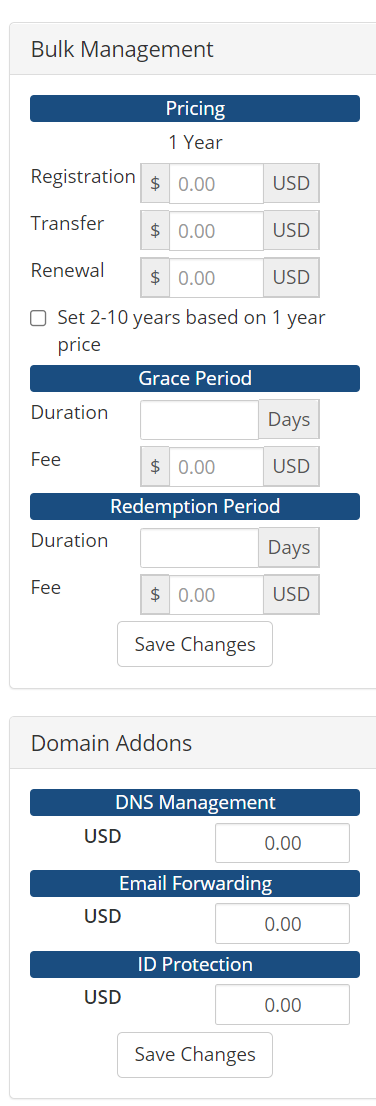
With the Bulk Management tool, you can set the price for Domain Registration, Renewal, and Transfer for all of your domains with the click of a button.
You can also set the Domain Grace Period and Redemption Period Length and Price.
Finally, if you offer domain addons, like DNS Management, Email Forwarding, and ID Protection, you can set the price of those options here.
Be sure to click that Save Changes button at the bottom to save your bulk changes.
And that’s how you configure Domain Registrars in WHMCS!
▶️ Please join us in the next tutorial where we will walk you through how to Add Funds to Your ChemiCloud Domain Reseller Account.