While WHMCS may include many features to help automate your sales, it also includes many features to help keep your data safe. However, you should still take some additional steps to further secure your WHMCS installation.
This Knowledge Base article will help you do just that.
Let’s begin!
WHMCS Security Checklist: 5 Ways to Secure Your Installation
Secure Your Writable Directories
WHMCS recommends moving all writeable directories to a non-public location to prevent web-based access. There are three required writeable directories in WHMCS:
- attachments
- downloads
- templates_c
If you change the location of these writable directories, you must specify their new location in WHMCS. This is done in 2 places:
- File Storage
- and Templates Cache
File Storage:
You have the option to move the attachments and downloads storage directories to a local location, or you can store them remotely on an AWS S3-compatible service. (If you aren’t familiar with S3-type services, we recommend using the Local Storage option.)
To change your storage locations, use the steps below.
Step 1: Create your tertiary storage location in the new service. This could either be one of the following:
- A writeable directory on your web server in a directory above your public_html folder.
- or a non-public AWS S3-compatible storage bucket.
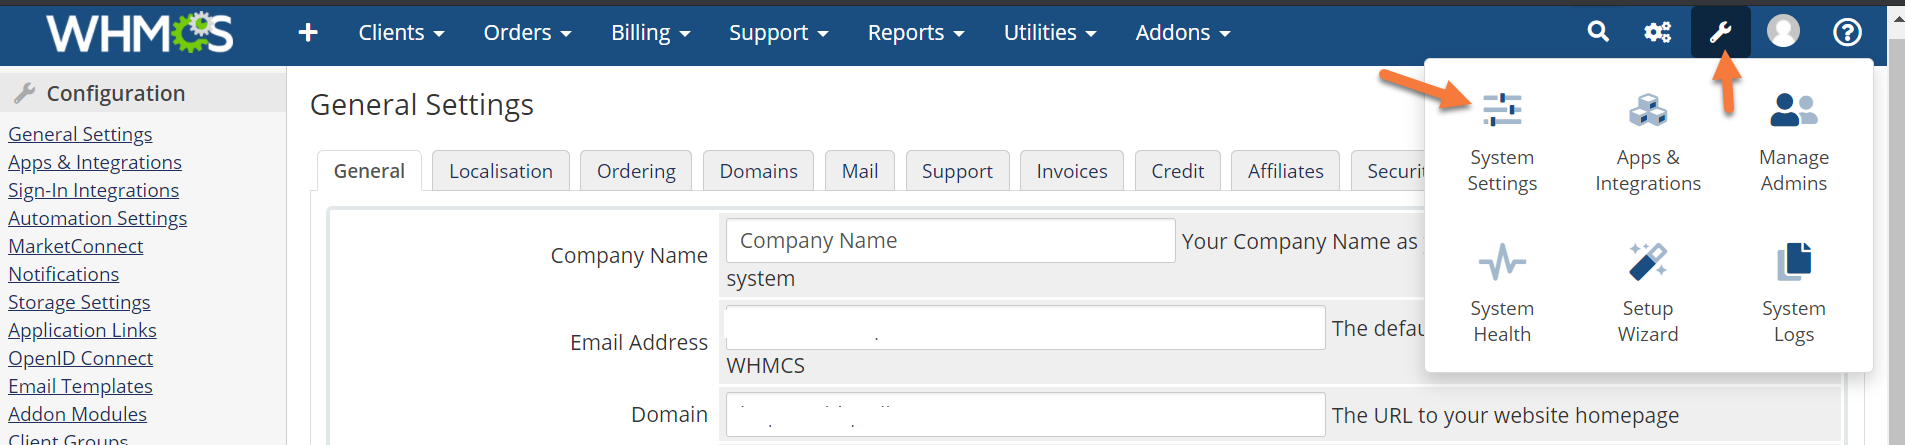
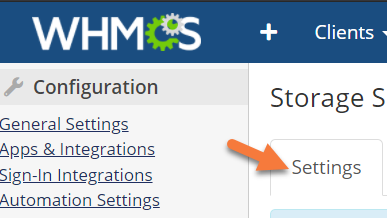
Step 2: Login to your WHMCS installation and once logged in, click the wrench in the top right corner, then click System Settings.

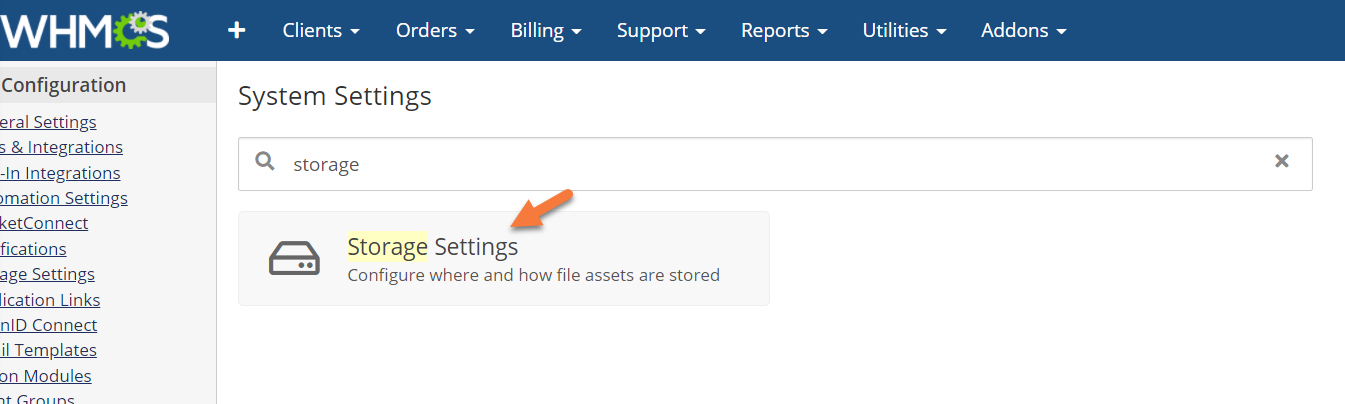
Step 3: Using the search function at the top, search for storage. Once the Storage Settings option loads, click it to open the Storage Settings.
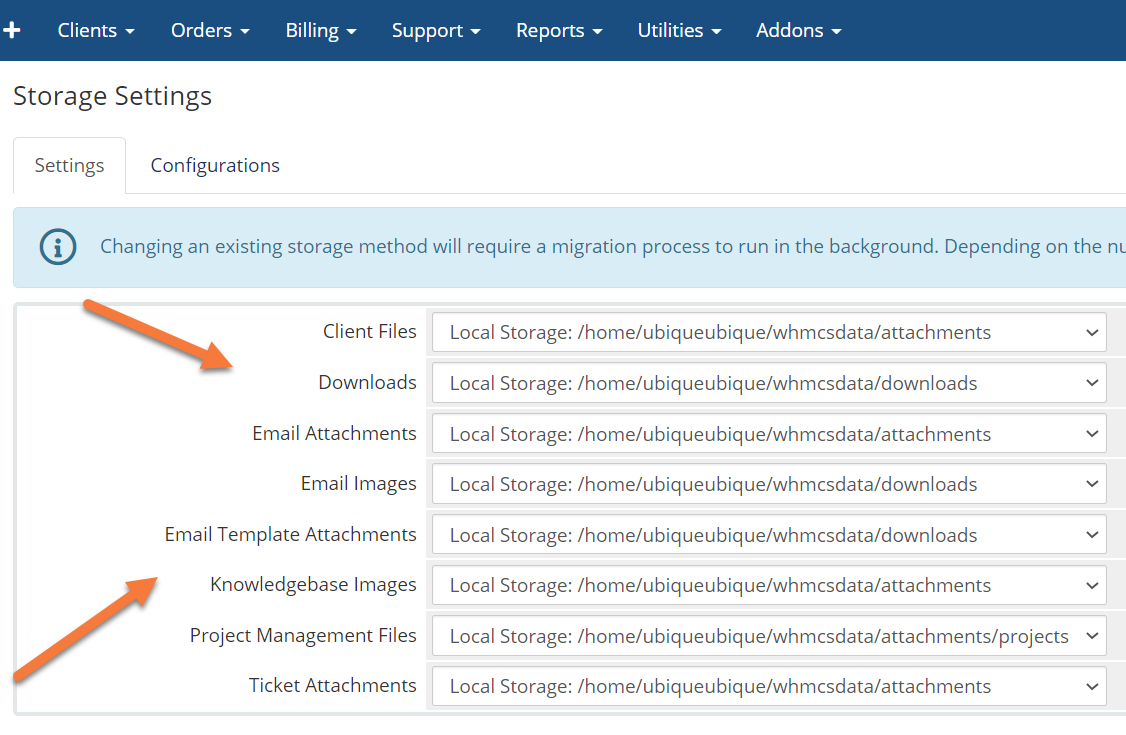
Step 4: Once the Storage Settings load, you’ll be presented with a list of all storage types and their locations:
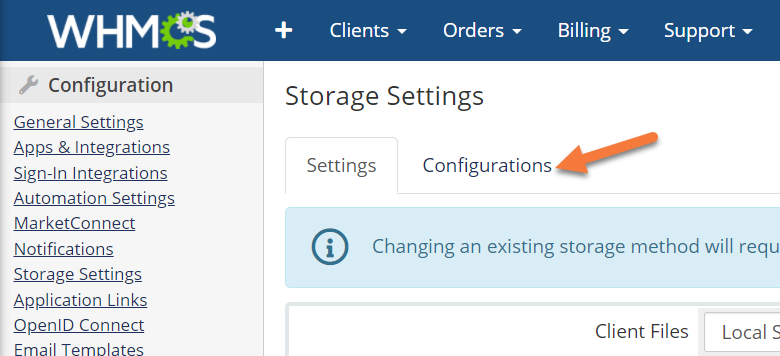
In order to set a offsite or S3-type storage, you’ll need to click the Configurations option at the top:
Once the configurations load, you’ll be presented with a list of the three local configurations plus the option to Add New Configuration.
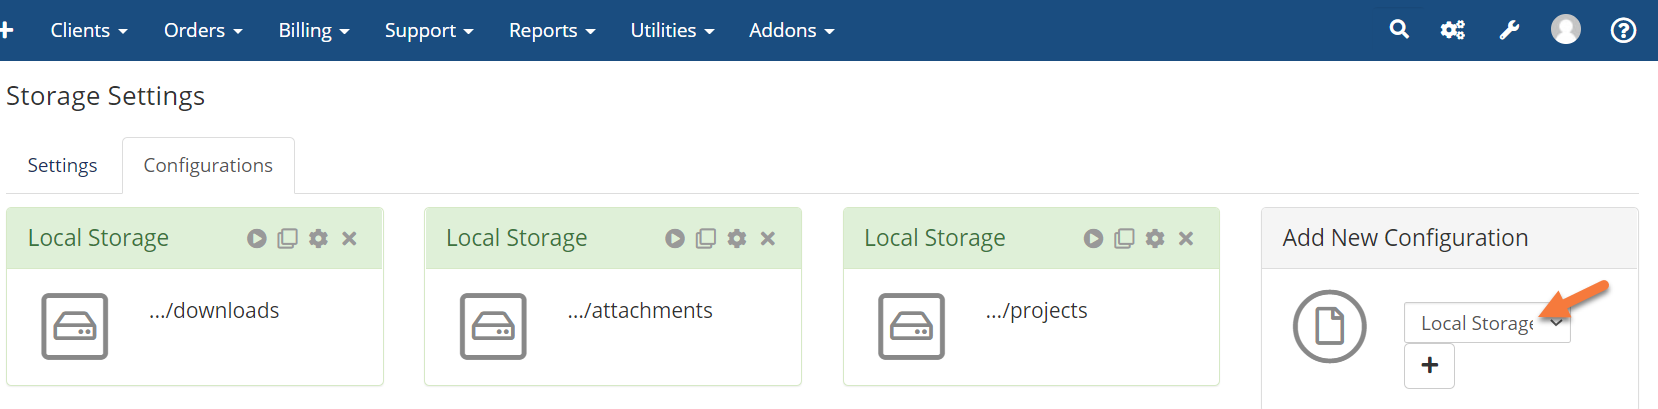
Click the drop-down next to Local Storage and choose S3, then click the + to add the configuration.
 In the modal that appears, you’ll need to enter the Access Key & Secret, plus the Bucket name and region, and an optional endpoint URL in order to successfully set this up.
Once you’ve entered that information, click Save Changes.
Next, return to the Settings by clicking Settings.
Once the list of locations loads, click the drop-down menu next to the location you want to set to remote, then choose the newly created remote destination from the drop-down menu.
Templates Cache:
You can use the templates cache (templates_c) to improve the performance of templated pages and emails. To do this, follow the steps below:
Step 1: Create a templates_c directory in the desired location…. i.e. above your public_html folder.
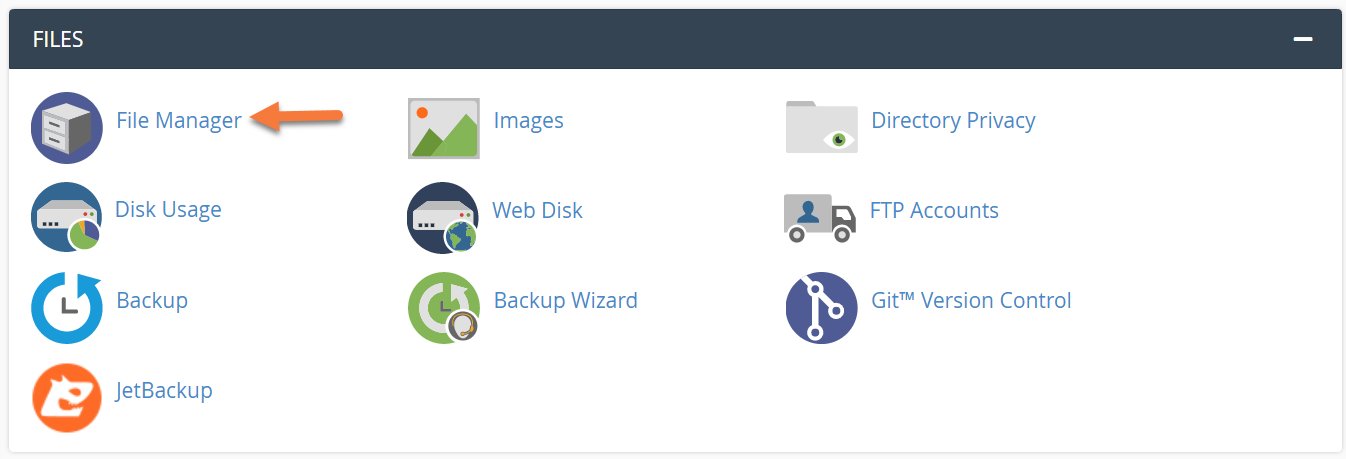
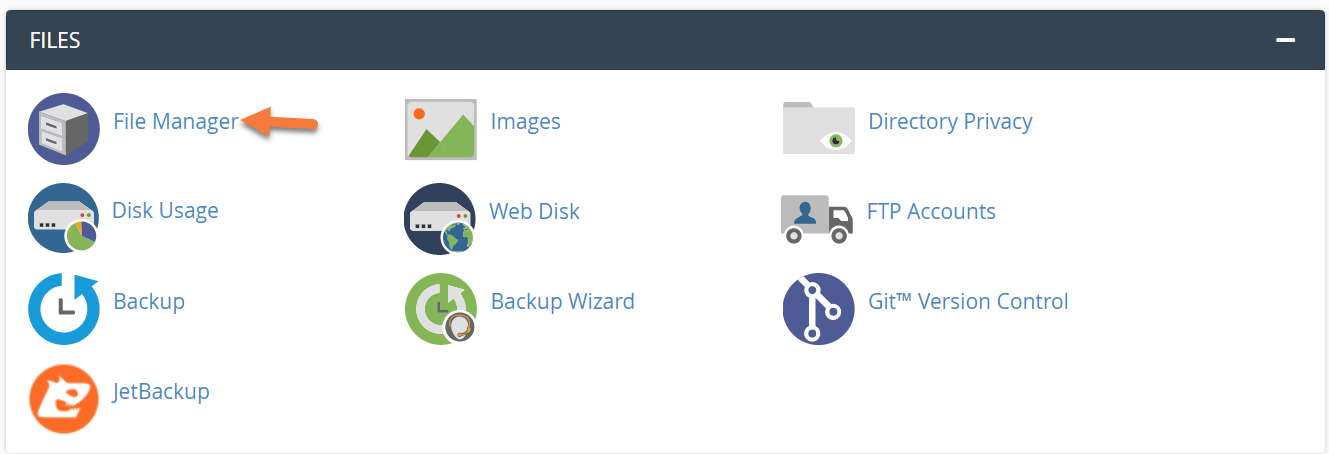
Step 2: This will involve editing the configuration.php file of your WHMCS installation. To do this, log in to your ChemiCloud account by clicking here, then open your cPanel > File Manager.
 Step 3: In your File Manager, navigate to the Directory where your WHMCS installation is located and locate a file called configuration.php.
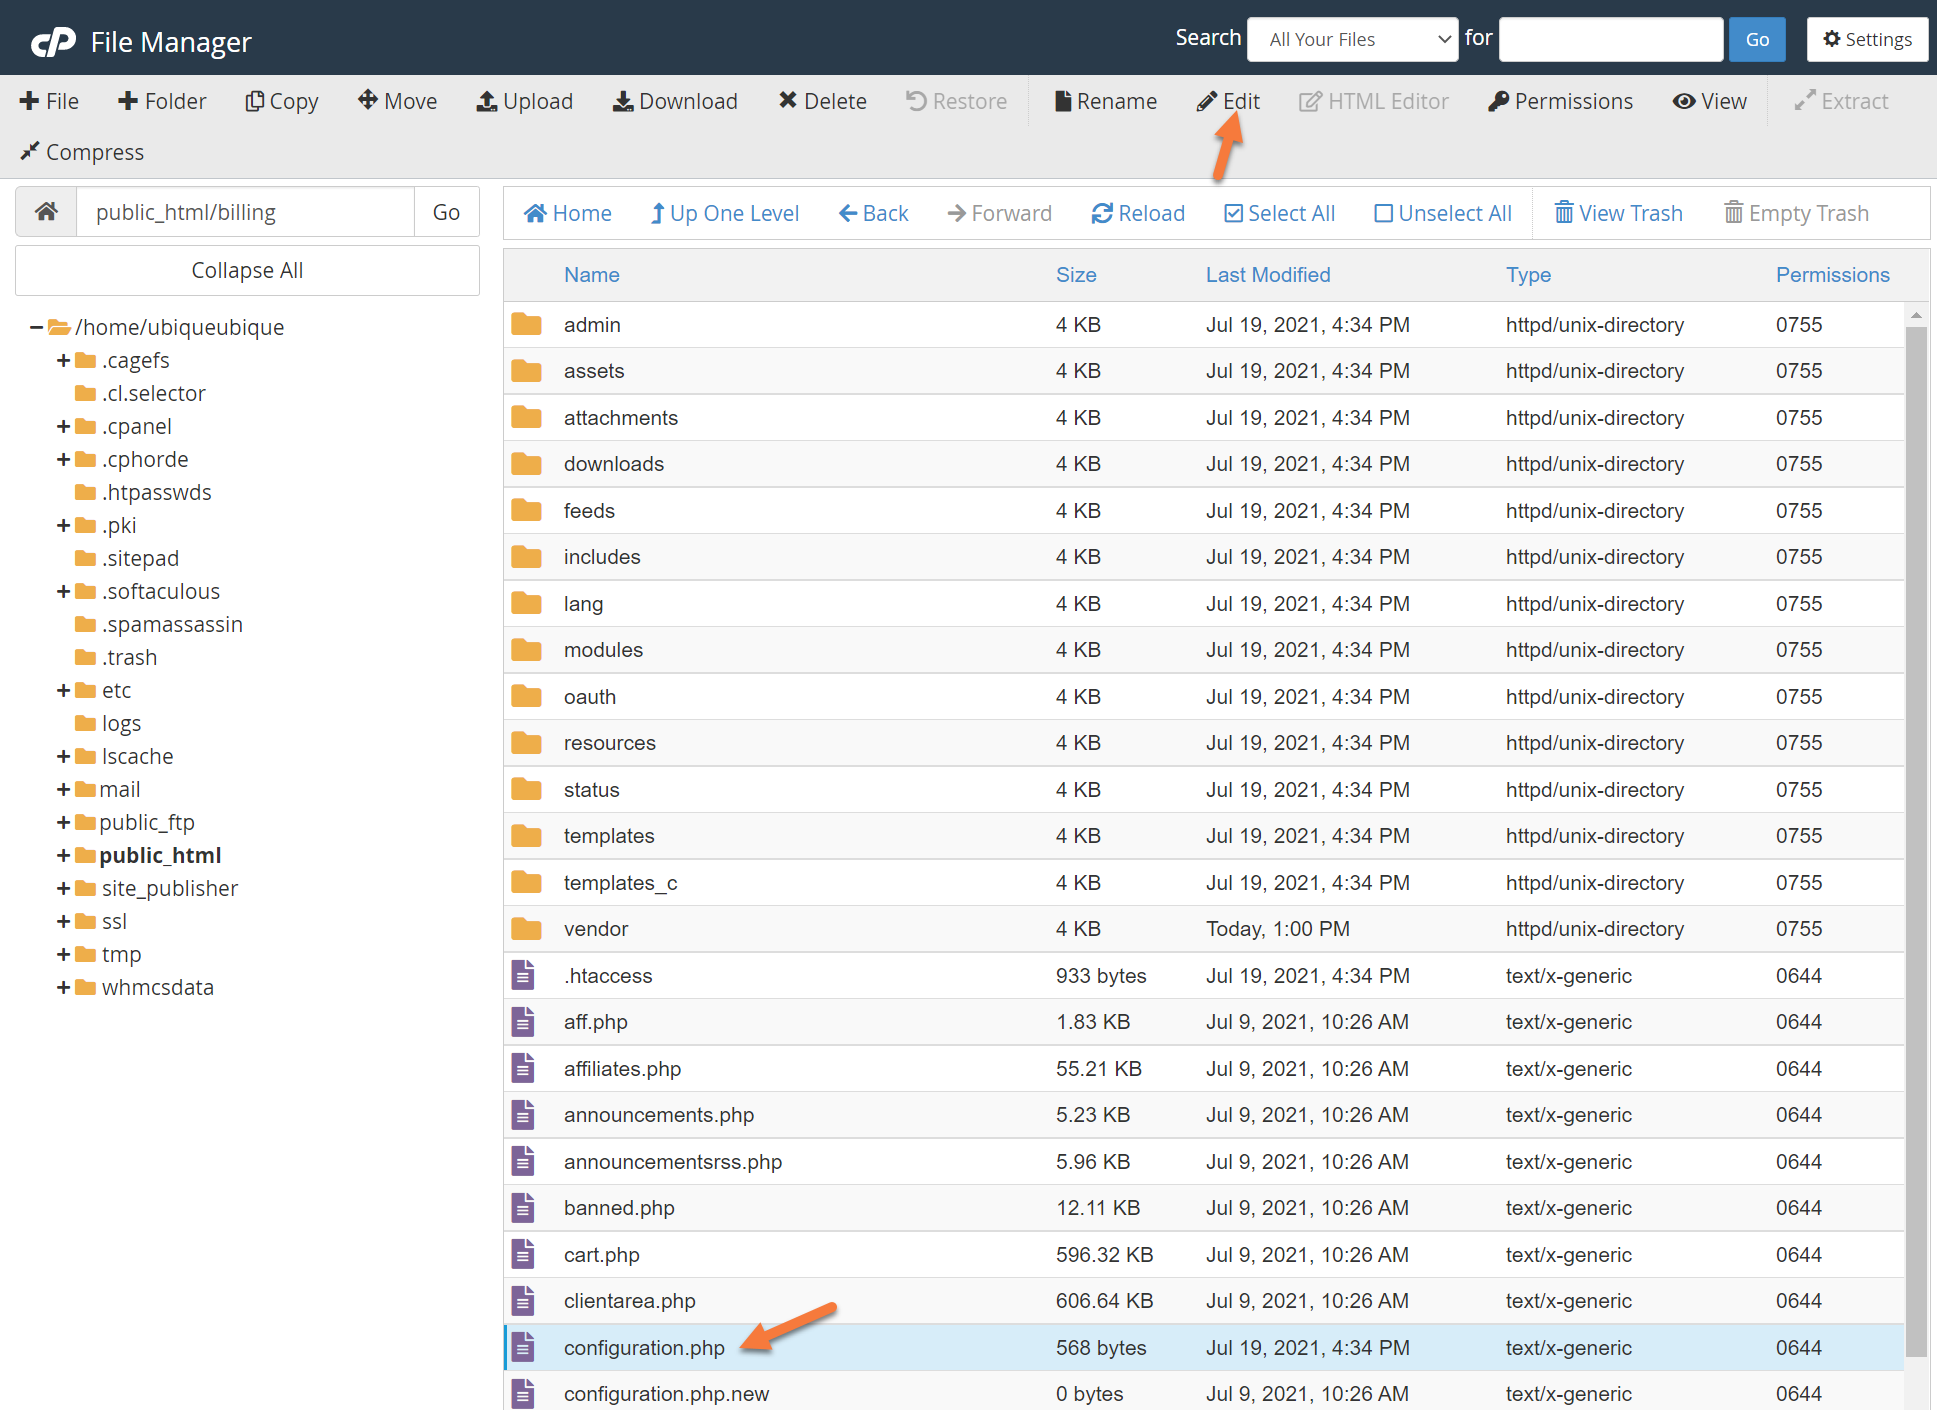
Click on the file, then at the top click Edit in the row of tools. In the modal that appears, click Edit.
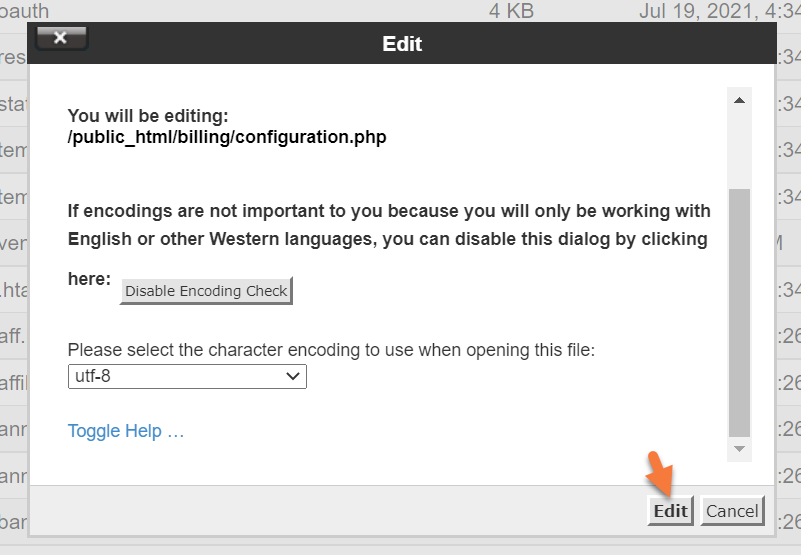
A new tab will open with your WHMCS configuration listed:
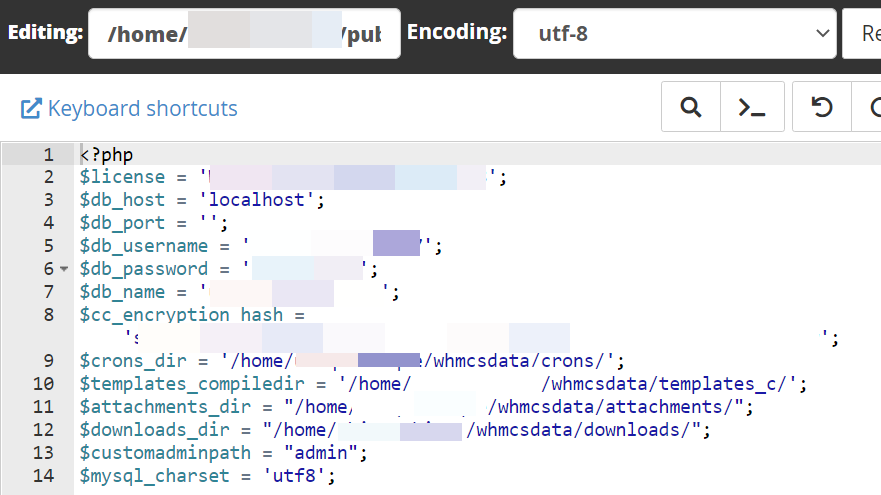
If you are changing the location of the templates_c, specify the new path to the templates_c directory you created on Line 10.
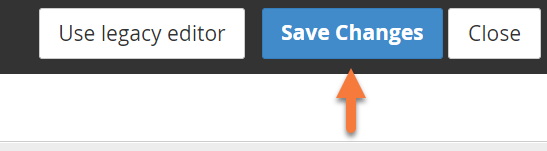
Step 4: When you’ve finished editing, click Save Changes in the top right corner.
Secure the configuration.php File
WHMCS recommends adjusting the permissions for the “configuration.php” file in your WHMCS root directory. This file contains sensitive data that you can’t recover without a backup of the file. To avoid accidentally overwriting, editing, or deleting the file, change the permission setting of this file to 400.
This provides the system with read-only access and prevents anyone else from reading, editing, or executing the file.
To change the permissions on this file, you can use the Terminal app to do. Just follow the steps below:
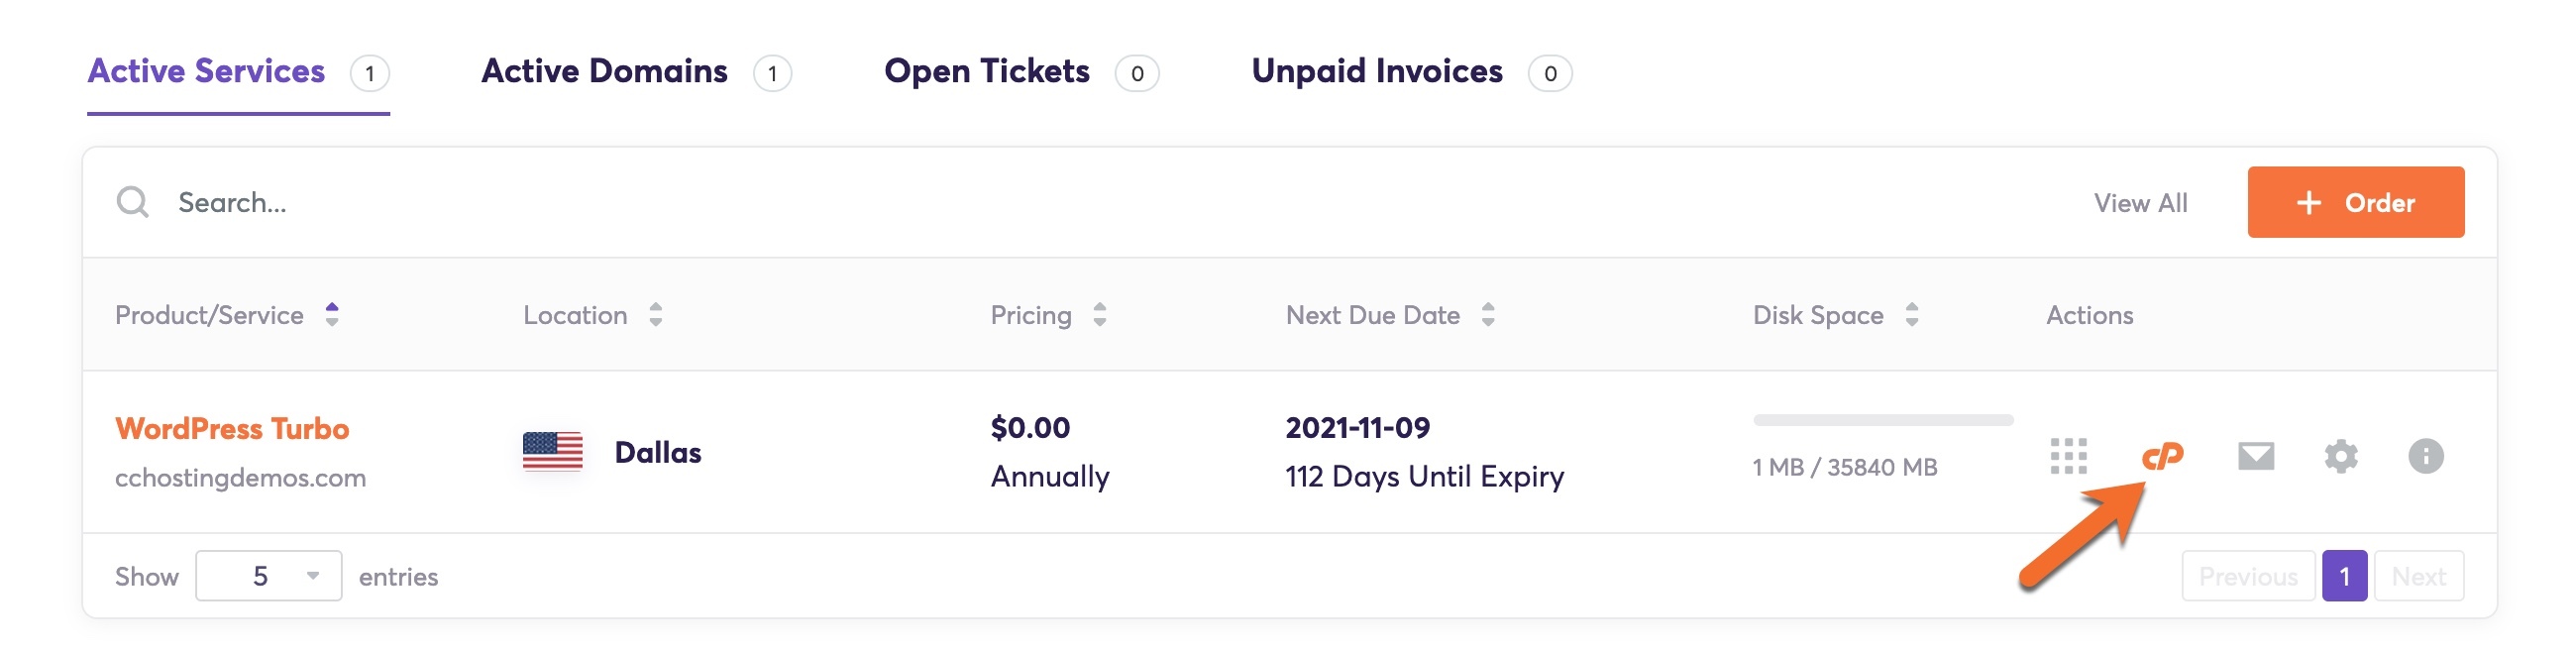
Step 1: Login to your ChemiCloud account by clicking here, then open your cPanel and look for Terminal, which is located in the Advanced Section.

Step 2: Once the Terminal Page opens, you’ll need to click the blue button which says “I understand and want to proceed.”. The Terminal is an advanced feature and you’ll need to follow the directions below precisely.

Step 3: After clicking the blue button, the terminal will load.
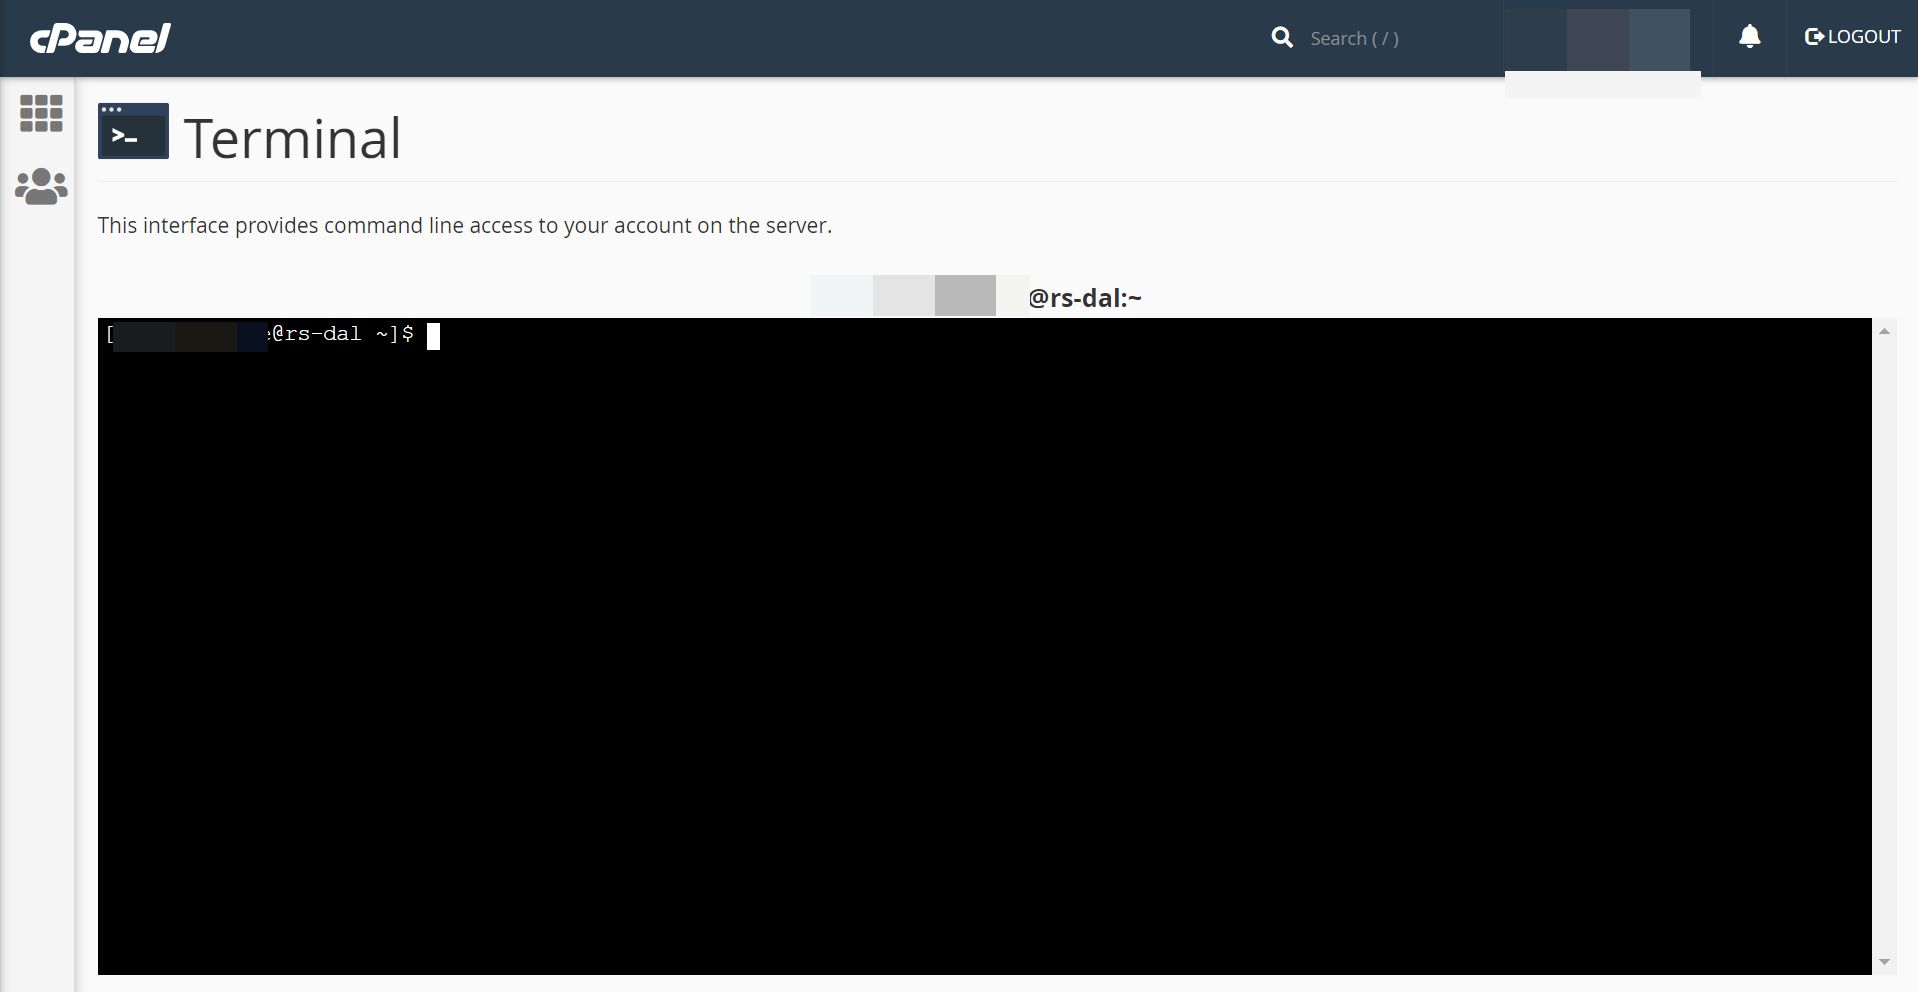
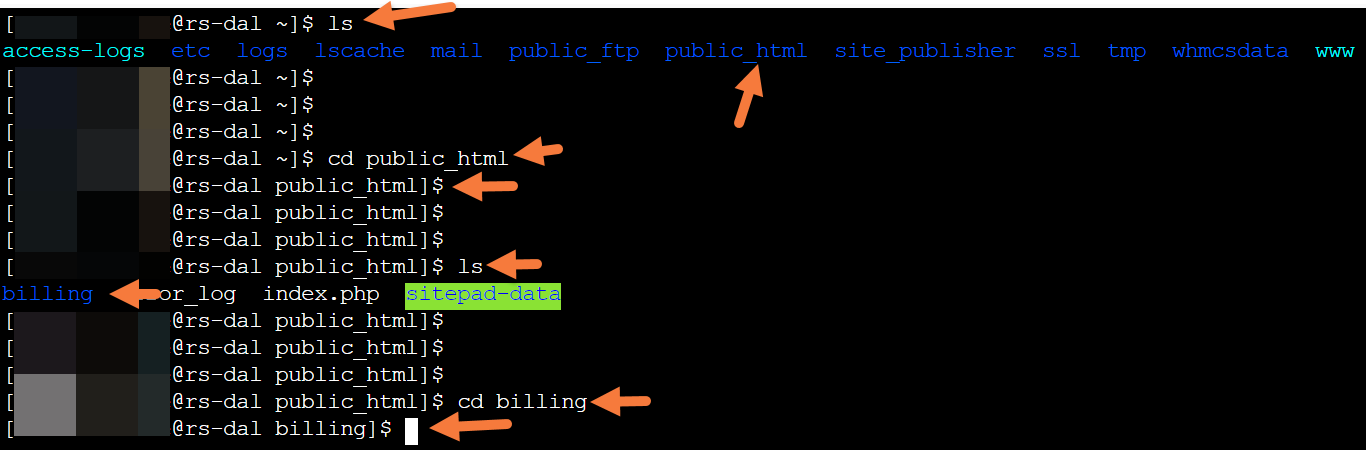
Step 4: Using the cd command, which stands for change directory, change directory into the directory where your WHMCS location is installed. In my case, WHMCS is installed in a folder called billing which is located in the public_html folder, so I will use this command:
cd public_html/billing
to change directories into the WHMCS installation directory.
Step 5: Next you need to run the following command in your Terminal:
chmod 400 configuration.php

After running the command, your Terminal should look like this:
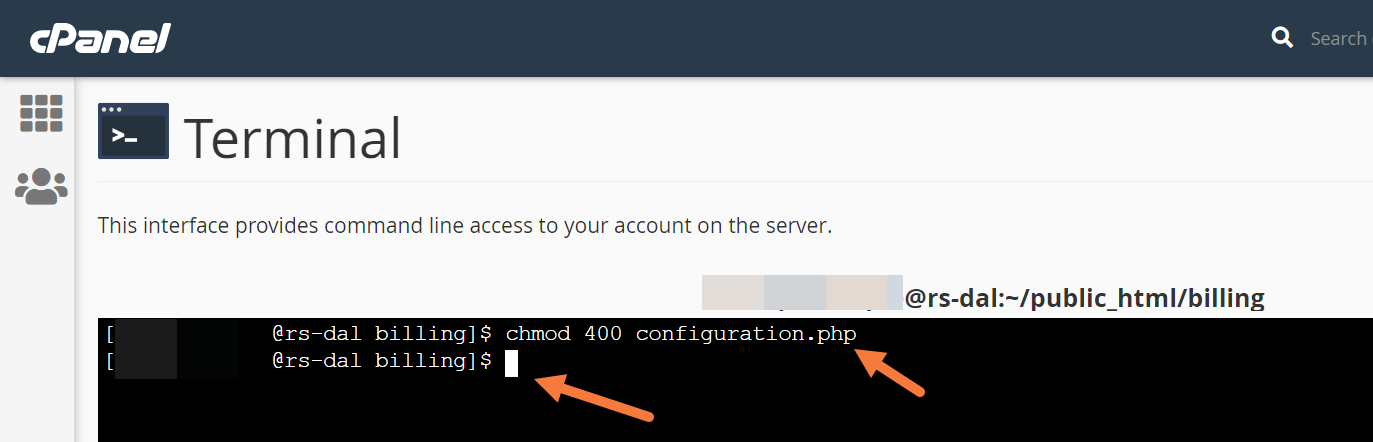
Congrats, you’ve successfully changed the permissions on the WHMCS configuration.php file. Keep in mind, if you need to update your WHMCS License Key, you must set the permissions on this file to 755 to allow the system to edit the file. After updating your license key, you can revert the permissions to 400.
Restrict Access By IP Address
For increased protection, if you and all of your staff use fixed (static) IP addresses, you can restrict access to WHMCS to a specific set of IP addresses. To do this, use the steps below:
Step 1: Log in to your cPanel. There’s a lot of ways to do this, but the sure-fire easiest way is to login to your Client Area, then open your cPanel.
Step 2: Once your cPanel is open, open your File Manager.
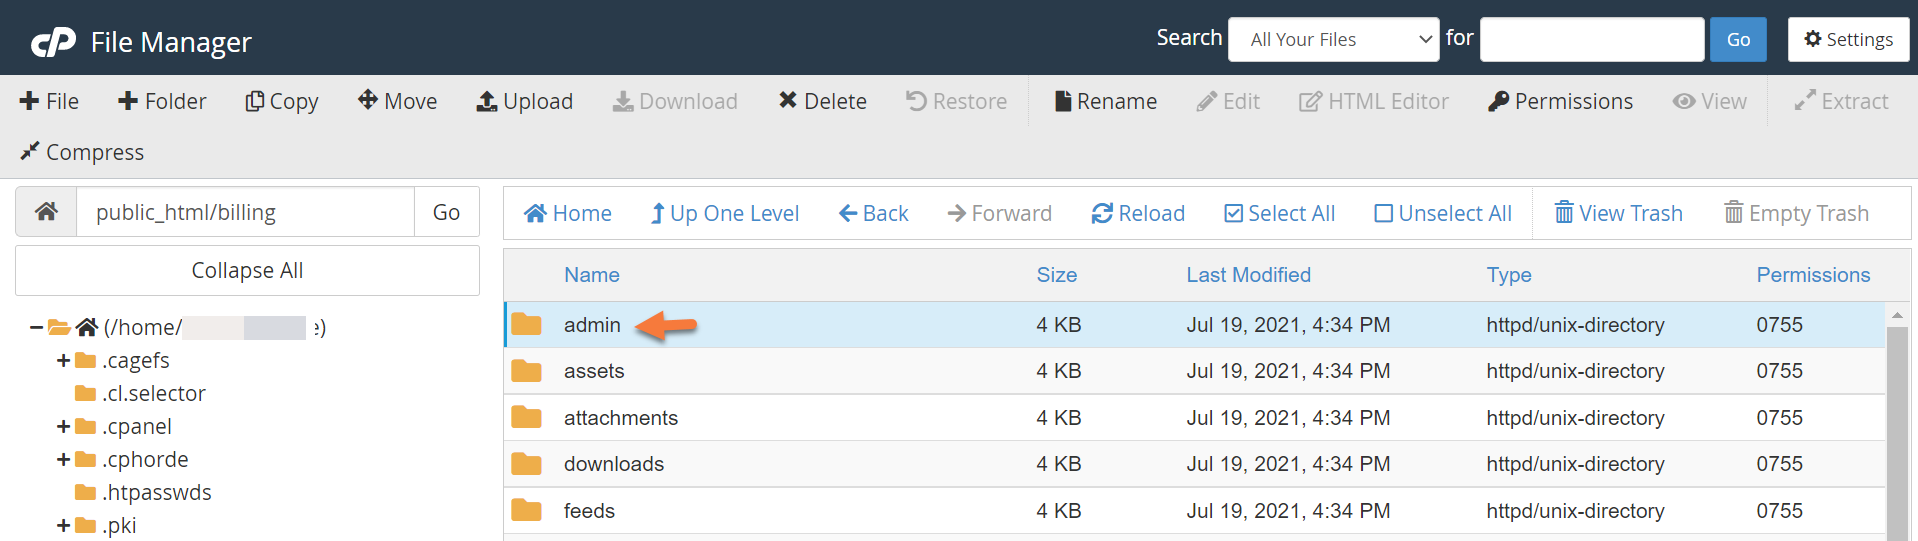
Step 3: In your File Manager, navigate to the directory where your WHMCS installation is located, and open the admin directory.
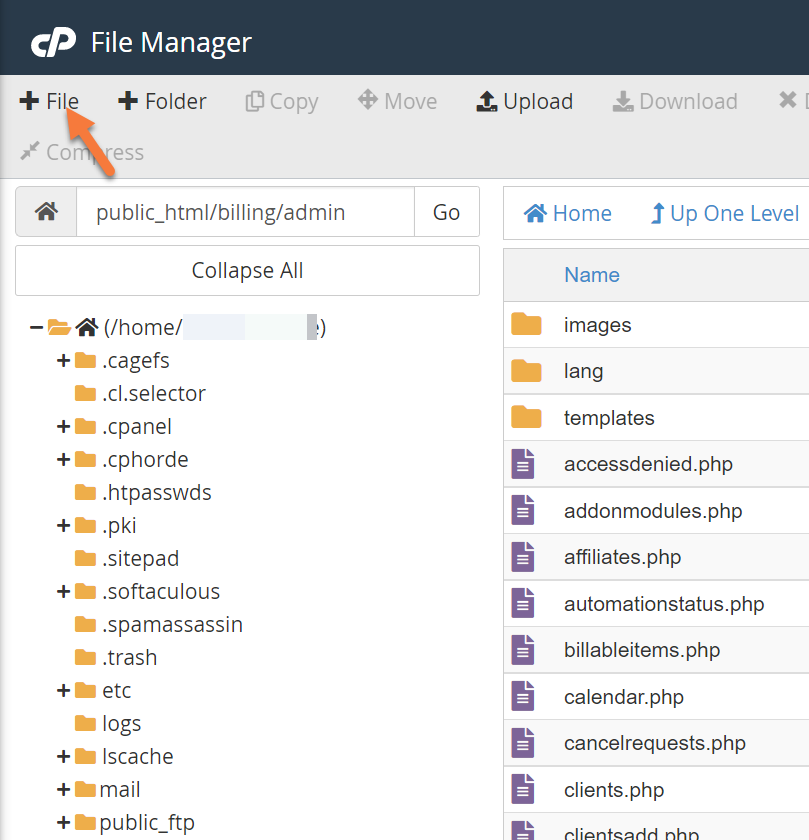
Step 4: You’ll need to create a new file in the admin directory in order to restrict access to WHMCS by IP address. To do this, click + File in the top left corner of File Manager.
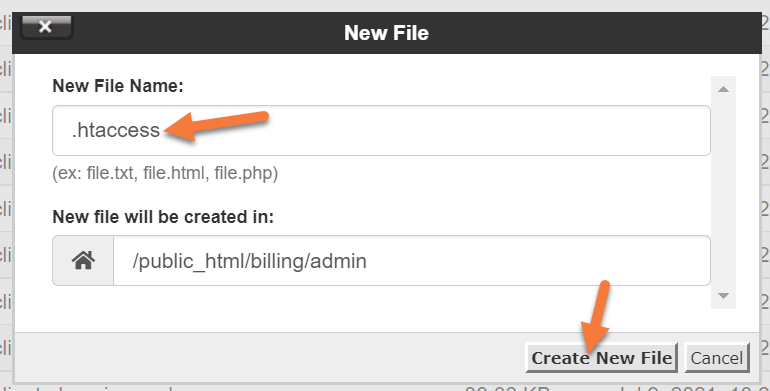
 In the new file modal, the file name will be .htaccess
Click Create New File after entering the filename.
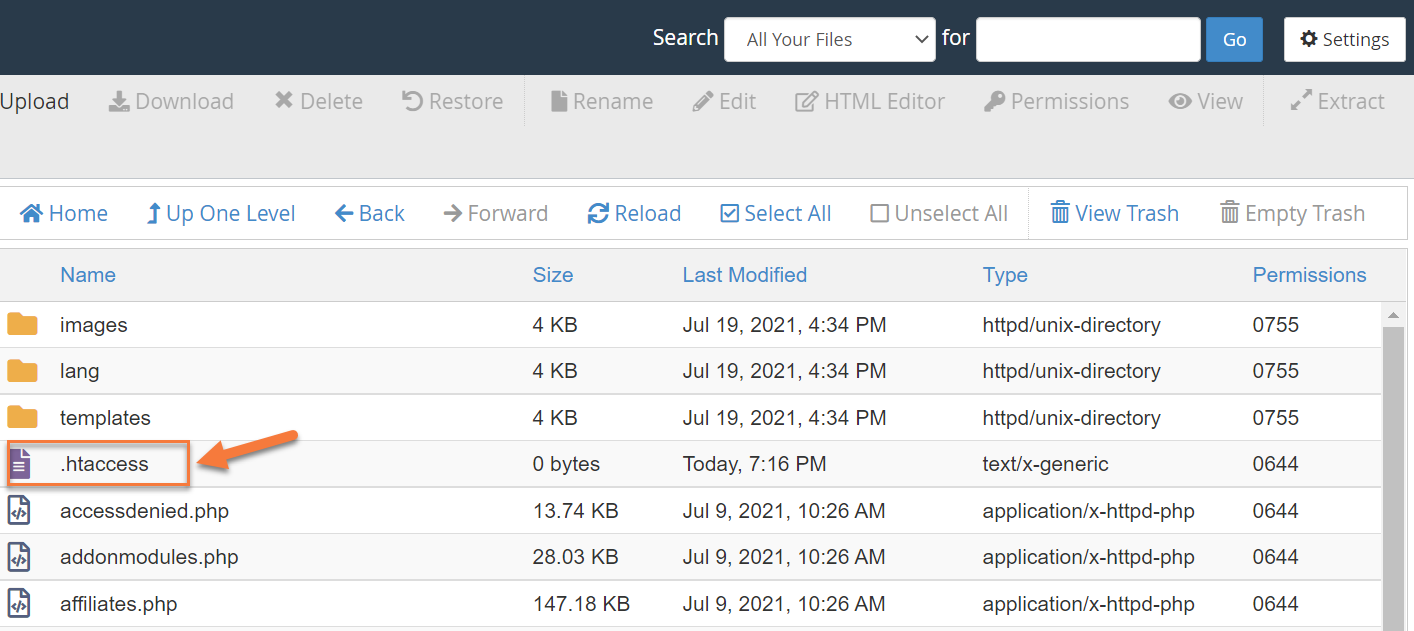
 Once the .htaccess file is created, it will be listed amongst the other files in the /admin directory:
Single-click on the .htaccess file to select it, then click Edit in the top right corner of the row of tools at the top of File Manager.
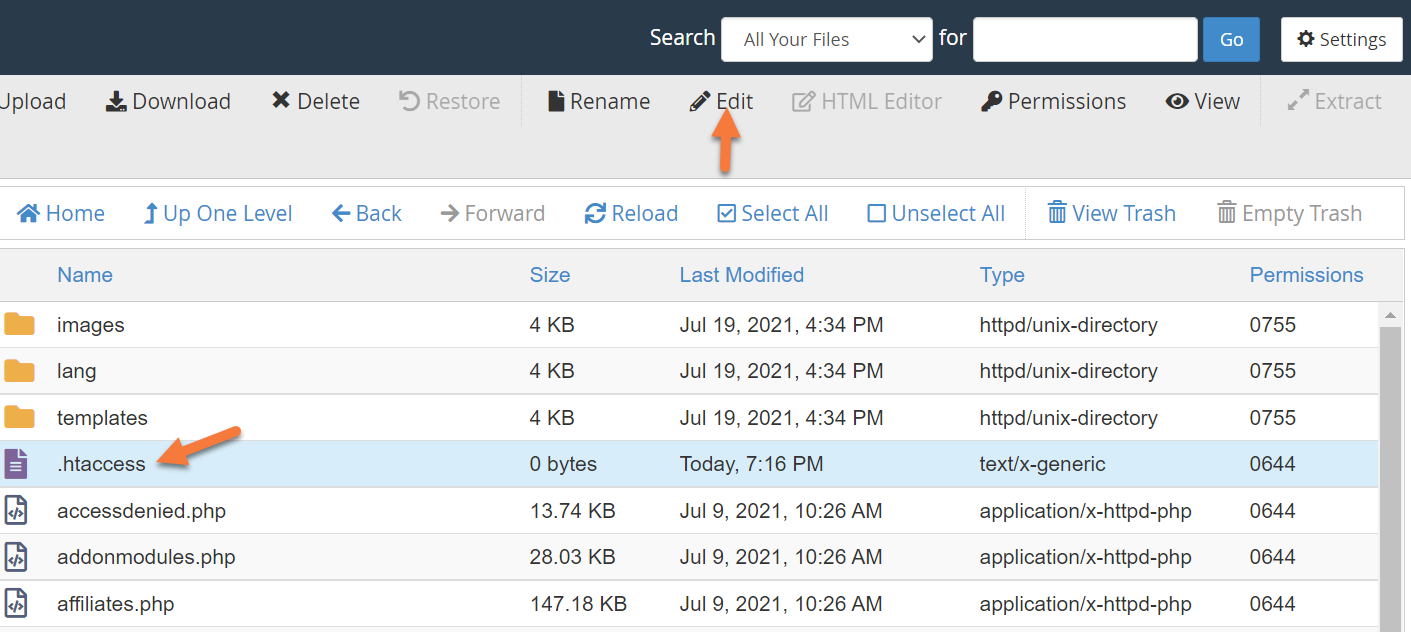
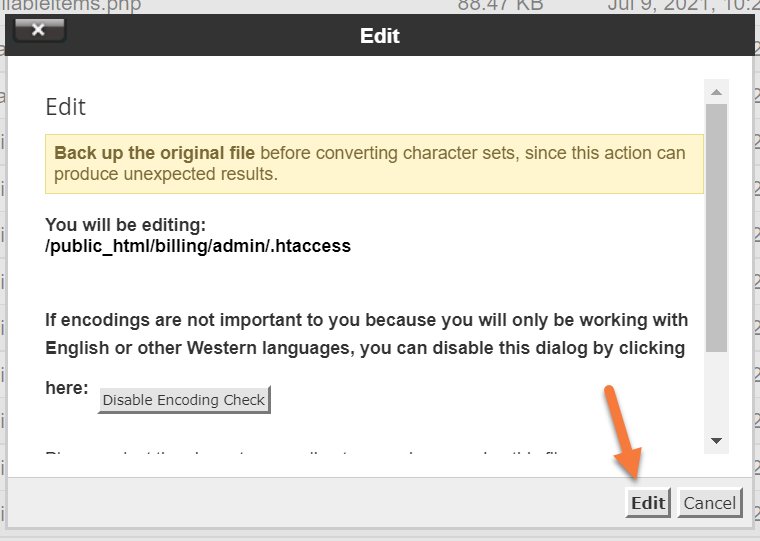
The Edit modal will appear, just click Edit in the bottom right corner to proceed.
 Step 5: A new tab in your browser will open with the HTML editor.
Enter the following text:
order deny,allow
allow from x.x.x.x
allow from x.x.x.x
deny from all
For each IP address, you wish to allow, enter a new line beginning with allow from, following by the IP address.
When you’ve finished, your file could look like this one below (depending on how many IPs you’ve allowed):
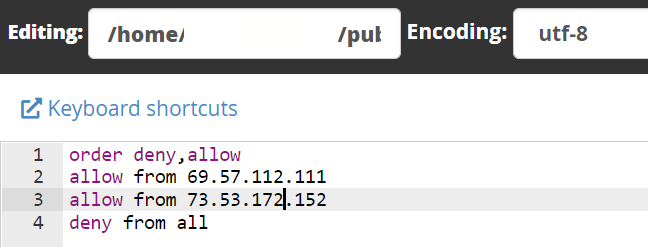
When you’ve finished, click the Save Changes button in the top right corner.
Now, when others try to access your WHMCS Admin area, unless their IP address is on the list, they won’t be able to load the login page or any other elements in the Admin directory.
Renaming Your Admin Directory
You can rename the Admin directory into something else to make it even harder for people to access your Admin area or break into your WHMCS installation.
Follow the steps below to rename your WHMCS admin directory.
Step 1: Login to your cPanel. There’s a lot of ways to do this, but the sure fire easiest way is to login to your Client Area, then open your cPanel.
Step 2: Once your cPanel is open, open your File Manager.
Step 3: In your File Manager, navigate to the Directory where your WHMCS installation is located and locate a file called configuration.php.
Click on the file, then at the top click Edit in the row of tools. In the modal that appears, click Edit.
A new tab will open with your WHMCS configuration listed:
At the bottom of the configuration, add a new line with the following text:
$customadminpath = "mycustomfoldername";Replace “mycustomfoldername” with the name you wish to use for your Admin directory. This should just be the directory name, not the full path to the directory.
Click Save Changes in the top right corner to save these new changes.
Step 4: Next, return to your File Manager and locate the Admin directory in the directory where WHMCS is installed.
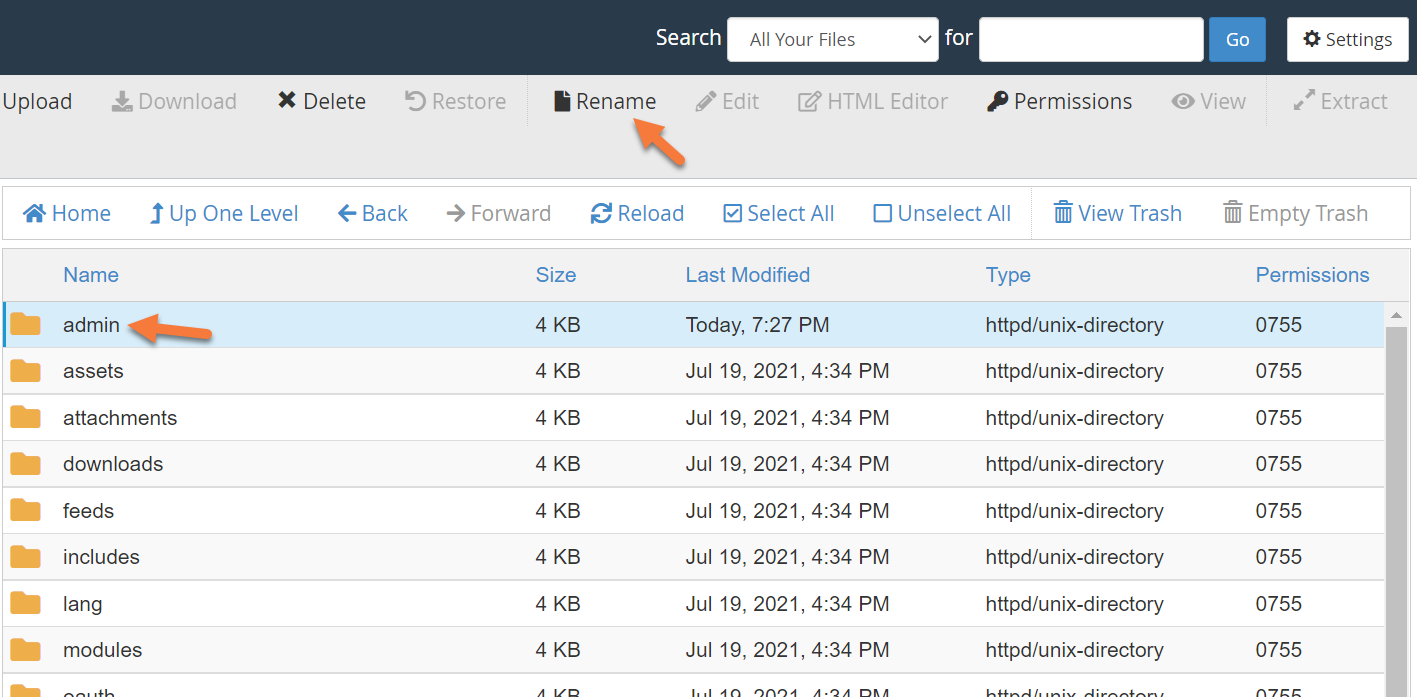
Single-click the folder, then click Rename from the row of tools at the top of the File Manager.
In the rename modal, give the folder the same name you entered in the WHMCS configuration.php file in the earlier step, then click the rename file button to save the file rename.
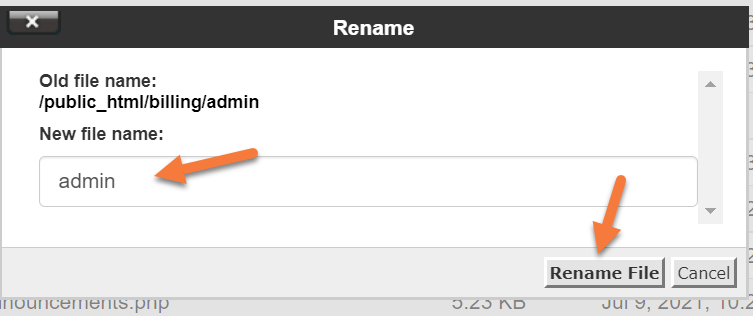
Now, the folder will be renamed and your WHMCS installation is even more secure!
Restrict Database Privileges
WHMCS only requires a few database permissions to operate day-to-day, including these permissions:
- DELETE
- INSERT
- SELECT
- UPDATE
- LOCK TABLES
However, if you are doing a new installation, upgrade, or activating and deactivating modules, you’ll need these privileges:
- ALTER
- CREATE
- DROP
- INDEX
For enhanced security, you can disable access to ALTER, CREATE, DROP, and INDEX. To do this, use the steps below:
Step 1: Login to your cPanel. There’s a lot of ways to do this, but the sure fire easiest way is to login to your Client Area, then open your cPanel.
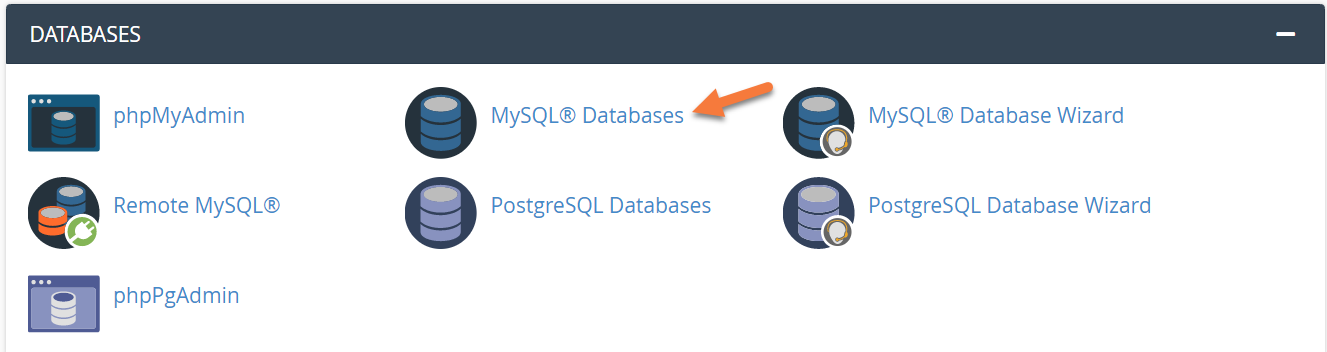
Step 2: Once your cPanel is open, scroll down to the Databases section and open MySQL Databases.
Step 3: Scroll to the Current Databases section and locate the database that’s used for your WHMCS installation.
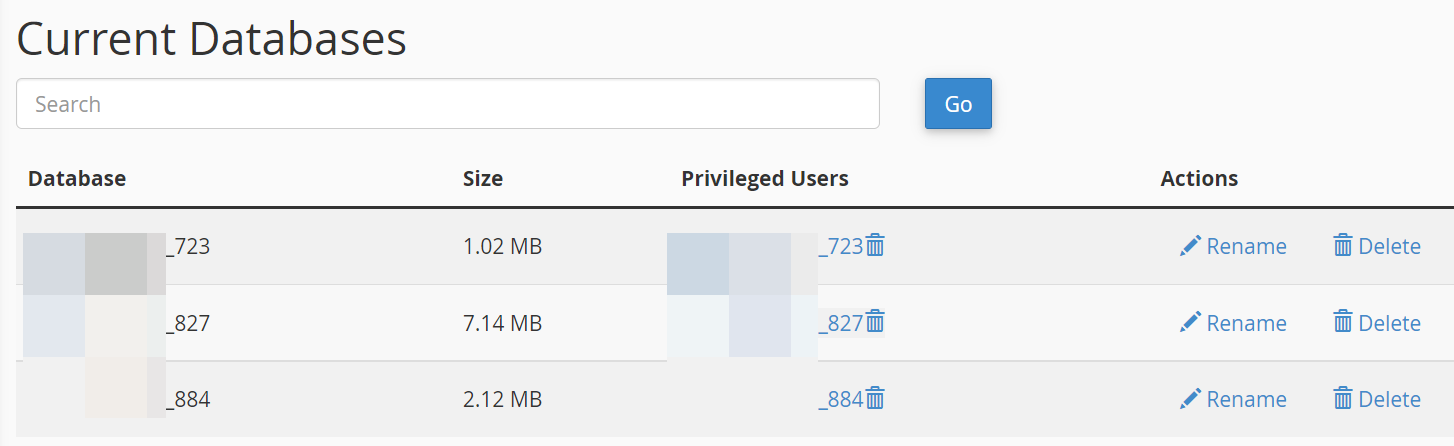
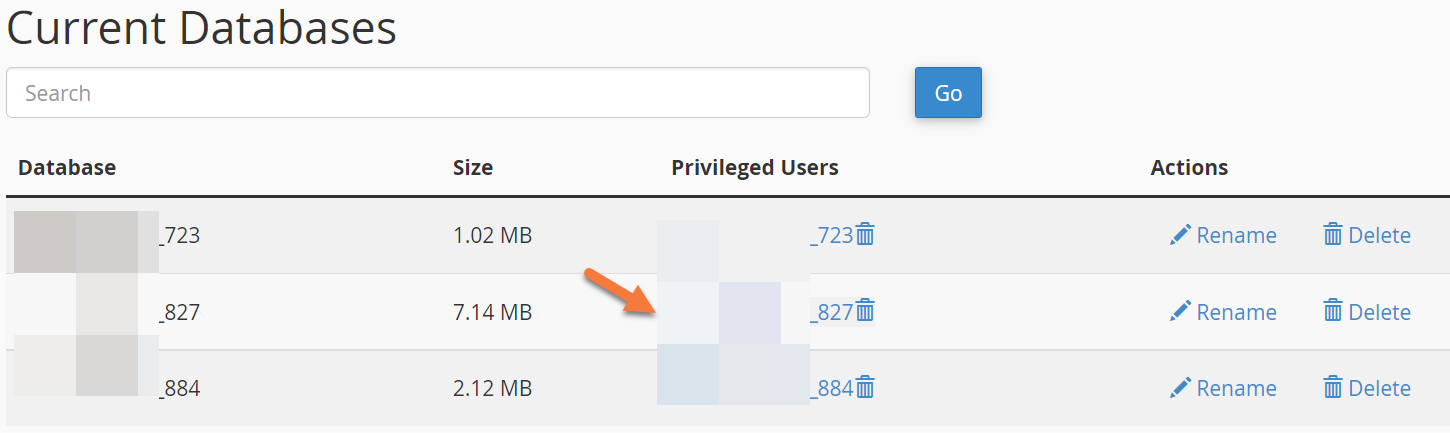
Step 4: Adjacent to the database used for WHMCS, click the Privileged User in the Privileged Users Column. This will load the User Privileges, aka permissions, page.
 Step 5: Uncheck the permissions that are not needed for day-to-day functioning of WHMCS. This includes these:
- ALTER
- CREATE
- DROP
- INDEX
When you’ve finished, click the Make Changes button at the bottom of the page.
And that’s all you need to do! Just keep in mind, next time you go to upgrade your WHMCS, or activate or deactivate a new module, you’ll need to enable those permissions.