WHMCS is your ultimate companion for reselling web hosting. This guide will help you set up the General Settings of WHMCS, which is the first step you should take after installing WHMCS.
Let’s begin!
How to Configure the General Settings in WHMCS
You can follow the steps in this article or watch out our video tutorial.
- First, log in to your WHMCS Admin. Once logged in, click the wrench in the top right corner, then click System Settings.
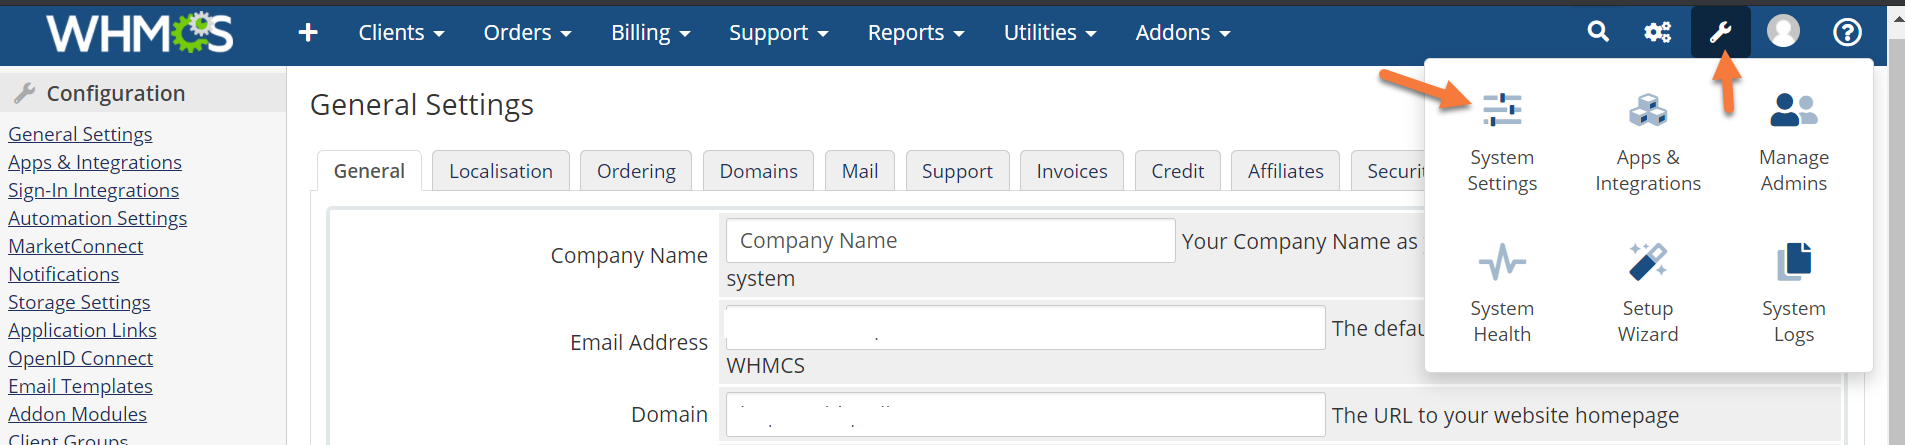
2. Once the System Settings load, you’ll notice there is a row of 12 tabs at the top of the page. Since you need to configure some of these settings to customize your WHMCS installation, let’s review each tab.
General Settings > General
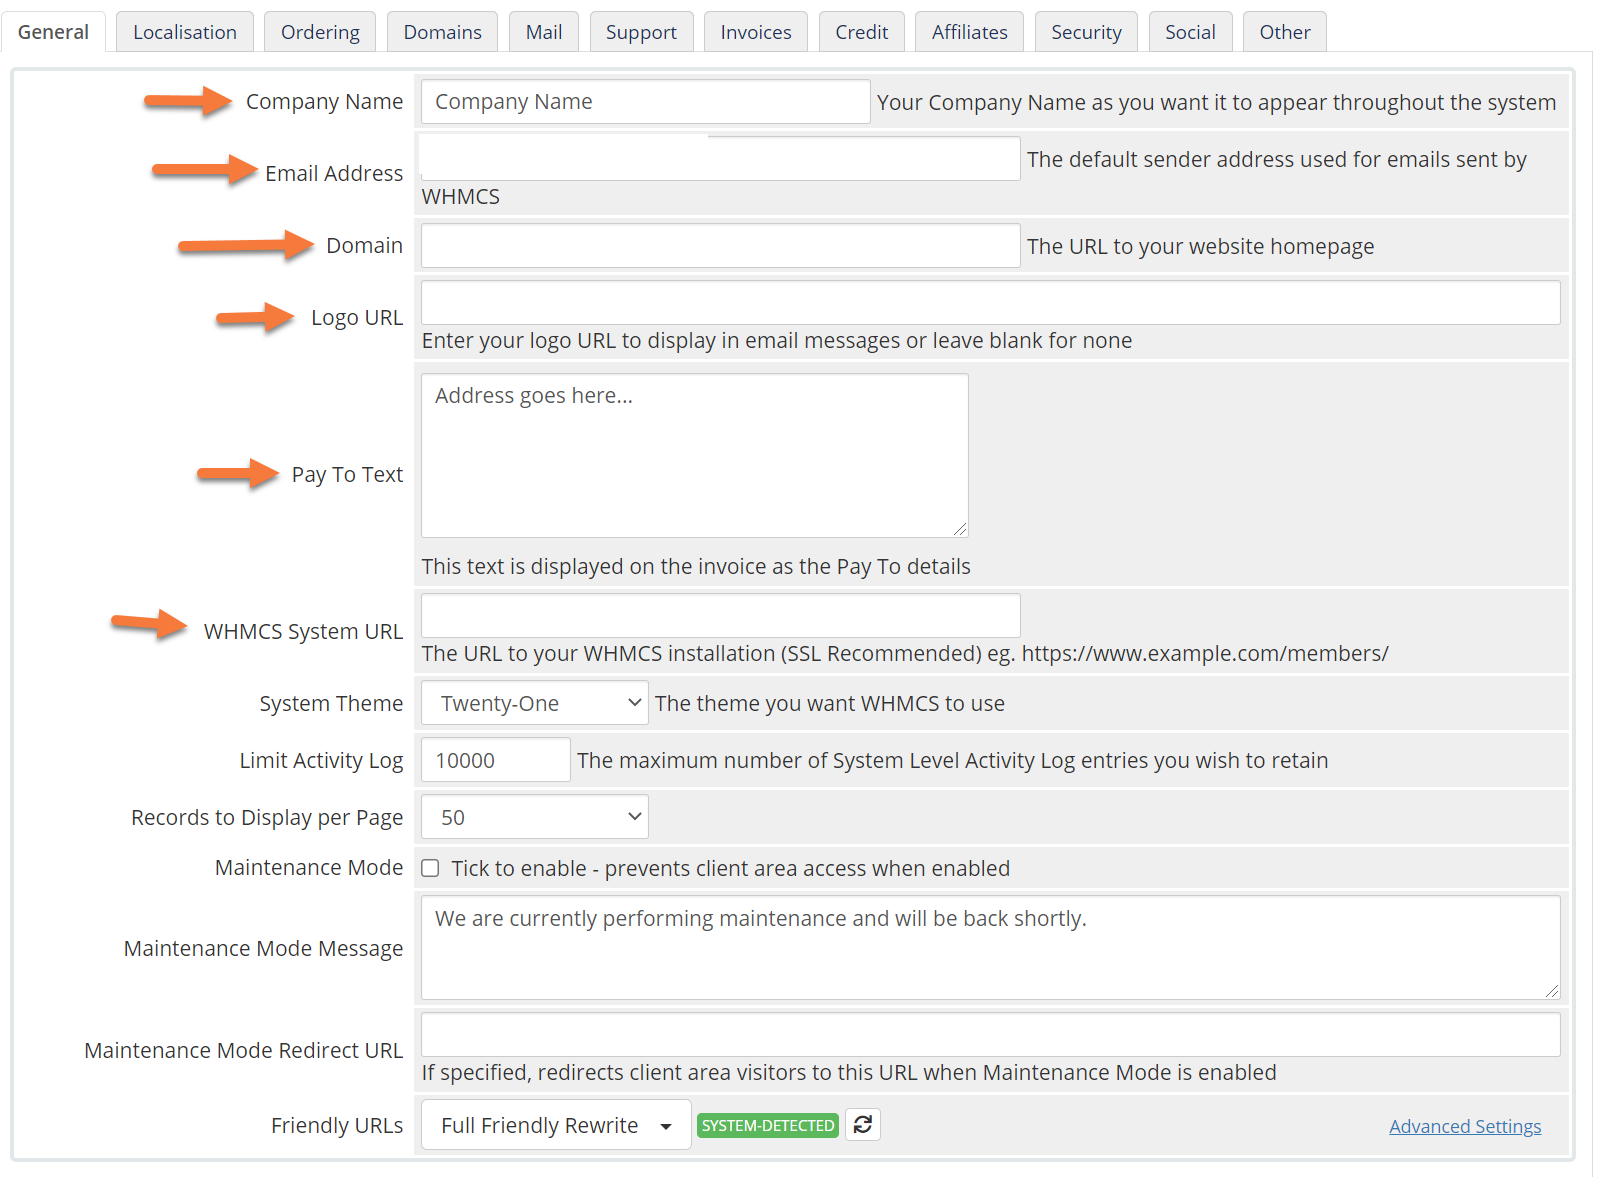
On the General tab, you’ll want to configure the following settings:
- Enter the name of your company in the Company Name field.
- In the “Email Address” field, ensure the address listed there is the one you want to appear when WHMCS sends an email to you or a customer.
- The Domain field is where your business domain name will be listed.
- Your logo URL is the field where you would enter the path to your company logo if you have one. This logo will appear on things like invoices and receipts.
- Your Pay To Text field is where you’ll enter the email address or mailing address where customers will send payments.
Click Save Changes to save any changes you made.
General Settings > Localisation
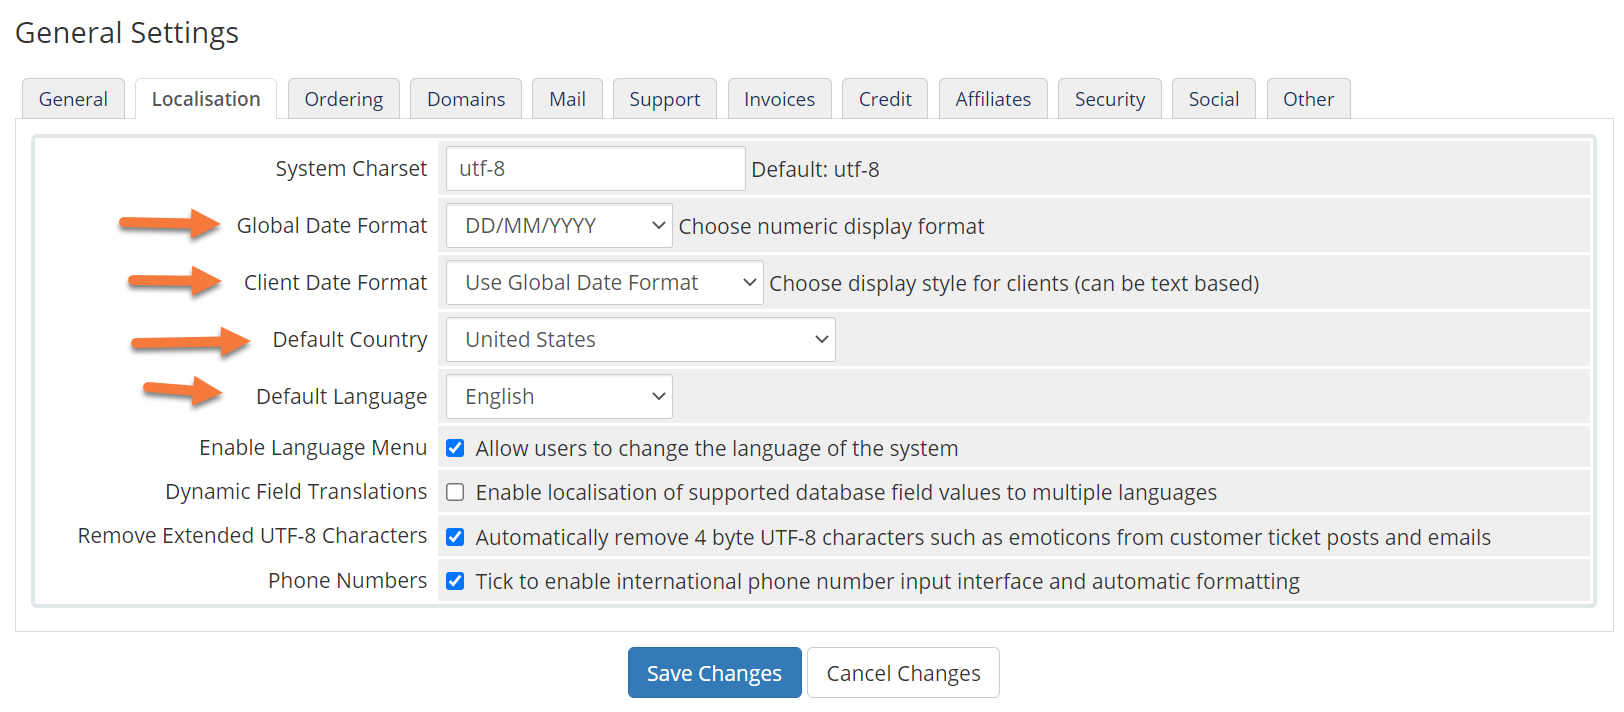
On the Localisation tab, you’ll want to configure the following settings:
- Set the global date format to the date you use in your country.
- Set the client date format to either use the global date, or a custom date.
- Set your default country to the country in which your business is located.
- Set the default language to the language you use.
Click Save Changes to save any changes you made.
General Settings > Ordering
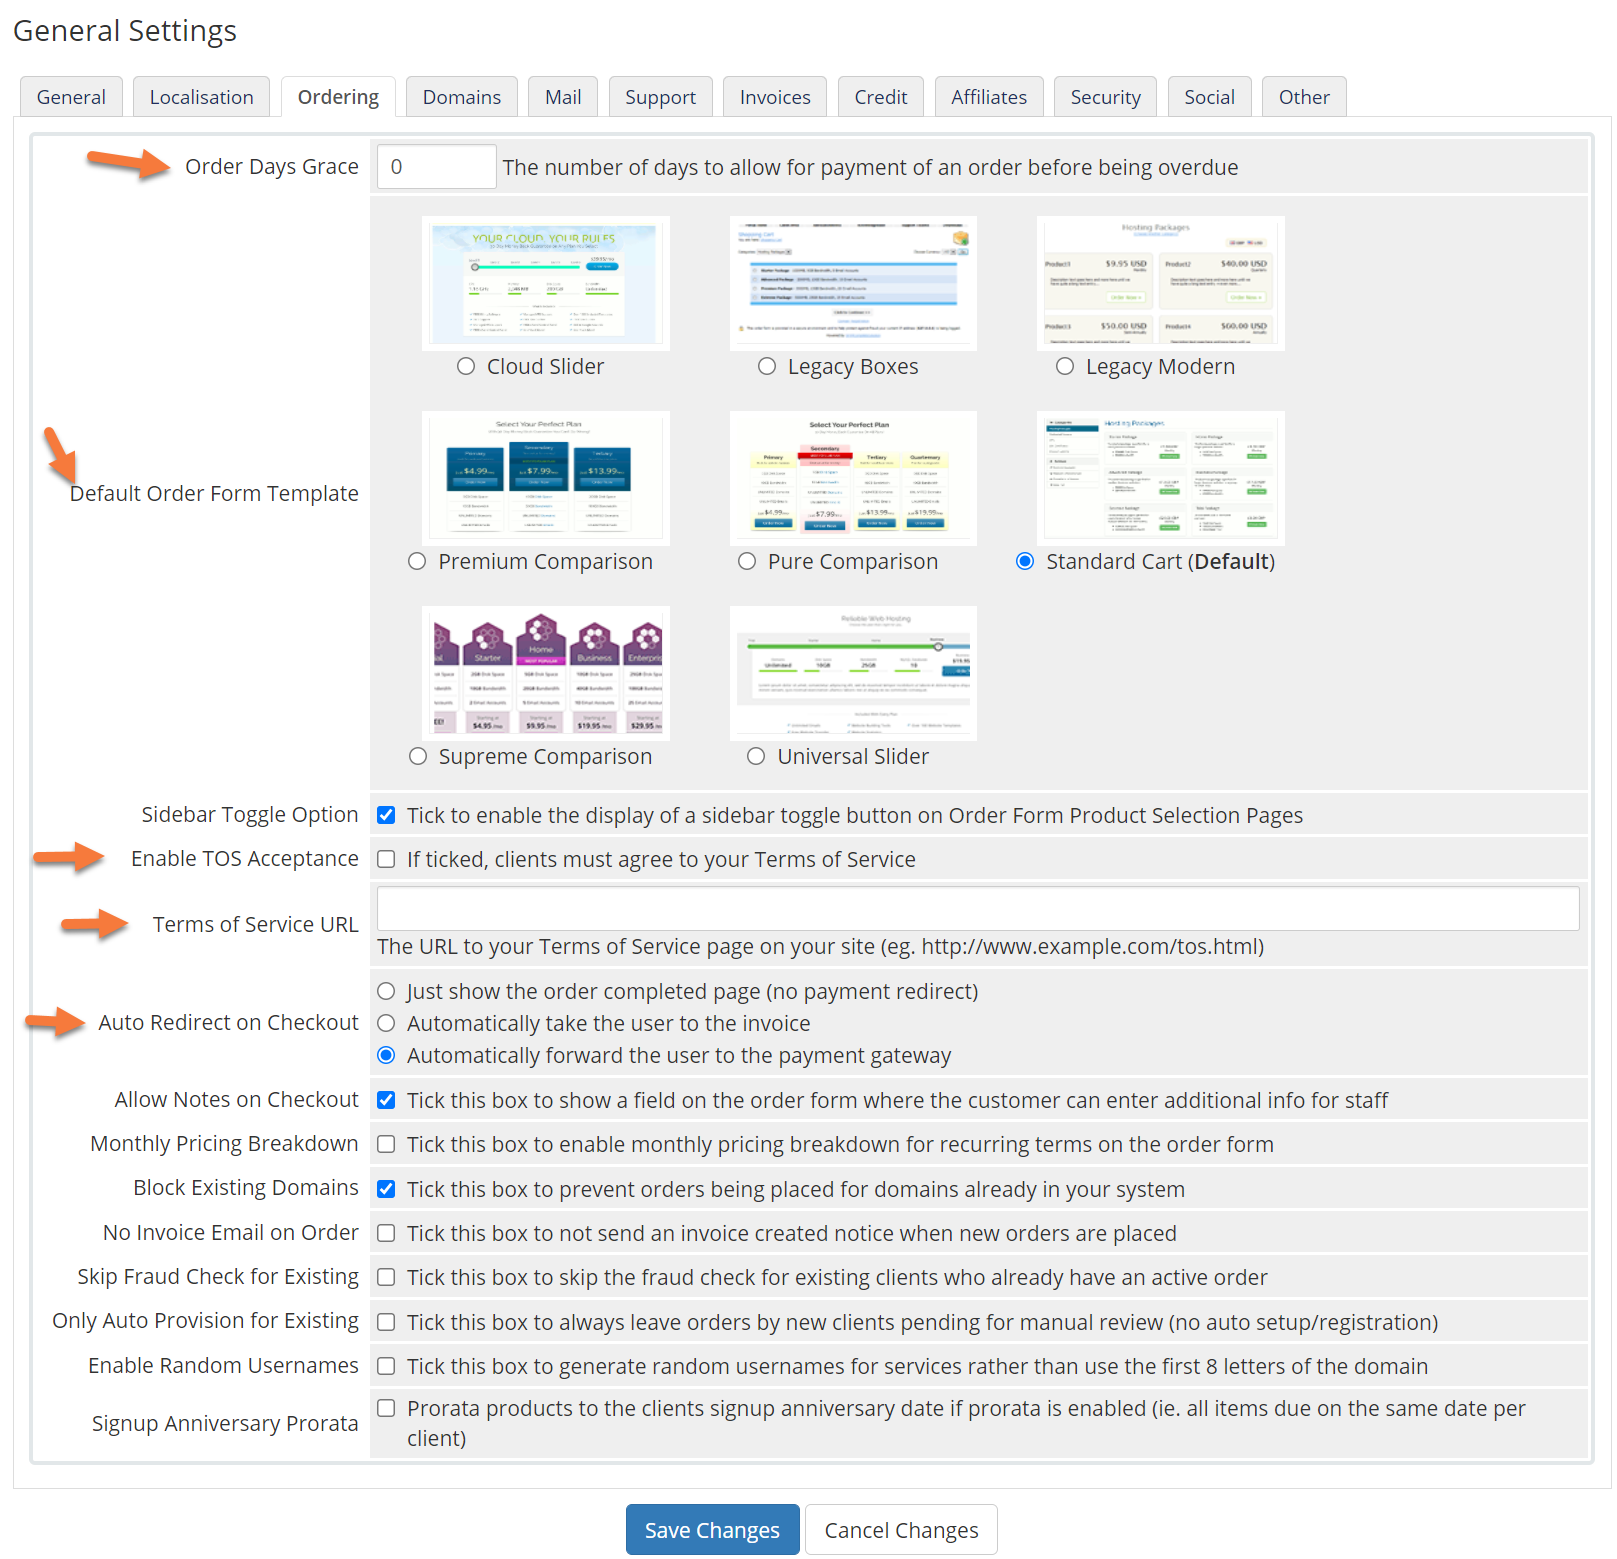 On the Ordering Tab, you’ll want to configure the following settings:
- On the Order Days Grace field, enter the number of days to allow for payment before order becomes overdue.
- Choose a “Default Order Form Template” to present to your customers when they are ordering.
- If you have a Terms of Service (TOS) and your customers have to abide by that before completing their purchase, tick the check box next to that option.
- Next enter the URL where the full Terms of Service can be read on your website.
- Finally, if you want your customers to be auto redirected somewhere at checkout, choose the relevant option to the right.
Click Save Changes to save any changes you made.
General Settings > Domains
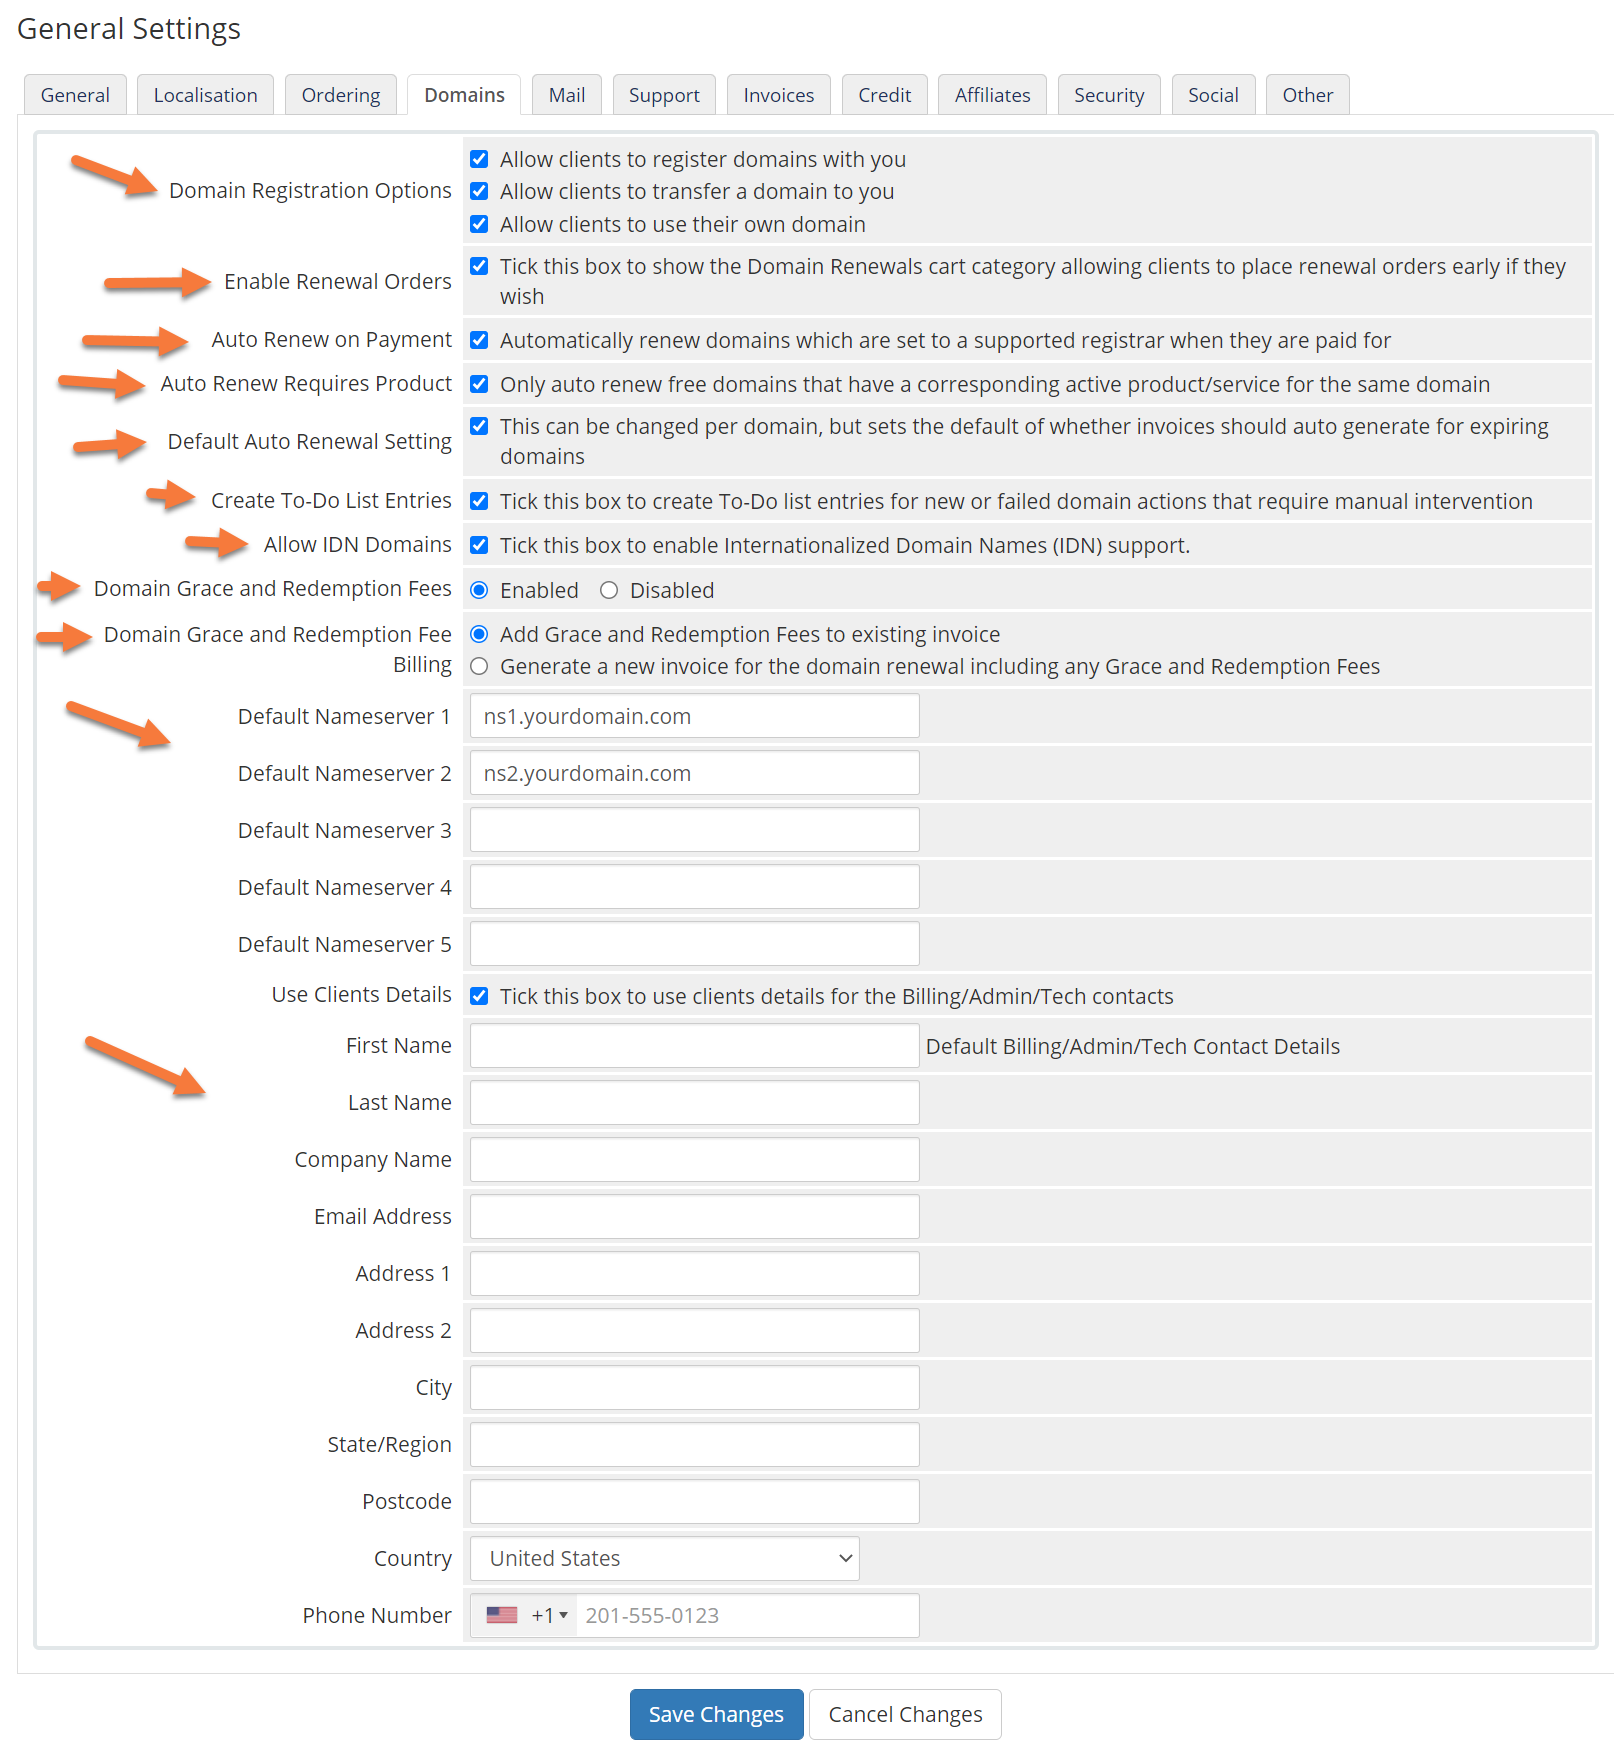
Most of the options on the Domains tab can be left alone, unless you don’t wish to enable certain features, such as IDN domains or Grace and Redemption fees.
However, you definitely want to enter your company’s default nameservers here so they can be auto-populated in the NS field when customers buy domains from you!
Click Save Changes to save any changes you made.
General Settings > Mail
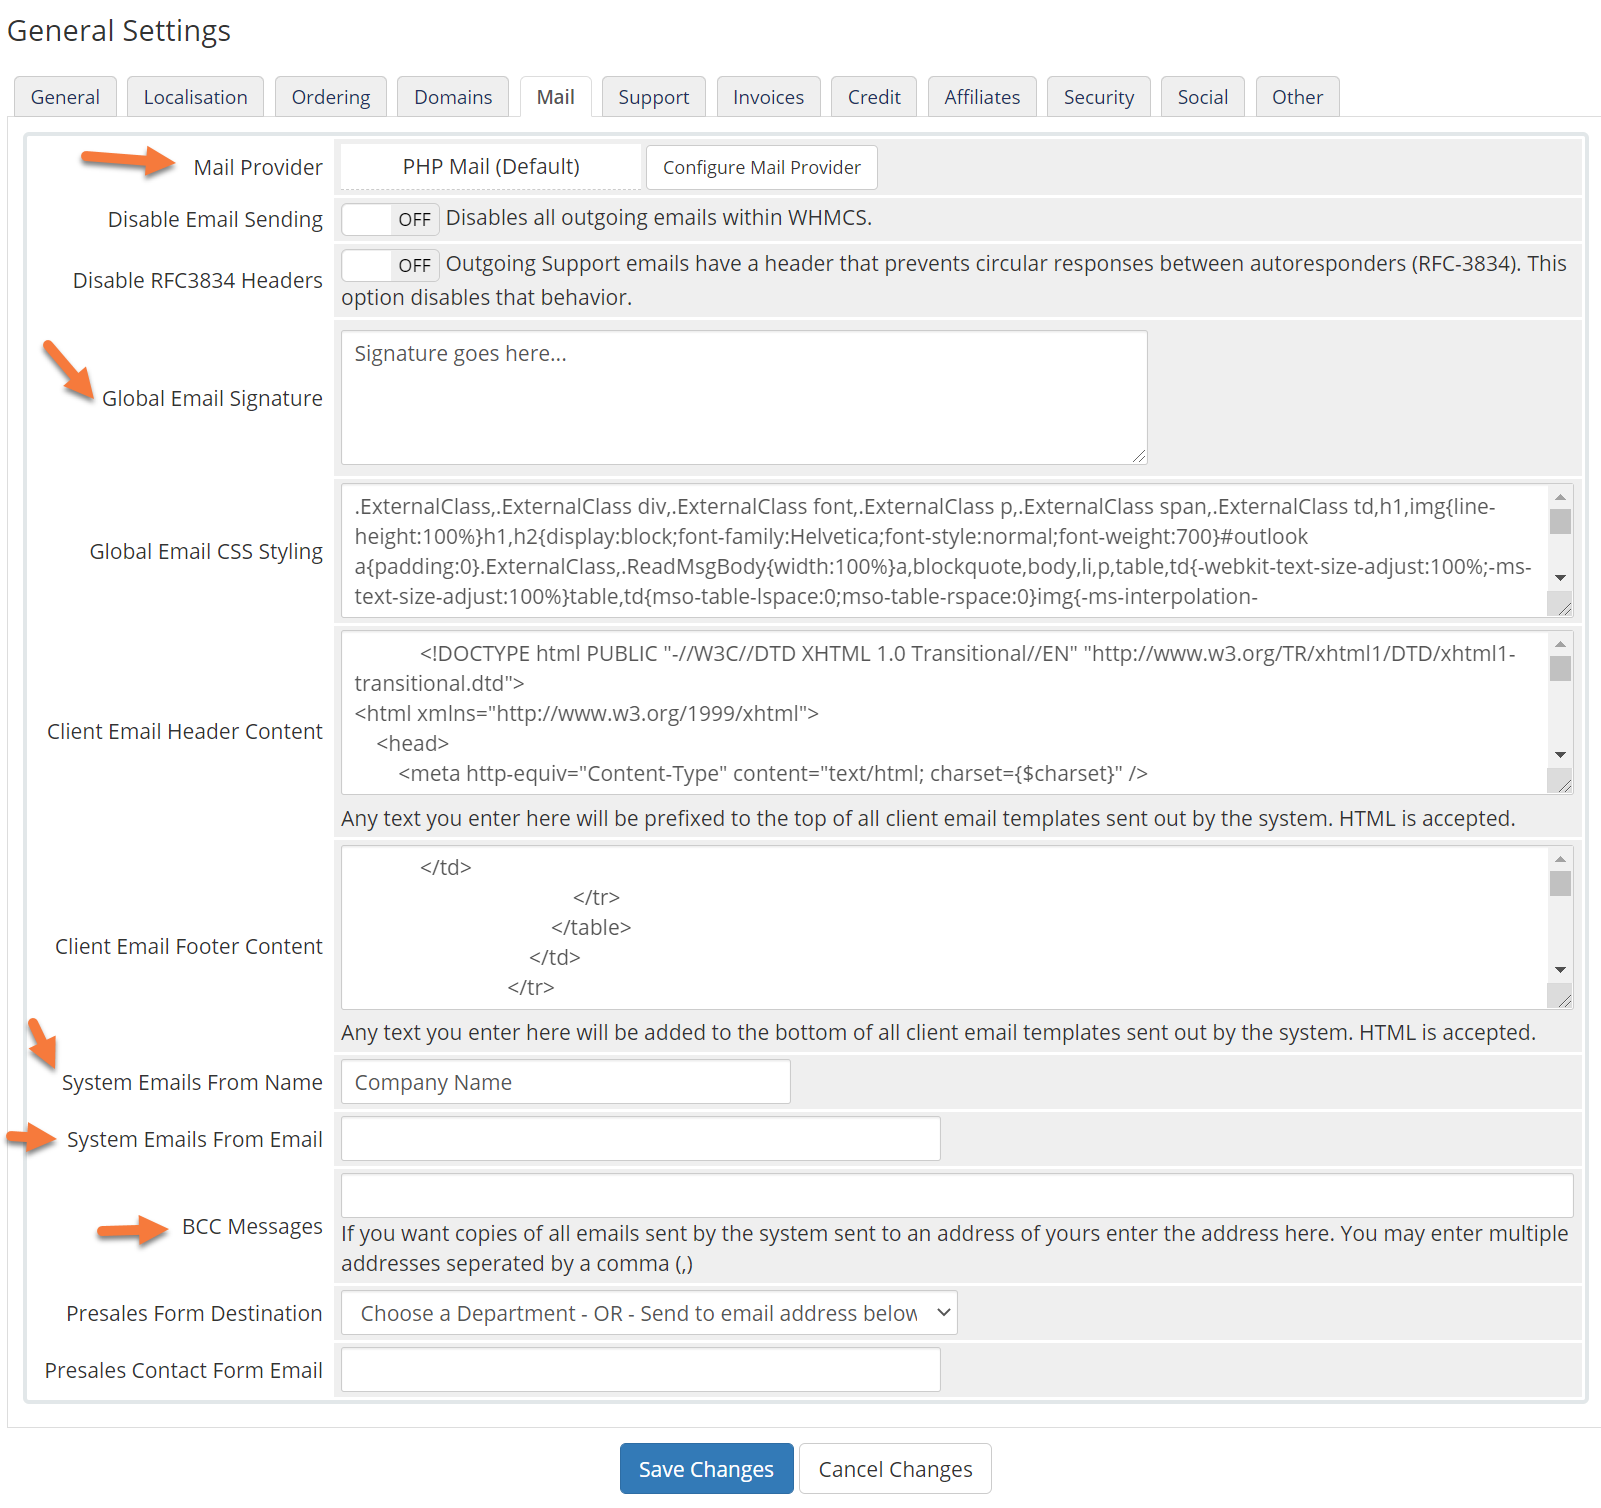
The Mail area contains a very important setting you must modify to use WHMCS successfully at ChemiCloud.
We do not support PHPMail on our servers & this is the default setting for WHMCS. You’ll need to click the “Configure Mail Provider” setting and set up SMTP based email. We have an article on this here.
In addition to changing from PHPMail to SMTP, you need to set a Global Email Signature to say something like:
Thanks for choosing us!
Regards,
Acme XYZ Team
Finally, you’ll need to set the name of the person or department and the email address from which system emails are sent.
Click Save Changes to save any changes you made.
General Settings > Support
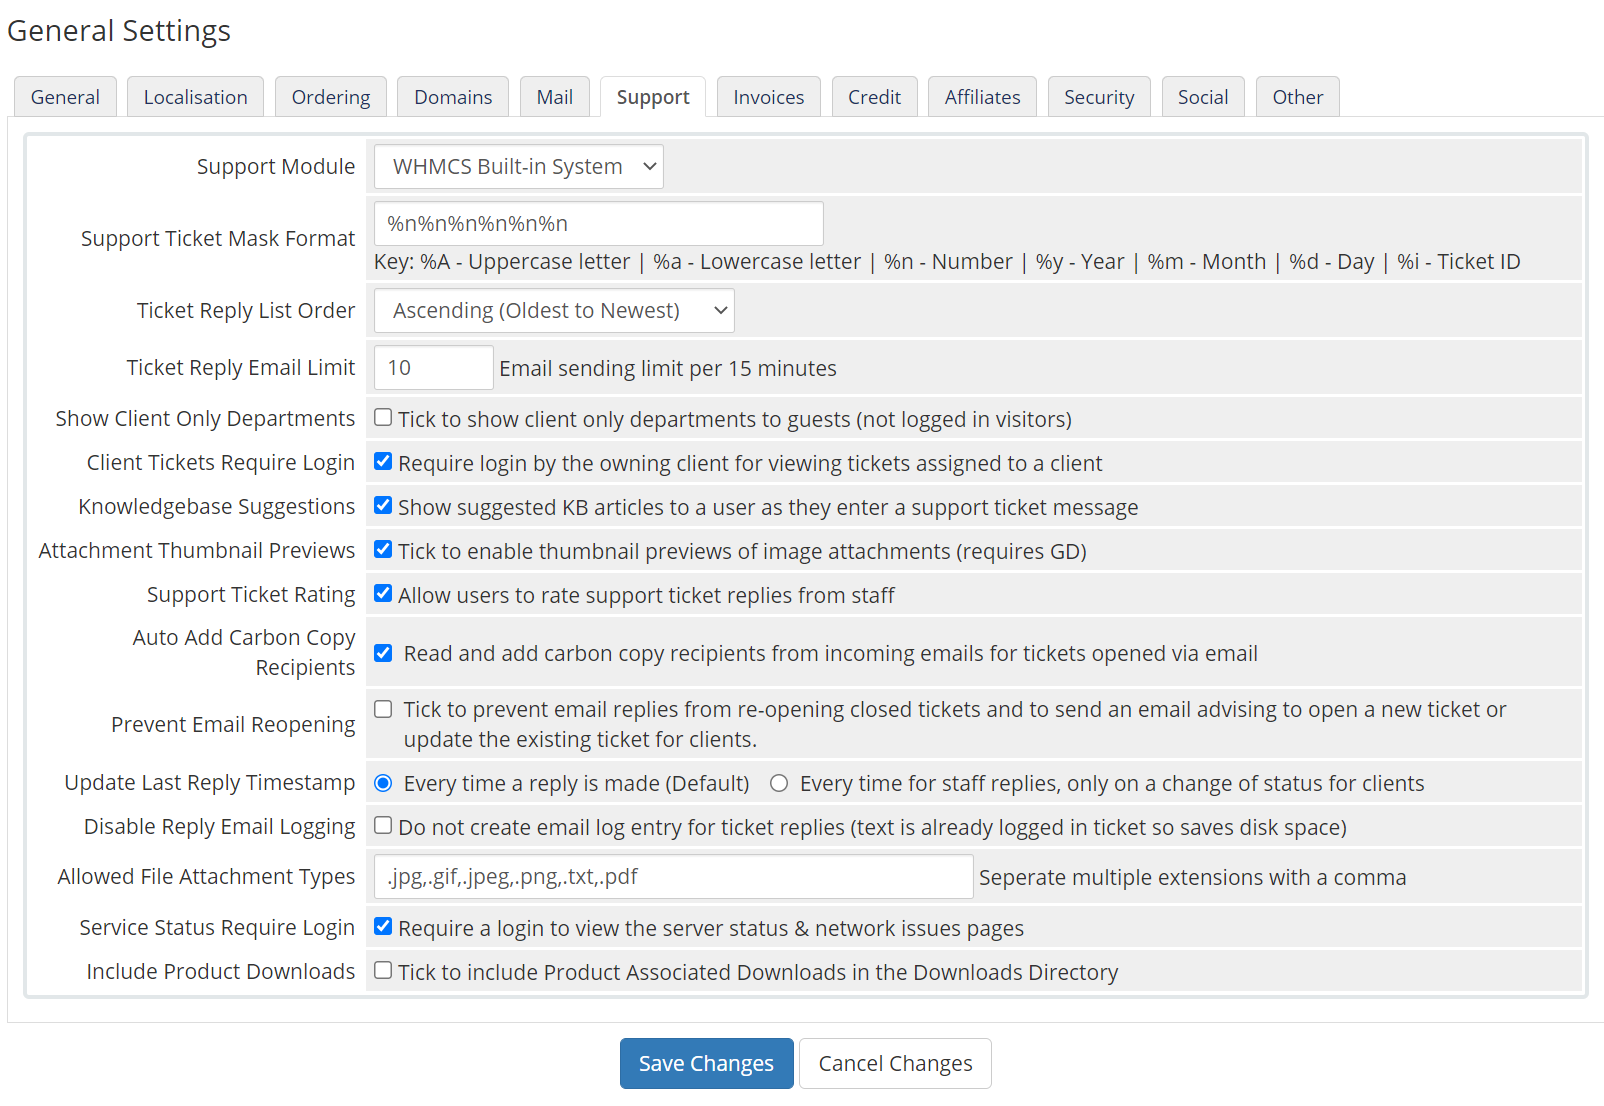
The Support section controls settings related to the built-in Help Desk / Support Desk functionality of WHMCS. Most of the settings here are good to go, however, there’s one setting I’d like to call out:
Service Status Requires Login
This setting will prevent people, whether they are customers or not, from setting if you have any network issues (assuming you plan to use the Network Issues section of WHMCS) unless they are logged in. In the opinion of this author, people shouldn’t need to sign in to see this information.
However, some web hosts have proprietary information on these pages, such as IP Addresses or the names of their Web Servers, which can become targets for Botnets and DDOS Bots, so we do understand if you want to leave this setting checked.
Click Save Changes to save any changes you made.
General Settings > Invoices
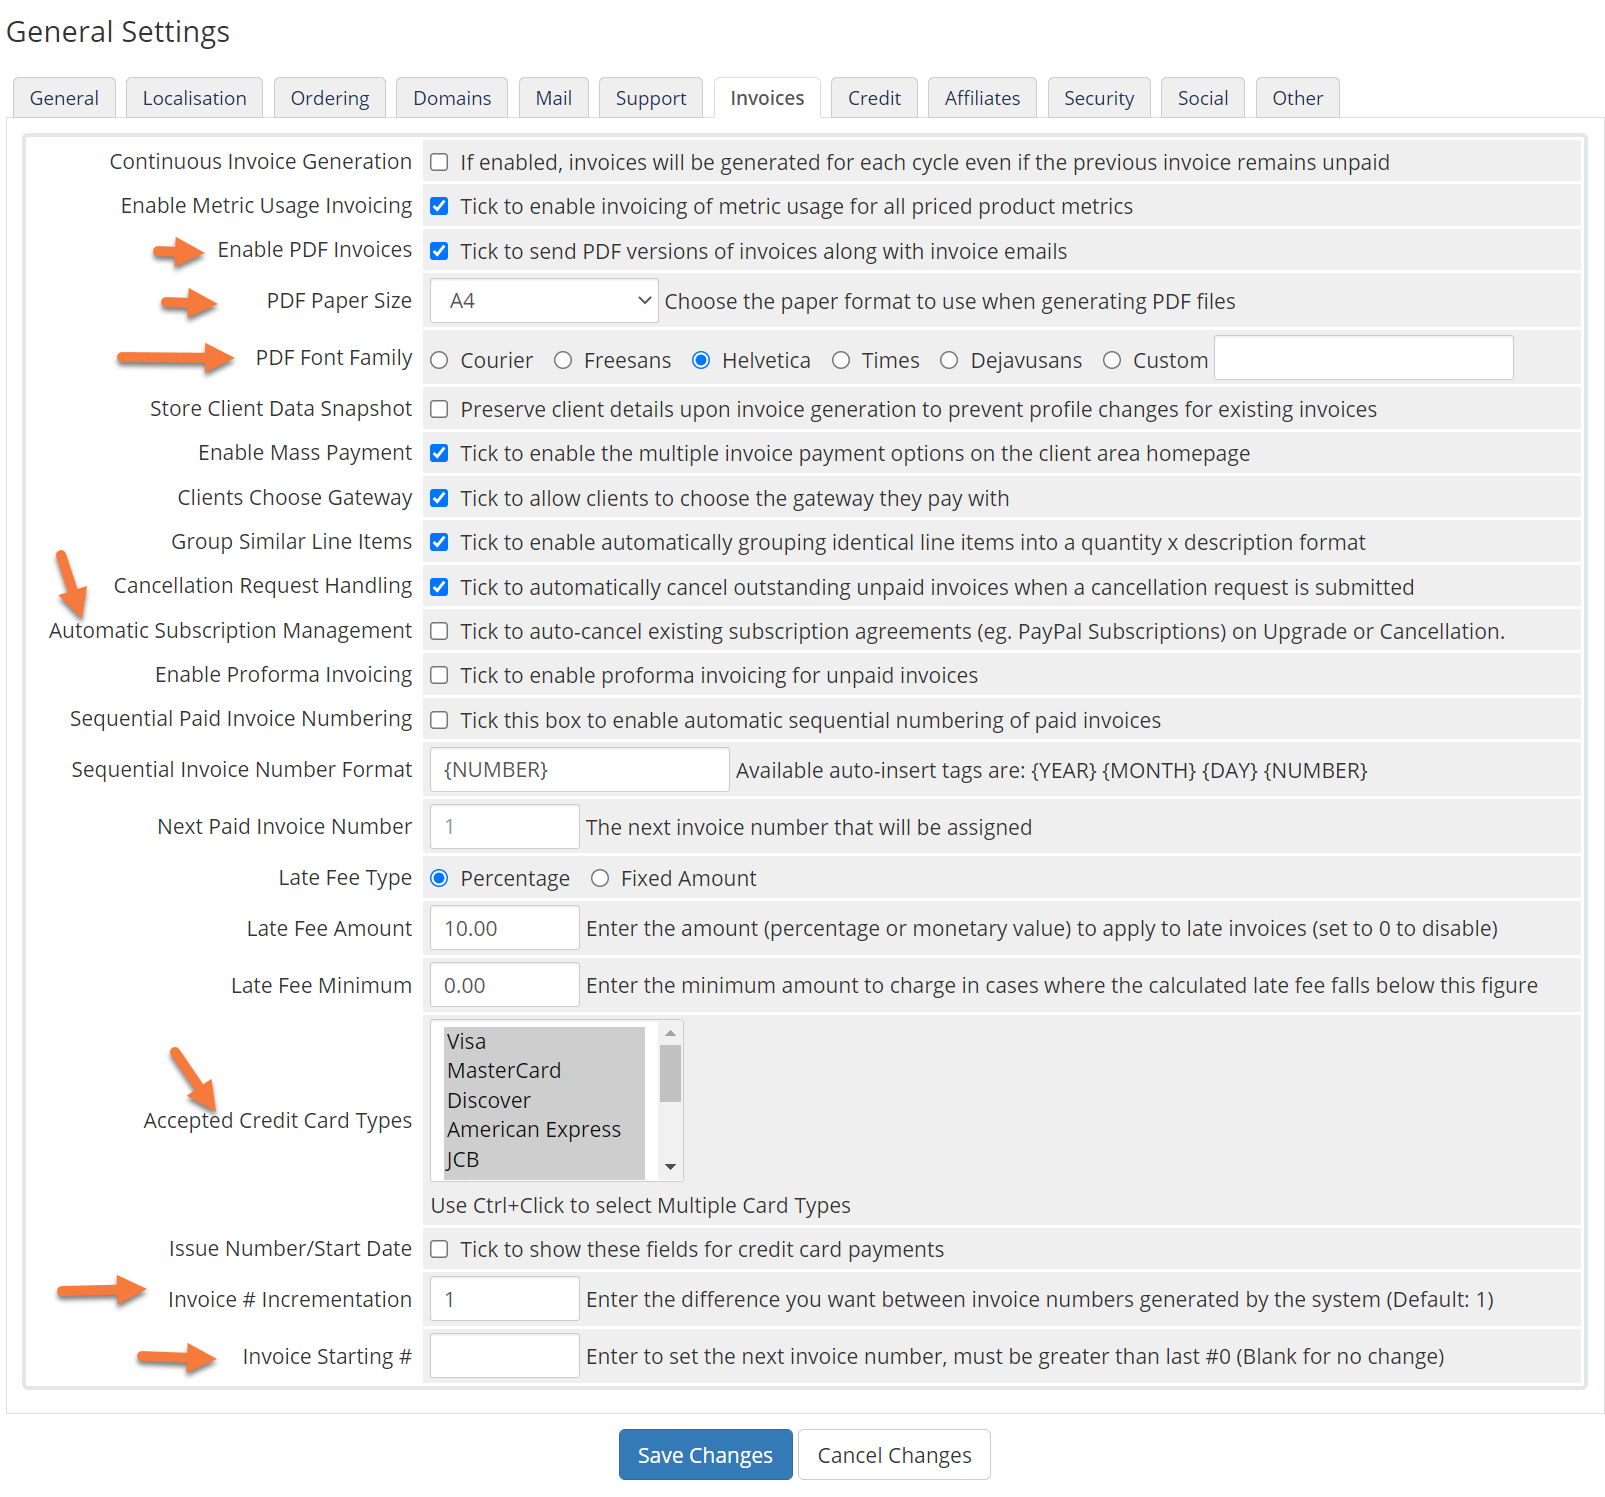
The Invoices tab contains a number of settings you should review, at the very least, including:
- Enable PDF Invoices
- PDF Paper Size
- PDF Font Family
- Automatic Subscription Management – this is a key feature and if enabled, can undoubtedly save you time.
- Accepted Credit Card Types – the system defaults to accepting a lot of credit card varieties, your payment gateway may not accept all of them, so be sure to only select the ones for which you can process payments.
- Invoice # Incrementation
- and Invoice Starting Number
Click Save Changes to save any changes you made.
General Settings > Credit
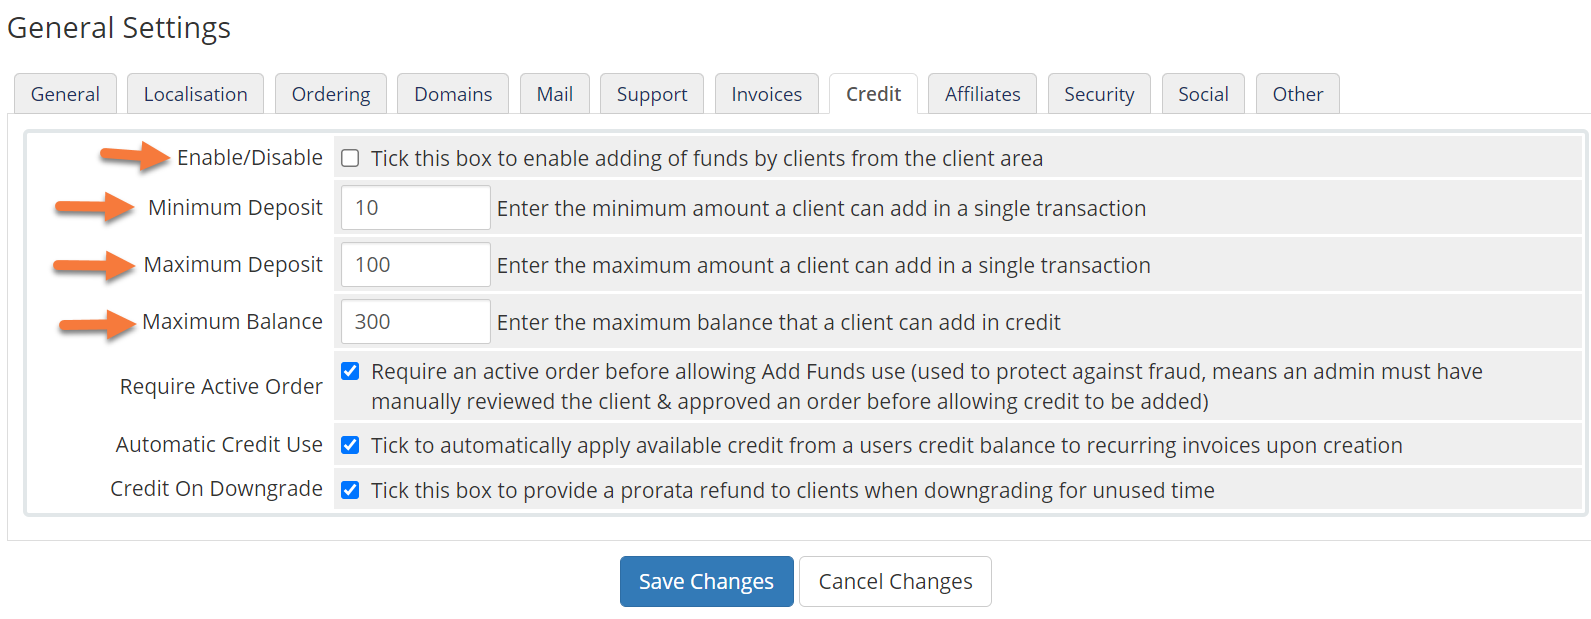
The Credit tab contains the settings related to ‘store credit’ in Customer accounts.
By default, this is disabled, however, if you wish for your customers to be able to pre-load the account with money, you can enable this, then configure the maximum and minimum deposit amounts, plus the overall maximum balance an account can have.
Click Save Changes to save any changes you made.
General Settings > Affiliates
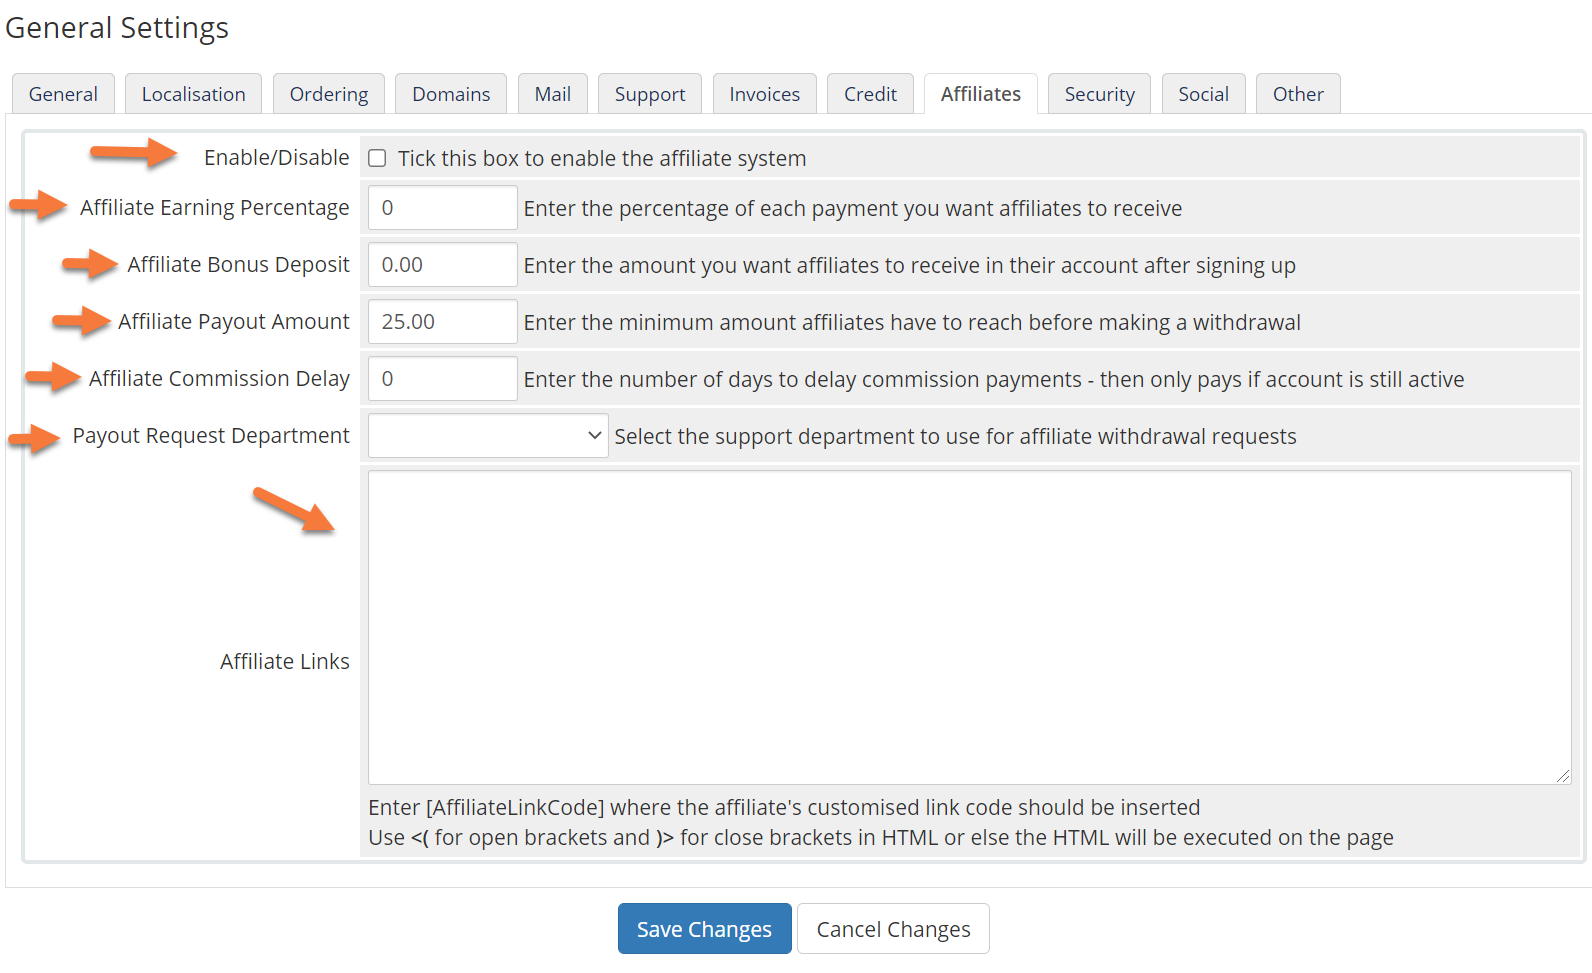
The Affiliates section controls settings related to the built-in Affiliates system in WHMCS.
By default, this setting is renewed and you should carefully review the WHMCS documentation on Affiliates before deciding to turn this on.
If you do decide to enable this feature, then you should set up the following fields:
- Affiliate Earning Percentage
- Affiliate Bonus Deposit
- Affiliate Payout Amount
- Affiliate Commission Delay
- Payout Request Department
Click Save Changes to save any changes you made.
General Settings > Security
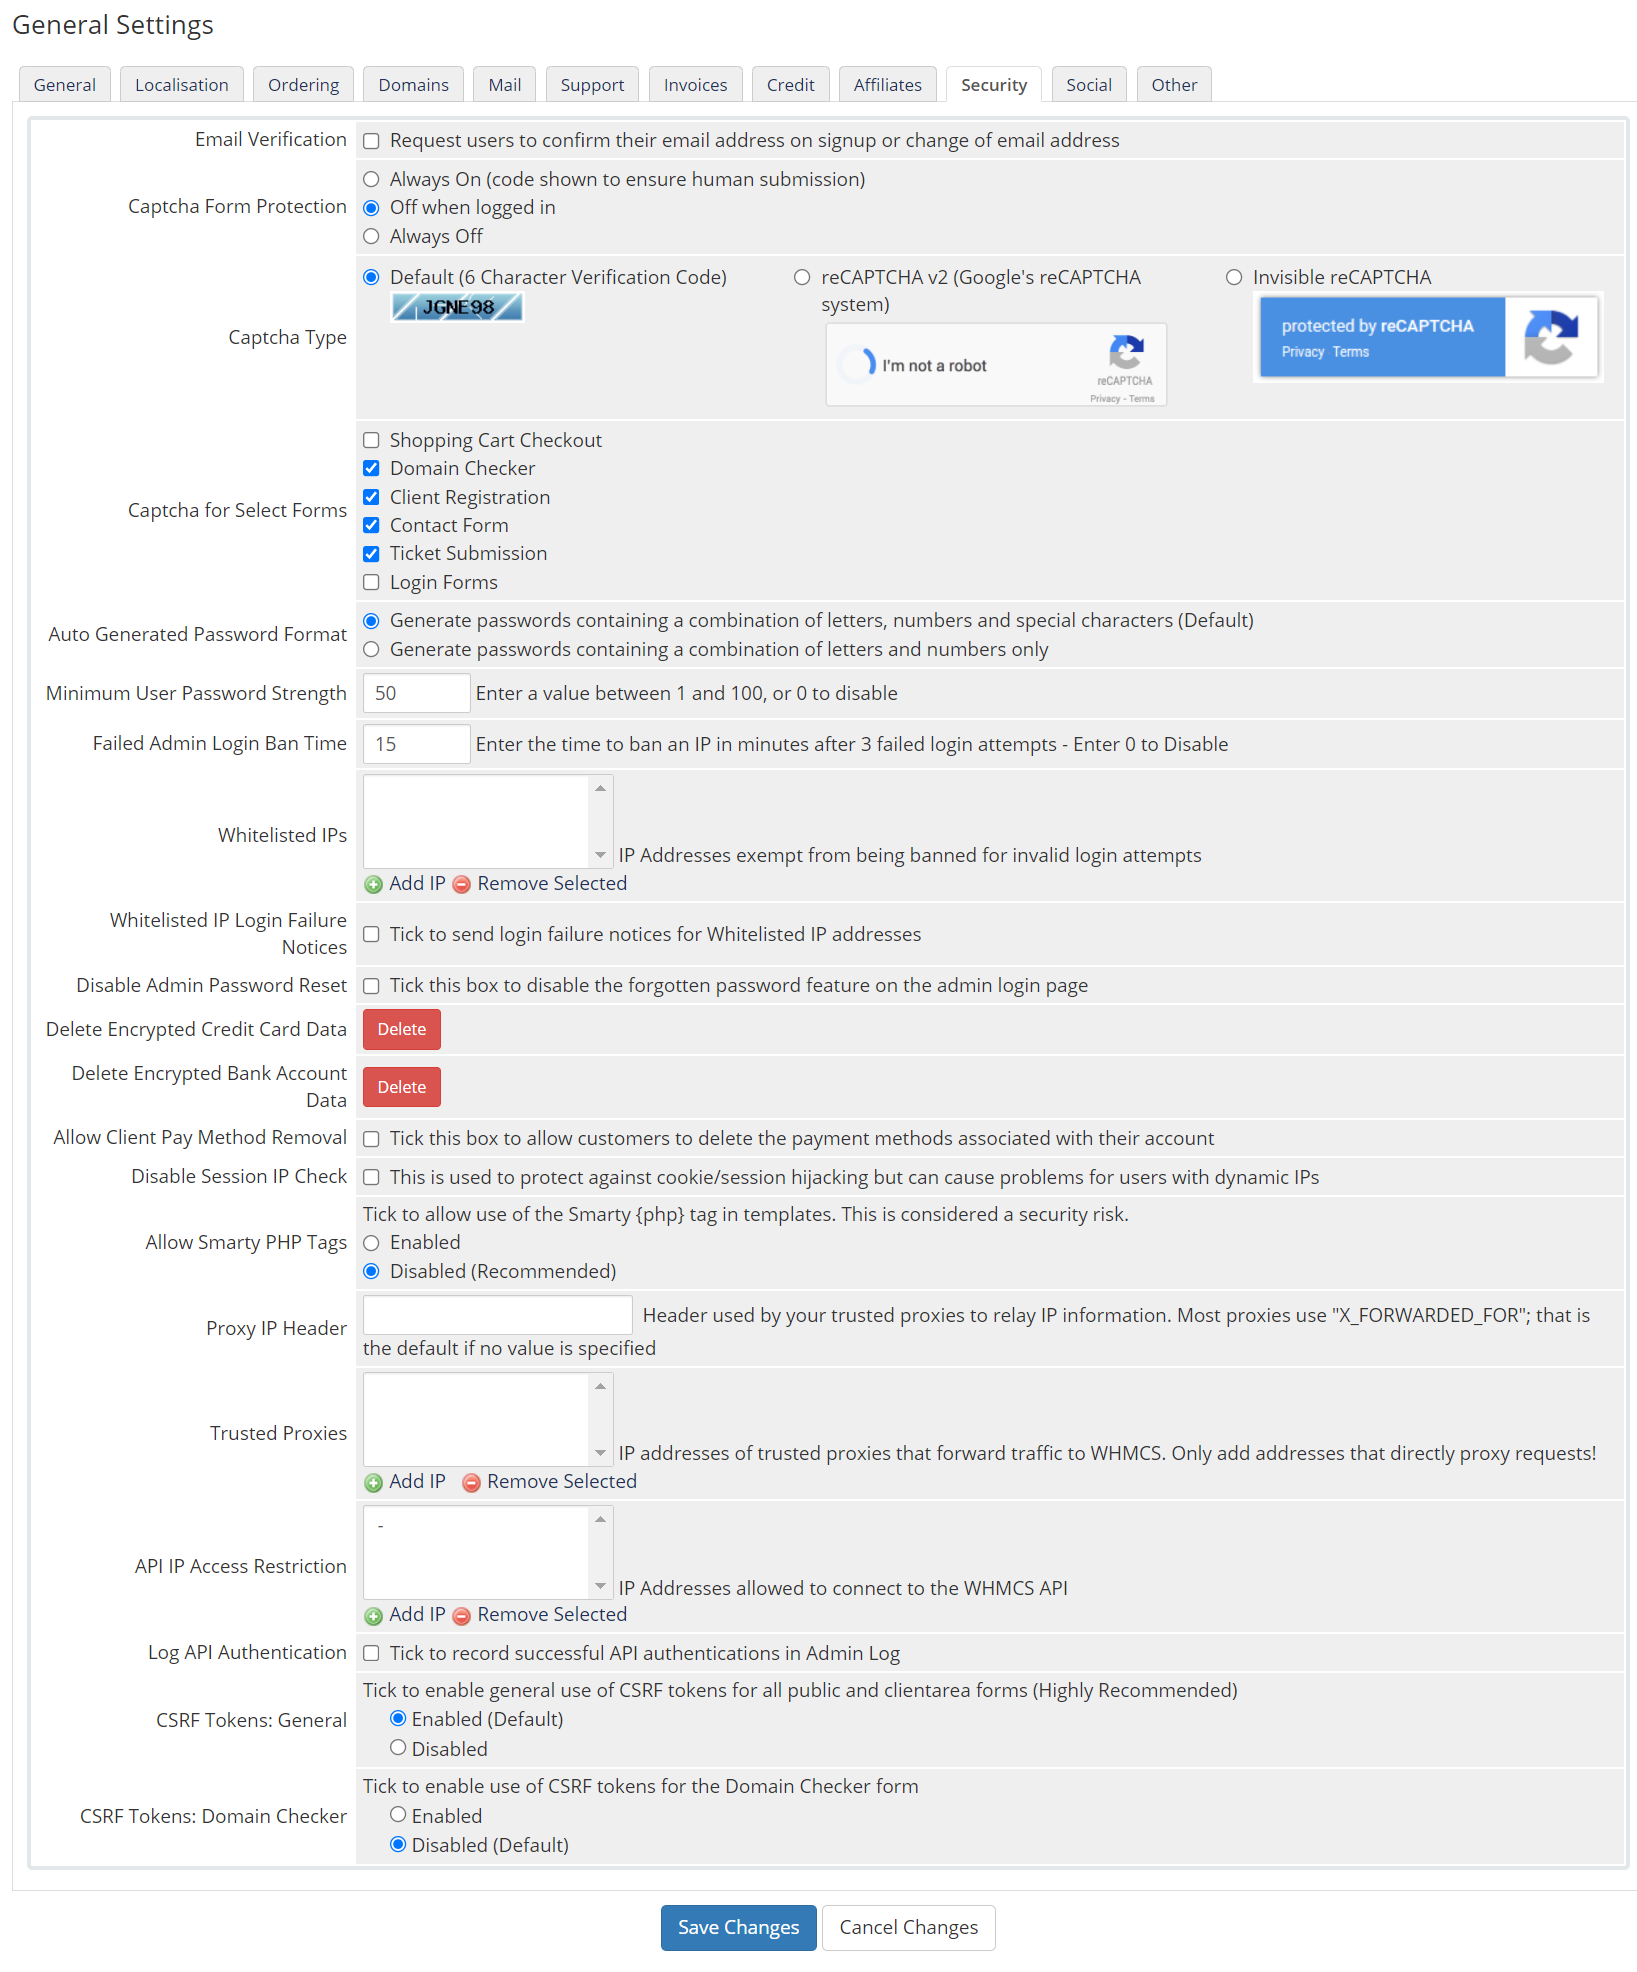
The Security tab contains some very important settings you should review, including:
- Email Verification – request users to confirm their email address on signup or change of email address.
- reCAPTCHA – This setting will protect your forms and should be enabled. You have the option to choose from a CAPTCHA that comes with WHMCS, or you can use Google’s reCAPTCHA.
- Auto-Generated Password Formats
- Minimum User Password Strength
- Whitelisted IPs
- Deletion settings for sensitive data, such as credit cards and bank accounts.
- and API IP Address Restriction.
Click Save Changes to save any changes you made.
General Settings > Social
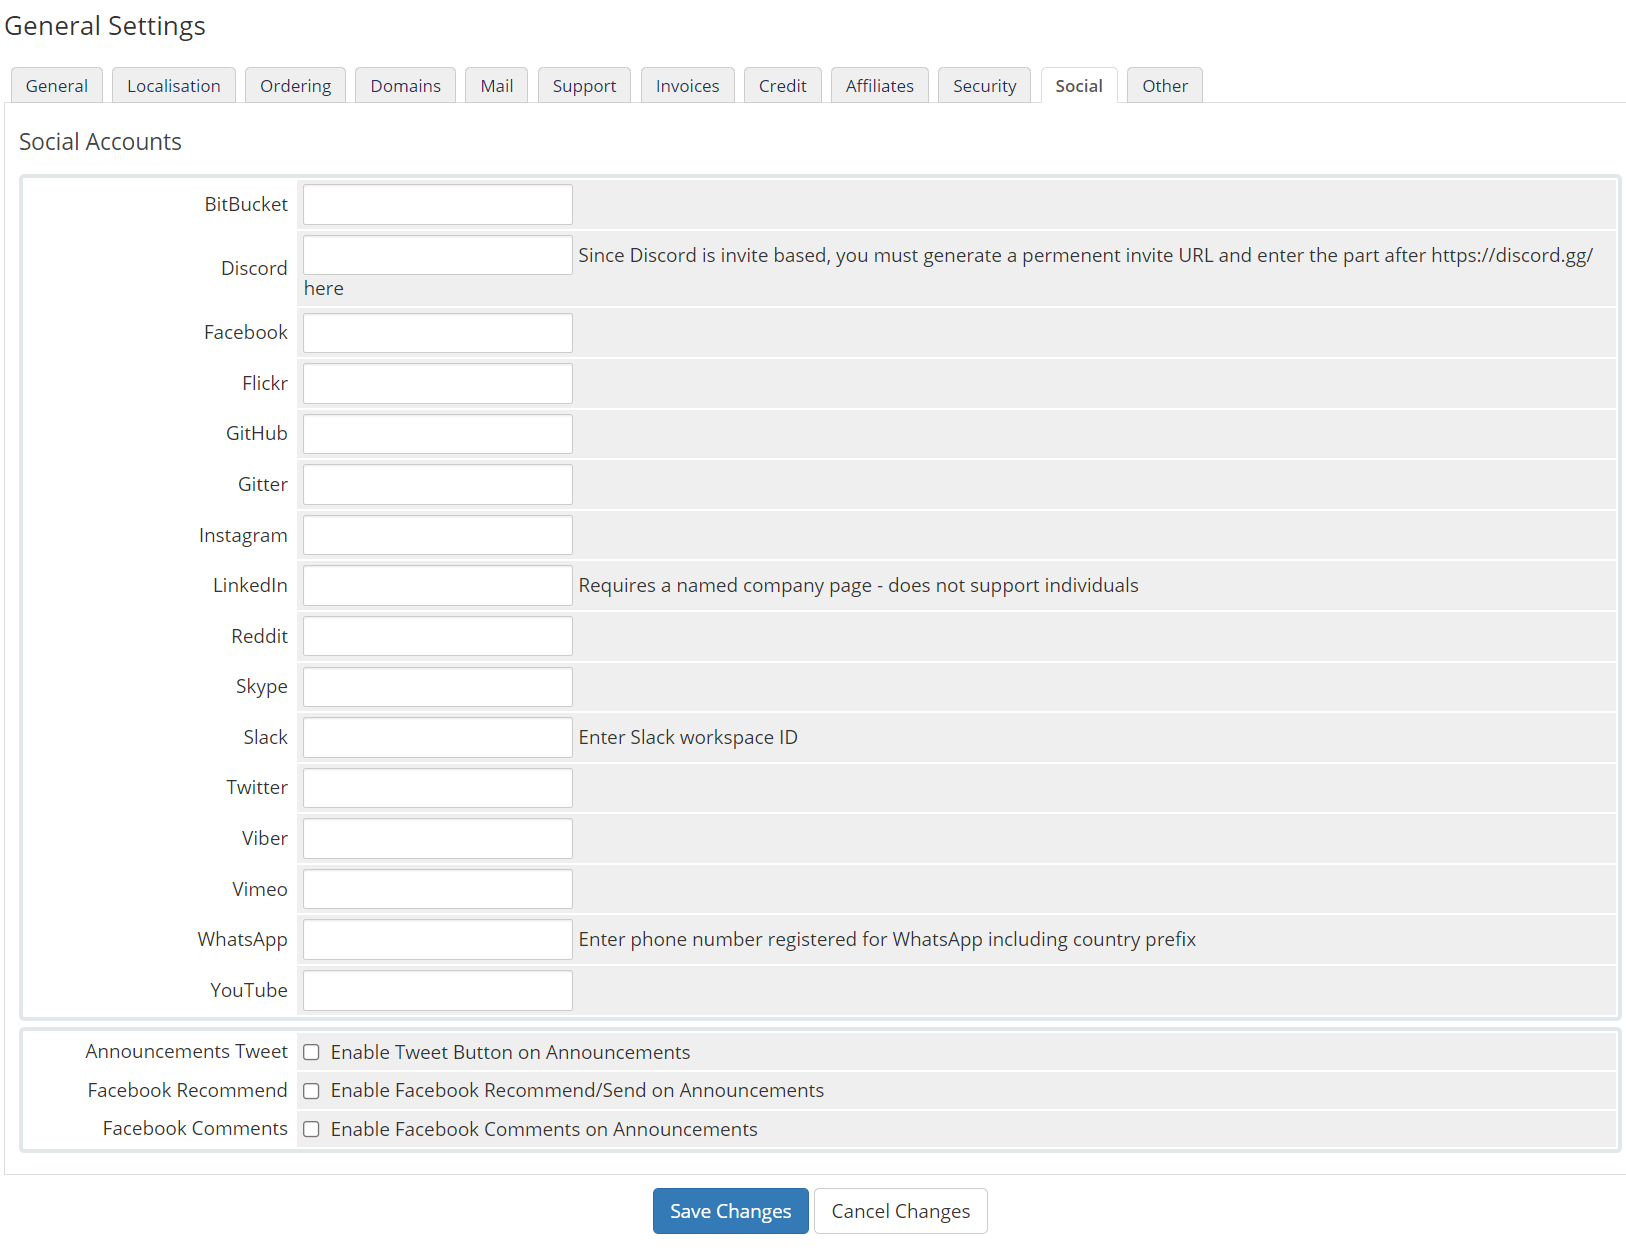
The Social section is where you will enter the information for any Social Media networks you have, like Discord, Twitter, or Facebook.
Click Save Changes to save any changes you made.
General Settings > Other
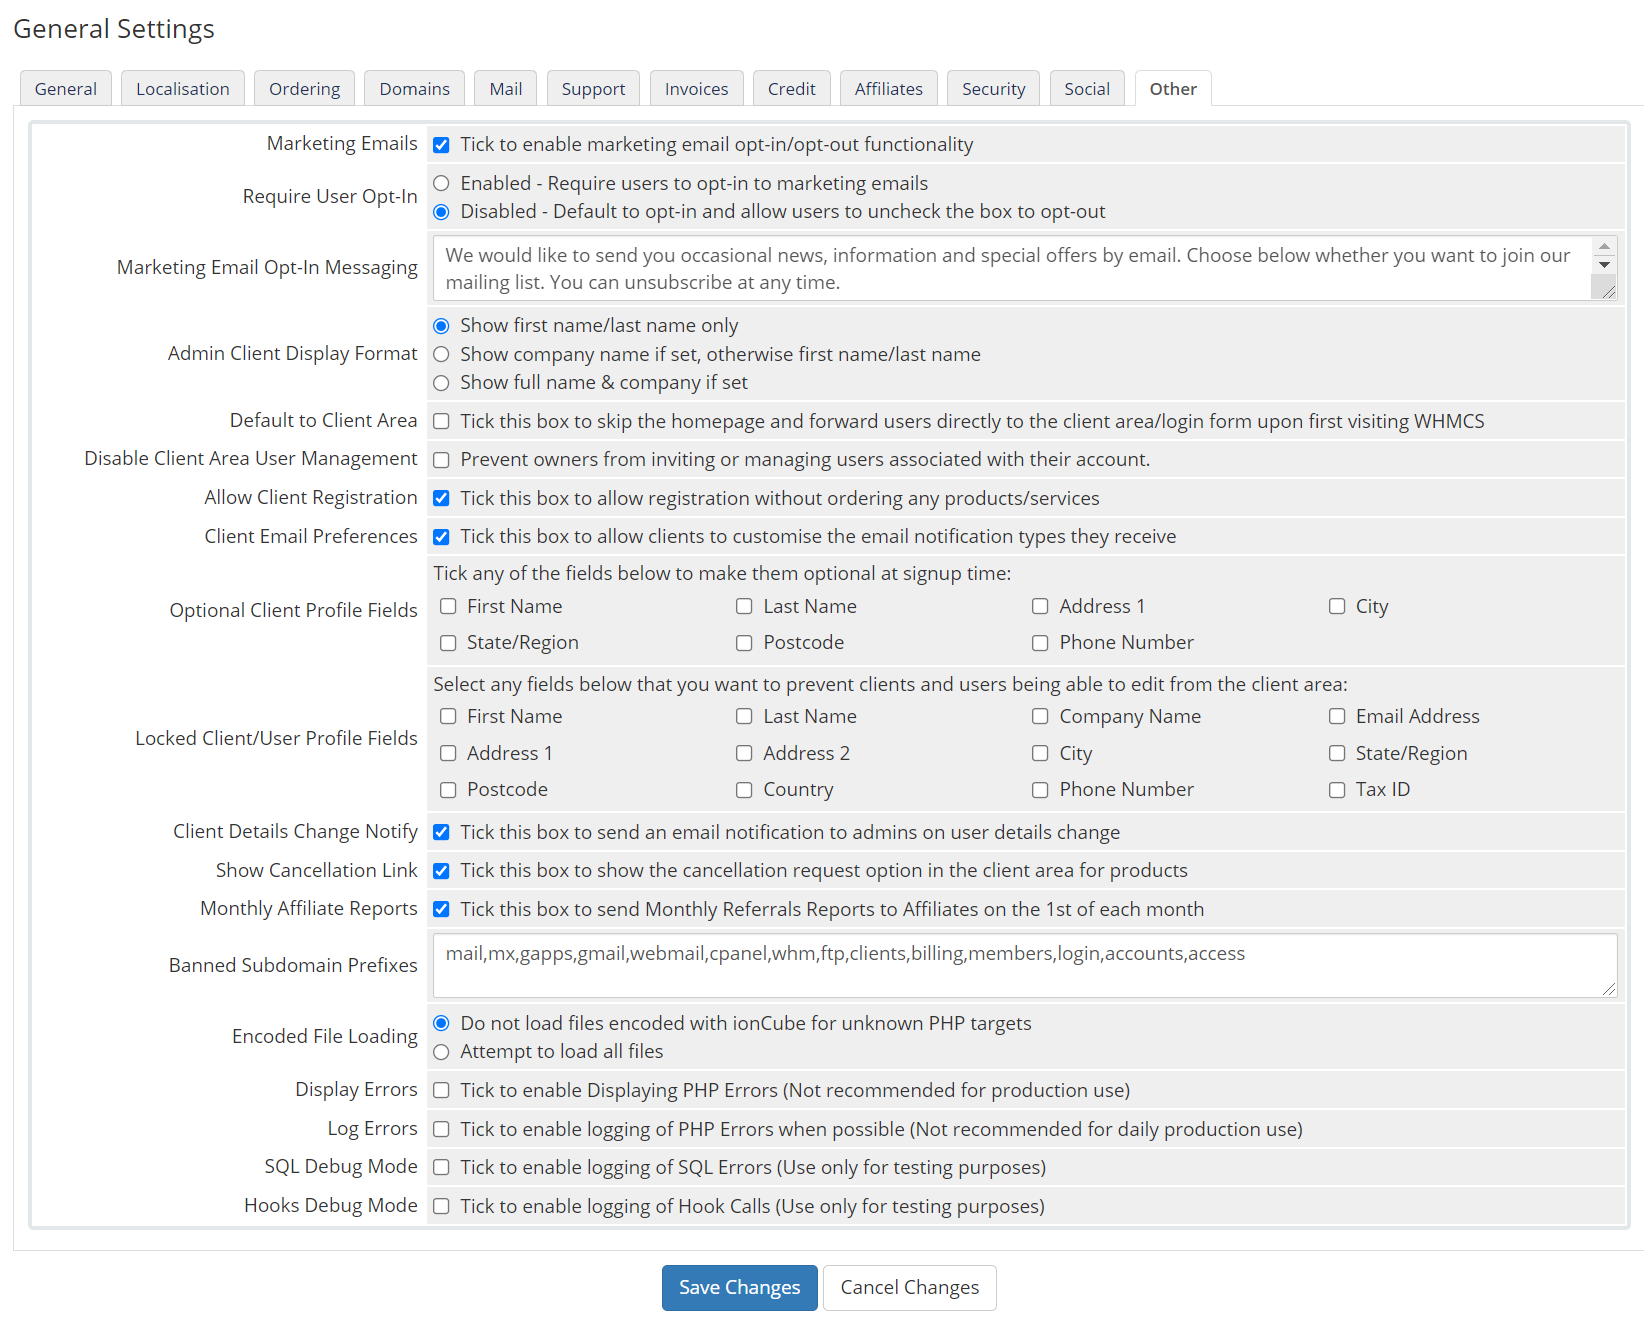
The Other section contains settings that don’t really fit in anywhere else. Review the settings and see if you want to enable or disable anything.
For the most part, the default settings are just fine.
Click Save Changes to save any changes you made.
And that concludes our review of the General Settings in the WHMCS app.
▶️ Please join us in the next tutorial where we will walk you through configuring the Automation Settings in WHMCS