This article will teach you how to back up or restore your website using the WordPress Toolkit in cPanel.
We’ll assume that you’ve already installed WordPress. If you do not see any installations listed, you must import them into WordPress Toolkit. Please follow the instructions in this guide.
How to Create a Backup for your WordPress Website using WordPress Toolkit
To create a backup for your WordPress site using the WordPress Toolkit, follow these steps:
- Log in to cPanel.
- In the Domains section of the cPanel’s home screen, click WordPress Management:
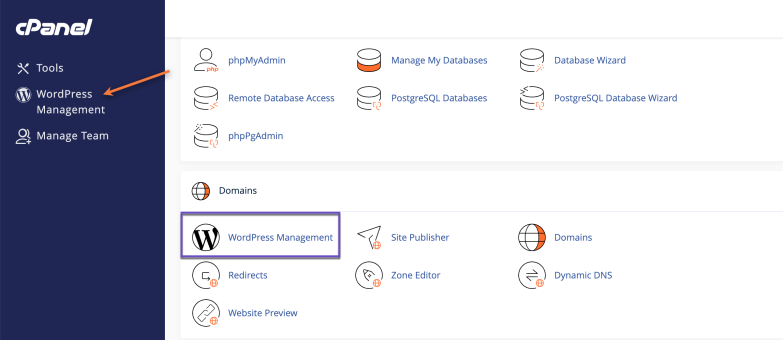
cPanel > WordPress Management - Next, the WordPress Toolkit page will appear, and you’ll see the list of the existing WordPress installs.
- From the WordPress Toolkit main page, locate your WordPress install and click Back Up / Restore.
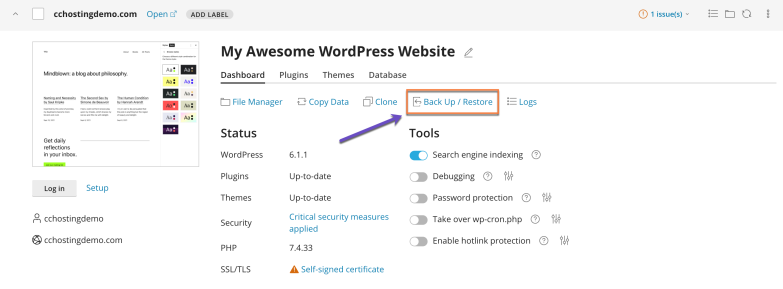
- To generate a backup, click Back Up
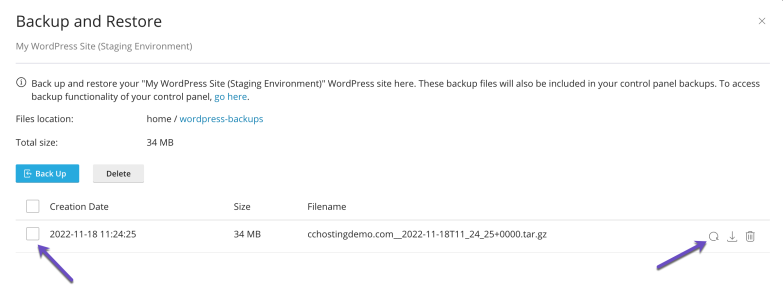
WordPress Toolkit will create the backup and place it in your account’s home directory, wordpress-backups folder.That’s it! Now you’ve made a backup. After creating at least one backup, you can restore, download, or delete it.

How to Restore a Backup for your WordPress Website using WordPress Toolkit
After creating at least one backup using WordPress Toolkit, you can restore, download, or delete it. To restore an existing backup for your WordPress site using the WordPress Toolkit, follow these steps:
- Log in to cPanel.
- In the Domains section of the cPanel’s home screen, click WordPress Management:
cPanel > WordPress Management - Next, the WordPress Toolkit page will appear, and you’ll see the list of the existing WordPress installs.
- From the WordPress Toolkit main page, locate your WordPress install and click Back Up / Restore.
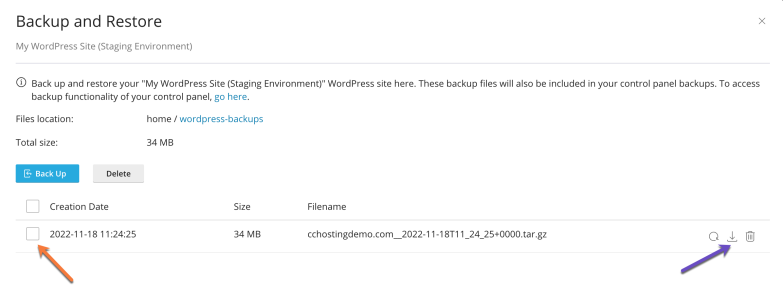
5. To restore an existing backup, click the restore icon:
6. To download a backup, click the download icon:
That’s it! Now you’ve restored a backup using WordPress Toolkit.